
Originally Posted At: https://breakingmuscle.com/feed/rss
The quest for a deep, muscular chest has probably been ingrained deep in human DNA since time immemorial. As such, dumbbell chest flyes were likely the second exercise ever invented, right after the king of chest-builders — the bench press.
The chest flye is an old school gem of an isolation (single-joint) exercise which has been included in bodybuilding training for decades, and for good reason. It allows you to emphasize your chest while minimizing involvement of supporting muscles like the shoulders or triceps.
But perhaps you’ve grown weary of doing the same exercise over and over again. If you’re itching for change, know that exercise variety has been proven efficient to promote muscle growth. Incorporating a variation might offer a new hypertrophy stimulus, less joint strain, or simply more focus on the target body part. (1) Here are 10 chest flye options to bring your chest training to the next level.
Best Chest Flye Alternatives
- Cable Crossover
- Pec-Deck
- Incline Flye
- Decline Flye
- Pronated Flye
- Floor Flye
- Flye Press
- Front Flye
- Suspension Trainer Flye
- Slider Flye
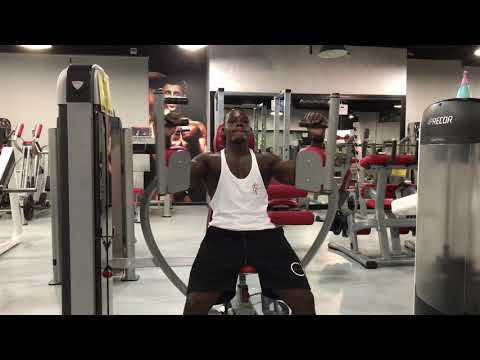
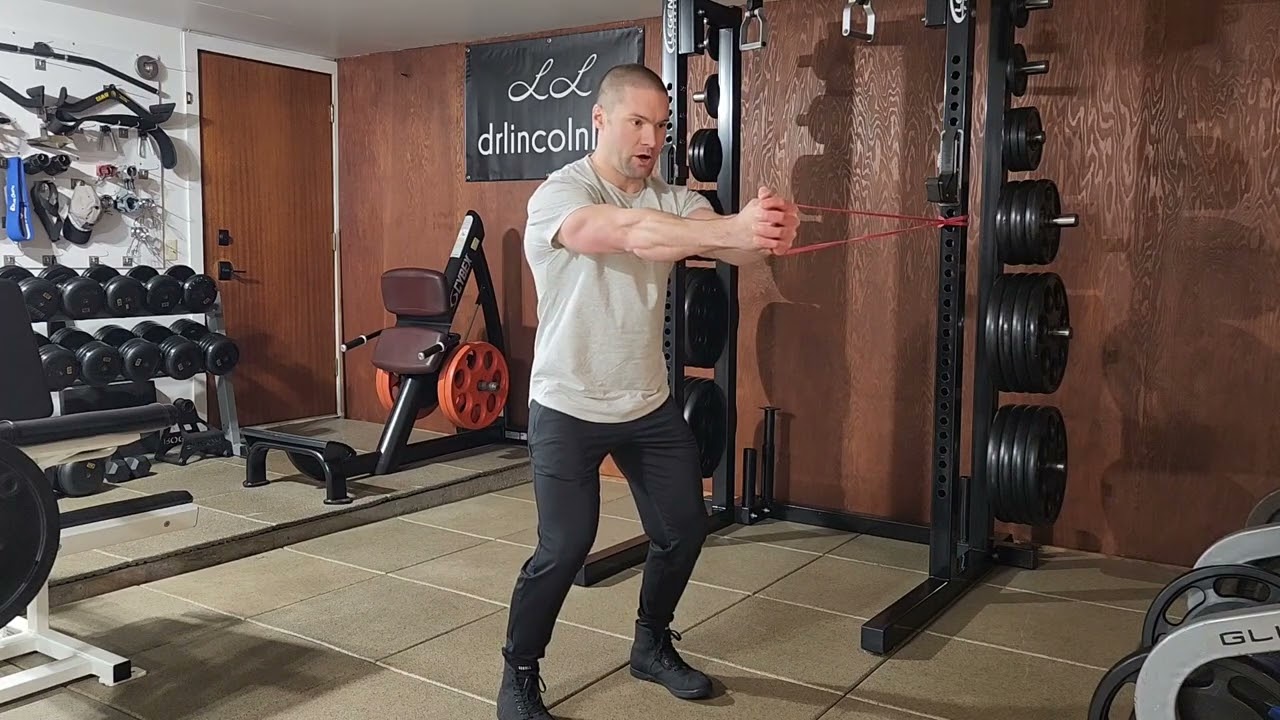
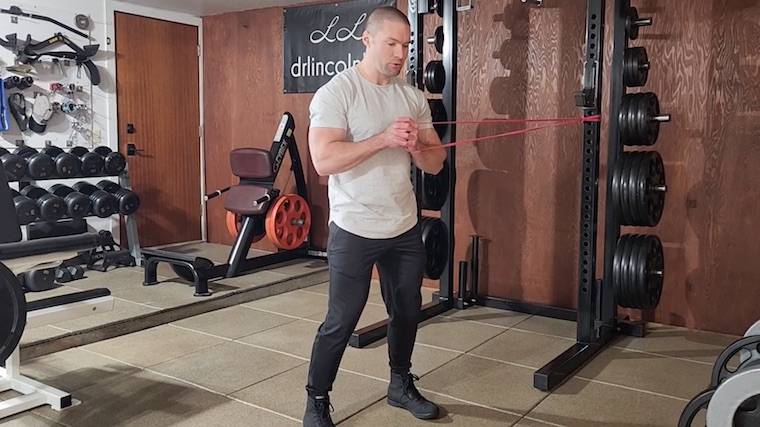
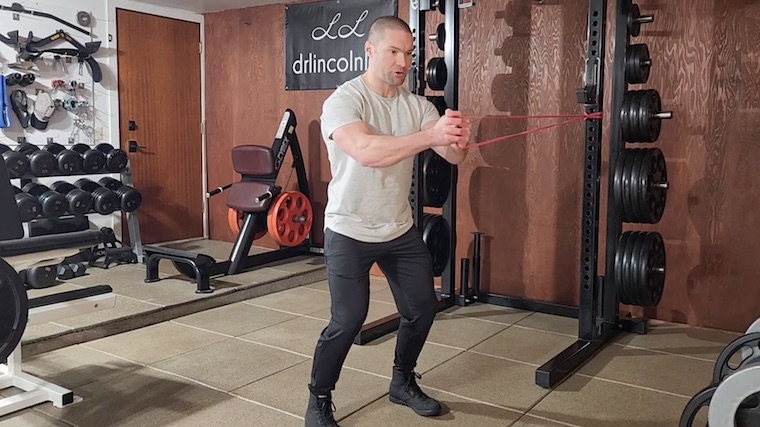
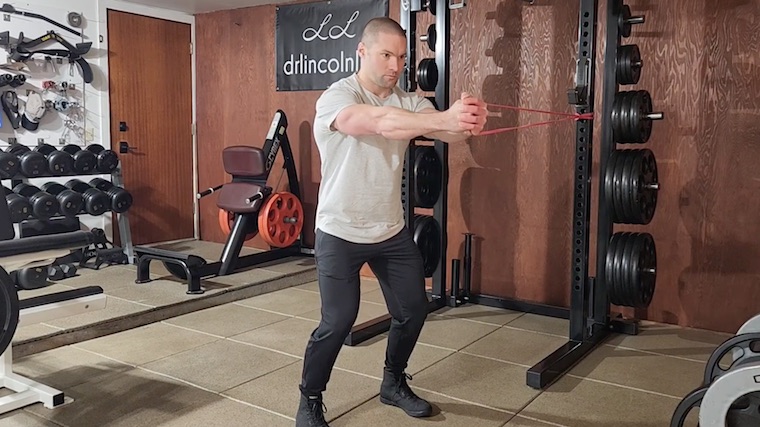
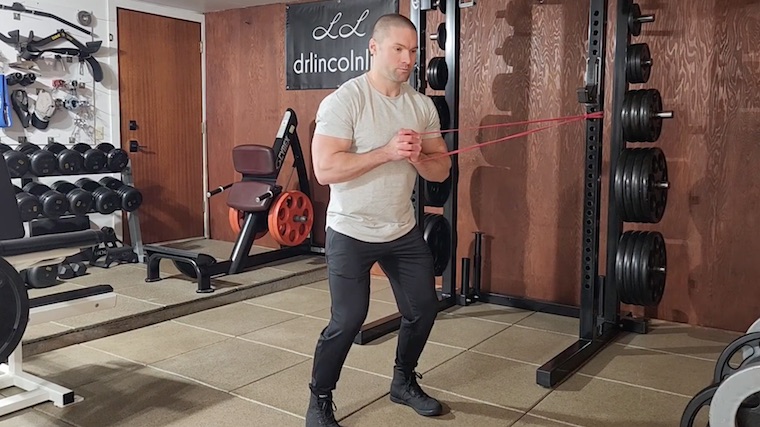
Cable Crossover
The cable crossover uses the same movement principles and serves the same goals as the traditional dumbbell flye. The most distinct difference is the equipment. This time you’re using a cable station and a pair of handles to perform the flye, which changes the resistance curve and changes tension on your muscles.
When to Use It
Use the cable crossover in lieu of the traditional flye, typically toward the end of your chest workout to enjoy a powerful pump. Because of its resistance curve, the dumbbell flye focuses on the stretch position — there’s minimal tension at the top of the lift, but a lot of muscular stress at the bottom. This is different with cables, which allow for a powerful, high-tension contraction throughout the entire range of motion.
How to Do It
Set the cable pulleys at chest level and attach a handle to each side. Grab both handles and stand in the middle of the station. Take a few steps forward to create tension, puff your chest, and place one foot in front for balance and stability. Bring your palms together in front of you, at chest-height, while squeezing your chest muscles.
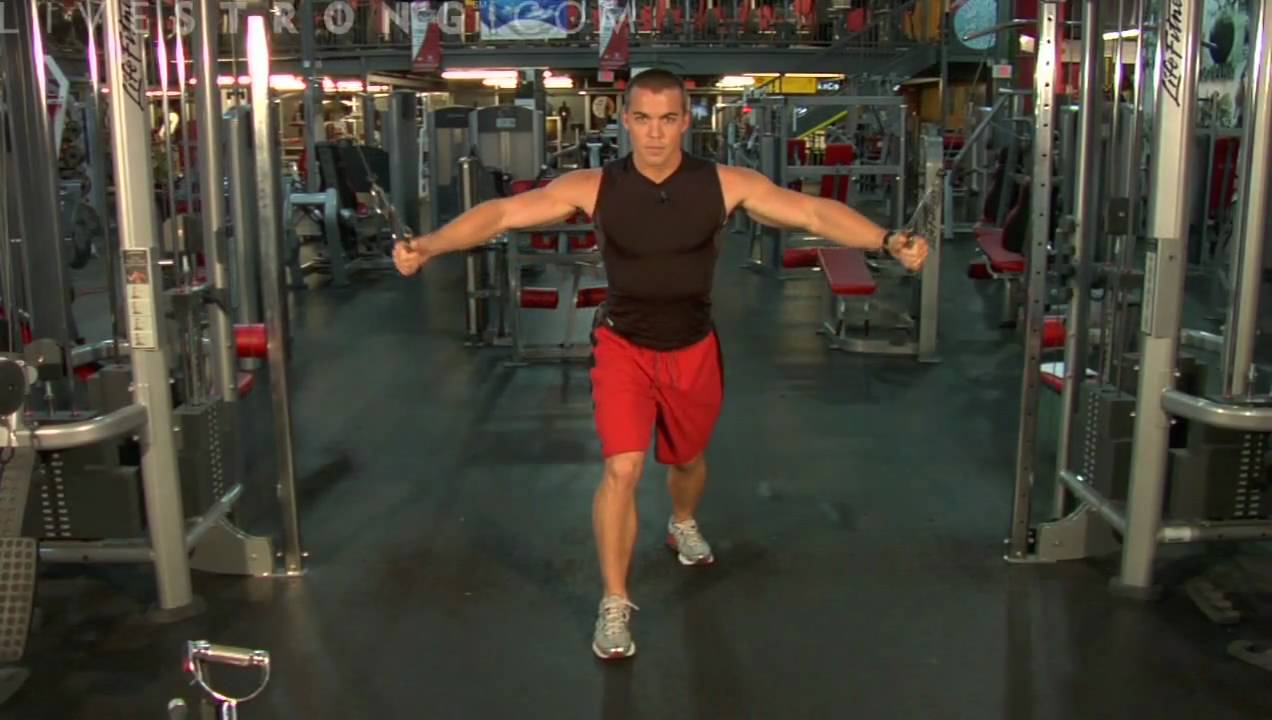
Keep your arms slightly bent and maintain the same angle during the lift. Bring your arms back into a stretch using control, before pulling hard to return to the starting position.
Pec-Deck
The quintessential machine flye. Using a bent-arm position offers the advantage of taking your grip and biceps out of the equation while avoiding elbow strain, compared to the straight-arm pec-deck machine which can increase joint strain by allowing too much arm extension.
When to Use It
Because the movement is guided on the machine’s rails, you eliminate all stability constraints and can further isolate your chest — you only have to focus on your pectoralis (chest muscle) while enjoying a constant tension similar to cables. The added benefit of avoiding arm involvement makes it an effective choice if you have elbow issues.
How to Do It
Adjust the seat pad to set your elbows just below shoulder height. Adjust the handles to allow a comfortable range of motion in the stretched position. Sit on the pec-deck machine and place your elbows on the pads with your hands grabbing any available handles.
Brace your core, sit with your back flush against the support, and arch your chest. Squeeze your chest while bringing your elbows together. Reverse direction to bring your arms back to the initial position with control.
Incline Flye
Changing the angle of the exercise is a simple way to shift muscular focus. An incline bench will allow you to target more the clavicular portion of the pectoralis major (the upper chest) as well as the anterior deltoid (front of the shoulders). (2)
When to Do It
Include the incline flye in your chest session if you want to focus more on upper chest development. A well-developed upper chest is lacking in many lifters, so improving this portion will certainly set your physique apart. As an isolation movement, keep the exercise toward the end of your training to finish off this portion of your chest.
How to Do It
Set an adjustable bench at a relatively low angle, roughly 30-degrees, for the best chest involvement. Using a higher angle, up to 45-degrees, will lead to more deltoid activation. Sit on the bench with a dumbbell in each hand and bring the weights to a locked out position over your chest.
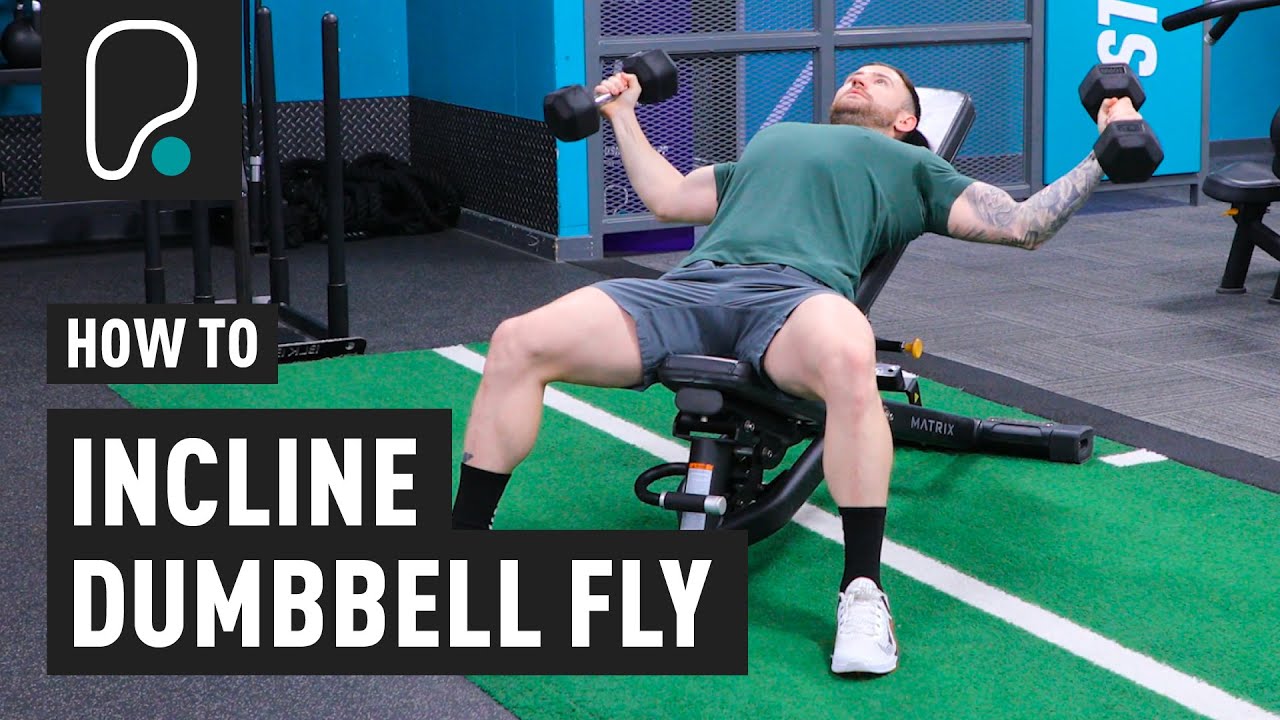
Set your hands in a neutral grip (facing each other). Pull your shoulders back into the bench and puff your chest into a “proud” position. Lower the weights to shoulder-level while keeping your elbows slightly bent. Focus on feeling a deep stretch across your chest before bringing your arms together above your chest.
Decline Flye
The decline flye is, naturally, the opposite of the incline movement. Instead of targeting the upper chest, it focuses on the “lower chest” portion of the muscle by shifting the bench’s angle to a slight decline.
When to Do It
It’s rare, but some people can have an underdeveloped lower chest. If that’s the case, use this variation to improve your mind-muscle connection and build size in this portion of your chest. You can also use this variation if your pressing exercises are mainly done at an incline and you want to stimulate this section of your chest muscle without excessive shoulder involvement.
How to Do It
A slight decline is more efficient than a steep angle, even just 10 to 20 degrees is sufficient. A very steep angle can make it too difficult to get into the starting position safely, and it can reduce your range of motion. If your bench doesn’t offer a small increment, you can place one or two weight plates securely under one side of the bench.
Lie on the bench with a dumbbell in each hand. Press the weights above your chest and lock your arms, then rotate your palms to face each other. Bend your arms slightly and lower the weight to shoulder level without changing your elbow angle. Drive the weights up while contracting your chest.
Pronated Flye
Simply turning your palms can change your shoulder joint position, which can optimize the exercise mechanics and allow for a stronger chest contraction. The pronated flye can be performed on either a flat or incline bench.
When to Do It
The mechanisms of hypertrophy are complex, and while stretch-mediated hypertrophy has been proven superior, incorporating exercises focusing on the shortened-muscle position will provide a more complete muscular and neural stimulus. (3) The internal rotation will reduce biceps involvement and improve pecs contraction for its muscle length is slightly reduced. Use this variation in lieu of your regular flyes to spice things up and provide a great chest sensation.
How to Do It
Lie on either a flat or incline bench while holding a pair of dumbbells over you using a pronated (overhand or palms-down) grip. Puff your chest and slightly bend your arms.

Slowly bring the weights down to your sides until you feel a deep stretch in your chest and shoulders. Squeeze your pecs forcefully to bring the weights together at the top.
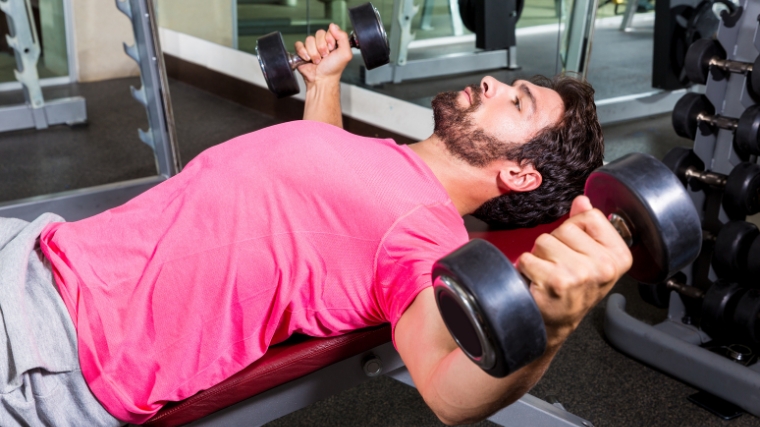
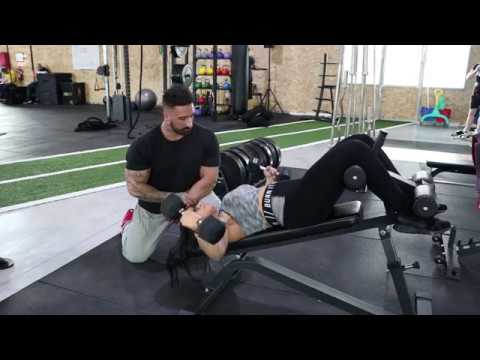
Floor Flye
With the floor flye, you don’t even need a bench (maybe just a towel or mat on the floor). It’s a great variation to accommodate achy shoulders because the limited range of motion prevents any excessive stretch in your shoulder joints.
When to Do It
A deep chest stretch can be great for promoting hypertrophy, but it can also prove stressful on the delicate shoulder joint. If your shoulders are constantly bugging you during chest exercises, take this variation for a spin. The restricted range of motion can also allow you to use relatively more weight, so it can be a great fit if you want to overload your pecs and get stronger.
How to Do It
Lie on the floor with a pair of dumbbells locked out above your chest. Perform a classic dumbbell flye — lowering the weight with your arms fixed in a slightly bent position. When your arms reach the ground, pause for a second before bringing your arms together at the top.
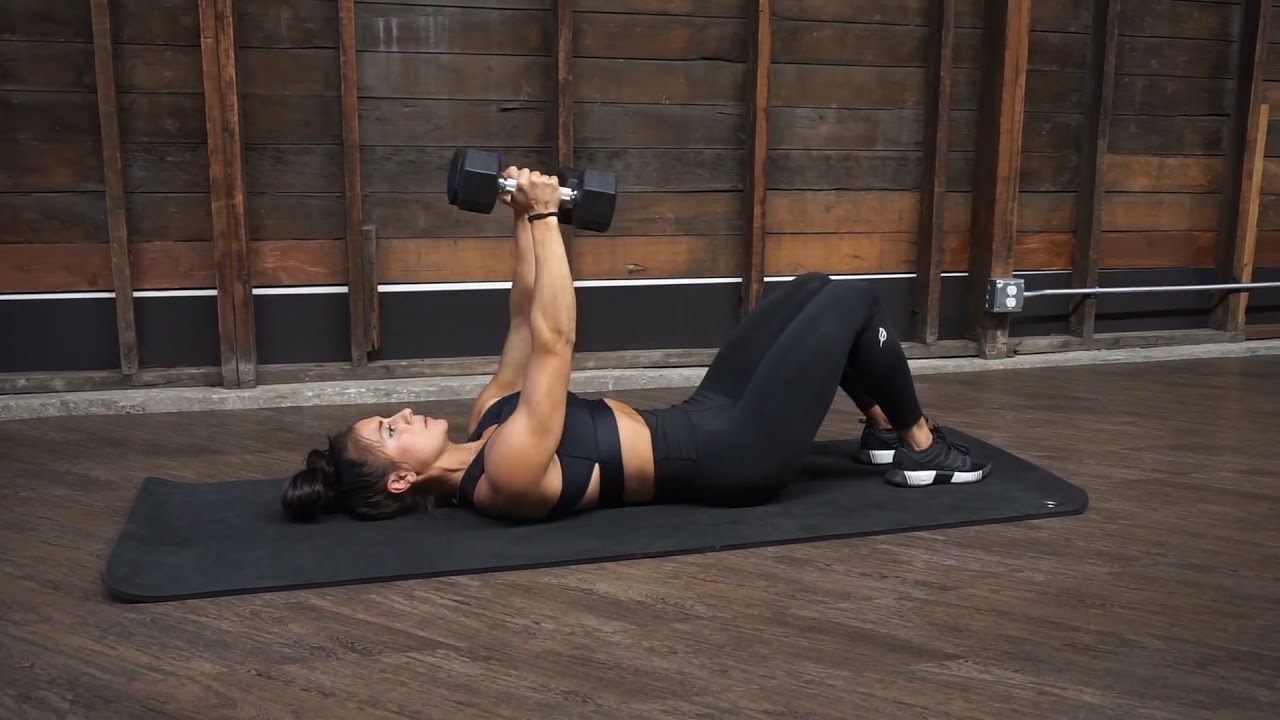
Use extra control when lowering the weight. You don’t want to bang your elbows in the ground, which could create impact and potentially injure your elbows. If the weights touch the ground, your arms are too straight — be sure to keep a slight bend during the entire movement.
Flye Press
This is the big boss of the flye world. It allows you to use the most weight, in part because is isn’t “strictly” a flye movement. This hybrid merges a multi-joint with a single joint exercise to emphasize the eccentric portion of the lift — meaning more weight moved, more strength build, and more muscle stimulated. (4)(5)
When to Do It
This is an “accentuated eccentric” training technique reserved for intermediate and advanced lifters. Overloading the eccentric will yield more neural and structural changes (meaning muscle and strength) as well as confidence. Use it when you want to gain those fast.
How to Do It
Lie on a bench with your shoulder blades retracted and your chest arched high. Hold a pair of dumbbells with a neutral grip (palms facing each other) above your chest. Slightly bend your arms and slowly bring them to your sides using a four to six-second count.
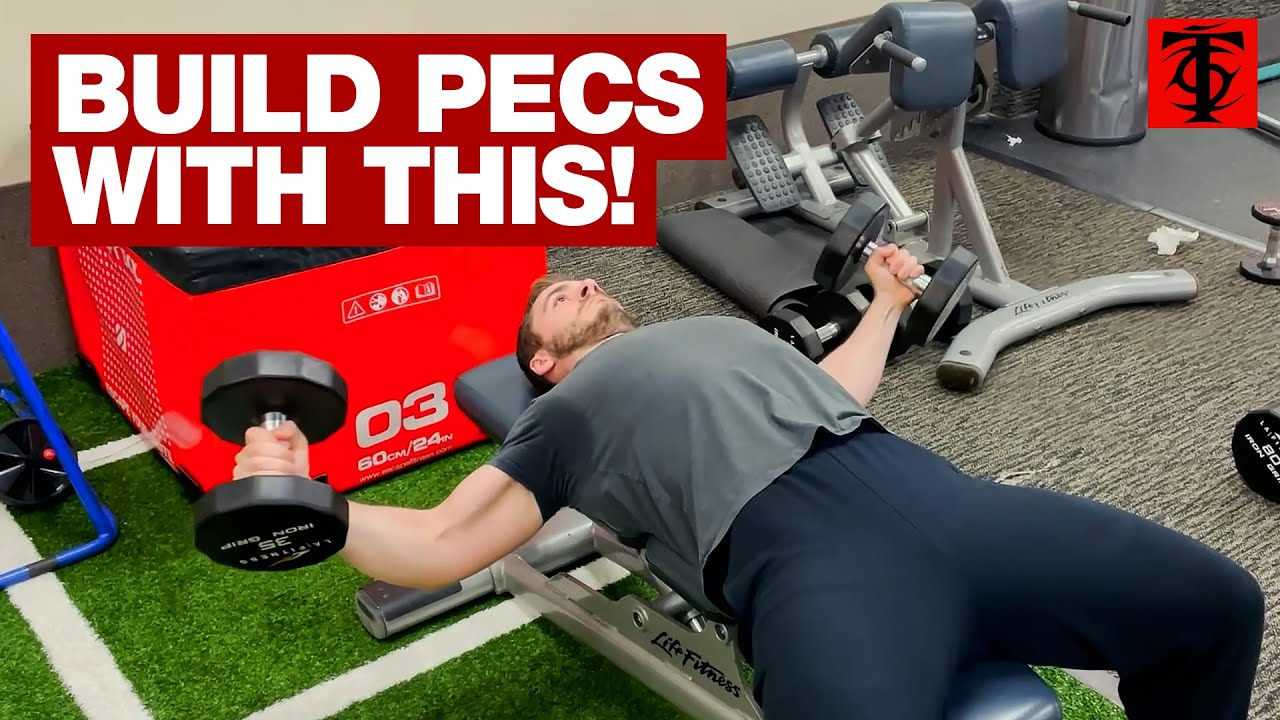
When your arms are at chest-level and your muscles are fully stretched, bend your arms to bring the weights closer to your shoulders and rotate your palms to face your feet. Exhale while performing a dumbbell bench press to lift the weight up. Rotate your palms to face each other and perform another flye with bent arms. Repeat the process for each repetition.
Front Flye
This advanced variation will provide a unique stimulus and new sensation by recruiting the chest through another function — retroversion (bringing the arm “down” from an overhead position). It could be considered a variation of the dumbbell pullover.
When to Do It
If you’ve mastered the traditional flye and less challenging variations, take the front flye for a ride. You’ll enjoy a completely different chest feeling and promote new hypertrophy. It’s a great way of pumping your muscle up after your heavy duty exercises.
How to Do It
Set an adjustable bench to a slight decline. Grab a pair of dumbbells with a pronated grip and lie on the bench in the decline position (be sure your head is slightly lower than your feet). With straight arms, bring the weights above your chest and squeeze the dumbbells together as hard as you can. This static tension should improve stability during the exercise while increasing muscular tension in your chest.
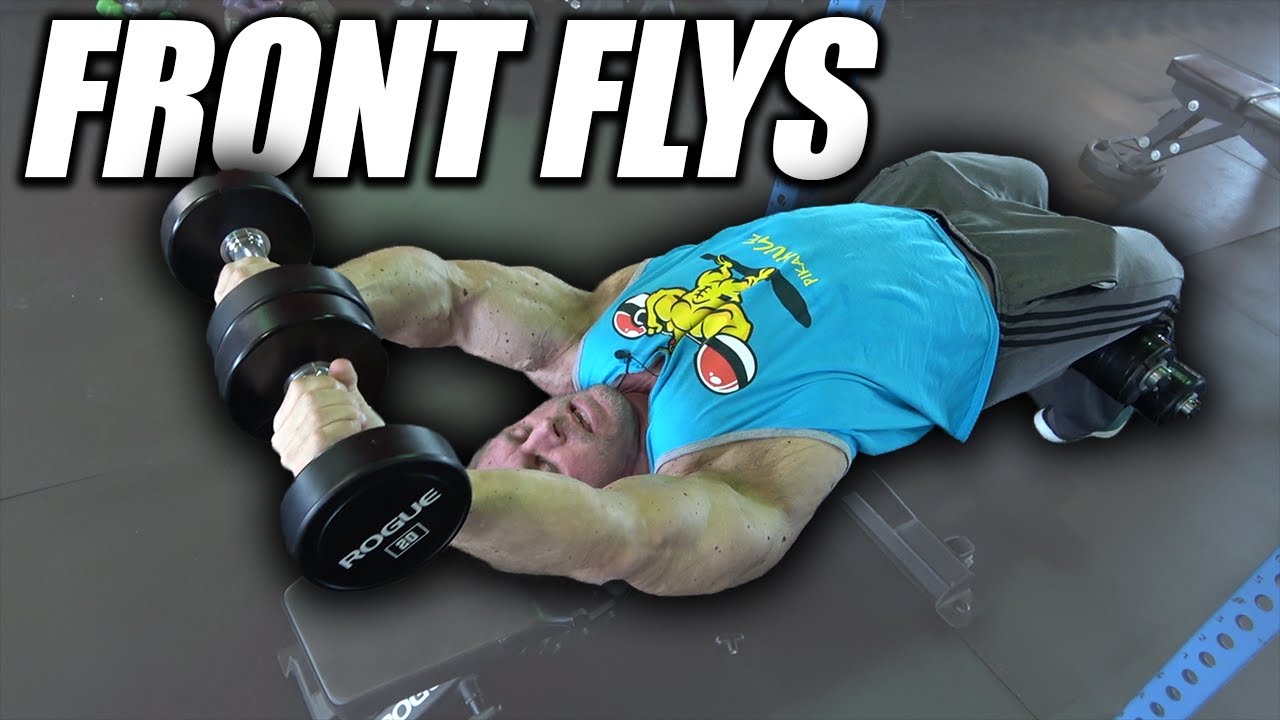
Lower your arms, slowly and with control, back behind over your head. Squeeze the weights together throughout the entire movement. When the weights reach head-level (if your shoulder mobility allows that range), bring them back up to the starting position without bending your arms.
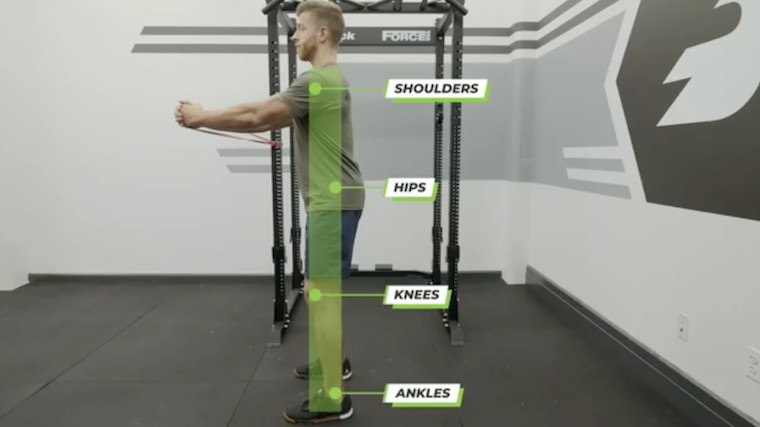
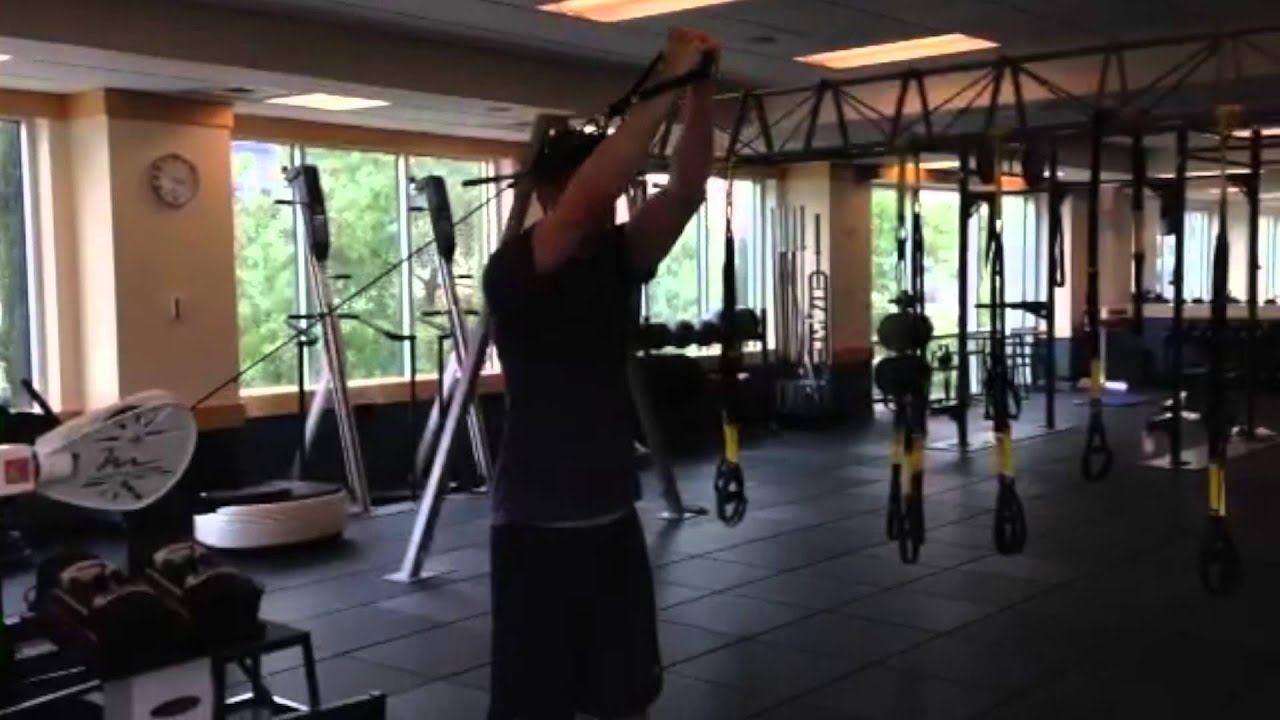
Suspension Trainer Flye
With this exercise, you don’t even need dumbbells or a gym, just a suspension trainer (like a TRX) or a pair of gymnastic rings supported to a stable overhead bar. This challenging variation can be done nearly anywhere, and is a great way to target your chest when traveling abroad, training outdoors, or if you want to improve your shoulder stability. (6)
When to Do It
The suspension trainer, or rings, use your bodyweight and leverage as resistance. The natural instability of the straps requires extra stability and coordination from your entire body. Because of this added challenge, the suspension trainer flye is an effective way to work on your chest and shoulder stability. Perform it instead of more stable, more supported flyes to build shoulder strength and stability. Since this equipment is mobile, you can also include this variation in any outdoor training sessions or in a cross-training circuit as a great chest, shoulder, and core builder.
How to Do It
Fix the straps to a sturdy object and set up according to your strength level. The higher the handles are set and the more vertical your body angle, the easier the exercise will be. Grab the handles and join your hands in front of you with your arms straight and your body braced.
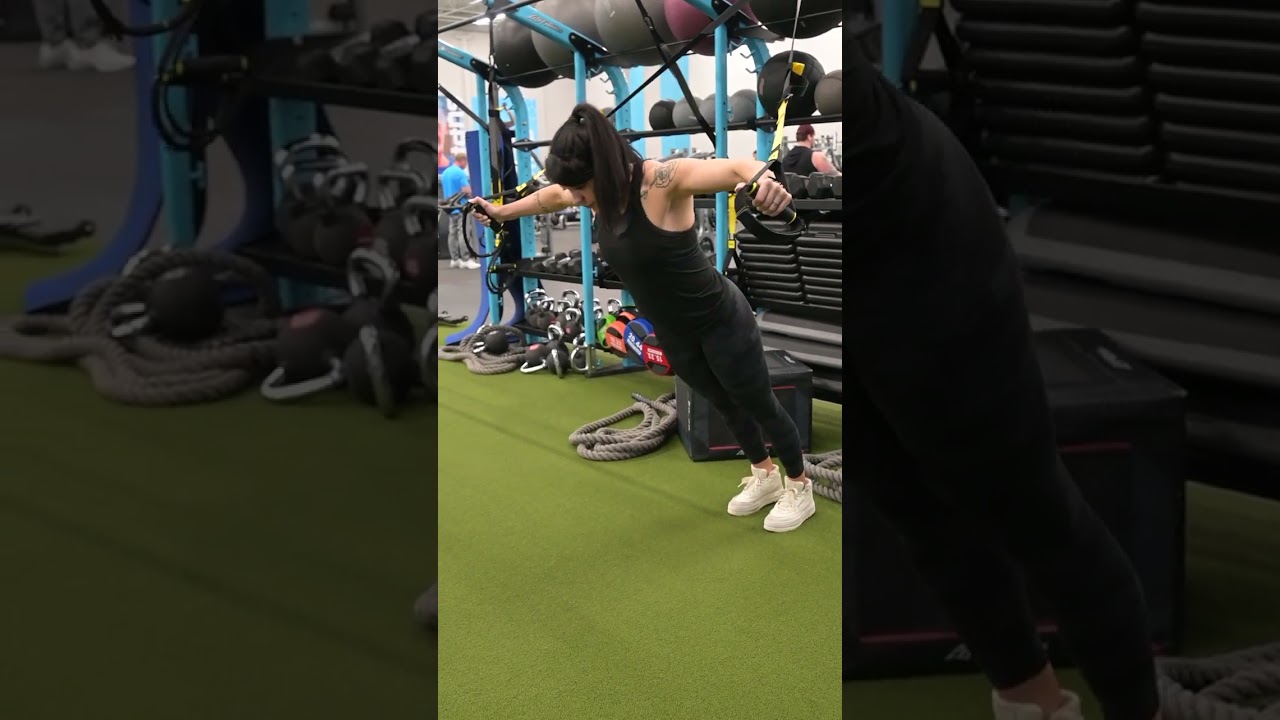
Bend forward to create tension in the straps, then step back while keeping your body straight until you’re in a straight-arms plank position. Bring your arms to your sides with control until they are at shoulder level. Squeeze your chest to bring your hands together.
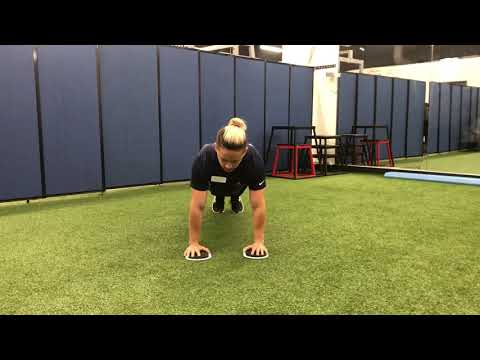
Slider Flyes
This one requires almost no equipment, just a pair of simple furniture sliders. You can even put your hands in old (hopefully clean) socks on a wood or tile floor. This movement lets you focus on your chest muscle anywhere, almost as versatile as a push-up. The sliders’ instability is similar to a suspension trainer and can also improve your core and whole-body stability, as well. If you’re short on time, space, or money, fit these into your training plan..
When to Do It
The beauty of sliders is that they take up almost zero space, so you can bring them virtually anywhere. Do this exercise if you’re traveling or only have a short time to train, as a chest finisher after push-ups or dips, or as part of a global exercise circuit. You can also use this variation to increase shoulder stability and injury prevention, as it demands more muscle awareness and stability.
How to Do it
Grab a pair of sliders and get on the ground in the plank position, arms straight and whole-body braced. Slowly slide your arms to your sides as low as you can before bringing them back together while exhaling.
You can work on your range of motion over the course of several sessions. The lower you go, the harder it will be.
Benefits of Chest Flyes Alternatives
The main goal of the flyes is to develop your chest, and as such, you have to either vary the stimulus from time to time, or find the variation that is best suited to you, including morphology, weaknesses, or equipment constraints.
Chest Size and Strength
Flyes are all about targeting your chest with laser-like focus, and these variations can even take things further by focusing more on the upper or the lower chest portion, use heavier weight for more strength gains, or employ a different training stimulus like machine, cables, or suspension straps. If you want to leave out the other pressing muscles to better target your pectorals, then there’s a variation for you.
Shoulder Stability and Health
If you want to build a barrel chest, you need to be able to actually train your chest. The shoulder complex, which is involved in every chest exercise, is the most unstable in the body and is prone to injuries and overuse issues induced by the modern lifestyle, anatomy, or a lot of pressing exercises. Some of these flye variations are more unstable, which will improve your stability and coordination, resulting in healthier, more resilient shoulders.
Fly Your Way to a Barrel Chest
Chest flyes can be beneficial for any lifter trying to improve their chest size and strength. Whether you’re a functional fitness fan, an aesthetics enthusiast, or a health-conscious individual, there are several variations you can include in your training to reach any chest-building goal.
References
- Baz-Valle E, Schoenfeld BJ, Torres-Unda J, Santos-Concejero J, Balsalobre-Fernández C. The effects of exercise variation in muscle thickness, maximal strength and motivation in resistance trained men. PLoS One. 2019 Dec 27;14(12):e0226989. doi: 10.1371/journal.pone.0226989. PMID: 31881066; PMCID: PMC6934277.
- Rodríguez-Ridao D, Antequera-Vique JA, Martín-Fuentes I, Muyor JM. Effect of Five Bench Inclinations on the Electromyographic Activity of the Pectoralis Major, Anterior Deltoid, and Triceps Brachii during the Bench Press Exercise. Int J Environ Res Public Health. 2020 Oct 8;17(19):7339. doi: 10.3390/ijerph17197339. PMID: 33049982; PMCID: PMC7579505.
- Oranchuk, D. J., Storey, A. G., Nelson, A. R., & Cronin, J. B. (2019). Isometric training and long-term adaptations: Effects of muscle length, intensity, and intent: A systematic review. Scandinavian journal of medicine & science in sports, 29(4), 484–503. https://doi.org/10.1111/sms.13375
- Higbie EJ, Cureton KJ, Warren GL 3rd, Prior BM. Effects of concentric and eccentric training on muscle strength, cross-sectional area, and neural activation. J Appl Physiol (1985). 1996 Nov;81(5):2173-81. doi: 10.1152/jappl.1996.81.5.2173. PMID: 8941543.
- Dudley GA, Tesch PA, Miller BJ, Buchanan P. Importance of eccentric actions in performance adaptations to resistance training. Aviat Space Environ Med. 1991 Jun;62(6):543-50. PMID: 1859341.
- Behm DG, Colado JC, Colado JC. Instability resistance training across the exercise continuum. Sports Health. 2013 Nov;5(6):500-3. doi: 10.1177/1941738113477815. Erratum in: Sports Health. 2015 Mar/Apr;7(2):184. Colado Sanchez, Juan Carlos [corrected to Colado, Juan C]. PMID: 24427423; PMCID: PMC3806173.
Featured Image: MDV Edwards / Shutterstock
The post 10 Chest Flye Alternatives to Try During Your Next Workout appeared first on Breaking Muscle.


 CLICK-CLICK (@asiagrapher_mk)
 For now classes are 6pm and 640pm at 2840 Wildwood st in the Boise Cloggers studio.
Book your class NOW!
click this ==>
For now classes are 6pm and 640pm at 2840 Wildwood st in the Boise Cloggers studio.
Book your class NOW!
click this ==>


