This post was originally published on this site

Originally Posted At: https://breakingmuscle.com/feed/rss

Maybe you first saw the pullover performed in low-res videos of Golden-era bodybuilders. Now, it’s common to see in commercial fitness centers, rehabilitation facilities, and home gyms. The dumbbell pullover is a classic back and chest exercise that’s experiencing a renaissance — and for good reasons.

A person doing dumbbell pullovers.
Credit: Wavebreakmedia / Shutterstock

This guide covers step-by-step instructions, benefits, unique considerations, variations, and programming for the dumbbell pullover.

Dumbbell Pullover

Dumbbell Pullover Instructional Video

Here’s Dr. Merrick Lincoln instructing the traditional form for the dumbbell pullover. Review the form and hear specific tips before practicing the movement on your own.

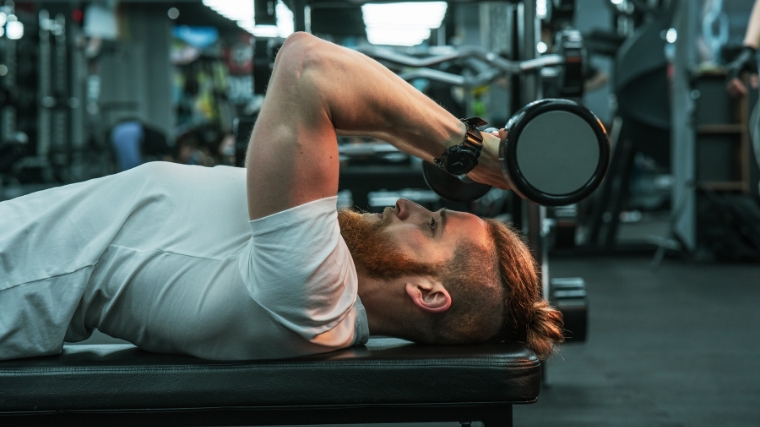
How to Do the Dumbbell Pullover Step By Step

The dumbbell pullover is an overhead shoulder extension exercise performed lying on a bench. These step-by-step instructions ensure proper form. 

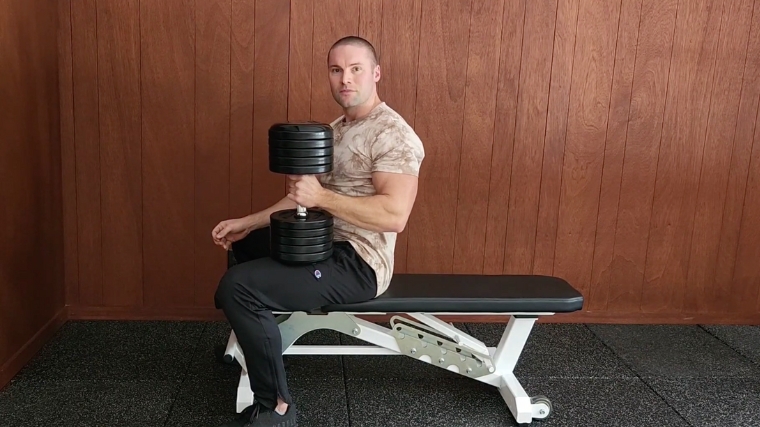
Step 1 — Set Up a Strong Foundation

Step 1 - A person properly positioned on the gym bench for a pullover.
Credit: Merrick Lincoln, DPT, CSCS / YouTube

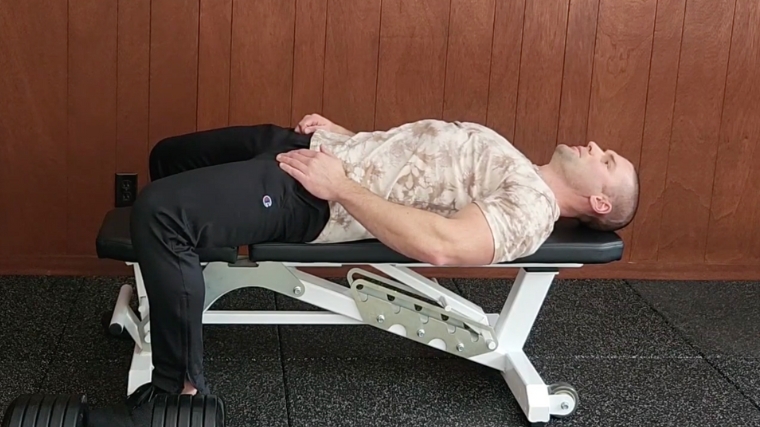
For the traditional dumbbell pullover, five stable points of contact are required — The back of your head, shoulder blades, and glutes must remain in contact with the bench, and both feet must be touching the floor. If your bench is too tall, placing your feet on the bench frame or atop weight plates is acceptable. 

Form Tip: Position your head as far up the bench as possible. By placing your head high on the bench, you reduce the likelihood of the bench impeding shoulder range of motion during the pullover.

Step 2 — Retrieve Your Dumbbell and Brace

Step 2 - A person securely grasping a dumbbell with both hands on the gym bench for a pullover.
Credit: Merrick Lincoln, DPT, CSCS / YouTube

The pullover requires a spotter due to movement of the dumbbell over your face and head. A spotter is an individual who assists with the movement and provides physical assistance in the event of form breakdown or failure.

A spotter is also helpful, because they can pass you the dumbbell when you are ready to begin. Otherwise, you will need to transfer the dumbbell from atop your thigh to above your chest, which can be awkward positioning. Whether or not you choose to recruit a spotter, you will cradle the inside top half of the dumbbell in your palms with thumbs and fingers wrapped around the handle.

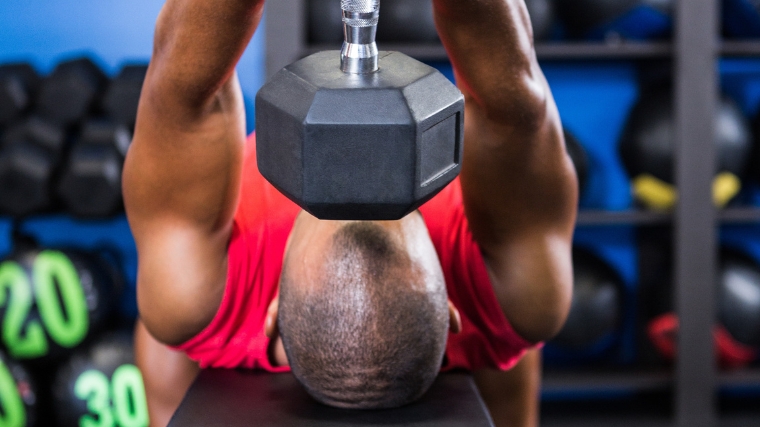
Form Tip: Grasp the dumbbell securely before bringing it over your face or before giving your spotter the signal to release it. The handle of the dumbbell should sit between the base of your thumbs and body of the hands. With one palm on each side of the dumbbell, create a “closed” grasp by overlapping your thumbs behind the handle and overlapping fingers in front.

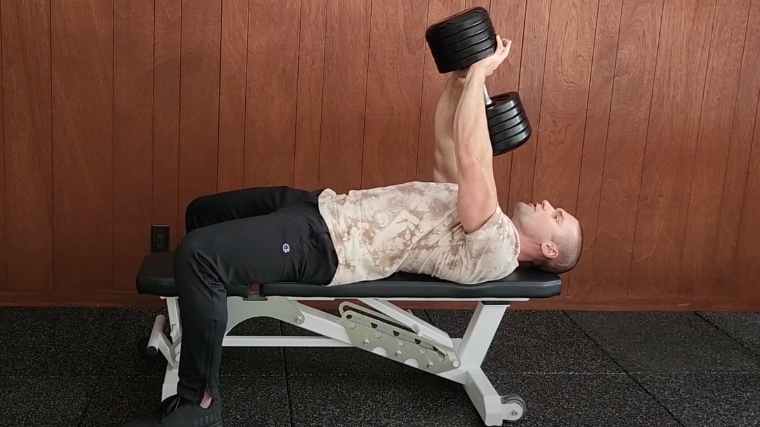
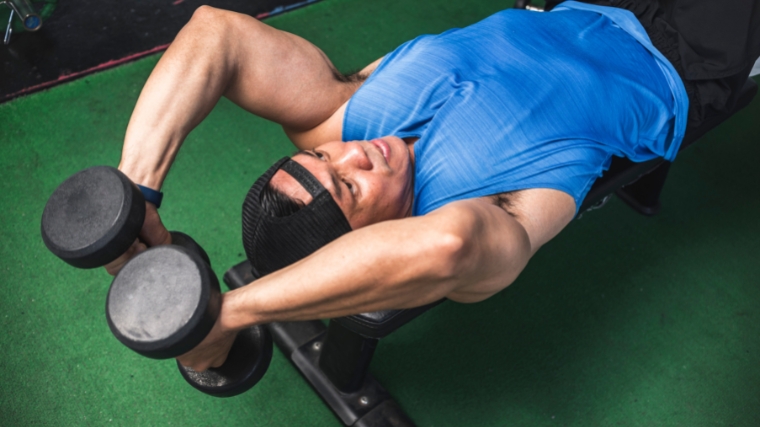
Step 3 — Lower to the Bottom Position

Step 3 - A person securely holding a dumbbell in the bottom position of a pullover.
Credit: Merrick Lincoln, DPT, CSCS / YouTube

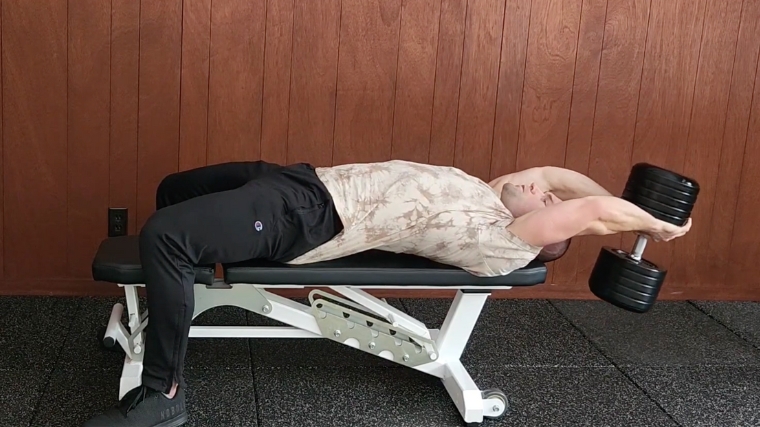
Begin with dumbbell above your upper chest with your arms vertical and elbows unlocked or slightly bent. Brace your abdominal muscles and maintain the five points of contact with the bench and the floor. Lower the dumbbell toward the floor with control. End the downward movement when you reach the greatest amount of shoulder flexion (stretch) that you can tolerate and control.

Form Tip: Achieve a tolerable stretch across your shoulders at the bottom position. The goal is to move through your full available range of overhead motion, not simply bringing the weight as close to the ground as possible.

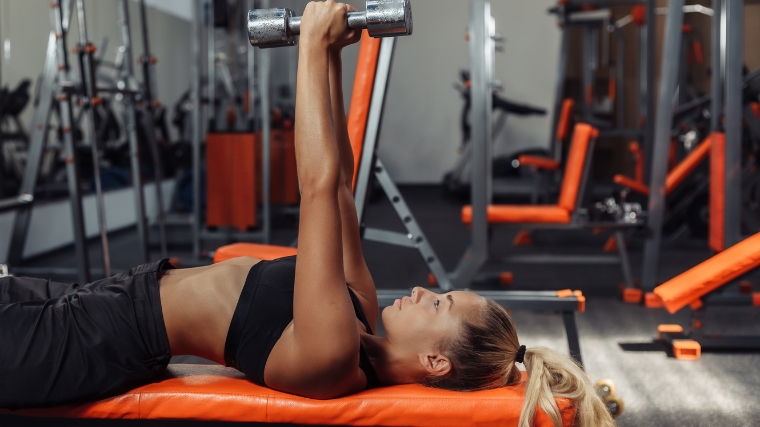
Step 4 — Raise to the Top Position

Step 4 - A person securely holding a dumbbell in the top position of a pullover.
Credit: Merrick Lincoln, DPT, CSCS / YouTube

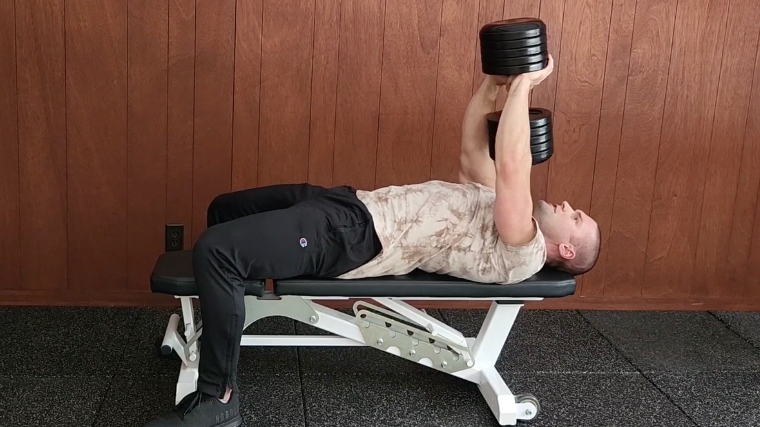
Reverse the movement by pulling the dumbbell through the same arc of movement. The repetition is complete when your upper arms are vertical. Keep your head locked in neutral and your gaze directed at the ceiling — don’t follow the weight with your eyes or head. Allowing your head to tilt into extension (looking overhead) promotes undesirable extension throughout the entire spine.

Form Tip: Maintain the same degree of arm bend throughout each repetition. If your elbows are bending and straightening during the exercise, you’re shifting muscular stress away from your chest and back and onto your triceps.

Step 5 — End the Set Safely

Step 5 - A person securely holding a dumbbell on his thigh at the end of a pullover set.
Credit: Merrick Lincoln, DPT, CSCS / YouTube

If you are using a spotter (recommended), indicate the set is complete. The spotter should take the dumbbell with both hands. (1) If you are training solo (at your own risk), bring the dumbbell to your thigh.

Form Tip: Avoid dropping the dumbbell on your face or chest. Unless you’re itching for a visit to the hospital and likely plastic surgery, safety is priority number one. Ensure the spotter has full control of the dumbbell before you let go. If training alone, maintain a secure grip until the dumbbell rests on your thigh.

Dumbbell Pullover Mistakes to Avoid

The pullover appears simple and sounds self-explanatory — Lie on your back and “pull the dumbbell over,” right? Well, yes, but a plethora of technique faults plague this exercise. Avoiding these errors to improve the effectiveness and safety of the dumbbell pullover.

Excessive Elbow Bend and “Flaring”

During the traditional dumbbell pullover, slight elbow bend allows the lifter to hold the dumbbell while moving their upper arms in the sagittal plane (i.e. parallel to the body’s midline). When lifters allow excessive elbow bend, the difficulty of the pullover is reduced, because the dumbbell is now closer to your shoulders.

More often than not, excessive elbow bend is also associated with “flared,” or outward-pointing, elbows. This position reflects internal rotation of the shoulder and may increase stress on the inside of the elbow (i.e. ulnar collateral ligament stress) during the pullover.

A person in a blue shirt doing a two dumbbell pullover.
Credit: MDV Edwards / Shutterstock

Avoid it: Focus on keeping your elbows pointing forward and/or up during the dumbbell pullover. While elbows should always remain “unlocked,” the pullover should never feel like a triceps extension (“skull crusher”).

Losing Contact with the Bench

Although allowing your hips to rise from the bench may give the impression of increased range of motion, back and hip extension does not equate to shoulder mobility. Unlike a competition-style bench press, arching is counterproductive to the pullover because it ultimately removes tension from latissimus dorsi. (2)

Worse still, excessive arching may allow a heavy dumbbell to destabilize your position, which could result in a “glutes over dumbbell” tumble over the back of the bench.

A person on the bench for a dumbbell pullover, with an arched back.
Credit: Vladimir Sukhachev / Shutterstock

Avoid it: Anchor yourself to the bench by digging your heels into the floor and aggressively bracing your abdominal muscles.

Not Allowing the Dumbbell to “Hang”

A common mistake is to attempt to hold or orient the dumbbell horizontally during the repetition rather than vertically. This requires unnecessary action of the wrist flexors and does little to improve the pullover. At worst, this error could cause premature grip fatigue. 

long-haired person in gym doing flat bench dumbbell pullover.
Credit: Vladimir Sukhachev / Shutterstock

Avoid it: The dumbbell should hang naturally from your hands throughout the pullover. (1)  Although you should maintain a firm grip on the dumbbell, avoid turning or tilting the dumbbell during your set.

How to Progress the Dumbbell Pullover

Lifters new to the pullover should start light when first learning the exercise. Like any exercise, the pullover must be progressed to ensure ongoing benefits. Begin by progressing traditional variables like adding reps and weight. Then, at some point, consider the simple technique modification discussed below.

Increase the Repetition Volume

As an accessory exercise, the pullover is typically programmed in the moderate repetition range (i.e. eight to 12 reps) or a higher repetition range (i.e. 12 to 16 reps). Yes, this is a broad recommendation, but it means you can likely progress for some time by adding a repetition here and there as able. Once you’re able to complete your repetition target, simply add one more rep the following workout. In the short term, progressing volume is likely most appropriate for those focused on hypertrophy. (23)

Increase the Weight

Once you reach the top of your target repetition range and feel you could do more, it is time to increase the weight of your dumbbell. Alternatively, if your primary goal is building strength, progressing weight is likely to be your best short-term strategy. (23) Since small jumps in weight dramatically increase the resistance experienced by the shoulders at the bottom of the pullover, incremental weight progression is best.  

Keep Constant Tension

The dumbbell pullover traditionally begins and ends when the dumbbell is above the chest. (1) However, most of the key muscles of the pullover are offloaded at this point in the range of motion, because the dumbbell is no longer creating demand for the shoulder extensors (i.e. lats, pecs, etc.). A minor tweak to pullover technique increases the difficulty of the early portion of the movement.

A person doing overhead pullovers.
Credit: Wavebreakmedia / Shutterstock

Although “constant tension” is just a catchy misnomer (no muscle experiences constant tension during dynamic exercise), we can intensify the pullover by ending the repetition and beginning the next rep while the shoulder extensors are still working. Rather than pull the dumbbell over your chest, simply reverse the movement when the dumbbell passes above your forehead.

Benefits of the Dumbbell Pullover

The dumbbell pullover trains the shoulders through an arc of overhead motion. Due to its ability to place substantial tension on already lengthened muscles, this simple exercise offers exciting benefits. 

Accelerated Muscular Growth

Mechanical tension, or the end-to-end pulling force experienced by muscle tissue, is generally accepted to be a primary driver of muscle growth (hypertrophy). (3)(4) Muscles experience mechanical tension as a result of muscle contraction and stretch-induced contributions. These forces combine and, when great enough, trigger a cascade of cellular events that ultimately result in muscle growth. (3)

A strong body builder with big muscles holding an EZ bar.
Credit: Lebedev Roman Olegovich / Shutterstock

Training at long muscle lengths increases the stretch-induced contributions to mechanical tension. Growing evidence suggests that training muscles in their lengthened position results in higher rates of muscle hypertrophy. (5)(6)(7) Unfortunately, no long-term hypertrophy study to date has focused on the pullover. However, the architectural properties of latissimus dorsi and pectoralis major, two primary muscles of the pullover, suggest that training at long lengths may be particularly effective. (4)(8

Unlike lat pulldowns, pull-ups, and chin-ups, the resistance torque of the dumbbell pullover is maximized in the overhead position. This is also the position where the average lifter’s lats and pecs are at or near their longest lengths — Altogether, the dumbbell pullover appears to impose ideal demands for “stretch-induced hypertrophy.” 

Improved Flexibility

The dumbbell pullover trains the shoulder extensor muscles at long muscle lengths — in the “stretched” position. In addition to the potential hypertrophy benefits, regular resistance training is known to promote changes in muscle structure and improve flexibility. (9)(10) In the short-term, a single bout of resistance training results in immediate increases in shoulder flexion range of motion. (11) Improved shoulder flexion may be desirable, because even dedicated gym-goers can suffer from limited range of motion. For example, competitive powerlifters — those who focus primarily on the bench press, squat, and deadlift — may demonstrate substantial limitations in shoulder flexion. (12

Person in white lying on gym bench holding a dumbbell overhead.
Credit: BalanceFormCreative / Shutterstock

Although research on the direct effect of the dumbbell pullover on shoulder flexibility is limited, evidence is mounting to support its efficacy. Morton and colleagues compared the effects of five weeks of resistance training or static stretching on flexibility. The resistance training group completed four weekly sets of the dumbbell pullover. (10)

While both groups showed improved shoulder flexibility, the resistance training group showed a trend for superior shoulder extension gains. (10) While training durations greater than five weeks may be necessary to substantiate the effect or show statistically significant findings, it appears the dumbbell pullover is at least equivalent to stretching for shoulder flexibility. 

Improved Overhead Strength and Stability

Compared to other common free weight exercises, the pullover requires your shoulders to work through a greater range of motion and results in significantly greater shoulder joint torques when similarly loaded. (13) Informed by the specificity principle, these features may result in superior strength and stability adaptations, especially through the overhead range of motion. 

Back view of a person holding a dumbbell overhead.
Credit: Max kegfire / Shutterstock

The pullover works the abdominal core along with the shoulders. Combining overhead exercise with core training is recommended for integrating strength into whole-body movements and resisting challenges to shoulder position. (14) Programmed appropriately, the pullover appears to be a strong exercise selection for targeted shoulder strengthening and robustification.

Muscles Worked by Dumbbell Pullover

The primary action resisted by the dumbbell pullover is shoulder extension. (1) Therefore, the exercise trains the muscles that extend the shoulder. Identifying these muscles may appear simple, but few exercises demonstrate the complexities of functional anatomy better than the pullover.

In basic anatomy, we learn muscle actions from “anatomical position” — a position with your arms at your sides. But the dumbbell pullover occurs through overhead range of motion, and since muscle actions may change as joints move away from anatomical position, referencing an anatomy textbook to determine the muscles that extend the shoulder worked during the pullover may be misleading. Moreover, different parts of broad or fan-shaped muscles may be biased throughout certain ranges of motion. In extreme cases, one part of a muscle may have an entirely different action than other parts of the muscle. (15)(16)

Close up view of the back and  shoulder muscles.
Credit: YAKOBCHUK VIACHESLAV / Shutterstock

Until a long-term training study consisting exclusively of dumbbell pullovers is conducted, we lean on anatomical modeling and electromyography studies to infer the answer to the question, “What muscles are trained by the pullover?”

Latissimus Dorsi

The latissimus dorsi is a broad, fan-shaped muscle spanning from the low- and mid-back, pelvis, and back of the ribcage up to the arm. (2)(8) Latissimus dorsi is active during the Pullover. (17)(18)(19) The lower fibers, or iliac part, which attaches to the pelvis, are most effective for producing shoulder extension, the movement resisted by the pullover. (8)(16

Pectoralis Major

Positioned prominently on the chest, the pectoralis major is another large, fan-shaped muscle. It’s commonly divided into two parts — the upper clavicular head and the middle to lower sternocostal head. Each part contributes disproportionately to various shoulder actions.

For pec training, movements like bench press, pec flye, and incline press are common. However, the sternocostal head of pectoralis major is active during the pullover. (18)(19) Available data suggest the lower fibers of pectoralis major act to extend the shoulder through the overhead range of motion. (16) Therefore, the sternocostal pectoralis major is considered a primary target of the pullover. 

Posterior Deltoid

The posterior deltoid, or “rear delt,” extends the shoulder. It’s active during the pullover. (19) From a mechanical standpoint, studies suggest the posterior deltoid is a more efficient shoulder extensor during the pullover than the latissimus dorsi or pectoralis major. (15)(16) This is because posterior deltoid demonstrates more “leverage” to produce extension (i.e. a greater extension “moment arm”) throughout the arc of motion trained by the pullover. (15)(16) While the pullover might not be your first pick when it comes to posterior deltoid training, don’t underestimate its potential to build the back of your shoulders.  

Triceps Brachii

The triceps brachii’s primary action is to extend the elbow. In addition, the long head of triceps brachii extends the shoulder. Ultimately, the triceps prevent excessive elbow flexion and assist with the principle movements of the pullover. The muscle controls the movement into shoulder flexion during the downward phase and extends the shoulder during the upward phase. (17)(18)(19)

Serratus Anterior and Abdominals

The serratus anterior is composed of small projections that run diagonally alongside the ribcage. It acts on the shoulder blade. The lower portion of serratus anterior has been shown to be particularly active in the bottom half of the pullover. (20

Close up view of the Serratus Anterior on a shirtless person.
Credit: ShotPrime Studio / Shutterstock

The abdominal muscles are active during the Pullover to resist excessive arching of the trunk, which would otherwise be caused by the dumbbell traveling overhead. (18) It’s fair to categorize the pullover as an anti-extension abdominal exercise. 

How to Program the Dumbbell Pullover

As a single-joint movement, the dumbbell pullover is typically categorized as an accessory exercise. Traditionally, accessory exercises are performed after multi-joint (“compound”) exercises. When programming accessories, avoid extremely heavy loads and one-repetition maximum attempts. Rather, focus on multiple grueling, moderate-to-high repetition sets. 

Moderate Weight, Moderate Repetitions

Those wishing to build muscle and strength with the pullover should consider three to four sets of eight to twelve repetitions. Performed after chin-ups or heavy lat pulldowns, pullovers allow you wring out a bit more hypertrophy work without taxing your grip. 

Low to Moderate Weight, High Repetitions

Pullovers are a greater exercise to begin or end your upper body workout. As an opener at the beginning of your workout, pullovers prime your shoulders for subsequent overhead lifts. As a finisher to end your training session, pullovers provide a dose of “pump work” and a potent stimulus for hypertrophy. Two to four sets of twelve to sixteen repetitions will do the job.

Pullover Variations

Classic exercises tend to accumulate many variants over time, and the pullover is no different. Pullover variations tend to switch out the resistance implement (e.g. dumbbell for a barbell) or the support surface (e.g. bench for a Swiss ball). Four of the most common pullover variations are shown below. 

Cross-Bench Dumbbell Pullover

The cross-bench dumbbell pullover is performed by orienting the body perpendicular to the bench and performing the exercise from a bridge position.

Not only does this setup facilitate activity of the glutes but it also encourages a stable pelvis position and allows the solo lifter to place the dumbbell conveniently on the bench before and after exercise completion. 

EZ-Bar Pullover

Without access to a full run of dumbbells? Having trouble securely holding the dumbbell during the pullover? If so, you may wish to try the EZ-bar pullover.

The EZ-bar allows incremental loading with “change plates.” The semi-pronated inner grips on the bar may be easier to hold for those with stiff forearms, tight shoulders, or smaller hands.
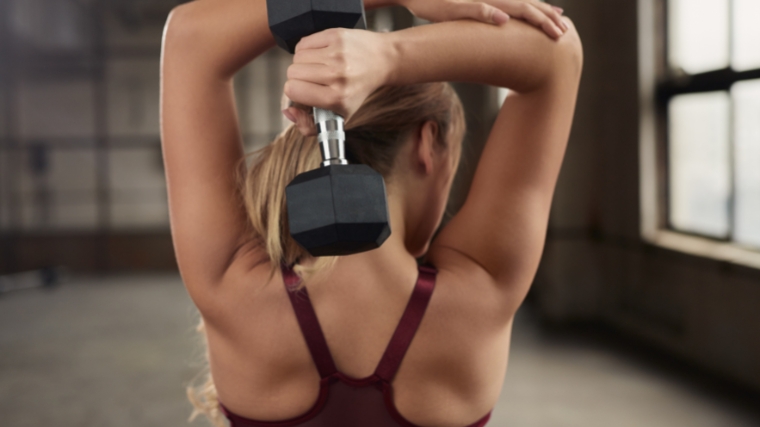
Single-Arm Pullover

Those training for shoulder stability may wish to consider the single-arm dumbbell pullover. By training unilaterally, you’re challenging your shoulder to control movement in an additional plane.

Owing to the natural tradeoff between stability and maximum load, expect to drop the weight 60 to 80% for the single-arm dumbbell pullover.

Cable Pullover

Cable pullovers are performed with a pulley or cable column set to a low position, while holding a triceps rope, strap, or short bar. The cable pullover changes the line of the resistance. Instead of encountering maximum resistance torque at or near the bottom position as in the dumbbell pullover, the shoulders experience maximum resistance torque earlier in the movement during cable pullovers.

The cable resistance also increases the productive range of motion of the exercise. Rather than ending the repetition with vertical arms, continue “pulling over” until the cable gently grazes your forehead. 

FAQs

Is the dumbbell pullover a back exercise or a chest exercise?

It’s both. The pullover also hits muscles in the shoulders, arms, and trunk. (16)(17)(18)(19)(20)
If you’re using a training split, you will need to decide how to categorize the pullover. Some like to include it in “chest day,” because Pullovers hit the lower portion of pectoralis major. (16) Others put pullovers on “back day,” as it can be used to train latissimus dorsi before or after grip-intensive exercise such as rows, lat pulldowns, or pull-ups. The good news? There is no wrong answer. 

Can I just do straight-arm pushdowns instead?

The straight-arm pushdown, also called “stiff-arm pulldown” or “lat prayer,” is a shoulder extension exercise performed standing with a cable machine or high pulley. This exercise may be appealing for several reasons. There’s is no need to occupy a bench, the upright position allows you to monitor your form (and your “pump”) in the mirror, and changing weights is easier on the cable stack. But for lifters seeking hypertrophy, the crux of the question is not convenience or even the “feel” of the exercise. It comes down to inherent differences between exercise biomechanics. 
The pullover and pulldown are different exercises, each with its own unique resistance profile and muscular activity pattern. (18) Anecdotally, lifters tend to “feel” their lats more during pulldowns than pullovers. The reverse seems to be true for “feeling” pectoralis major. Indeed, the pulldown shows greater muscle activity in the latissimus dorsi than the pullover, and the pullover shows greater muscle activity in all parts of pectoralis major than the pulldown. (18
Does this mean the pullover is better for back and the pulldown is better for chest? Absolutely not. This misconception stems from a common misunderstanding of exercise electromyography (EMG) studies. Higher EMG does not equal a “better exercise,” because we cannot predict long term training outcomes from EMG studies alone. (24)(25) Moreover, EMG is not a valid indicator of mechanical tension, a key driver of muscular adaptations. (24)(3)
In short, many features must be considered when determining exercise selection. These include, but are not limited to training goals, personal preferences, and how the exercise fits into the program as a whole. 

How can hit my lats or pecs harder in the pullover?

Presently, there is no definitive pullover technique modification to bias one agonist muscle over another. Although some have claimed flaring the elbows during the pullover favors latissimus dorsi and keeping elbows straight favors pectoralis major, either technique compromises the exercise.
Flaring the elbows outward results in shoulder internal rotation, which takes tension off latissimus dorsi. (26) — Not desirable if you wish to take advantage of increased tension in the muscle, stretch-mediated hypertrophy, and flexibility benefits of the exercise. (4)(8)(9)
Keeping your elbows completely straight seems to make it easier to “feel” or contract your pecs at the top of the repetition, but it also requires extreme shoulder abduction at the bottom of the repetition (think of your biceps touching your earlobes). I do not recommend either option. 

The Perplexing Pullover

The pullover exercise is a conundrum. It’s performed in hardcore bodybuilding gyms and rehabilitation clinics, alike. It’s an exercise for building muscle and enhancing range of motion. It’s a back exercise and a chest exercise. It’s loved and hated. 

Despite its complexities, the dumbbell pullover has stood the test of time. Maybe now is the time to focus on pullovers in your training program? 

References

  1. Leavy, C. M. (2004). Dumbbell pullover. Strength & Conditioning Journal26(2), 48-49.
  2. Bogduk, N., Johnson, G., & Spalding, D. (1998). The morphology and biomechanics of latissimus dorsi. Clinical Biomechanics13(6), 377-385.
  3. Wackerhage, H., et al. (2019). Stimuli and sensors that initiate skeletal muscle hypertrophy following resistance exercise. Journal of Applied Physiology, 126(1), 30-43.
  4. Ottinger, C. R., et al. (2022). Muscle hypertrophy response to range of motion in strength training: a novel approach to understanding the findings. Strength & Conditioning Journal, 10-1519.
  5. Maeo, S., et al. (2021). Greater hamstrings muscle hypertrophy but similar damage protection after training at long versus short muscle lengths. Medicine and Science in Sports and Exercise53(4), 825.
  6. Maeo, S., et al. (2022). Triceps brachii hypertrophy is substantially greater after elbow extension training performed in the overhead versus neutral arm position. European Journal of Sport Science, 1-11.
  7. Pedrosa, G. F., et al. (2021). Partial range of motion training elicits favorable improvements in muscular adaptations when carried out at long muscle lengths. European Journal of Sport Science, 1-11.
  8. Gerling, M. E., & Brown, S. H. (2013). Architectural analysis and predicted functional capability of the human latissimus dorsi muscle. Journal of Anatomy223(2), 112-122.
  9. McMahon, G. E., et al. (2014). Impact of range of motion during ecologically valid resistance training protocols on muscle size, subcutaneous fat, and strength. The Journal of Strength & Conditioning Research28(1), 245-255.
  10. Morton, S. K., et al. (2011). Resistance training vs. static stretching: effects on flexibility and strength. The Journal of Strength & Conditioning Research25(12), 3391-3398.
  11. Leite, T. B., et al. (2017). Effects of different number of sets of resistance training on flexibility. International Journal of Exercise Science10(3), 354.
  12. Gadomski, S. J., Ratamess, N. A., & Cutrufello, P. T. (2018). Range of motion adaptations in powerlifters. The Journal of Strength & Conditioning Research32(11), 3020-3028.
  13. Schütz, P., et al. (2022). Chest exercises: movement and loading of shoulder, elbow and wrist joints. Sports10(2), 19.
  14. Brumitt, J., & Dale, R. B. (2009). Integrating shoulder and core exercises when rehabilitating athletes performing overhead activities. North American Journal of Sports Physical Therapy: NAJSPT4(3), 132-138.
  15. Hoffmann, M., et al. (2022). Moment arms of the deltoid, infraspinatus and teres minor muscles for movements with high range of motion: A cadaveric study. Clinical Biomechanics, 105685.
  16. Ackland, D. C., Pak, P., Richardson, M., & Pandy, M. G. (2008). Moment arms of the muscles crossing the anatomical shoulder. Journal of Anatomy213(4), 383-390.
  17. Borges, E., et al. (2018). Resistance training acute session: Pectoralis major, latissimus dorsi and triceps brachii electromyographic activity. Journal of Physical Education and Sport18(2), 648-653.
  18. Muyor, J. M., López-Miñarro, P. A., & Alacid, F. (2022). Comparison of electromyographic activity during barbell pullover and straight arm pulldown exercises. Applied Sciences12(21), 11138.
  19. Campos, Y. D. A. C., & Silva, S. F. D. (2014). Comparison of electromyographic activity during the bench press and barbell pullover exercises. Motriz: Revista de Educação Física20, 200-205.
  20. Büll, M. L., et al. (2001). Electromyographic validation of the trapezius and serratus anterior muscles in pull-over exercises. Brazilian Journal of Morphological Sciences18(1), 69-73.
  21. Newmire, D. E., & Willoughby, D. S. (2020). Partial Range of Motion Resistance Training: A Feasible Bodybuilding Training Regiment for Local or Regional Muscle Hypertrophy?. Strength & Conditioning Journal42(5), 87-93.
  22. dos Santos Albarello, J. C., et al. (2022). Non-uniform excitation of pectoralis major induced by changes in bench press inclination leads to uneven variations in the cross-sectional area measured by panoramic ultrasonography. Journal of Electromyography and Kinesiology67, 102722.
  23. Plotkin, D., et al. (2022). Progressive overload without progressing load? The effects of load or repetition progression on muscular adaptations. PeerJ10, e14142.
  24. Vigotsky, A. D., et al. (2018). Interpreting signal amplitudes in surface electromyography studies in sport and rehabilitation sciences. Frontiers in Physiology, 985.
  25. Vigotsky, A. D., et al. (2022). Longing for a longitudinal proxy: acutely measured surface EMG amplitude is not a validated predictor of muscle hypertrophy. Sports Medicine52(2), 193-199.
  26. Hik, F., & Ackland, D. C. (2019). The moment arms of the muscles spanning the glenohumeral joint: a systematic review. Journal of Anatomy234(1), 1-15.

Featured Image: Wavebreakmedia / Shutterstock

The post How to Do the Dumbbell Pullover for Upper Body Muscle and Mobility appeared first on Breaking Muscle.

Be Nice and Share!
This post was originally published on this site

Originally Posted At: https://breakingmuscle.com/feed/rss

The deadlift is considered by many lifters to be the king of exercises. It could be considered the ultimate display of full-body strength, and it’s likely an exercise that recruits the most muscles in the human body. Deadlifts are also a very natural and instinctive movement — useful in everyday life as well as being transferable to many sports. It is the quintessential “hinge” exercise, one of the five basic human movement patterns popularized by coaches in recent years, along with “squat,” “push,”, “pull,” and “carry.”

Man in gym performing barbell exercise
Credit: Qilin’s prance Filmmaker / Shutterstock

As such, this primordial lift is so versatile, it can be used for a multitude of goals — strength, muscle growth, speed and power, grip strength, core stability, and more — as long as you can perform it properly. But human ingenuity, and necessity, also helped to create countless variations, each focusing more on one or more of these aspects.

Whether you want to target a precise muscle group, improve your deadlift technique, a specific weak point, or improve your athletic abilities, there’s a variation for you. The traditional deadlift will build total body size and strength, but we can take things even further. Here’s a list of 15 deadlift variations to include in your training regimen and tailor your sessions to your specific needs.

Deficit Deadlift

Standing on a plate or elevated platform will make the lift more difficult. The increased range of motion requires you to reach and crouch down further, placing you in a less-than-optimal position.

That’s usually not something you want to do on purpose, but the poor leverage improves your strength at the start of the lift, making it useful for lifters who are “weak off the floor,” or have trouble with the initial phase of the deadlift.

When to Do It

This variation is often used by lifters interested in strength sports (specifically powerlifting or strongman/strongwoman) or those looking for maximal deadlift strength. It is a perfect fix if you fail at the start of the lift, at floor-level or just above it. Being elevated means that the range of motion is increased and you’ll have to use more knee flexion, which will increase your quadriceps strength and power off the floor.

Deficit deadlifts are also a great teaching tool if you have trouble getting deadlift technique right, as it forces you to use less weight and focus on perfect form. Finally, you can also use it as a variation to increase quadriceps recruitment, either for strength or size.

How to Do It

Stand securely on a small platform or a weight plate. Grab a barbell and perform a regular deadlift. Because your feet are elevated, your hips will have to get lower in the starting position because the bar will be further down. Do not make the mistake of turning it into a stiff-leg deadlift — be sure to bend your knees and use your quads.

Don’t get crazy with an extremely high deficit or it won’t have much transfer to your basic deadlift. Elevating yourself just a few inches will be right for most lifters When in doubt, start with the lowest height and increase gradually.

Rack Pull

Working the opposite spectrum from the deficit deadlift, the rack pull provides a reduced range of motion. Sometimes called a partial deadlift, the rack pull starts with the bar in a power rack and skips the starting phase near the floor.

By starting with the barbell in a higher position, you can use more weight and stimulate more growth. You can also focus on the “end range” (lockout portion) of the movement if locking out deadlifts is your specific weakness.

When to Do It

The rack pull is ideal for emphasizing your glutes and back. It is also a relatively less technical lift because of the shortened range of motion. Rack pulls are suitable for many people because the movement requires less mobility and can put less strain on your lower back because you can begin in a more stable position.

Use this version to focus on hypertrophy (muscle growth), as a powerlifting tool to improve your lockout strength, or in lieu of the conventional deadlift if it’s not suited to your body type or injury history.

How to Do It

Set the safety pins in a rack so the barbell starts at your mid-shins, or higher if needed. Grab the barbell, flex your abs as hard as you can and perform the upper portion of a deadlift — pull your shoulders back and drive your hips forward.

Remember that overconfidence is a slow and insidious way to kill your results, so don’t set the barbell too high just to lift more weight. The higher the bar, the more weight lifted, but the less carryover to the actual movement. A shorter range of motion may also be less effective for growth, so choose an appropriate height.

Trap Bar Deadlift

With this variation, we’re using a trap bar instead of a straight barbell. This hexagon- or diamond-shaped specialty bar is now a common occurrence in many gyms around the world, and for good reason: this is an amazing lift that delivers size and strength with less joint strain.

This relatively easy to learn exercise is a hybrid between a squat and a standard deadlift because of the adjusted body position. This combination of benefits makes it excellent for developing size and strength.

When to Do It

If you’re a beginner who can’t make the regular deadlift work for you, give this variation a go. It will help you master overall positioning, hip hinging, and core bracing, while increasing total-body size and strength.

It is also a favorite for developing lower body strength and athleticism. Because you can keep your torso more upright, and put less strain on your lower back, it can be less risky than the conventional deadlift. It’s a great fit for people who only use weightlifting to get better at their sport. If you’re playing football, rugby, hockey, or combat sports, the trap bar deadlift can become your primary lower-body builder. 

How to Do It

Step into the trap bar and grab it by the handles. Brace your whole body, push through your legs and pull with your back to lift the weight up. You can use either the low or high handles if you flip the trap bar. Using the high handles is the basic and most common configuration which is recommended for most, and especially taller lifters whose leverages make barbell deadlifts too uncomfortable.

Using the low handles can be great to stimulate more quadriceps growth by forcing knee flexion, similar to performing a deficit deadlift. You can also perform the trap bar deadlift more like a squat, keeping your hips low and driving as much as you can through your legs to trigger quadriceps growth. This technique used by some bodybuilders so focus on leg growth more than strength and power.

Sumo Deadlift

This “controversial” lift has gotten a bad rap and is even seen as cheating by some lifters, because you can greatly reduce the range of motion compared to a conventional (close-stance) deadlift.

But the sumo deadlift also has a number of unique benefits: It puts less pressure on the lower back, it’s better suited to some morphologies (body types with varying limb lengths), and it will improve size and strength in the quadriceps, glutes, and adductors.

When to Do It

For some people, the sumo deadlift simply feels more natural. If that’s the case, then make it your default deadlift of choice. If you’re a competitive powerlifter and are stronger with this technique, do not hesitate to make it your competition lift. Some coaches argue that a good lifter should be efficient with both styles, for they both have their strengths and weaknesses and teach you different key positions and techniques. 

Studies have shown that the sumo deadlift puts less stress on your spine than a conventional deadlift, so if you’re a veteran lifter with an achy back, consider this lift as your deadlift of choice. (1) You can also simply rotate the sumo deadlift with the conventional deadlift to periodically rest your spine, for instance during a deload.

How to Do It

Take a stance that it is wider than shoulder-width. The specific foot position will depend upon your morphology, mobility, and preferences. Let your arms hang straight down to grab the barbell near the center of the bar, and sink your hips down. Your hips should be as close to in-line with the barbell as possible, rather than remaining in a high position.

Take a deep breath and brace your core. Contract your lats while keeping your upper body close to vertical. Push through the ground with your feet. Imagine trying to split the ground in half with your feet as you drive up. Pull the weight until your hips are locked out.

Stiff-Leg Deadlift

This strength-focused variation is all about your lower back. By extending your legs and keeping them almost straight in the starting position, you change your body’s leverage and muscle recruitment.

The stiff-leg position decreases involvement from your quadriceps and make it a pure posterior chain exercise — emphasizing your spinal erectors (lower back) and hamstrings.

When to Do It

This variation is mostly done by strength enthusiasts to strengthen their posterior chain, especially their lower back. (2) Compared to the traditional deadlift, the stiff-leg deadlift is more difficult because fewer muscles are involved in moving the weight, but that doesn’t prevent it from being used as a main exercise. Use it if your posterior chain is a weak point, strength-wise, or if you want to build a more muscular set of spinal erectors.

How to Do It

Set yourself like you would for a conventional deadlift — stand in front of a bar with your feet roughly hip-width, grabbing the barbell slightly outside your legs — but keep your hips higher and your legs only slightly bent. Your torso should be roughly parallel to the ground. The farther the barbell is from your shins, the more strain will be put on your lower back and core. As long as you’re conservative with the weight, this adjustment can be used deliberately to focus even more on these muscles. 

Create tension in your whole body and hinge at your hips. This is a pure hip hinge exercise with little-to-no leg drive. Extend your body completely to stand up and squeeze your glutes at the top. Reverse the motion with control until the barbell is back on the ground.

Romanian Deadlift

The Romanian deadlift, or RDL, is all about triggering hypertrophy by providing a great stretch, constant muscular tension, and a long time under tension — all drivers for muscle growth. (3)

It was popularized by Romanian Olympic weightlifter Nicu Vlad when he arrived in the United States. Vlad supposedly complemented his Olympic lifting with this variation instead of rounded-back stiff-leg deadlifts which were common at the time.

When to Use It

This classic exercise is one of the most efficient exercises for developing your hamstrings and glutes. Use it for moderate repetitions (eight to 12 per set) as your posterior chain exercise of choice during a bodybuilding-focused session or as an assistance exercise in your strength programming for sets of five to eight repetitions per set. Beginner lifters and elite athletes alike can rotate this lift into their training plan.

How to Do It

The Romanian deadlift is often confused with the stiff-leg deadlift, but technique for each movement is slightly different. The RDL starts from the top position, and not with the bar on the floor like the stiff-leg deadlift. Grab the barbell from a power rack, take a step backwards, and bend at the hips while keeping your back flat and your knees barely bent. Think about pushing your hips backward as far as you can. 

Descend until you cannot push your hips back anymore, or until you feel your back starting to round, and reverse the motion by flexing your glutes and driving your hips forward. You should feel a deep stretch in your hamstrings. Your mobility will determine how low you can go — don’t necessarily try to reach the bar to the ground. Keep in mind, when done consistently the Romanian deadlift may improve your flexibility and mobility. Consider using a pair of lifting straps to ensure your grip doesn’t fail or distract you from feeling your leg muscles working.

Single-Leg Deadlift

The single-leg deadlift requires some coordination, but it can challenge your core, balance, glutes, and hamstrings like no other. It may seem simple in appearance: “deadlift while standing on only one leg.” But sometimes, the simplest things are the best.

The unilateral (single-leg) exercise focuses on more core stability while also shifting the work load to each individual leg. This single-sided focus can help to correct potential strength and size imbalances. (4)

When to Do It

This exercise can improve mobility, coordination, and balance, while also training your hamstrings, glutes, and lower back. Your core also development, especially the obliques through anti-rotation. 

Whether you’re an athlete, a bodybuilder, a strength athlete, or simply someone who wants to be more functional, you can find a place for this exercise in your training. It’s also a great warm-up exercise that will lubricate your joints, teach correct mechanics, and prime your body for the heavier lifts.

How to Do It

Hold a barbell, a pair of kettlebells, or a pair of dumbbells and extend one leg behind you so that only the toes of that foot are touching the ground. Keep your front leg slightly bent and shift the majority of your body weight onto your front leg. Pitch your torso forward and lift your extended leg behind you until your body forms a T-shape. Reverse the motion by squeezing your hamstrings and glutes. Keep the weights relatively light, the repetitions moderate, and your form impeccable. Moving at a slightly slower pace can help to keep your technique and balance in order.

Snatch-Grip Deadlift

No, the snatch-grip deadlift is not only reserved for Olympic lifters. It does initially come from the world of weightlifting, and the snatch exercise itself, but it’s essentially a deadlift performed with a very wide grip.

This posterior chain exercise will recruit your whole back, with emphasis on your upper back muscles. It can also improve your drive off the floor because it requires you to start in a lower position.

When to Do It

If you’re an Olympic weightlifter, it’s a no-brainer as you can overload the snatch movement pattern, target the related muscles, and improve the starting position. If you’re a powerlifter who’s weak off the floor in the conventional deadlift, rotate the snatch-grip deadlift into your training to focus on your weak point. And if you’re only interested in aesthetics, the snatch-grip will overload your lats and upper back even more than the traditional deadlift.

How to Do It

Use a slightly wider stance than a conventional deadlift, lower your hips a bit more, and grab the barbell with a wide grip. Exactly how wide will depend upon what you want to achieve. If you’re a weightlifter, use the same grip as your normal snatch — which can be collar to collar for taller lifters. If you’re a powerlifter, you should employ a grip slightly outside your shoulder-width to have maximal carryover to your conventional pull. Consider using lifter straps for this variation, as your grip will be extremely challenged and you cannot use a mixed grip (one overhand grip and one underhand grip).

The wider your grip, the lower your hips will have to be to achieve a strong starting position. This means more work for your glutes, quads, and lats. Brace your core and drive through your legs while keeping a flat spine until you’re standing tall. Descend with control to the ground.

Zercher Deadlift

This one’s for the most unconventional lifters. Ed Zercher was a strongman who would perform lifts with the barbell in the crooks of his elbows. It led to the Zercher squat, Zercher carry, Zercher deadlift, Zercher good morning, and so on.

Holding a barbell in this awkward style will tremendously increase the stress on your core, upper back, and biceps, leading to more growth and strength. 

When to Do It

Most people in the gym seeing you perform this unique lift may think you’re a little crazy or misinformed, but the Zercher deadlift will challenge your core like almost no other movement. It is performed with a slightly rounded back, and as such, should be reserved for experienced lifters who’ve mastered bracing and core stability. It’s also a great exercise for competitive strongmen and strongwomen to train for the Atlas stone event, as it replicates the motion. If you want to build your back and core, try the Zercher deadlift.

How to Do It

Use a wider-than-usual stance to accommodate your arms, and squat deep to place the barbell in the crook of your elbows. Flex your abs as much as you can and lift the bar off the ground. If it’s too painful for your elbows, use a bar pad or try to use a thicker axle bar. The Zercher deadlift requires a lot of mobility, and might prove too stressful for your lower back. In that case, elevate the bar in a rack or on blocks and perform a partial motion.

Chain Deadlift

This powerlifting favorite is not available for most people, but if you can have access to chains, adding them to your standard deadlift will spice up your training and unlock new gains.

Using this accommodating resistance in conjunction with regular weights will change the curve of resistance: the weight will be lighter at the bottom, and heavier at the top. This can provide new training paradigms. This can also be performed for a similar effect using resistance bands on each side of the bar.

When to Do It

Because the weight is heavier at the top, chain deadlifts are perfect if you want to emphasize this portion of the lift and target the specific muscles responsible for the top-end motion, namely your back and glutes.

If the top-end is already your forte, you can also use the chain deadlift for overload, using a heavier weight than you could normally lift, which can unlock new growth. (5) It’s also invaluable if you want to do speed work — a specialized kind of strength training moving light-to-moderate weights as fast as you can. Bands and chains allow you to accelerate and be even more powerful through the phenomenon of compensatory acceleration, making you even stronger. (6)

How to Do It

Attach chains to the barbell so that they hang from it as the bar elevates, but not so high as they completely come off the floor. Some links should remain on the floor for to keep the bar balanced and stable.

A good weight is to aim for around 25% of your one-rep maximum in chains, and at least as much regular weight in plates. For example, if your max deadlift is 405 pounds, use around 100 pounds of chains. Then, perform a normal deadlift.

Sweeping Deadlift

If you have trouble with keeping your upper body tight and braced, coach Christian Thibaudeau popularized the sweeping deadlift. It’s the perfect fix for learning how to engage your lats and improve your posture during the deadlift.

Fighting the band’s pull will force you to constantly engage your lats and maintain total-body tension during a deadlift.

When to Do It

The deadlift can be hard to master, as it is a total body lift that requires lots of coordination and technique. A common flaw is having the barbell “moving away” from you during the ascent. This results in a strength leak and puts more stress on the lower back. To fix this, integrate the sweeping deadlift, either as a warm-up movement or a supplemental exercise. It will teach you to engage your lats and keep the bar close to your body at all times, which is the optimal pulling position.

How to Do It

Loop one end of a band around the center of your barbell and the other end to a sturdy object like a rack. Step in front of the barbell, facing the rack, so that the band is pulling the barbell away from you. Perform controlled deadlift repetitions while keeping tension in your lats and on the band. Keep the bar close to you at all times and don’t allow it to drift forward.

Kettlebell Deadlift

This beginner-friendly variation is a great introduction to the hip hinge pattern, but can also serve as an effective glute and hamstring builder. The kettlebell deadlift allow you to really push yourself without risking form breakdown or causing too much fatigue.

The kettlebell deadlift is a simple and efficient way to drill the deadlift movement. You can reinforce general technique while building strength and targeting all of the involved muscles, from your legs to your upper body and grip.

When to Do It

If you’re new to the gym, the kettlebell deadlift is the perfect tool to teach you proper hip hinge mechanics. Because the weight is closer to your centerline and not in front of you like a barbell, it is an easier and more natural-feeling exercise. You can start with lighter weight, which is great for inexperienced lifters. But if you have access to heavy kettlebells, it can also become a great lower body exercise for more advanced lifters, as it will put less strain on your back than a barbell.

How to Do It

Depending on the size of the kettlebell and your mobility, you might want to elevate it for a higher starting position. Step in front of the kettlebell and assume a shoulder-width stance. Hinge forward and grab the kettlebell. Brace your core, flex your lats by squeezing an imaginary ball under your armpits, and spread the floor apart with your feet. Drive your hips forward to full extension and exhale. Lower the weight with control to the ground.

If you want to make the exercise a bit harder, drive as hard as you can and squeeze your glutes at the top, so the weight rises up in a slight arc, similar to the beginning of a kettlebell swing.

Landmine Deadlift

The landmine is a little piece of equipment designed to hold one end of a barbell and allow for a myriad of exercises using it as a fixed anchor. Among these exercises, we can find the deadlift.

The landmine variation of the deadlift is simpler and safer than a barbell, making it a perfect variation for beginners. The bar follows a somewhat fixed path with the landmine, so this movement necessitates less coordination and technique than a barbell

When to Do It

The landmine deadlift is a great way to learn the hip hinge pattern and to develop the confidence for lifting heavier weights. It also puts less strain and shear forces on the spine because you can keep your upper body more upright  — a perfect variation for battered-up lifters dealing with aches and pains.

Because the exercise doesn’t require as much coordination and balance as a barbell deadlift, you can focus more on the desired muscles and improve mind-muscle connection, which makes it a perfect variation to improve size.

How to Do It

Place a barbell in a landmine, and load plates on the free end. Take a shoulder-width stance and grab the collar. Keep your back flat, your chest puffed, and your abs flexed. Drive your hips forward until you’re standing tall. If you’re more interested in hypertrophy, consider performing a landmine Romanian deadlift and stop the descent before the weight reaches the ground, to maximize time under tension.

Suitcase Deadlift

Who knew holding luggage could host so much benefits? This deadlift variation mimics lifting a heavy suitcase off the ground and delivers massive core and grip strength.

Using a barbell will challenge your grip to the extreme, as you’ll have to keep the long bar level and engage some rarely used grip and forearm muscles.

When to Do It

What’s interesting with this exercise is that it provides unilateral benefits for your upper body. It can improve core and bracing strength, most notably in your obliques via anti-lateral flexion, but also your upper back and lat posture and strength. If you feel you lack core strength or have upper-back imbalances, include this variation as supplemental exercise or as your core movement of choice.

How to Do It

Stand next to a heavy dumbbell or a barbell. Grab it and, if using a barbell, take extra care to hold it right in the middle for stability. Brace your whole body and perform a standard deadlift. It may seem simple, but you can’t just rip it off the floor if you want to reap the benefits. Remain level and don’t allow your body to bend toward one side or the other. This will demand a great deal of bracing and core strength. Do not rush your reps, and do not use heavier weight until you’re sure you can maintain perfect posture.

Using a barbell will also require lots of grip and wrist stability to balance the barbell. If you tend to fail deadlifts because of a weak grip, consider this variation. Having stronger grip and forearms will also improve elbow and shoulder health at the same time.

Reeves Deadlift

Also called a “pinch-grip deadlift,” this variation gets its name from bodybuilder and actor Steve Reeves. He was known to deadlift while holding a barbell by the plates, to exacerbate upper back and forearm strength.

If you’re up for an unconventional yet highly effective lift, try it. Think of the Reeves deadlift as a more intense variation of the snatch-grip deadlift, with a major grip strength challenge added to the mix.

When to Do It

This tough exercise is even more difficult than the snatch-grip deadlift, and amplifies its benefits and weaknesses. Forget all hope of lifting really heavy with this one. But if you want to vastly improve your grip and forearm strength, as well as your lats, rhomboids, and middle traps, this is the right choice.

How to Do It

Load a barbell and grab it by the holes in the plates, which would be a very wide grip. If the weight plates don’t have cutout holes, grab the lip of the plate. If you want to increase the load, use one 45-pound plate to grip, followed by smaller plates afterwards.

Pack your scapulas (shoulder blades) back and down and hold a neutral posture for the whole lift. If you don’t have extra-long arms, consider using a trap bar as they are shorter than a standard barbell. 

Muscles Worked by the Deadlift

This total-body lift is one of the few movements that recruits most of the muscles throughout your body. Even though these variations emphasize some muscles more than others, all of the following muscles will actively participate in any deadlift exercise.

Legs

Your quadriceps, hamstrings, and even your calves will be recruited during the deadlift. The hamstrings are a series of posterior muscles that flex or bend your knees. They also help extend the hips in conjunction with the glutes. In the deadlift, your hamstrings assist the glutes in driving the weight up from the bottom position by extending the hips.

long-haired person in gym doing deadlift
Credit: YAKOBCHUK VIACHESLAV / Shutterstock

The quadriceps are among the biggest and strongest muscles in the body. This group of four muscles goes from the tibia on top of the knee and ends up on the top of the femur (thigh bone) or the hip. They extend your knee, and as such, the more flexed your knees will be during any variation, the more your quadriceps will be trained. The calves, the muscles on the back of the lower leg, also assist the upper legs by extending the ankles.

Glutes

Like any hip hinge, the glutes will be heavily involved in the deadlift. The gluteus maximus, medius, and minimus are a group of three large muscles that govern hip movement. In the deadlift, their main role is to extend the hips — bringing the body from a bent-over position to an upright posture.

Back

Even though you’re not pulling with your upper body or arms, several back muscles contribute to the deadlift. The latissimus dorsi (lats), the biggest back muscle, are engaged to provide spinal stability and maintain a strong arm position. Your trapezius, rhomboids, and rear deltoids across your upper back all work in conjunction to protect your shoulder joints and guide the barbell along its path. The wider your grip will be, the more these muscles will contribute to the exercise.

Erector Spinae

Sometimes called the spinal erectors, this is considered the “lower back,” when it’s actually a length of muscle that goes from the pelvis up to the base of the skull. This postural muscle helps keep the spine in place and also contributes to hip extension. It will work primarily to stabilize your upper body in the deadlift.

If your back rounds over during the deadlift, you put the erector spinae into a more active role and increase the risk of injury. You don’t want to use them as the prime mover during a deadlift.

Abdominals

Your abdominals work together with the erector spinae to form your “core” and provide a stable upper body. The abs control torso rotation and flexion (bending forward), as well as resisting extension (leaning backward). During the deadlift, your abs are highly active to maintain a neutral spine position.

Forearms

Your forearm muscles (wrist flexors and wrist extensors) are responsible for your grip strength, which is a big part of the deadlift. Some of these variations will challenge it even more, through thick handles or a wider grip.

Deadlift Form Tips

The deadlift can seem like a daunting task, but as long as you’re following these cues, you can get bigger and stronger, safely and efficiently. A very common flaw is to try to “squat” the deadlift, meaning lifting with your hips very low as if you were performing a squat. This will result in an inefficient bar path and strength leakage, making the exercise less effective.

You have to move around the bar, not the other way around. If you deadlift with low hips, you will either push the barbell away from you to avoid your knees or you’ll shoot your hips up first and perform a pure hip hinge afterwards.

person in gym bending forward with barbell in hands
Credit: YAKOBCHUK VIACHESLAV / Shutterstock

If you want to be optimal and efficient, remember that the starting position of the deadlift is not the same as the squat. Your hips have to be higher, your knees only slightly bent, and your shoulders directly over or slightly in front of the bar. If your hips and your shoulders raise at the same time, and the bar follows a straight path, then you know you’re doing right.

Another dreadful and potentially dangerous form issue is to round the back. Experienced lifters can sometimes use this technique in very specific and deliberate contexts, but in general, you should deadlift with a stiff and neutral back if you want to minimize the risk of injuries.

To help you engage your lats and keep a flat back, think about bending the bar like a horseshoe or think of squeezing imaginary balls under your armpits. Keep your chest puffed and your shoulder blades packed. Hold a big breath of air in your belly and brace your core as much as you can during the lift.

Deadlift Yourself Up

Now you have no excuses not to fit some form of this quintessential exercise into your training plan. The deadlift is a fundamental movement that should be done by every lifter. Whether you’re a beginner, a gym veteran, an athlete, or someone that just wants to pack on some more muscle, now you can find a variation that will benefit your goals and situation. 

References

  1. Cholewicki J, McGill SM, Norman RW. Lumbar spine loads during the lifting of extremely heavy weights. Med Sci Sports Exerc. 1991 Oct;23(10):1179-86. PMID: 1758295.
  2. Martín-Fuentes I, Oliva-Lozano JM, Muyor JM. Electromyographic activity in deadlift exercise and its variants. A systematic review. PLoS One. 2020 Feb 27;15(2):e0229507. doi: 10.1371/journal.pone.0229507. PMID: 32107499; PMCID: PMC7046193.
  3. Krzysztofik M, Wilk M, Wojdała G, Gołaś A. Maximizing Muscle Hypertrophy: A Systematic Review of Advanced Resistance Training Techniques and Methods. Int J Environ Res Public Health. 2019 Dec 4;16(24):4897. doi: 10.3390/ijerph16244897. PMID: 31817252; PMCID: PMC6950543.
  4. Manca A, Dragone D, Dvir Z, Deriu F. Cross-education of muscular strength following unilateral resistance training: a meta-analysis. Eur J Appl Physiol. 2017 Nov;117(11):2335-2354. doi: 10.1007/s00421-017-3720-z. Epub 2017 Sep 21. PMID: 28936703.
  5. Peterson MD, Pistilli E, Haff GG, Hoffman EP, Gordon PM. Progression of volume load and muscular adaptation during resistance exercise. Eur J Appl Physiol. 2011 Jun;111(6):1063-71. doi: 10.1007/s00421-010-1735-9. Epub 2010 Nov 27. PMID: 21113614; PMCID: PMC4215195.
  6. Swinton PA, Stewart AD, Keogh JW, Agouris I, Lloyd R. Kinematic and kinetic analysis of maximal velocity deadlifts performed with and without the inclusion of chain resistance. J Strength Cond Res. 2011 Nov;25(11):3163-74. doi: 10.1519/JSC.0b013e318212e389. PMID: 21993040.

Featured Image: BAZA Production

The post 15 Deadlift Variations for Total-Body Size, Strength, and More appeared first on Breaking Muscle.

Be Nice and Share!
This post was originally published on this site

Originally Posted At: https://breakingmuscle.com/feed/rss

On Christmas Eve, Dec. 24, 2022, six-time CrossFit Games women’s champion Tia-Clair Toomey announced that she and her husband, Shane Orr, are expecting their first child together. As a result, she will not be competing in the 2023 competitive season.

“We are extremely excited to share, WE’RE PREGNANT! This has been the greatest surprise and significantly special to share with family and friends while being home in Australia for Christmas,” Toomey wrote in the caption of her Instagram post. “This will definitely be a Christmas for us all to remember.”

Along with posts on social media, the expecting parents also shared a video with the announcement on their YouTube channel, which you can see below.

While Toomey focuses on her growing family, this means that the CrossFit Games podium will be an unfamiliar site in 2023. Toomey had made the podium every year she’s competed since 2015, starting with two second-place finishes in 2015 and 2016. She then amassed her incredible run of six straight championships from 2017 to 2022. She is considered by many in the CrossFit community to be the greatest individual competitor of all-time. She could also be regarded as one of the most popular female athletes in all of strength sports. 

The 2023 Games’ podium will be the first that Toomey isn’t standing on since 2014. The champion that year was Camille Leblanc-Bazinet, with Annie Thorisdottir and Julie Foucher joining her in second and third, respectively. Since the Games began in 2007, only nine women have won the title of “Fittest on Earth”. Those champions are listed below.

2007: Jolie Gentry

2008: Caity Matter

2009: Tanya Wagner

2010: Kristan Clever

2011-2012: Annie Thorisdottir

2013: Samantha Briggs

2014: Camille Leblanc-Bazinet

2015-2016: Katrin Davidsdottir

2017-2022: Tia-Clair Toomey

If Thorisdottir and Davidsdottir should compete in the 2023 Games, they could potentially be the first individual champions to regain the title after losing it. If they don’t, and Toomey chooses to return to competition in 2024 or later, she could potentially be the first to reclaim the title, adding to her already incredible track record in the sport.

Among those that could be considered top contenders for the title in 2023 now that Toomey is out of the field include former two-time Games’ runner-up (2018, 2121) Laura Horvath, who finished in third in 2022, and the 2022 second-place finisher, Mallory O’Brien.

Featured Image: @tiaclair1 / Instagram

The post Tia-Clair Toomey Announces Pregnancy with First Child, Will Miss 2023 CrossFit Season appeared first on Breaking Muscle.

Be Nice and Share!
This post was originally published on this site

http://www.marksdailyapple.com/

Woman embraces a big pile of assorted vegetables piled on a kitchen countertop.When the keto diet first skyrocketed in popularity in the late 2010s, it quickly gained a reputation as the “bacon and butter” diet. Vegetables might appear on one’s plate as a small side of spinach or, more likely, cauliflower masquerading as everything from rice to pizza crust to wings. By and large, the focus was on limiting consumption to “keto vegetables” while focusing mainly on increasing fat intake. (I’m talking mainstream keto, mind you, not the Primal Keto Reset approach.)

This, as you’d expect, led to no end of pearl-clutching from mainstream medical professionals and the popular media, who quickly branded keto as a dangerous fad diet, a heart attack in the making. It was true that many early adopters of keto went hard on butter, cream, cheese, bacon, and other high-fat foods, probably as an understandable backlash against the low-fat diet dogma that dominated the previous four decades. Some people still do, I’m sure.

However, I think most keto folks now understand that they cannot (or should not, anyway) live on butter alone. At least in more forward-thinking health circles, contemporary keto looks less bacon-and-butter and more like a lower-carb version of the Primal Blueprint way of eating, complete with bountiful salads and larger servings of protein.

Personally, I’m all for keto eaters embracing a wide array of produce (keto-carnivore diets notwithstanding). At some point, though, the carb question comes into play. By definition, keto requires you to limit your carbohydrate intake to keep glucose and insulin low enough to facilitate ketogenesis. All vegetables contain carbohydrates, some more than others. You can’t eat unlimited amounts of vegetables, especially the higher-carb ones, if you want to stay in ketosis all the time. 

So how do you decide which ones are best? 

What Vegetables Are Best for Keto?

In order to achieve ketosis, most people need to limit carbohydrate intake to a maximum of 30 to 50 grams per day. Hence, the best vegetables to include on a keto diet are the ones that deliver the most nutrients with the fewest carbs. That sounds straightforward, but in practice, it can be hard to know where to draw the line. 

The internet is rife with lists that sort foods into discrete “allowed on keto” and “not allowed on keto” categories. They mean well—and they do help simplify the often confusing transition from SAD eating to keto—but they lack nuance. No food will knock you out of ketosis in a single bite. There are no “bad” vegetables. There are only serving sizes and carbohydrate content and fiber.

Why does fiber matter? Because fiber is not absorbed into the bloodstream and converted into glucose. It’s counted as a carbohydrate, but it does not contribute to the glucose-induced insulin spike you want to minimize on keto. Fiber, especially the soluble type, is mostly just food for your gut microbes. From a ketosis perspective, fiber is neutral. 

And in vegetables, especially the leafy and above-ground non-starchy varieties, much of their carb content is actually fiber, meaning their glucose/insulin impact is minimal. So much so that I don’t even count these varieties against the 50 grams of (total) carbohydrates I recommend as the limit in the Keto Reset. They’re not the only vegetables allowed on keto, just the easiest to enjoy in abundance. 

My Favorite Vegetables for Keto

Without further ado, these are my top vegetables to enjoy on keto. If your favorite doesn’t appear here, never fear. You can still include it, I’m sure. This list is half based on personal preference, half on carbohydrate and nutrient content. Many vegetables that don’t appear on this list would still be considered “keto-friendly” even by the strict keto police; they’re simply not ones I gravitate towards first.

1. Bitter greens

Kale, arugula, mustard greens, endive, dandelion greens, turnip greens, collard greens, broccoli rabe, watercress. Increasingly, science is finding that bitter foods have unique metabolic and gut health benefits.

2. Other leafy greens

Spinach, lettuce (all types), for my Big-Ass Salads

3. Cauliflower

So versatile it has become a joke in the low-carb world, but that’s just because it’s great in so many dishes. Who am I to argue?

4. Broccoli and broccolini

Is there anything better than crispy roasted broccoli next to a big, juicy steak? And the sprouts contain sulforaphane, a compound with impressive features that might make broccoli sprouts the next big superfood. 

5. Bok choy

One of the sulfur-rich vegetables that may help the body buffer oxidative stress. And it’s delicious sauteed or added to stir-fries.  

6. Green beans

A classic. 

7. Mushrooms (all varieties)

Besides their pleasing textures and umami flavors, mushrooms pack prebiotics to nourish your gut bugs.

8. Asparagus

High in vitamin K, excellent grilled, roasted, or air-fried, and you can wrap it in bacon. (Hey, I didn’t say you shouldn’t eat bacon on keto.)

9. Cabbage

Especially when fermented into sauerkraut or kimchi. Everyone should eat fermented vegetables.

10. Fiddlehead ferns

My dark-horse pick. I just think they deserve more publicity.

What about avocados?

Obviously, avocados get a big yes from me, but they’re also a fruit. I’m not putting them on my list of favorite keto vegetables, lest the entire internet come for my head. 

Why Eat ANY Vegetables on Keto?

You don’t HAVE to. But as I’ve said about the carnivore diet before, I think most people probably do better in the long run eating at least some vegetables. Rather than completely excluding plant foods, I’d recommend something like “carniflex,” a meat-centric diet with strategic plant additions.  

Regardless, most Primal folks are omnivores, so they want and need strategies for incorporating vegetables into their keto macros. In that case, here’s what you should keep in mind:

  1. Any vegetable can work on a keto diet. Some just happen to be relatively higher in carbohydrates than others (beetroot, parsnips, celeriac, for example).
  2. Prioritizing above-ground leafy and non-starchy vegetables lets you pack your plate with colorful fare without meticulously counting carbs. Since these foods contain a good deal of fiber (low net carbs), their glucose and insulin impact (and hence their likelihood of interfering with ketosis) is minimal. They also deliver a wide array of nutrients and keep your meals varied and interesting. 
  3. Adjust serving sizes as needed. For higher-carb vegetables—think ones that grow below ground or that taste sweeter—look up the carb content of a typical serving in a tool like Cronometer. Make sure you aren’t blowing a huge chunk of your daily allotment on a small serving of a single food.

Ok, those are my top 10. What would you have included?

steak_sauce_640x80

The post Keto-friendly Vegetables appeared first on Mark’s Daily Apple.

Be Nice and Share!
This post was originally published on this site

Originally Posted At: https://breakingmuscle.com/feed/rss

Travel season is upon us. For many, that means spending time in airports. Aside from the expected overpriced bottled water, bad chain restaurant food, and long lines for much-needed coffee, airport travel can also bring fatigue, bloating, and aches associated with inactivity. That’s not the best combination for getting into the “holiday spirit” or “vacation mode.” 

To combat these negative effects, here’s a full workout you can do right in the airport. Complete with targeted mobility work, blood-pumping strength training, mood-boosting cardiovascular exercise, and restorative stretches, this entire workout can be performed within your terminal.

Jetsetter Airport Workout 

Why Work Out at the Airport?

It’s simple. You are choosing to spend some of the downtime around your flight moving to counteract a few of the potential downsides of travel. Travel tends to confine us to small spaces and it separates us from our regular movement practices. Fortunately, exercise has powerful effects on our bodies and minds. It can keep us moving well and feeling good. 

Just one bout of resistance training has been shown to increase concentrations of anti-inflammatory protein messengers in and around the knee joints. (1) Moreover, this effect lasted over three hours. Since prolonged sitting is typically hard on joints such as the knees, it makes sense to counteract immobility with exercise.

On the psychological side, a single bout of resistance training or cardiovascular training has been associated with improvements in mood and well-being. (2) If you work out regularly, you may be accustomed to the uplifting effects of exercise. On the flip side, you’re also likely to notice its absence. If you could keep the exercise-induced good vibes rolling through travel season, why wouldn’t you?

An underappreciated benefit of exercise is the potential boost to the immune system. Immediate and lasting elevations in immune cell activity occur after submaximal resistance training and cardiovascular exercise. (3) Ultimately, any non-fatiguing workout may stimulate the immune system to mobilize its resources.

Although these acute changes in the immune system have not been directly tied to risk of common illnesses, it seems safe to say that revving up your immune system may be desirable if you are soon to be confined with dozens of strangers on a plane.

Dynamic Mobility

The dynamic mobility part of this workout serves dual purposes. First, it’s a great warm-up. Second, it begins to address some of the “problem areas” that may become stiff or achy during prolonged travel. For this portion of the workout especially, settle into a controlled exercise pace. Find a quiet area of floor space, tune out the hustle and bustle of the airport, and then get to work.

Plank to Pike with Alternating Toe Reach

  • How to Do it: Begin the high plank position — similar to the top of a push-up with your body straight and supported by your palms and forefeet. Move to the pike position by driving your hips back and up, putting your body into an inverted v-shape. Next, reach one hand toward the opposite foot. Return to the pike position and repeat with the other hand to the opposite foot. Drop your hips and return to the high plank position to complete the repetition. Repeat the entire sequence for reps. 
  • Sets and Reps: 3 x 10
  • Rest Time: Rest only long enough to transition to the next exercise. 

Plank to Deep Lunge with Rotations

  • How to Do it: From the high plank position with your hands and feet on the ground, bring one leg forward.  Place your foot outside of your hand, or as close as your flexibility allows. Lift your hand on the forward leg side and reach for the ceiling. Rotate your trunk and follow your hand with your eyes. Replace your hand to the floor and bring your leg back to the high plank position. Repeat with the other side to complete one full repetition.  
  • Sets and Reps: 3 x 10 per side
  • Rest Time: Rest only long enough to transition to the next exercise. 

Side Plank with Rotations

  • How to Do it: Get into a side plank position, supporting your body with one forearm and both feet. To enhance stability, place the foot of your top leg slightly in front of the foot of your bottom leg. Reach the hand of your top arm underneath your rib cage, near the ground and toward the wall behind you. Allow your body to rotate at your support-side shoulder and keep your eyes locked on your moving hand. Reverse the movement and reach your moving arm toward the ceiling. 
  • Sets and Reps: 3 x 10 per side.
  • Rest Time: Rest only long enough to transition to the next exercise. 

Dead Bug

  • How to Do it: Lie on your back with you arms straight up and your legs bent at roughly 90-degrees. Bring your low back into contact with the floor by rolling your pelvis backward (imagine “tucking your tail” or “bringing your belt buckle toward your chin”). Keep your low back in contact with the ground throughout the exercise. Simultaneously bring one arm to the ground overhead and the opposite leg down to the ground. Return to the start position. Repeat with the other arm and leg to complete one repetition. This can require some coordination, so move slowly and focus on controlling the movement
  • Sets and Reps: 3 x 10 per side.
  • Rest Time: Rest only long enough to transition to the first exercise. 

Upper and Lower Body Training

The main course (or concourse) of the airport workout is full-body resistance training. The first two exercises use your body weight as the resistance, while the final three exercises use your carry-on luggage for resistance.

Each of these exercises will use an intensification technique called “elevator reps” to increase the training stimulus with limited load. Every individual repetition consists of one full range of motion repetition followed by one rep with roughly 50% range of motion and another rep with roughly 75% range of motion. Elevator reps are structured based on the resistance curve of the exercise. Each repetition forces you to spend extra time in the most challenging portion of the range of motion. The specific techniques are shown and described below.

If completing elevator reps for the target rep range is too challenging, either perform the basic exercise without the intensification technique or perform fewer total repetitions per set.

Push-Up with Elevator Reps

  • How to Do it: Begin in the top position of the push-up. You should be supported on your palms and the front of your feet with your elbows extended and your trunk braced. Lower yourself to the bottom position of a push-up, with your chest just above the floor. This is where the “elevator reps” begin. Push halfway back to the top position then immediately reverse the movement and return to the bottom position. Push three-quarters of the way to the top position and immediately return to the bottom position. Finally, push all the way to the top position. That’s one rep.
  • Sets and Reps: 3 x 10 
  • Rest Time: Rest 90 to 120 seconds between sets. 

Rear Foot Elevated Split Squats with Elevator Reps

  • How to Do it: Stand in a staggered stance with the top of your rear foot supported by a piece of stable luggage (definitely nothing with wheels), or a bench or chair. Shift your weight primarily onto your front leg and lower yourself toward the ground keeping your torso upright. In the bottom position, the knee of your rear leg should gently touch the floor or hover just above it. Time for the “elevator rep.” Push halfway to the top position then return to the bottom position. Then, push three-quarters of the way to the top position then return to the bottom position. Complete the repetition by pushing all the way to the top for one full repetition.
  • Sets and Reps: 3 x 10 per leg.
  • Rest Time: No rest between legs. Rest 90 to 120 seconds between sets.

Suitcase Row with Elevator Reps

  • How to Do it: Hinge forward at your hips and hold your luggage below you at arm’s length. Keep your legs slightly bent. Pull your shoulders and upper arms up and back to row the luggage to your stomach. To perform the elevator repetition, lower the bag halfway to the bottom position, then row it back to your abdomen. Next, lower the bag three-quarters of the way to the bottom position and row it back up. Complete the rep by lowering the bag all the way to the bottom position. 
  • Sets and Reps: 3 x 10 
  • Rest Time: Rest 90 to 120 seconds between sets.

Suitcase Good Morning with Elevator Reps

  • How to Do it: Stand up straight and hold your luggage tight to your chest. Unlock your knees and hinge forward at your hips until you feel a profound stretch in your hamstrings. This is the bottom position. To perform an elevator rep, return halfway to the top position then lower to the bottom position. Next, return three-quarters of the way to the top position and return to the bottom position. Finally, return to standing to end the repetition. 
  • Sets and Reps: 3 x 10 
  • Rest Time: Rest 90 to 120 seconds between sets.

Suitcase Upright Row with Elevator Reps

  • How to Do it: Stand holding your luggage in front of your legs with your elbows straight. Draw your elbows up and out as you pull your luggage along the front of your body. In the top position, your hands should be at neck or sternum level. Lower the bag halfway to the bottom position then upright row it to the top position. Lower the bag three-quarters of the way to the bottom position and upright row it back to the top, and then lower the bag to the bottom position to complete one repetition.  
  • Sets and Reps: 3 x 10 
  • Rest Time: Rest 90 to 120 seconds between sets.

Cardiovascular Conditioning

In addition to duty-free shops, fast food, and the occasional shoeshine station, airports tend to offer large expanses of indoor space. If you avoid the escalators and moving sidewalks, the airport can provide a great environment for cardiovascular training.

After locating your gate and taking inventory of how much time you have to burn, go for a fitness walk. Since you cannot leave your luggage unattended, walking offers the added benefit of loaded carries

  • How to Do it: Walk or climb stairs at the highest effort and quickest pace that allows primarily nasal breathing, which may provide a more efficient cardio training stimulus compared to open-mouth breathing. (4) For a greater challenge for your grip and core, perform a literal suitcase carry. Instead of wheeling your luggage or slinging it over your shoulder, carry it at your side in one hand. Switch sides just before your grip fails.
  • Sets and Duration: Two or three five-minute intervals.
  • Rest Time: Rest two minutes between each interval.

Targeted Stretching

Stretching serves as a nice cooldown. At this stage, your muscles are warm and ready for a relaxing stretch. To efficiently wrap up your workout, each of these stretches hits multiple muscle groups. Like the dynamic mobility warm-up, special attention is given to areas of the body that commonly become stiff or cranky with prolonged seated travel. 

Half Kneeling Hip Flexor Stretch with Side Bend

  • How to Do it: Kneel down with your front hip and knee bent to 90-degrees and your the knee of your trailing leg on the floor underneath you. Roll your pelvis underneath you (again, think about “tucking your tailbone” or “tilting your belt buckle toward your chin”). You should feel a stretch develop in the front of your trail leg thigh. Squeeze your glute to maintain this stretch. Reach overhead with the arm of the kneeling leg and slightly bend sideways to increase the stretch. Hold this position before switching sides.
  • Sets and Duration: 3 x 15 to 30-second holds per side. 
  • Rest Time: Rest only long enough to transition to the next stretch. 

Pretzel Stretch

  • How to Do it: Lie on your side with both legs bent in a “zig-zag” position — your bottom leg’s thigh in line with your torso and your other thigh pointed straight ahead. Reach back with your top arm to grab the foot of your bottom leg. Use a luggage strap, belt, or shoelace if necessary. Flex your top side hip and knee and use your opposite arm to push your knee toward the floor as far as comfortable, thereby promoting trunk rotation. Lie back and try to rest your head and both shoulders on the ground. Hold this stretched position for time before switching sides.
  • Sets and Duration: 3 x 15 to 30-second holds per side. 
  • Rest Time: Rest only long enough to transition to the next stretch. 

Thoracic Spine Extension Stretch

  • How to Do it: Kneel in front of your luggage with your glutes resting on your heels. Place your elbows on the luggage and interlace your fingers at the back of your head. Drive your sternum “up” and forward, and aim to feel a stretch in your mid-back, lats, and triceps. If your luggage is soft-sided or collapsible (like a duffel bag), use a bench or chair instead.
  • Sets and Duration: 3 x 15 to 30-second holds. 
  • Rest Time: Rest only long enough to transition to the next stretch. 

Thoracic Spine Flexion Stretch

  • How to Do it: Stand with your fingers interlaced in front of your stomach and your arms straight. Drop your chin to your chest and reach your hands forward as you push your mid-back backward. Think about maximizing the distance between your sternum and your hands and focus on feeling a stretch through your mid-back.
  • Sets and Duration: 3 x 15 to 30-second holds. 
  • Rest Time: Rest only long enough to transition to the first stretch. 

But What Will Other Travelers Think?

If you commit to this airport workout, you will draw some curious (and maybe even judgmental) eyes. Forget the lurkers. Your lifestyle is your business alone. Only you will live with the ramifications of prolonged sedentary behavior at the airport, and only you will experience the benefits of completing a light workout during your next layover or wait at the airport gate. 

Assuming you want to arrive at your destination feeling fresh, why wouldn’t you take a few steps to ensure that outcome? A light workout at the airport can help. And speaking of feeling fresh, if you do work up a sweat, be sure to make a pit stop at the restroom to freshen up before you board your plane. Mobilized, energized, clean, and ready for take-off.

Add a Workout to Your Itinerary

Let’s face it, air travel is hard on the body. Fortunately, a workout that promotes mobility and a healthy pump might be the best non-pharmaceutical tonic for the ills of air travel. Until more airports start building gyms within their gates, bodyweight moves and luggage lifts might be your best options. Bookmark this airport workout as your travel companion for your next flight. 

References

  1. Helmark, I. C., et al. (2010). Exercise increases interleukin-10 levels both intraarticularly and peri-synovially in patients with knee osteoarthritis: a randomized controlled trial. Arthritis Research & Therapy12(4), 1-11.
  2. Rocheleau, C. A., et al. (2004). Moderators of the relationship between exercise and mood changes: Gender, exertion level, and workout duration. Psychology & Health19(4), 491-506.
  3. Schlagheck, M. L., et al. (2020). Cellular immune response to acute exercise: Comparison of endurance and resistance exercise. European Journal of Haematology105(1), 75-84.
  4. Dallam, George & Kies, Bethany. (2020). The Effect of Nasal Breathing Versus Oral and Oronasal Breathing During Exercise: A Review. Journal of Sports Research. 7. 10.18488/journal.90.2020.71.1.10.

Featured Image: Xato / Shutterstock

The post The Only Airport Workout You’ll Need When Traveling appeared first on Breaking Muscle.

Be Nice and Share!
This post was originally published on this site

http://www.marksdailyapple.com/

Research of the Week

Less autophagy, more heart disease.

Donating blood might be one way to lessen the risk of Parkinson’s.

Ketones may help chemotherapy patients (again).

Even if aspartame doesn’t increase anxiety in humans as it does in rodents, what do you have to lose by using stevia or monk fruit instead?

The more boosters a person had, the greater their risk of getting COVID.

New Primal Kitchen Podcasts

Primal Kitchen Podcast: The Link Between Dairy Intolerance and Dairy Genes with Alexandre Family Farm Founders Blake and Stephanie

Primal Health Coach Radio: Using Data to Guess Less and Help More with Risa Groux

Media, Schmedia

Strict carnivore now hitting TikTok.

Because the FDA has done so well elsewhere.

Interesting Blog Posts

Better conditions beget more evolved differences between the sexes.

How plant-based diets might worsen menstrual symptoms

Social Notes

Don’t let this be you.

But animal fat is making you fat!”

Everything Else

I’m still blown away by the increase in ultra processed food consumption in this country—from 5% of calories to over 60%.

Things I’m Up to and Interested In

Crazy to realize: Always great when a German bank does better research than the USDA.

Concerning: We’re still getting fatter.

An easy law to abuse: CA doctors will soon face censorship of any advice that conflicts with conventional wisdom.

Interesting research: LSD appears to have huge effects on genes and proteins related to neuroplasticity and neurogenesis.

How is this possible?: Big variation in outcomes among people with LDL over 190.

Question I’m Asking

What are you doing for Christmas?

Recipe Corner

Time Capsule

One year ago (Dec 10 – Dec 23)

Comment of the Week

I launched a Friday Family Fun Night initiative here where every other friday 5-10 dads get together at a gym with their kids and we all just play hard in a free unstructured setting. Dodgeball, tag, nerf battles, tug of war, whatever comes up. It’s glorious.

-Great way to get kids and parents playing from Don.

Olive_Oil_640x80

The post New and Noteworthy: What I Read This Week—Edition 204 appeared first on Mark’s Daily Apple.

Be Nice and Share!
This post was originally published on this site

Originally Posted At: https://breakingmuscle.com/feed/rss

The recent rise (and arguably unnecessary obsession) with “functional training” has seen the renegade row become a staple in CrossFit, fitness boot camps, and bodyweight workouts across the world.

It’s likely that many gym-goers or home-gym lifters have done this ground-based exercise at least a few times before — holding a straight-arm plank while performing alternating dumbbell rows — to build conditioning and head-to-toe strength and stability.

tattooed person in home gym doing dumbbell row exercise on floor
Credit: Dragon Images / Shutterstock

If you’re going to do the renegade row, it’s time to make sure you’re performing it properly. Here’s how and when to include it in your workout routine, plus a few effective variations to take this popular movement up a notch.

Renegade Row

How to Do the Renegade Row

The renegade row is a type of combination exercise — performing a static plank while simultaneously performing a rowing motion. So before you try the renegade row, you should have some basic experience performing both of those exercises separately. Then grab two dumbbells or kettlebells and get ready to work. 

Step 1 — Set Your Hands and Feet

muscular person in outdoor gym in straight-arm plank
Credit: MDV Edwards / Shutterstock

Get on the ground with a dumbbell in each hand, placed just inside shoulder-width. Set your feet slightly wider than hip-width and straighten your legs. Make sure you can really push into the ground with your feet, which will help you successfully create tension in your whole body. Don’t let your hips sag down or arch high. Hold a straight line from your ankles to your neck. This stable plank position is the “base” for each repetition of the exercise.

Form tip: Placing your hands directly under shoulders would be great technique for a standard plank, but remember this is not just a plank. Having your hands a bit closer is going to help your stability by reducing the weight transfer from side to side as you switch arms during each repetition. This will make it much easier to create tension in your plank while keeping your hips nearly level.

Step 2 – Press and Pull

muscular person in outdoor gym doing dumbbell row
Credit: MDV Edwards / Shutterstock

Squeeze both dumbbells extra-hard and actively push one arm toward the ground without bending it. This will create more stability through your upper body. (1) As you drive that arm down, lift the opposite elbow up and back, moving the weight toward your front pocket in an arching motion, not in a straight line to the ceiling. Maintain total-body tension and fight the weight pulling you off-balance.

When the dumbbell is near your torso, return it back to the floor slowly. The exercise is about control and consistency, not rushing through reps as quickly as possible. Drive your second arm toward the ground and row the first dumbbell. Repeat the movement, alternating sides with each repetition.

Form tip: As you row your elbow up and back, it’s going to be tempting to lift that same side hip and shoulder because rotating your body might assist you with the lift. Instead, move toward the challenge, literally. If you are rowing on the right side, your body will naturally want to lift your right hip. Instead, as you pull your elbow up, actively push your right hip down to resist the twist and keep your hips level. This will also help you to stay more braced through your midsection and recruit more abdominal muscles.

Renegade Row Mistakes to Avoid

The exercise involves head-to-toe coordination and stability, so there are some common mistake that can occur with such a big movement. Here are some issues to watch out for.

Keeping Your Feet Too Close

When your feet are set too narrow, it will be nearly impossible to do anything other than simply shift your weight from side to side as you move through the rep. It’s extremely difficult to maintain a plank position because close feet create a very small base of support, so you end up just doing a row in a really inefficient position.

long-haired person in gym holding plank position
Credit: SOK Studio / Shutterstock

Keeping your feet set slightly wider than your hands will put you in a powerful stance to perform the movement without sacrificing stability. If your feet are too close, you’ll be off-balance from the start and unable to generate enough force to efficiently lift the dumbbell.

Avoid it: When you get into the starting position, make sure your feet are more than hip-width apart to provide a wide enough point of contact for stability. When you row, you shouldn’t be at risk of tipping to one side or the other.

Twisting Your Body

Rotating your body to get the weight moving means you’re using momentum to help pull the dumbbell off the floor instead of using your back muscles. When this happens, you end up with a very poor row and a very poor plank. That’s a lose-lose situation.

long-haired person in gym doing dumbbell row exercise
Credit: Anel Alijagic / Shutterstock

When you shift your body to one side, you drastically reduce the need to stabilize your core, which takes away from the entire point of the exercise. You might end up doing extra reps, but each rep is less effective at building strength and conditioning.

Avoid it: Try to focus on body awareness and feel your shoulders and hips staying nearly level throughout the entire exercise, as you lift and lower the weights. Fighting to keep your body in position is what’s going to deliver the results you’re after.

Tapping the Weight to Your Chest

When you’re performing the renegade row, focus on the movement of your elbow instead of what’s happening with the dumbbell itself. If your elbow starts and finishes in the right place, the dumbbell will follow.

person outdoors performing dumbbell floor exercise
Credit: Maridav / Shutterstock

When the load gets too heavy or when you focus on “bringing the dumbbell to your ribs,” you lose range of motion because the focus shifts away from the most effective technique

Avoid it: Pay attention to each individual repetition and perform it properly, without regard to the specific weight you’re moving. Go step by step and follow the technique tips, and avoid any instinct to make the dumbbell a key player in the movement.

How to Progress the Renegade Row

Deciding how and when to progress this movement can be difficult and there need to be some special considerations because it is a combination we are not just progressing one movement. 

Technique Over Weight or Volume

The renegade row isn’t well-suited for handling heavy weights, training with extreme intensities (muscle failure), or using high volume (many sets and reps). Instead, performing the exercise with greater competency and crisp form is the real key to long-term success and results.

Gradually adding even one or two reps per set, or one or two sets, each workout would give you a great opportunity to perform some very effective, high-quality work.

Plank Shoulder Tap

One modification to the renegade row is to swap the dumbbell row for an unweighted shoulder tap, reaching one arm across your body to lightly tough the shoulder of your base arm.

This bodyweight-only exercise trains similar total-body stability and strength by teaching you how to stay tight in a plank position while alternating between single-hand support. You’ll also build core strength to keep your body level and avoid twisting as you move.

Unilateral Renegade Row

Another effective modification the renegade row would be to do all reps unilaterally (with one arm) before switching arms. This creates more localized fatigue in the muscles on the specific side you’re working.

While the unilateral renegade row emphasizes the back muscles and core stability, it can be slightly less challenging rotationally because your body isn’t repeatedly adjusting from between alternating sides.

Benefits of the Renegade Row

The renegade row is not a great exercise choice for improving absolute strength because you can’t move heavy weights. It’s also not ideal for hypertrophy (muscle-building) because it doesn’t focus a specific body part with the time under tension needed to stimulate growth. (2) However, it can be an incredibly useful exercise to address often overlooked aspects of many training plans.

Core Control

The renegade row is a complete core exercise that can build strength and stability, while also improving your ability to move your upper body limbs around the rib cage. This carries over to athletic performance and big lifts.

A stronger core may help reduce the risk of back injuries and can boost performance, especially in sports where running and change of direction are involved. (3) Training your body to maintain trunk stability while manipulating your arms can be a big factor in avoiding “strength leaks,” which can reduce power output.

Strength-Endurance (aka Conditioning)

To perform the renegade row competently, you need to take your time with a relatively moderate to light load and moderate to higher repetitions because the exercise isn’t conducive to very heavy weights or very low reps.

The duration of each set creates a stimulus that is more endurance-based, which contributes to muscle-specific endurance in the recruited body parts (especially the back, shoulders, arms, and abs). The total-body exercise also contributed to overall cardiovascular endurance — after your first set of 15 or more reps, you’ll notice what kind of cardio shape you’re really in.

Muscles Worked by the Renegade Row

The combination of the plank position and single-arm row will recruit a large number of muscle groups across the body, even though the renegade row is sometimes considered either an ab exercise or a back exercise.

Internal Obliques

These deep core muscles are responsible for controlling your pelvis and creating posterior tilt, along with the hamstrings. The internal obliques help you to create and maintain tension with the other core muscles, like the transverse abdominals and the rectus abdominis. They also work significantly to resist rotation when you raise the dumbbell on either side during the renegade row.

Chest, Shoulders, and Triceps

These muscles work together during the exercise, as they are recruited in an isometric action (without any significant range of motion) as you push into the ground and keep the arms fully extended. The chest, shoulders, and triceps of your base arm fire as you row the opposite side, although the rear portion of the shoulder on the working side also assists to lift the weight.

Lats, Rhomboids, and Trapezius

This series of separate back muscles work together to put the row in “renegade row.” They are recruited during the concentric (lifting) action and they control the weight back to the ground during the eccentric (lowering) phase.

Depending on your arm length and range of motion, not all of the muscles may achieve the type of full stretch and peak contraction that contribute to major muscle growth.

How to Program the Renegade Row

The renegade row is often performed either as a standalone exercise or as part of a complex with other bodyweight or basic dumbbell exercises. It is essentially a core exercise, and fits well at either the beginning of a workout (similar to a full-body warm-up to improve movement quality) or at the end of a workout as a high intensity core finisher.

Light to Moderate Weight, Moderate to High Repetition

To maintain an emphasis on strict technique, stick with a weight that’s challenging for no fewer than 8-10 reps — if you go much heavier than that, you’re likely to compromise form to move the weight. Generally, training the renegade row with two or three sets of 12 to 20 reps can deliver a major stimulus for conditioning and muscular stimulation.

Movement Quality

One unique way to incorporate the renegade row at the start of your workout is with a quick circuit, pairing the exercise with two or three core-focused bodyweight movements. Perform three to five sets of the entire sequence, with no rest between each exercise and 30 to 60 seconds rest between each circuit.

  • Renegade Row — 10 reps
  • Deadbug — 10 reps
  • Side Plank — 30 seconds per side
  • Medicine Ball Throw — 10 reps

Core Finisher

You can also end your training session with a finisher that features the renegade row and emphasizes the abs. Repeat the series for as many rounds as possible within five minutes.

  • Renegade Row — 10 reps
  • Leg Raise — 10 reps
  • Sit-Up — 10 reps
  • Hollow Hold — 20 seconds

Renegade Row Variations

The renegade row can be pretty complete on its own, but there are a few variations that can take it even further. By adding the right movements to the basic renegade row, you can get more muscle recruitment and a bigger overall training stimulus.

Renegade Row Push-Up

One of the most challenging renegade row variations involves adding a push-up between each row. Special consideration needs to be taken here because now you need to be highly competent at three different exercises (the plank, dumbbell row, and push-up), so it’s definitely not a beginners-level movement.

This variation works very well as part of a circuit with two or three other exercises, such as mountain climbers and the dumbbell deadlift, where the renegade row could be performed with lower reps but repeated for more total sets.

Renegade Row Burpee

The burpee itself has a strong “love it or hate it” reputation with many lifters, but it can flow smoothly at the end of a renegade row because the plank also the bottom position of a burpee.

Transitioning from the renegade row to the burpee can either be done with a quick and seamless transition, for a high intensity conditioning effect, or you can briefly pause in the plank position after the second row before jumping your feet in. This can help prevent form breakdown.

FAQs

Can you build strength with the renegade row?

Yes, you can build a degree of strength, but it’s technically relative strength rather than absolute strength. Meaning, it will get you generally stronger overall, but not necessarily closer to doing barbell rows with 300 pounds.
Similar to doing air squats compared to barbell squats, you will see some improvements in strength and work capacity (conditioning), but those improvements will be relative to the load and intensity you can use during the exercise. With the renegade row, load and intensity are limiting factors — you can’t train with heavy weights and you can’t safely reach muscular failure.
Regardless, you can definitely include the exercise in your routine and benefit from improved relative strength, but if getting super-strong is a priority, focus on improving absolute strength with heavy weights and low reps with exercises deadlifts, rows, and pull-ups.

My hands hurt while resting on the dumbbells. What can I do?

This is actually very common. The simplest solution is to place your hands on the floor, with the dumbbells just inside your wrists. Then, only pick the dumbbell up when performing the rowing portion of the rep. Each repetition will take slightly longer and you might not be able to do as many reps, but it will still be an effective core exercise.

Be a Renegade

The renegade row is definitely not for beginning lifters because there are so many moving parts. Once you’re mastered form on the component exercises like the plank, dumbbell row, and even push-ups, then you’re ready to add this full-body exercise to your program and start building rock-solid stability and off-the-charts conditioning.

References

  1. Gontijo, L. B., Pereira, P. D., Neves, C. D., Santos, A. P., Machado, D.deC., & Bastos, V. H. (2012). Evaluation of strength and irradiated movement pattern resulting from trunk motions of the proprioceptive neuromuscular facilitation. Rehabilitation research and practice2012, 281937. https://doi.org/10.1155/2012/281937
  2. Burd, N. A., Andrews, R. J., West, D. W., Little, J. P., Cochran, A. J., Hector, A. J., Cashaback, J. G., Gibala, M. J., Potvin, J. R., Baker, S. K., & Phillips, S. M. (2012). Muscle time under tension during resistance exercise stimulates differential muscle protein sub-fractional synthetic responses in men. The Journal of physiology590(2), 351–362. https://doi.org/10.1113/jphysiol.2011.221200
  3. McGill, Stuart PhD. Core Training: Evidence Translating to Better Performance and Injury Prevention. Strength and Conditioning Journal 32(3):p 33-46, June 2010. | DOI: 10.1519/SSC.0b013e3181df4521

Featured Image: MDV Edwards / Shutterstock

The post How to Do the Renegade Row for Conditioning and Core Strength appeared first on Breaking Muscle.

Be Nice and Share!
This post was originally published on this site

http://www.marksdailyapple.com/

keto chicken parmesan with primal kitchen marinaraThere’s nothing more comforting than the rich tomato flavor of a classic Italian dish. However, those regularly practicing a keto lifestyle or starting a Keto Reset Diet may wonder if homestyle Italian cuisine is out of reach. This delicious keto chicken parmesan recipe proves that you don’t have to leave your comfort food favorites behind while traveling the keto path.

Our recipe substitutes Primal Kitchen Roasted Garlic Marinara for the laborious, day-long sauce that typically accompanies traditional chicken parmigiana, making for a quick and easy weeknight meal. We prefer cooking our chicken parmesan in a cast-iron pan for flavor and the hemoglobin iron boost, but you can use any oven-safe pan. Serve alone, with pan-roasted vegetables, or atop keto-friendly noodles.

How to make keto chicken parmesan

First, use a food processor or blender to pulverize the pork rinds into a coarse flour. Mix the pork rind powder in a bowl or dish with the almond flour, garlic powder, oregano, salt and pepper. Whisk your eggs in another bowl or dish. Dredge each cutlet one at a time in the egg mixture, allow the excess egg to drip off, then dredge the cutlet on both sides in the flour mixture. Set each cutlet aside and repeat with the rest of them.

Chicken cutlets in egg mixture

Preheat your oven to 375 degrees Fahrenheit. Heat the olive oil in a large oven-safe skillet on your stovetop over medium-high heat. Once hot, place the cutlets in the pan and sear for 4-5 minutes on each side. Depending on the size of your pan, you may need to sear the chicken in batches. Don’t crowd the pan or else you won’t get a nice crust on the chicken. After you have seared the chicken, place all of the cutlets in the pan. Place the pan in the oven until the internal temperature of the thickest cutlet reads 165 degrees Fahrenheit. Pour the roasted garlic marinara sauce on top of each cutlet and place the pan back into the oven for 3-5 minutes.

chicken cutlets cooked on cast iron skillet

Take the pan out of the oven and sprinkle the chicken with the cheese. Increase the oven temperature to 450 degrees. Place the skillet back into the oven until the cheese is melted and browned. You can also use the broil function of your oven. Remove from the oven and top with black pepper and oregano and basil.

Serve with your favorite veggie side. We like simple roasted or steamed broccoli, sauteed zucchini, kale or spinach, or spaghetti squash.

keto chicken parmesan

Print

keto chicken parmesan in cast iron

Keto Chicken Parmesan


Description

There’s nothing more comforting than the rich tomato flavor of a classic Italian dish. However, those regularly practicing a keto lifestyle or starting a Keto Reset Diet may wonder if homestyle Italian cuisine is out of reach. This delicious keto chicken parmesan recipe proves that you don’t have to leave your comfort food favorites behind while traveling the keto path.


Ingredients

2 pounds chicken breast, pounded into ½” thick cutlets

12.5 ounce bag baked pork rinds (we used EPIC brand)

2/3 cup fine almond flour

1 tsp garlic powder

1 tsp dried oregano

1/2 tsp black pepper

1/41/2 tsp salt

2 large eggs

1/4 cup Primal Kitchen Extra Virgin Olive Oil

1.5 cups Primal Kitchen Roasted Garlic Marinara Sauce

1.5 cups shredded mozzarella cheese

Fresh basil


Instructions

  1. Use a food processor or blender to pulverize the pork rinds into a coarse flour. Mix the pork rind powder in a bowl or dish with the almond flour, garlic powder, oregano, salt and pepper.
  2. Whisk your eggs in another bowl or dish.
  3. Dredge each cutlet one at a time in the egg mixture, allow the excess egg to drip off, then dredge the cutlet on both sides in the flour mixture. Set each cutlet aside and repeat with the rest of them.
  4. Preheat your oven to 375 degrees Fahrenheit. Heat the olive oil in a large oven-safe skillet on your stovetop over medium-high heat. Once hot, place the cutlets in the pan and sear for 4-5 minutes on each side. Depending on the size of your pan, you may need to sear the chicken in batches. Don’t crowd the pan or else you won’t get a nice crust on the chicken.
  5. After you have seared the chicken, place all of the cutlets in the pan. Place the pan in the oven until the internal temperature of the thickest cutlet reads 165 degrees Fahrenheit. Pour the roasted garlic marinara sauce on top of each cutlet and place the pan back into the oven for 3-5 minutes.
  6. Take the pan out of the oven and sprinkle the chicken with the cheese. Increase the oven temperature to 450 degrees. Place the skillet back into the oven until the cheese is melted and browned. You can also use the broil function of your oven. Remove from the oven and top with black pepper and oregano and basil.

Notes

Serve this dish with your favorite veggie side. We like simple roasted or steamed broccoli, sauteed zucchini, kale or spinach, or spaghetti squash.

  • Prep Time: 15 min
  • Cook Time: 40 min

Nutrition

  • Serving Size: 1/6 of recipe
  • Calories: 558.8
  • Sugar: 3.7g
  • Sodium: 1047.6mg
  • Fat: 31.3g
  • Saturated Fat: 7.4g
  • Trans Fat: .2g
  • Carbohydrates: 9.9g
  • Fiber: 2.4g
  • Protein: 56.4g
  • Cholesterol: 203.8mg

Keywords: keto chicken parmesan

The post Keto Chicken Parmesan appeared first on Mark’s Daily Apple.

Be Nice and Share!
This post was originally published on this site

Originally Posted At: https://breakingmuscle.com/feed/rss

Strongman athlete Martins Licis has several accolades to his credit. The 2019 World’s Strongest Man is also the 2021 Rogue Invitational winner and the 2022 Arnold Strongman Classic champion. Licis is always testing his strength in different ways, and his recent trip to Gold’s Gym Venice in California included putting his grip to the test against the world famous Golden Dumbbells.

As seen at the 8:56 mark in the Youtube video posted on Licis’ channel, he managed to perform a single-arm row with one of the 150-kilogram (330-pound) dumbbells for a quick first rep, followed by two more reps after a very brief pause to re-grip the weight. Watching from behind was Licis’ mentor and renowned grip strength legend Odd Haugen. After an unspecified rest period, Licis then did a second set, getting five reps. Both sets were performed with only chalk on his hands and without the aid of a lifting strap.

Licis and his business partner, Romark Weiss, originally went to the iconic bodybuilding gym with a challenge of having members attempt to lift the legendary Thomas Inch Dumbbell to a standing position using only one hand. The legendary Inch Dumbbell weighs 77 kilograms (170 pounds) and has a handle nearly two and a half inches thick. Licis offered $100 to any person that could complete the challenging lift, and two men managed to perform that feat.

There is no official list of people that have lifted with the Golden Dumbbells, but among those that have done so on camera include 2022 Arnold Classic UK bodybuilding champion Andrew Jacked and social media personality Jake Johns (a.k.a. Big Boy), who performed a single-arm row for 10 reps with the dumbbell. However, they used straps while Licis did not.

Licis is coming off a busy 2022 season that saw him win the Arnold Strongman Classic in Columbus, OH in March, followed by a second-place finish to Tom Stoltman at the 2022 World’s Strongest Man contest in Sacramento, CA. Licis then took fourth place at the 2022 Rogue Invitational strongman contest in Texas. The champion at that event was Oleksii Novikov.

Licis’ 2023 plans are still to be determined. He had previously said that he would like to pursue challenging world records, and he is unsure if he will enter any major contests. His most recent contest appearance was a short notice entry in November 2022 to replace Robert Oberst as the captain of Team USA against Team UK at the 2022 Giants Live World’s Strongest Nation contest. Team UK, captained by 2017 World’s Strongest Man Eddie Hall, won that competition.

Featured Image: @martinslicis on Instagram 

The post Martins Licis Rows 150-Kilogram (330-Pound) Gold’s Gym Golden Dumbbell for Five Reps appeared first on Breaking Muscle.

Be Nice and Share!
This post was originally published on this site

http://www.thealternativedaily.com/

Ask almost anyone what it takes to lose a few pounds, and they’ll inevitably tell you, “Just exercise and eat right!” Then they’ll probably go on to say, “As long as you burn more calories than you consume, you’re golden,” or, “Get off your butt and just hit the gym!” Turns out, there are in […]

Be Nice and Share!