Originally Posted At: https://breakingmuscle.com/feed/rss
Larry “Wheels” Williams has never been one to shy away from sharing his ambitious goals. Of late, the powerlifter/strongman/influencer extraordinaire has been on a fresh training journey while using Testosterone Replacement Therapy (TRT). As he neared a “mock” powerlifting meet of one-rep maxes for competitive lifts like the bench press and squat, Wheels shared the latest update on his ongoing strength progress.
On Jan 2. 2023, Wheels posted a video to his Instagram of himself completing a 360-kilogram (793.6-pound) raw deadlift while barefoot and wearing a lifting belt. Per the caption of Wheels’ post, it’s his heaviest pull while using TRT and is also one of his final steps before the mock meet, of which the precise date is undisclosed. Wheels noted that he had a bodyweight of 255 pounds for the pull. (Note: Wheels writes that the deadlift is 795 pounds, but that may have been an errant typo).
Wheels’ fitness and strength journey since late summer 2022 has been primarily marked by noticeable progress with his lifts while on TRT.
Before notching his heaviest-ever pull while using TRT, Wheels previously squatted 224.5 kilograms (495 pounds) raw for 15 reps in a September 2022 AMRAP attempt. Then, in late November 2022, Wheels was able to squat 305 kilograms (672.4 pounds) raw for six reps. As for his bench progress, Wheels posted late December 2022 videos where the athlete completed a raw 230-kilogram (507-pound) bench press and a (252.6-kilogram) 557-pound bench press with wraps.
Another additional effect of Wheels’ status on TRT is that he has lost a significant amount of weight. The athlete has yet to make clear how much he’s cut his body weight down. For some context, according to Open Powerlifting, Wheels competed in the 140-kilogram weight class during his last powerlifting contest in the 2020 Extreme Powerlifting Coalition (XPC) Arnold and weighed in for that contest at 283.6 pounds. He has since lost roughly 10% of his previous body weight.
After the holiday season and in the new year, many athletes might only be starting to figure out their long-term goals for a complete, clean-slate calendar of events. That doesn’t appear to be the case for Wheels, who has hit the year 2023 on the ground running. Whenever he does finish his mock powerlifting meet, it seems clear Wheels will continue to charge full steam ahead with whatever’s next on his to-lift list.
Originally Posted At: https://breakingmuscle.com/feed/rss
Derek Lunsford, a former 212 Olympia champion (2021), competed for the first time in the Men’s Open at the 2022 Mr. Olympia. After a sterling second-place finish to eventual champion Hadi Choopan, Lunsford certainly maximized his debut on stage in the sport’s flagship division. As the 2023 calendar year starts to unfold, Lunsford is already setting up his high personal expectations for the months ahead.
In a podcast appearance with Fouad Abiad Media on Jan. 1, 2023, Lunsford discussed his upcoming plans after his second-place result at the 2022 Olympia. Among the more notable tidbits was the athlete revealing he would not compete at the 2023 Arnold Classic this March as he will center a majority of his energy on capturing his first career Olympia title in November 2023.
With a bigger picture in mind, Lunsford is specifically forgoing a potential appearance at the 2023 Arnold Classic to improve aspects of his overall physique, like his chest and leg muscles. This plan generally falls in line with Lunsford’s singular Olympia approach from 2022. As a new year starts to roll along, he’s wasting no time getting after it in his training for the next Olympia.
“I’m right back at the gym training, getting ready for next year,” Lunsford said. “I just knew this was a new beginning for me.”
Lunsford had congratulatory words of appreciation for Choopan, who he knows had been chasing bodybuilding’s highest peak and coming up just short for years. At the same time, Lunsford noted how close the final result was and how grateful he was to have a chance to push the eventual victor.
“I’m happy for Hadi [Choopan], man,” Lunsford explained. “He’s been at this for so many years. People have argued that he should have had an Olympia title already. So, I’m happy for him, man. And me, coming in with my Men’s Open Olympia debut getting second, and it was really close. I think it was a one-point difference in prejudging. It was just awesome, man. I was just there to put on a show and have a good time.”
While Lunsford seemed satisfied with his Men’s Open debut, he alluded to understanding that there’s still a lot of work to do. Like many elite athletes before him, Lunsford put his crosshairs on improvement and finishing the job the next time around.
When one comes as close to victory as Lunsford did, it’s only natural to focus on where to fill in the gaps.
“Dude, you can’t complain coming into your Mr. Olympia debut getting second place and, like, arguably pushing for that title,” Lunsford said. “I was really on cloud nine, and I still am, to be honest. Then, I just talked to myself, ‘Okay, well, you’re this close. What do you need to get better?’. For me, how awesome is it to be this close to walking away with the title, and I know how many more improvements I can make? As I said, that’s where my mindset is. I’m one step away [from victory] in my first Olympia.”
Originally Posted At: https://breakingmuscle.com/feed/rss
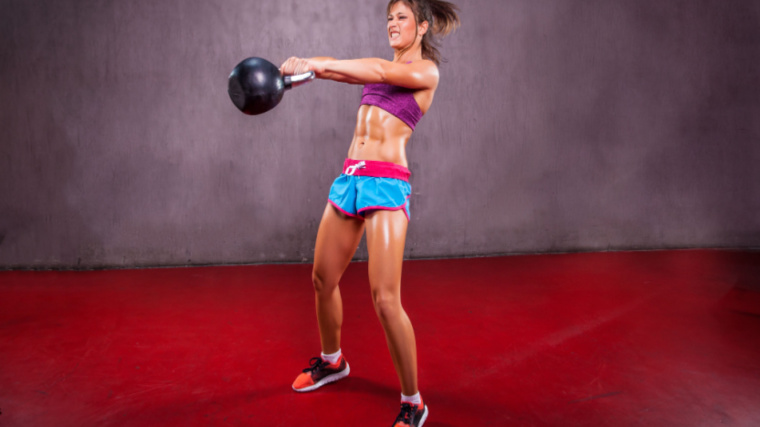
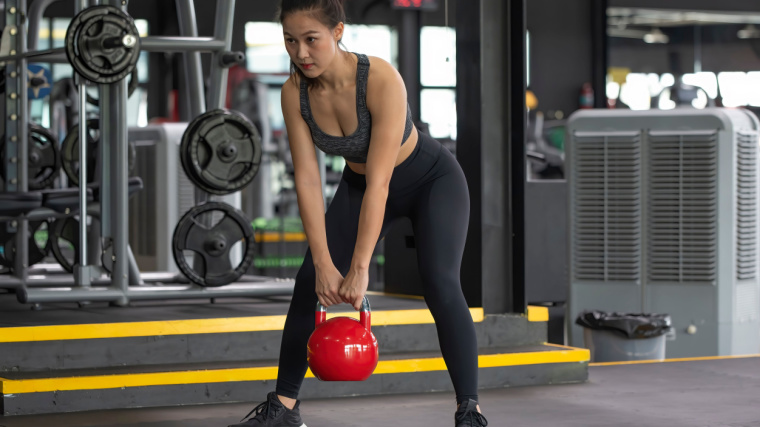
When a new lifter finally gets a kettlebell in their hands, the swing is typically one of the first exercises they try. But it shouldn’t be. The swing is arguably the most popular kettlebell exercise and it might actually be the movement that’s synonymous with the oddly shaped weight, but the swing isn’t exactly a simple exercise to perform.
Credit: Bojan656 / Shutterstock
Swings require a base level of muscular conditioning, coordination, and timing to reap major benefits. Beginning your kettlebell experience with the swing is like learning to cook an omelet before you can manage scrambled eggs. Instead, consider the kettlebell deadlift as your introductory kettlebell exercise.
The kettlebell deadlift will build strength, size, and conditioning in your lower body, core, back, and arms. The deadlift also teaches you how to properly hinge at your hips, which is the most efficient way to recruit your glutes and hamstrings for powerful lifts (including, you guessed it, the swing). Here are more reasons to get started with the real fundamental kettlebell movement — the kettlebell deadlift.
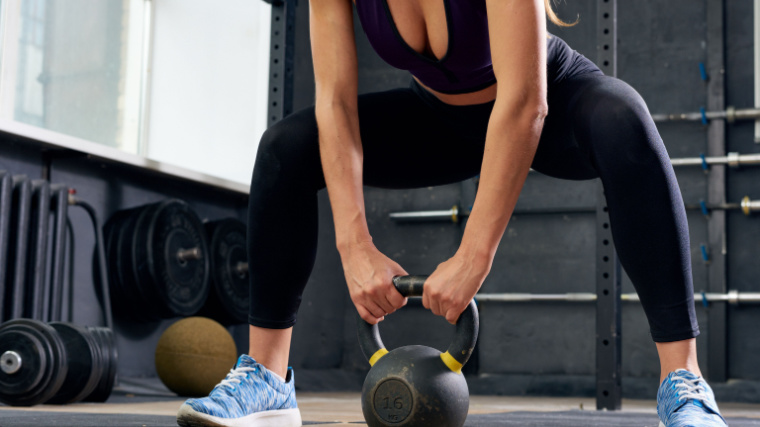
Watch coach Alex McBrairty showcase picture perfect technique with a kettlebell deadlift. Even though he’s specifically demonstrating a wide-stance, or sumo-style, kettlebell deadlift, the overall form and body positioning will be the same when using a more moderate foot position.
Get a visualization of the movement and then continue learning tips, cues, and more form advice.
How to Do the Kettlebell Deadlift Step By Step
The kettlebell deadlift is a foundational movement. It teaches the hip hinge movement pattern, which coordinates force production through your hamstrings, glutes, and lower back. The kettlebell deadlift is also, quite practically, a safe and efficient way to lift any load off the ground.
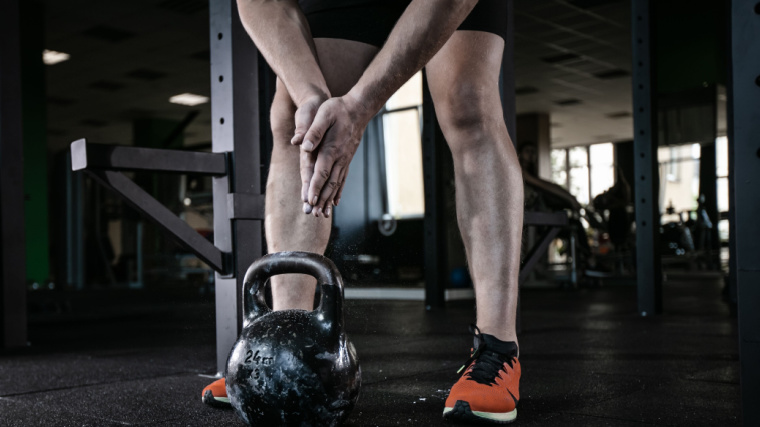
Step 1 — Address the Kettlebell
Credit: Rocksweeper / Shutterstock
No, not by tipping your hat and cheerily saying “Hello, bell.” Stand in front of the kettlebell with your feet roughly shoulder-width apart. Position the center of the weight between your toes and midfoot. The weight’s handle should be pointing toward each foot, not front and back.
Form Tip: If you have a larger frame, a long torso, or short arms, you may need to adjust the kettlebell’s starting position. If possible, perform one or two repetitions with a relatively light weight and adjust your stance to achieve a comfortable and powerful starting position.
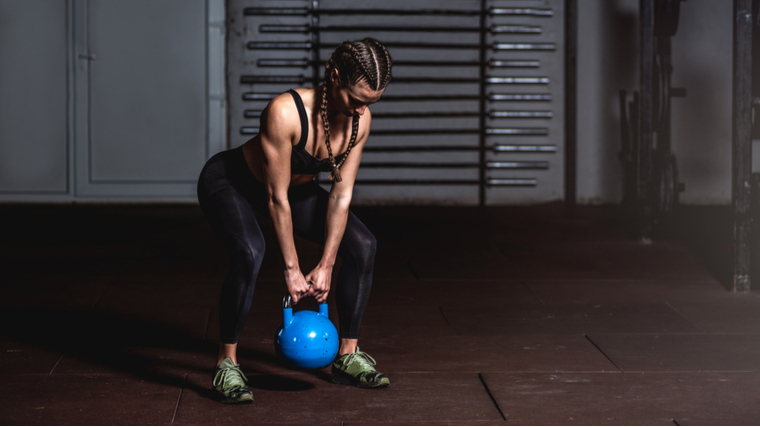
Step 2 — Grab the Weight and Drop Your Hips
Credit: Srdjan Randjelovic / Shutterstock
Drive your glutes backward and bend at your hips to reach toward the weight. Grab the top handle with a palms-down grip using both hands, with your thumbs nearly touching each other. Keep your torso straight and bend your legs until your shoulders are in line above the weight and your hips are below your shoulders. Keep your head neutral — avoid any instinct to look straight ahead, which could strain your neck.
Feel tension in your hamstring and glute muscles. Squeeze the handle and rotate at your wrists and shoulders to point your biceps forward. This should also drive your shoulder blades down toward your hips and put tension on your lat muscles, which improves your upper body stability.
Form Tip: If the kettlebell handle is too narrow to comfortably fit both hands, leave your pinkies running along the outer edge or “horns” of the kettlebell, pointing to the ground. It may feel awkward, but it shouldn’t affect performance of the exercise or impact your grip strength to any large degree.
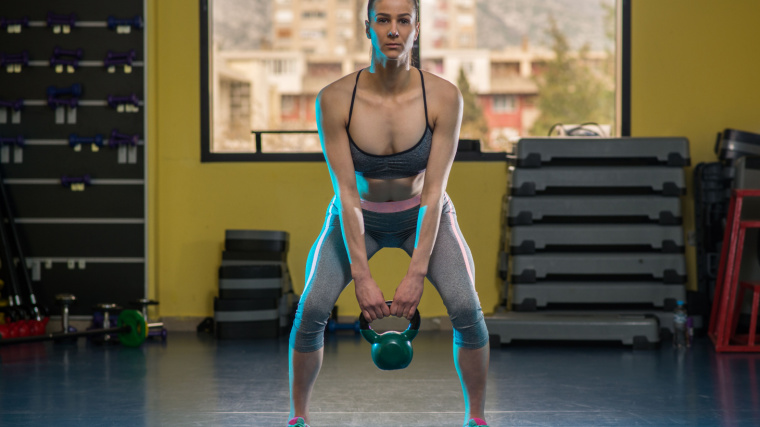
Step 3 — Drive Up to a Standing Position
Credit: ildintorlak / Shutterstock
Squeeze your grip and pull your shoulders toward your hips to feel tension on your lat muscles. Drive your feet through the ground, pull your shoulders back, and push your hips forward to stand up to a locked out position. Keep your arms straight and bring the kettlebell up along your legs.
In the locked out position, the weight should be resting near the front of your thighs with your arms locked straight. Take a quick breath in, brace your core, and reverse the motion — driving your hips back and returning the weight to the ground under control.
Form Tip: Aim to stand up straight without leaning back excessively at the top. Flex your glutes, abs, and arms to ensure a mostly straight lockout. This should prevent too much backward “overcorrection,” which can strain your lower back.
Kettlebell Deadlift Mistakes to Avoid
While the kettlebell deadlift is a fundamental and relatively basic movement, there are several technique errors that can be counterproductive. Here’s what to avoid as you perform the exercise.
Pulling with a Rounded Back
This is a capital mistake for any deadlift variation, including the kettlebell deadlift. Having your back in a rounded position as you drive up in a deadlift puts the supportive muscles of your spine in a poor leverage position, which transfers stress to your vertebral discs.
Credit: pnarongkul / Shutterstock
A rounded back position also puts your body in an inefficient position to transfer force from your lower body to your upper body, which will affect how much power you can produce.
Avoid it: Stay stiff from your hips to your neck. Before lifting the weight off the ground, flex your core and lat muscles to create tension throughout your entire torso.
Pulling with Bent Arms
Similar to the issue regarding a rounded back, you want to avoid performing any deadlift variation with bent arms. If your arms are less than straight as you lift, you shift stress onto your elbow joints rather than your muscles. You also decrease the amount of force you can transfer from your back and shoulders into your grip, which will decrease your strength.
Credit: SeventyFour / Shutterstock
There’s also a chance of straining your biceps muscle, which will be partially contracted when your arm is bent, compared to a more stable and supported straight-arm position.
Avoid it: Before each repetition, contract your triceps and try to “aim” your biceps forward by rotating at your wrists and shoulders. These small steps should force your arms into a straightened position, or highlight when your arms are bent.
How to Progress the Kettlebell Deadlift
Some lifters may not be able to perform a kettlebell deadlift with good technique due to their limb leverages, current strength levels, or other factors. Other lifters may consider the exercise “too fundamental” and not challenging enough. Rather than neglecting the exercise, some simple adjustments can be made to accommodate lifters of any experience level or capability.
Elevated Kettlebell Deadlift
The most efficient adjustment to the exercise is raising the kettlebell onto a sturdy step or series of weight plates. This reduces the range of motion, making the exercise more accessible for lifters whose limb lengths make the standard exercise technique uncomfortable.
The elevated kettlebell deadlift is also an excellent choice if you only have access to a limited selection of kettlebell weights and the “lightest” available is beyond your current capacity. Gradually increasing an exercise’s range of motion, rather than increasing the weight used, is an effective technique for building strength and muscle. (1)
Kettlebell Deficit Deadlift
Performing the kettlebell deadlift while standing on a slightly elevated platform is another way of manipulating the range of motion, this time making the exercise more challenging.
Placing stable weight plates or sturdy platforms (of identical heights) under each foot will increase muscle recruitment by requiring your body to move through a longer range of motion. When lifting from a deficit, a little elevation goes a long way. Don’t be too aggressive by starting with significant heights. One to two inches (such as a 25-pound weight plate) is an effective way to begin.
Benefits of the Kettlebell Deadlift
The kettlebell deadlift can serve a number of roles in your training plan. Whether it’s part of a kettlebell-only workout or incorporated into other training, this exercise can deliver a range of results.
Lower Body Strength
The kettlebell deadlift can be used to establish a base level of strength in the posterior chain — your lower back, glutes, and hamstrings. Even though the exercise isn’t often performed with very heavy weights, the applied tension will build strength and muscular conditioning in the target muscles. This strength can carry over to other deadlift variations, as well as a variety of lower body exercises.
Lower Body Size
The glutes and hamstrings, in particular, are strongly recruited during the kettlebell deadlift. (2) The quadriceps and back are also involved, and all of these activated muscles will be stimulated for muscle growth during the exercise. Any deadlift variations, including the kettlebell deadlift, can be very effectively used as part of any bodybuilding-style leg day.
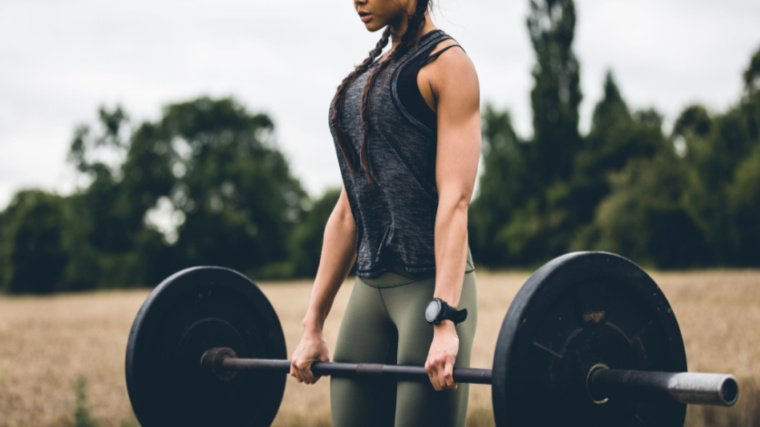
Practicing the Hip Hinge Movement
Because the kettlebell deadlift requires a single piece of training equipment, it’s a convenient way to train the hip hinge movement pattern or general deadlift technique. While the kettlebell itself is unique to the movement, the overall body positioning, necessary tension, and step by step technique cues will carry over to barbell deadlifts.
Credit: Tom Yau / Shutterstock
This makes the kettlebell deadlift an efficient way to train the movement without needing to place the body under heavy loads, which can be useful for general mobility training, exercise warm-ups, or technique practice.
Muscles Worked by the Kettlebell Deadlift
The kettlebell deadlift is typically considered a lower body exercise, but like many other deadlift variations, it can only be performed by coordinating actions between your legs and upper body. Here’s a closer look at everything that’s working during a set.
Legs
Your legs are the primary targeted muscle group during the kettlebell deadlift. More specifically, your glutes and hamstrings are strongly recruited to lift the weight and extend your hips into the locked out position. Your quadriceps play a role in the lower portion of the lift, initially bringing the weight off the ground.
Upper Back
The upper back muscles (including your trapezius, rhomboids, and rear deltoids) play a role in controlling your posture during the kettlebell deadlift. Because your hands are close together while holding the weight, your shoulders are pulled slightly forward. Your upper back is activated to resist this action by pulling your shoulder blades into a more stable position.
Core
Your abs and lower back work in unison to provide a safe, strong, and stable body position during the kettlebell deadlift. Your core is the key to transferring force from your lower body through your upper body to move the weight. Your lower back, in particular, is heavily activated to achieve a fully upright, locked out position.
Grip
Many kettlebell manufacturers design their handles to be slightly thicker than the average barbell or dumbbell. Training with thick-handled implements can increase the activation of forearm muscles, which can benefit grip strength development.
How to Program the Kettlebell Deadlift
Few lifters will have access to kettlebells heavy enough to perform extremely heavy, low repetition training. There are still effective ways to fit the kettlebell deadlift into your training plan for optimal results.
Moderate Weight, Low to Moderate Repetition
The kettlebell deadlift can be ideally trained for size and strength using a classic set and rep scheme of three to four sets of five to eight reps. A moderate load should be used to avoid muscular failure. This keeps the emphasis on crisp technique and a high rate of force production rather than cumulative fatigue from a long time under tension, which could compromise technique.
Light Weight, Moderate Repetition
The kettlebell deadlift can be performed as a type of warm-up movement using a relatively light weight for two to three sets of eight to 10 reps. With this approach, you can drill the hip hinge movement and prepare your hips, hamstrings, glutes, and involved muscles without excessive fatigue.
Kettlebell Deadlift Variations
The kettlebell deadlift can deliver a range of benefits from just a few simple modifications and variations. Here are some of the most basic and most efficient variations to trigger more results.
Kettlebell Suitcase Deadlift
Performing a single-arm kettlebell deadlift may sound like an intuitive variation, but more importantly than using only one arm is keeping the weight next to your body rather than in front of it.
Shifting the weight from in front of your body to alongside your leg creates a more intense challenge to your core. This lights up your obliques (side abs) and spinal erectors (lower back) to prevent your body from leaning toward the weight as you perform the exercise.
Kettlebell Stiff-Leg Deadlift
By keeping your legs stiff or nearly straight (not entirely locked out), you shift muscle recruitment to more strongly emphasize your hamstrings, glutes, and lower back. This technique adjustment will slightly reduce the amount of weight you can lift, but will increase the stress put on the target muscles.
With the kettlebell stiff-leg deadlift, it’s essential that you maintain a stiff lower back and not round forward to reach the weight, which would increase strain on your vertebrae.
Kettlebell Single-Leg Single-Arm Romanian Deadlift
This might win the award for longest exercise name, but the results are also award-worthy. The “KBSLSARDL” is a performance-based movement focused on using perfect technique and full-body tension rather than lifting heavy weight or targeting one specific body part.
Holding the weight in one arm while supporting your entire body on one leg turns the exercise into a total-body test of strength and stability. Muscles from your ankle to your neck to your grip will fire nonstop as you fight to remain in control of the weight.
FAQs
Is the kettlebell deadlift very different from the dumbbell deadlift?
Both movements can either be alternatives to, or progressions toward, the standard barbell deadlift. The key difference, beyond the specific implements (one kettlebell versus two dumbbells), is that the dumbbell deadlift is typically performed with the weights held at your sides. This can reduce some strain on the lower back by shifting your center of gravity and dispersing stress. The kettlebell deadlift is performed with the weight in front of your body, which is more similar to the conventional barbell deadlift. The exercises are otherwise very similar and can be used nearly interchangeably, as your needs require.
I only have access to one kettlebell. How should I use the kettlebell deadlift?
This is a common situation with home gym-based lifters who may have limited equipment. If you only have a single, fixed-weight kettlebell, you can incorporate the kettlebell deadlift with adjusted programming methods. Manipulate the sets and reps depending on your current strength level relative to the weight you have available. If you can perform more than 10 repetitions, consider adding an additional set or reducing rest times to make the exercise more challenging. You can also perform the kettlebell deficit deadlift as a more challenging progression. If you can perform fewer than five repetitions with your weight, consider using the elevated kettlebell deadlift while progressively decreasing the height. You can also perform multiple sets of one to two repetitions, to build strength while maintaining good technique.
Pick Up the Kettlebell
The kettlebell swing is highly effective and versatile exercise, but you need to walk before you run. Or, more accurately, you need to deadlift before you swing. Take the time to master this fundamental movement and it will serve you will for building a base of muscle, strength, and conditioning, as well as fine-tuning your hip hinge to boost your barbell lifts.
References
Whaley, Orrin & Larson, Abigail & DeBeliso, Mark. (2020). Progressive Movement Training: An Analysis Of Its Effects On Muscular Strength And Power Development: 881 Board #7 May 27 1:30 PM – 3:00 PM. Medicine & Science in Sports & Exercise. 52. 210-211. 10.1249/01.mss.0000675840.15637.df.
Martín-Fuentes, I., Oliva-Lozano, J. M., & Muyor, J. M. (2020). Electromyographic activity in deadlift exercise and its variants. A systematic review. PloS one, 15(2), e0229507. https://doi.org/10.1371/journal.pone.0229507
Originally Posted At: https://breakingmuscle.com/feed/rss
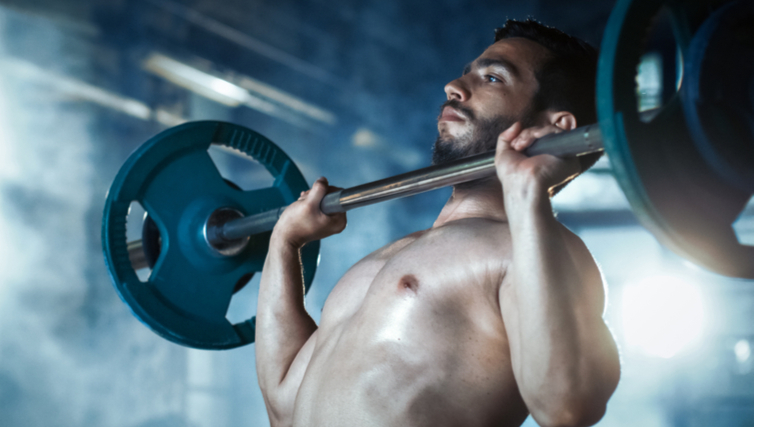
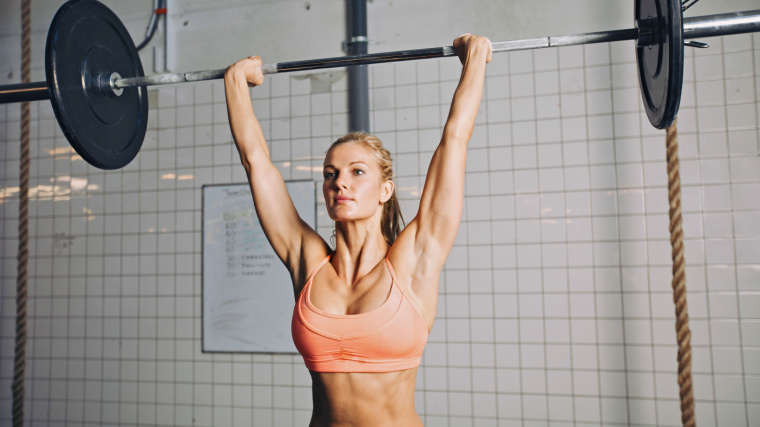
Everyone talks about “International bench day,” but there’s nothing quite like pressing something heavy overhead. It’s pretty much the most innate display of strength. When little kids want to impress their parents with how strong they’re getting, they lift something overhead.
Most lifters should be able to press something relatively heavy overhead. If you can’t, it often means you’re missing the full use of your shoulders. Maybe you can’t move your shoulder through its full range of motion or maybe the stabilizing muscles of your shoulder blades and trunk can’t create stability to safely produce force.
Credit: Gorodenkoff / Shutterstock
The strict standing barbell press involves the shoulders, upper back, triceps, and even upper chest. It trains the entire body to create a stable base to push from, but it can be difficult to steadily improve and progress tends to stall much sooner relative to other barbell lifts. That’s why it’s important to know and use many different variations to help continue building muscle and strength. Here are eight overhead variations that will help you impress mom, again.
Sometimes, pushing weight directly overhead can cause more harm than good. It may be because of an injury or just a lack of flexibility in the shoulder, triceps, lats, or wrists. The landmine press is unique because the pattern of movement is between a straight vertical and horizontal path.
This hybrid type of motion gives many of the benefits of direct overhead pressing while reducing the joint angle that may be putting a dangerous demand on your shoulder.
When to Use It
The landmine press is great to use when recovering from injury and building back strength and function from time off training. It allows you to still develop strength and muscle while you work to restore full function of the shoulders to press directly overhead.
It’s also a good variation to use when doing an intense phase of bench press training, as it won’t fatigue your shoulders excessively or affect recovery quite like straight overhead barbell pressing.
How to Do it
If you don’t have a landmine holder, you can wedge a regular barbell in any corner where it won’t cause damage. Load the bar and pick it up by the head (the end of the sleeve where you load the plates).
The landmine press can be performed with just one arm or both together. If you’re using two arms, cup the end of the barbell sleeve with both of your hands. Place the head of the bar near your sternum with your torso leaning slightly forward. Set your feet between hip and shoulder-width apart. Keep your elbows close and pulled in as you press. As your elbows lock with the bar almost at the crown of your head, shrug your shoulders up before returning the bar back to the starting position.
If you’re using the one-arm variation, grab the end of the sleeve with one hand and place the bar at the front of your shoulder. Stand and press the same way, driving the bar forward and up to lockout, followed by a shoulder shrug. Make sure you keep your elbow in, so the bar stays in line with your shoulder throughout the entire movement. Flaring your elbow will alter the pressing angle, reduce power, and shift stress to the joint.
Landmine Push Press
The push press is a great way to increase overhead stability with weights you couldn’t otherwise strict press. You use your legs to help to drive the weight up in a push press, allowing you to use heavier weights.
But a standard barbell push press can be difficult to learn and to do efficiently. The landmine push press is easier for people to grasp because of both the path you drive the bar and the position of your shoulders relative to the bar.
When to Use It
The landmine push press is a great exercise to add whenever your pressing progress slows or hits a plateau. The exercise can be included on either bench or overhead press days as a way to overload the pressing muscles with more volume while still moving relatively big weights.
How to Do it
Just like the landmine strict press, if you don’t have a holder you can wedge the bar in a corner and load it the same way. Because using heavier weights is a specific benefit of the landmine push press, it’s best performed with both hands on the bar. Cup your hands and place the head of the bar almost directly on your sternum. Set your feet between hip and shoulder-width apart and flare your toes out very slightly.
Brace your core and dip your knees as if you were preparing to jump as high as possible. Drive your feet into the ground and explosively extend your knees and hips as if you were trying to jump. Your heels will lift from the floor from this aggressive ankle extension, but keep the balls of your feet in contact with the ground — don’t actually jump into the air.
As your ankles extend, shrug your shoulders toward the bar. Try to make the bar fly off your chest from your leg drive and shoulder shrug. Then, push with your arms to extend your elbows. Let your heels touch back to the floor right as your elbows extend with the bar over the crown of your head. Control the bar as you bend your arms and absorb the momentum with your legs and trunk as you lower it.
Bottoms-Up Press
This is one of the best, but most challenging, pressing exercises for shoulder and scapular function and stability. It’s often used as a rehab or “prehab” drill because it engages most of the postural muscles like those of the rotator cuff that stabilize and move the shoulder blade.
Balancing the bell upside down trains you to find the most stable path of motion and forces you to control the movement. Sometimes, the dominant muscles responsible for pressing overhead are restricted by how well your shoulders are stabilized. Improve those muscles and you can improve how much force you can create.
When to Use It
These are great to do on deload weeks or at the very beginning of a new phase of training. You can think of them as a developmental exercise to prepare the shoulders for heavier, more intense training ahead.
How to Do it
The bottoms-up press can be done standing or sitting, but a half-kneeling position actually puts you in a great mechanical position to do the exercise. Kneel down with the kettlebell in one hand and that side leg kneeling on the ground, with the opposite leg forward. Squeeze the handle and turn the weight upside down so the bottom of the bell is facing the ceiling. Crush your grip to maintain the weight in this vertical position.
Move your elbow toward your center so your thumb is in front of your face and your elbow is at a right angle with the floor. Slowly extend your elbow up to the ceiling and move your upper arm slightly back to put it in line (or covering) your ear as you lock out overhead. Stabilize the weight overhead briefly before slowly returning back down to your face.
Kettlebell Z Press
The Z press is an excellent choice for increasing the tension and demand on your shoulders and upper back without necessarily increasing the load used. Often you’ll see a lifter arch their spine or lean back during a standing overhead press because they lack the postural control and trunk or upper back strength needed to keep their spine neutral while pressing.
Sitting upright on the floor with no possible leg drive or back support helps you feel any change in your spinal position, so you can focus on preventing the problem. Pressing from the floor with the offset weight of kettlebells challenges your trunk and shoulder stabilizers in a way other exercises can’t.
When to Use It
Use the kettlebell Z press at the beginning of a workout to warm up your entire shoulder complex. One or two sets with light to moderate weight is enough to get your shoulders moving freely without causing fatigue that could affect your main training.
Adding it to the end of a hard pressing workout is also a great way to add more volume, because you don’t need to use much weight or too many reps for the movement to be effective.
How to Do it
Sit on the floor with your legs straight while keeping an upright torso. Hold a pair of kettlebells with your palms facing each other at shoulder-level. Exhale hard through your mouth trying to force the air out of your torso to make it as narrow as possible. You should feel your ribcage drop down and the muscles in the front and sides of your torso, around your core, contracting.
Keep these muscles engaged to prevent your back from arching or your ribs flaring up as you press overhead. Keep your upper arms in line with your ears and rotate your hands palms-forward as you lock your elbows. Shrug your shoulders as your elbows lock before returning to the starting position.
Earthquake Bar Overhead Press
The earthquake bar is a bridge between training stability and increasing pressing power. The bar is designed to shake and swing, which engages the deepest and smallest shoulder stabilizers. Because it’s one straight bar, you can use relatively heavier weights than you could with dumbbells or kettlebells.
If you don’t have access to an earthquake bar, hanging resistance bands from the ends of both sleeves of a standard barbell and attaching weight plates is an effective alternative.
When to Use It
You can think of this like a secondary lift which can be done right after a heavy overhead barbell press or bench press. Though you will use much less weight, you can use a similar weekly progression of set and reps that you’d use for your main pressing lift. The instability will be the key challenging element to this exercise.
How to Do it
Set the bar on a rack just as you’d do for a standing overhead press. Start with relatively light weight and gradually slowly add more as you feel comfortable and learn to control the movement. Grab the bar with your thumbs just outside your shoulders. Angle your elbows just slightly in front of the bar. Shrug your shoulders forward and up to create a support for the bar, whether you have the mobility to rest the bar on top of your shoulders or not.
Step back from the rack and set your feet hip-width apart with your knees just slightly unlocked. Wait until the initial swinging stops and pull your chin back (think of giving yourself a “double-chin”). Press the weight up slowly, keeping the bar as close to your face as possible.
Once the bar passes the crown of your head, very slightly push your head and sternum forward so your elbows lock overhead as the bar is directly over the base of your neck. Shrug your shoulders upward and stabilize the bar at the top. Lower the weight by pulling your chin back and returning the bar to the starting position.
Snatch-Grip Behind-the-Neck Press
Usually you’d only see Olympic weightlifters use this as an accessory exercise, but it can be very beneficial to anyone looking to improve overhead strength or build their upper back and traps.
The ultra-wide grip challenges your rear delts and upper back in a very unique way. If you start with relatively light weight and progress slowly, the snatch-grip behind-the-neck press can actually improve your shoulders’ working range of motion and strengthen the muscles and connective tissue that support good shoulder function.
When to Use It
These can be pretty difficult, so instead of adding them as an accessory exercise after heavy standard overhead pressing, take a few weeks to prioritize the exercise by progressively working heavier instead of performing the standard barbell overhead press. Do them as the first main lift on a pressing or upper-body focused day.
How to Do it
Place a bar on a rack at your back squat-height (roughly upper-chest level). Walk under the bar and place it on your back as if you would for a high bar squat. Unrack the weight and step back. Slide both hands out until your index fingers are generally outside of the knurl marks on the barbell (smooth rings).
Angle your elbows directly under the bar, keep your neck straight, and brace your trunk while keeping your ribs from flaring up. Press the bar while keeping it in line with the base of your neck until your elbows lockout overhead. Don’t let the bar sway forward or behind your neckline. Shrug your shoulders at the top before returning the bar all the way back to the top of your traps.
Swiss Bar Overhead Press
The Swiss bar is one of the best tools to use if you’ve had any shoulder or elbow pain, or pre-existing injuries. Its key benefit is multiple handles that let you place your hands close or wide while keeping a neutral-grip (palms facing each other) position.
This neutral position gives even those rotator cuff dysfunction a way to press without causing more strain in problematic areas in the shoulder or upper back.
When to Use It
The Swiss bar press is great to do when your shoulders, elbows, or wrists get cranky from other types of pressing. You can use the exercise in place of other overhead pressing options until you fully rehab an injury or recover from whatever nagging pain is causing issues.
How to Do it
Decide which grip-width feels most comfortable use and set the bar on a rack, the same you would for any overhead barbell press. Grab the handles and rotate the bar so your thumbs face toward your head. Unrack the weight and step back to your standard press foot position, roughly hip-width apart. Start with the bar about chin height.
Pull your neck in, as if you were giving yourself a double-chin, and keep the bar close to your face as you press overhead. Push your head slightly forward as you lock your elbows overhead. Shrug at the top as your elbows lock before lowering to the starting position.
Overhead Pin Press
Part of the reason overhead pressing can be so hard to improve is because you push from a static position, particularly on the first rep. In many other lifts, like the bench press, you have the eccentric (lowering portion) of the lift which helps store force that you use to press the weight back up.
Because you don’t lower the bar first in an overhead press, you have to be able to muster a large amount of force suddenly without momentum. This is called “starting strength” and a pin press is one of the most effective ways to specifically train this quality.
When to Use It
If you can’t create a stiff and stable base of tension, you can’t suddenly create this force. And if you’re shifting your torso back and forth as you press, you definitely don’t have a good base of support.
Consider swapping all barbell overhead pressing for pin pressing until you improve this stability. Because the bar is supported on the safeties, you can better focus on setting your trunk and keeping it stiff and fixed in place as you push hard against the bar to lift it from the starting position.
How to Do it
Set the bar on strong safety bars at the height you would start your press from, generally around neck-height. Set your feet hip- to shoulder-width apart and grab the barbell with your standard overhead grip. Get in position under the bar and brace your entire trunk and back so your ribs won’t flare up and your spine is locked in place.
Keep this static position as you press as hard and fast as possible, brining the bar to lockout overhead. Return back to the pins and let the weight settle there before re-bracing and repeating for another repetition.
Muscles Worked by the Overhead Press
The overhead press is primarily a “shoulder exercise,” but it cannot be completed without assistance from several key body parts. Each of these body parts will be put under training stress during the exercise.
Shoulders
Your shoulders (deltoids or “delts”) are the primary movers during the overhead press. These muscles are responsible for flexing your arms overhead. The shoulder muscles consist of three heads — the front, side, and rear — which are involved in moving the arm in those respective planes of motion relative to your body.
All three muscle heads are used to press the weight overhead, but can be emphasized with various types of lateral raises.
Triceps
The triceps work to extend your arms, which is the latter portion of any shoulder press. The lockout portion of any overhead press, specifically, strongly activates your triceps. (1) The triceps are worked through a long range of motion during any overhead press variation, with the muscle recruited maximally in the top half of the movement.
Core
Your abs and lower back work together to form a strong, stabilizing core which supports overhead pressing. Any degree of sideways or backward lean is prevented through strong core stabilization. (2) It’s not unusual to feel sore abs after an intense overhead pressing session, which is one indicator of how significantly the core muscles work during the movement.
Overhead Press Form Tips
A few key technique cues can turn your basic overhead press from pain into progress. If you’re performing the lift from a power rack, set the safeties near shoulder or neck-level, not near your chest. Beginning the press from a position that’s too low leaves you with poor leverage that shifts more strain to the shoulder joint than the shoulder musculature.
Credit: Jacob Lund / Shutterstock
During any press exercise, grip the bar as hard as possible. This will start a chain reaction of strength from your wrist and forearm muscles, through your upper arms, into your shoulders and upper back. (3) It’s a surprisingly effective way to stay tight while producing more power and minimizing joint strain.
Similarly, don’t stand up “passively.” Before each repetition, flex your core, glutes, legs, and calves. Imagine gripping the ground with your feet. This will help to establish total-body stability to drive a strong upward press.
Press More Over Your Head
Bench press variations are fairly commonplace. Without giving it much thought, lifters tend to do much more horizontal pressing than vertical, but too much horizontal work and not enough vertical pressing can lead you to develop deficiencies in the muscular development and control of the entire shoulder girdle.
Learning and trying new overhead variations not only increases the potential weights you can use for your barbell overhead press, but also reduces the gap between these two pressing patterns making you much stronger and more balanced. Diversify your overhead training and reap the strength, stability, and muscle-building results.
References
Kholinne, E., Zulkarnain, R. F., Sun, Y. C., Lim, S., Chun, J. M., & Jeon, I. H. (2018). The different role of each head of the triceps brachii muscle in elbow extension. Acta orthopaedica et traumatologica turcica, 52(3), 201–205. https://doi.org/10.1016/j.aott.2018.02.005
Shinkle, J., Nesser, T. W., Demchak, T. J., & McMannus, D. M. (2012). Effect of core strength on the measure of power in the extremities. Journal of strength and conditioning research, 26(2), 373–380. https://doi.org/10.1519/JSC.0b013e31822600e5
Gontijo, L. B., Pereira, P. D., Neves, C. D., Santos, A. P., Machado, D.deC., & Bastos, V. H. (2012). Evaluation of strength and irradiated movement pattern resulting from trunk motions of the proprioceptive neuromuscular facilitation. Rehabilitation research and practice, 2012, 281937. https://doi.org/10.1155/2012/281937
For now classes are 6pm and 640pm at 2840 Wildwood st in the Boise Cloggers studio.
Book your class NOW!
click this ==>
Warrior Fit Testimonials
First, I want to say thank you for convincing me to do Tabata! I was struggling to lose weight and Finally I found something that helped! I really appreciate your coaching! - Craig T.
Ever since I was convinced to do Tabata I have seen huge results, I lost 6 pounds and gained energy in the first 3 weeks. I have been working out for 3 months before I decided to do Tabata and I struggled to lose weight.
At first I thought "How am I losing weight by bringing my heart rate up then cooling down then bringing it up again?" I don’t know how it works but it does!
Thank you!! - Theresa F.
The first day of Tabata, I wondered WHAT AM I DOING - I AM 56 !! Five weeks later I knew that it was what I needed. I learned that I could push myself well beyond my comfort zone and feel good later. I have a marked improvement in physical as well as emotional endurance. - Lyn C.
When I was first told about Tabata I was very excited from the word go, however that excitement stemmed from the fact that I had no clue what it meant. I missed the first week of class b/c I was traveling for work so when I came in during the 2nd week I had some making it up to do.
It was hard at first b/c my body wasn't used to working out at such a fast pace, but once I got into a rhythm I started to feel very good. These classes are no joke. If you stick with it you will leave there feeling stronger, healthier and overall better about yourself and what you've accomplished.
I would recommend these classes to anyone. Darrin is a great trainer and he'll keep you going with his energy.
- Jami L.
Warriors Fit Audio
Warrior Fit uses High Intensity Music to get ya Moooovin' So we can all "Get Our Sweat On"
The link below will give ya a freeee shot at Audible plus a couple audio books just to try it out and if you haven't used audio books on your commutes you are missing out. Get pumped up before you get to where you are going and exercise your mind. I use it Everyday. Go get yours now!

 For now classes are 6pm and 640pm at 2840 Wildwood st in the Boise Cloggers studio.
Book your class NOW!
click this ==>
For now classes are 6pm and 640pm at 2840 Wildwood st in the Boise Cloggers studio.
Book your class NOW!
click this ==>


