This post was originally published on this site

Originally posted at: http://www.nerdfitness.com/

This pencil is a perfect tool to track your fitness progress.

If you’re on a weight loss or fitness journey, you need to read this article.

Why?

Because tracking your body measurements and fitness progress can be crucial for getting in shape!

Those who succeed in transforming themselves are those who write everything down. As they say “That which gets measured gets improved.”

Or as we tell our 1-on-1 Online Coaching clients, “track the problem to crack the problem!


Today, we teach you these life-changing habits:

Let’s jump right in!

How Do You Measure Fitness Progress?

Numbers, like those on this carpet, will help show if you're progressing in fitness.

Does this sound familiar?

  1. You decide you want to get in shape.
  2. You go for runs every day for a week and try to eat less food.
  3. You step on the scale every day for a week and the numbers go down. Yaaaay!
  4. You go to a cookout on a Sunday, step on the scale on Monday, and it’s higher than before!
  5. You freak out, go crazy, and fall off the wagon.
  6. Lather, rinse, repeat.

I’d guess this is 80% of people who try and fail to get in shape.

You need to track your progress Deadpool! Keep reading!

Fortunately, you’re reading Nerd Fitness which means you’re most likely smart, incredibly good looking, humble, and aware that doing the same thing over and over again while expecting different results is the definition of insanity.

On top of that, you understand and value the importance of tracking your progress – as the saying goes “that which get measured gets improved.

This is true specifically for these reasons:

1) Scales don’t tell the whole story. I’ve already covered my thoughts on scales. If you are training the right way (with an emphasis on strength training), your weight might not drop as fast as it would if you starved yourself and ran 20 miles a day.

Heck, you might be getting stronger and more muscular but the scale refuses to budge. Now, if you only had a scale as your ‘measuring stick,’ you’d probably get super discouraged and depressed at the lack of “progress.”

However, if you were tracking your body changes properly, you’d realize that you are making far more significant and healthier progress by doing things the right way. At the end of Saint’s journey to the Ab-promise land, his weight WENT UP while his body fat percentage went down. The scale can lie!

Scales can sometimes be all over the place.

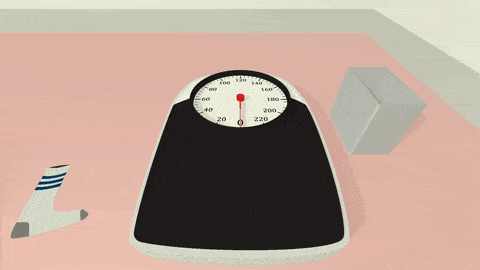
NOTE: the scale can also serve as a good “trend tracker” and I’ll cover that below – it was a key tool for me in losing 22 pounds over 6 months while building muscle.

2) You don’t know if you’re on the right path. Along with the scale not telling the whole story, it’s tough to tell if you’re losing the right kind of weight in the right kind of places.

There are so many other aspects to consider other than the number on the scale, including how you look, feel, and where the weight loss is coming from – your muscles or your stored fat.

It’s like driving cross country without a map, compass, road signs, or landmarks to use – how do you know you’re going the right way if you have no idea where you were or where you’re headed?

3) You don’t know how much you’re eating. If you’re overweight, you might think your metabolism is broken and you simply can’t lose weight. (Tracking some things will tell a different story). If you’re underweight and “can’t gain weight no matter what you eat,” you probably don’t realize how many calories you consume on a daily basis. We often have such a warped sense of reality when it comes to proper “portion size” and what constitutes a meal.

For example, this is a serving of carbs and fat:
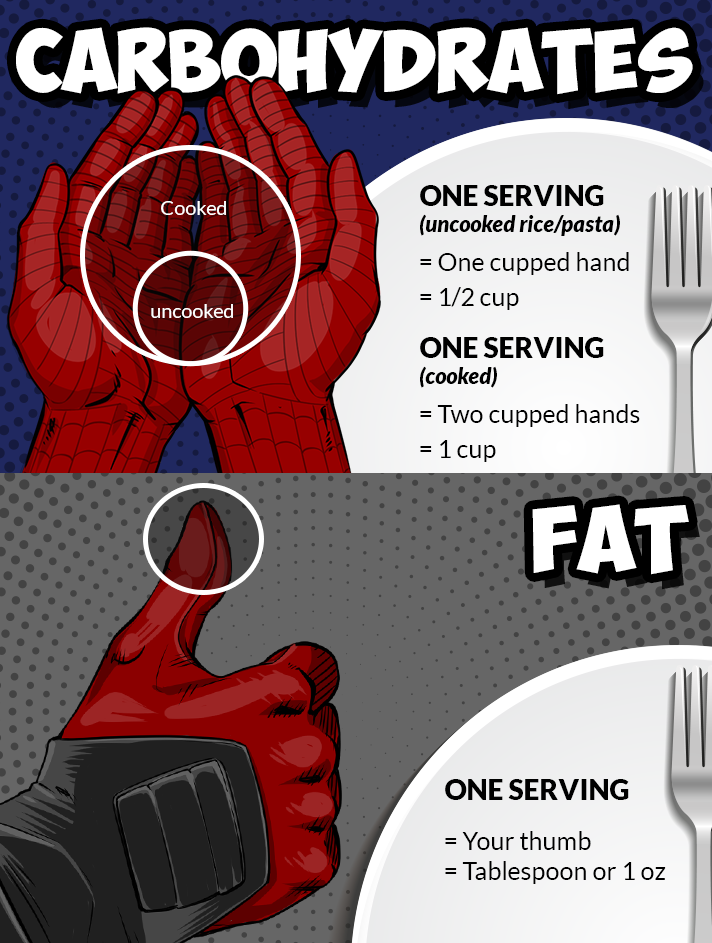
A reminder of the serving sizes of carbs and fat.

Taken from our Healthy Eating guide

We need to be better informed on proper portion sizes.

4) You can’t tell if you’re getting stronger. Our bodies need to be constantly challenged in order to adapt and get stronger. If you do 3 sets of 10 push-ups every day for a year…you will just be really good at doing 3 sets of 10 push-ups and nothing more.

You need to constantly increase the difficulty of your workouts in order to get results.

A one arm push-up can help you lose fat and build muscle, but maybe start with regular push-ups first.

This concept of “progressive overload” is the cornerstone of strength training. If you didn’t know how you did last time, how the hell are you going to know if you’re doing better this time?

That which is measured gets improved! I’m sure there are actual psychological reasons behind why this works, but I know that I get better results when I exercise if I know EXACTLY what I need to lift or how fast I need to run to get stronger and better. If I did 30 push-ups in a row last week, then this week I have “31! 31! 31!” emblazoned in my mind while doing them…sure enough, I’ll get to 31.

On top of that, if you’re constantly:

  • Keeping track of what you eat
  • Taking measurements
  • Tracking your workouts

You will always be thinking “healthy!” and thus make healthier decisions on a more consistent basis.

Hopefully, at this point you’ve at least come to the conclusion that maybe you should start tracking your progress. “Yes Steve, I have seen the light and I’m ready to start tracking my progress…tell me what the hell I need to do!

PERFECT. Here’s how to do it.

How Do You Take Body Measurements?

This tape measure can help track your fitness progress.

THE NUMBER ON THE SCALE DOES NOT DEFINE YOU! When you strength train and eat properly, your body tends to only shed fat while keeping the muscle you already have. I deep dive into the subject in the article “Can you lose weight and gain muscle at the same time?

Compare that to crash dieting and hours of cardio where your “weight loss” will be greater, but you’ll be losing both muscle and fat (and leave you looking and feeling like a weakling).

By tracking your body composition in more than one way, you’ll have a more accurate view of what’s working and what’s not working with your training. If after a few weeks you’re not losing the right kind of weight, you’ll know that you need to make some adjustments.

Before we get into metrics, let’s set one ground rule: Don’t track everything on a day-to-day basis.

Our bodies are incredibly complex pieces of machinery where all kinds of crazy stuff happens all day and all night.

Our bodies are tough to track because we are even more complex than this machine.

Our weight can fluctuate by many pounds over the course of a day. Measuring EVERY day can promote an unhealthy OCD behavior where every tiny little change will be scrutinized and blown out of proportion.

So measure yourself once a week at the same time under the same conditions. I advise after you wake up and before you eat breakfast.

Depending on your schedule, I’d either pick Friday or Monday mornings to track all of your measurements – if you tend to let yourself go on the weekends, I’d advise doing your measurements on Friday morning so that you’ll have a whole week to get back on track and see long-term changes.

Here are the best ways to track yourself OTHER than a scale:

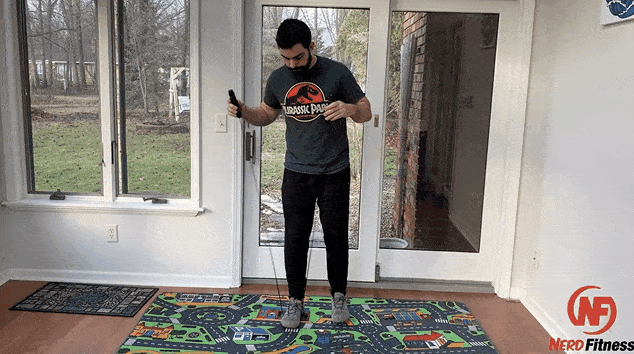
1) Take a front and side picture – My favorite method. Stand in front of a mirror in a bathing suit or your underwear with your cell phone camera and take a picture.

Then turn to the side and take another picture of your profile view. Just take the picture, hide it in a folder on your computer, and add to it once a week.

You live with yourself (duh), so it’s tough to notice changes on a day-to-day basis. However, if you have two months of week-to-week photos to look back on, you’ll be able to tell if your body is transforming in the right way.

2) Take body measurements – Go to a craft store and buy a cheap tape measure or buy one of these self-help tape measures. Make sure your measurements are taken under the same conditions each time.

Also, make sure you measure the same location each week – kind of weird, I know, but I pick freckles on my arms and legs so I know exactly where to measure each week.

Take a circumference measurement at each of these spots and write it down:

  • Neck (for most people, this is the thing that connects your body to your head).
  • Shoulders (both arms down at your side, at the widest point from shoulder to shoulder).
  • Chest (lift up your arms, wrap the tape measure around your chest, just above the nipple, and then lower your arms).
  • Bicep (either left or right, but be consistent).
  • Waist (at the belly button for consistency).
  • Hips (measure the widest part of your hips).
  • Thigh (left or right, but pick the same spot on your thigh each week).

3) Measure your body fat percentage – This one is a little tricky depending on your resources and financial situation.

Your best bet would be to purchase a simple body fat caliper if you’re strapped for cash.

If you want to be more accurate, pay $40-60 per visit and get your body fat tested at a Bod Pod Location – a wise investment once a month (or every other month) to make sure you’re on the right path.

I am NOT a fan of body fat calculators that are built into your scale as I find them to be wayyyy too hit and miss.

Important info about body fat percentage tracking: no test is truly 100% accurate, and the specific number isn’t nearly as important as how it’s changing from month to month.

You can at least make sure you measure it the same way each time to measure if it’s trending in the right direction.

What Should I Measure for Weight Loss Progress? (Your Food)

What should you track for weight loss? All the different foods you eat, like found in this picture.

Are you aware of how many calories you eat on a daily basis? When I talk to somebody who is trying to gain weight/lose weight, the response is the same: “I eat enough for my goals, but I’m not getting results…I guess it’s genetics!”

Unfortunately, 99% of the time, it’s usually ignorance and not genetics. It’s a subject we tackle in-depth in the article “Why can’t I lose weight?

Unless you’ve taken the time to actually count calories for a few days of your normal eating schedule, you probably have no freaking clue how many calories you eat!

Want a rough idea on the number of calories you should be eating? Calculate your caloric needs right here.

Batman stoked you want to track your calorie intake.

You CAN’T outrun your fork – 80% of your successes or failures will be a direct result of how you eat.

Although the quality of your calories consumed is incredibly important, the quantity of calories you consume is the first thing that needs to be fixed.

Think of your stomach as a muscle that adapts to its surroundings. If you continually shovel 4000 calories down your throat, your body will start to crave 4000 calories even though it doesn’t need that many.

Most people eat the same few meals over and over again on a weekly basis – I do. For that reason, I don’t think it’s necessary for you to track ALL of your calories EVERY day for months and months. However, I think spending a week writing down every calorie is incredibly important for your education and awareness on what you’re eating.

I’m talking every freaking calorie: that half of a Kat Kat bar at Judy’s desk when you stopped by to grab some cover pages for your TPS reports, the handful of M&M’s you ate while watching 30 Rock reruns on Netflix, the five cans of Coke you drank while finishing up that late night project, and the six beers and three slices of pizza you crushed to celebrate afterwards.

Every. Single. Calorie.

Once you have an idea of how much you eat regularly, take a look in the mirror. Do you like how you look? If so, GREAT! Keep doing what you’re doing.

If you’re not making progress AND you’re tracking your calories, congrats! No, your body isn’t broken. You need to get better at tracking. Consider getting a food scale, and making sure you have your portion sizes correct!

TO LOSE WEIGHT: Start by eating slightly less than you’re used to (so you’re not miserable), and training your stomach to expect less. You can also look into Intermittent Fasting.

Once you have your numbers under control, you can start making some other healthy changes.

We’ve actually factored all of this stuff in, and created the 10-level Nerd Fitness Diet – pick the level you’re comfortable with, then follow the instructions in our strategy guide (free when you sign up in the box below), and level up your nutrition (and your physique) permanently!

I understand writing down your calories can be a pain in the ass, which is where sites like MyFitnessPal come in handy. They all have massive food databases that allow you to simply plug in what you ate (Big Mac, one apple, a gallon of Ben & Jerry’s ice cream, etc.) and it keeps track of calories, protein, carbs, and fats for the day.

If you eat out frequently, you’ll have to do some research – go to the restaurant’s website and they’ll probably have nutritional information on there. If they don’t have it online, do your best to estimate by picking a similar meal option on one of the sites listed above and use its meal information instead.

It doesn’t have to be perfect, but tracking your food for just a few days could be one of the most eye-opening experiences you have when it comes to getting in shape.

Write it down, sucka!

For more help on counting calories, check out our guide on “calories in, calories out.”

How do you know if you are making progress in the gym?

This book is full of data, which will help with tracking your progress.

“Would you tell me, please, which way I ought to go from here?”
“That depends a good deal on where you want to get to,” said the Cat.
“I don’t much care where–” said Alice.
“Then it doesn’t matter which way you go,” said the Cat.

When you exercise, do you know what you need to do to be better? Do you know exactly what you’re going to do and how long it should take you?

Or do you kind of wander around the gym like a lost sheep, trying to figure out which machines look fun to use that day? If you’re serious about getting in shape, you need to start tracking your workouts.

Think of it like racing your ghost in Mario Kart: when you can see how you did last time, you know exactly how much better you need to be this time!

Lifting at the gym can be like racing against yourself in Mario Kart.

Here’s how to track your workouts:

  1. If you did 3 sets of 10 push-ups last week for a total of 30 push-ups, you need to be able to do 31 total push-ups this week to be stronger.
  2. If you did squats with 135 pounds last week, this week you better be squatting 136 pounds or more
  3. If you did 3 pull-ups last week, you know you need to get to 4 this week if you want to be stronger.

Have a plan, know what kind of results you need to get in order to be better today than you were yesterday, and then GET THERE!

You can certainly use any of the sites listed above for diet tracking to keep track of your workouts too, but I’m a huge fan of strength training, so I just track my workouts in Evernote. It’s this simple tracking method that got me to deadlift 400+ pounds.

I always know exactly how I did in my last workout so that I know what I need to do in this workout to get stronger.

I’ve been working with an online fitness coach for 5+ years – he can see my progress and then create the next workout that is sliiiightly more difficult.

As we’ve learned from the Spartans, “appearance is a consequence of fitness.” If you are focusing on getting stronger and faster, taking a more active role in how you eat, and you are consistently tracking your progress to make sure you are heading in the right direction, you WILL get the results you’re after.

A quick note: strength training has transformed my life and the lives of every success story at Nerd Fitness. If you want to transform like them, and you’re interested in strength training but don’t know HOW to get started, we’re here for you!

Walking into a gym can be intimidating, especially if you’re not used to using the free weights section. Knowing how to eat for your body type and goals can be overwhelming too.

We remove all of that guesswork in our 1-on-1 Coaching Program, where our coaches get to know our clients, build custom workout programs for them, help adjust their diet in a way that doesn’t make them miserable, and gets the permanent results!

You can schedule a free call and learn more over on our the coaching page by clicking below:

Success Stories of People Who Tracked Their Progress

We’ve had some incredible success stories here at Nerd Fitness.

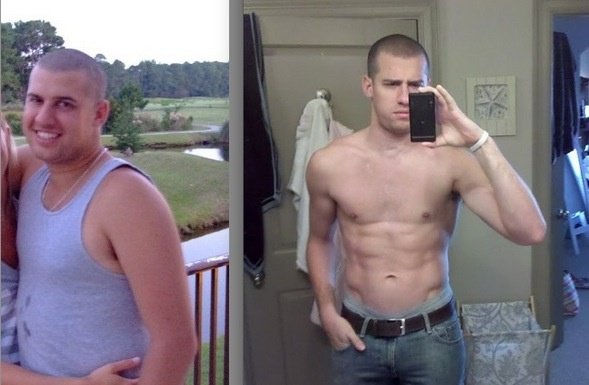
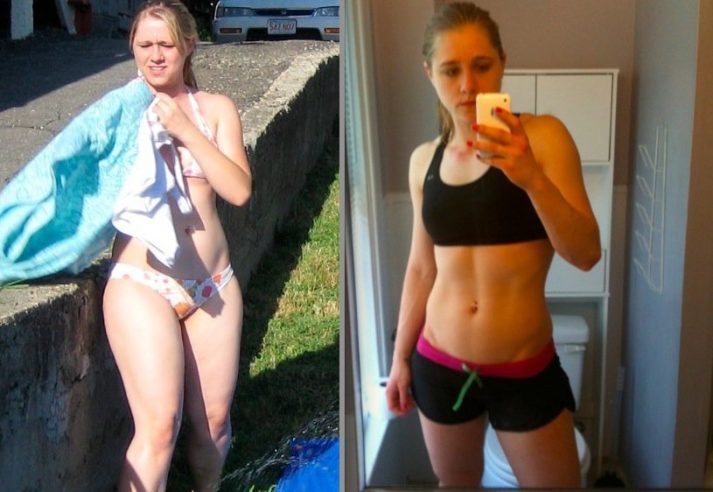
Guys like Saint who dropped 60 pounds of fat and got in shape for his wedding:

Saint tracked his way to a six-pack.

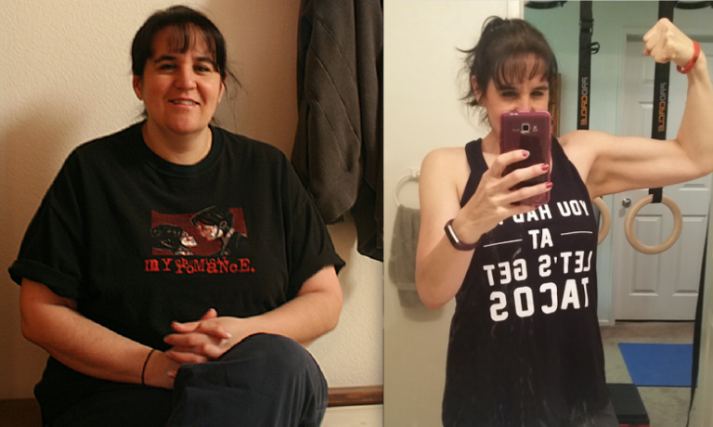
And women like Staci who started strength training and transformed her life:

Staci loves to track her food, workouts and progress.

Or Leslie a single mom who lost 100+ pounds since she started her Journey with Nerd Fitness:

How did Leslie transform? By tracking all her food and workouts.

These are just three examples of hundreds and hundreds I could share with you.

Some people gained strength and muscle while others lost tremendous amounts of weight and body fat; despite the differing goals and vastly different results, they all made one specific change that helped them truly get the results they wanted:

They wrote everything down: their measurements, their food intake, and their workouts.

If you’re serious about making changes to your life and getting in shape, I cannot stress enough the importance of tracking your progress, and I don’t mean just stepping on the scale every morning and freaking out every time it goes up 1/10th of a pound. I’m talking about a plan that allows you to find and stay on the right path.

Luckily, I’m here to help you start putting these practices in place TODAY.

I bet you’re here because you’re interested in transforming and losing weight like Saint and Staci and Leslie above. I know how tough this stuff is – it’s not just KNOWING what to do, but ALSO knowing how to do it correctly and sticking with the plan for months.

There’s nothing worse than walking into a gym and not knowing what you’re doing, or spending months training only to realize that you’ve been training the wrong way the whole time! K

Knowing how to exercise, and then getting yourself to actually follow through with the program long enough to get permanent results is brutally difficult.

If you’re ready to cut through the noise and you’re looking for guidance, accountability, and personalized attention, check out our 1-on-1 Coaching Program! We’ve been helping busy people like you (and Leslie above, a coaching client!) get results in a healthy, sustainable, non-miserable way.

You can learn more about our coaching program by clicking on the image below and scheduling a free call with us to learn more:Nerd Fitness Coaching Banner

Your turn:

How are you tracking your progress?

Have you made adjustments to your plans after tracking your results?

Do you have any questions on how to properly track your body, food, or workouts?

That’s what I’m here for. Well, that and comedic relief.

Let me know in the comments!

-Steve

PS: If you’re looking for EVEN MORE instruction and guidance, check out Nerd Fitness Prime

Nerd Fitness Prime contains at-home exercise routines, live-streamed workouts with NF Coaches, a supportive online community, group challenges, and much more!

Plus, you can even chat with me in our private Discord group!

See you in there?

###

pencil, numbers, tape, flatlay, the notebook

Be Nice and Share!
This post was originally published on this site

Originally Posted At: https://breakingmuscle.com/feed/rss

Put your carb timing to use.

Carbohydrates are a macronutrient, meaning a larger nutrient class, which (for the most part, must be obtained externally. Carbohydrates are often mistakenly thought of as sugars.


Yes, sugar is a carbohydrate. However, spinach is predominantly water and fiber but is also considered a carbohydrate. In short, understanding what carbohydrates are, along with their classes and application, can guide a gym-goer or athlete to consume the carbs that will help them to perform their best.  

read more

Be Nice and Share!
This post was originally published on this site

http://www.marksdailyapple.com/

alternatives to burpees
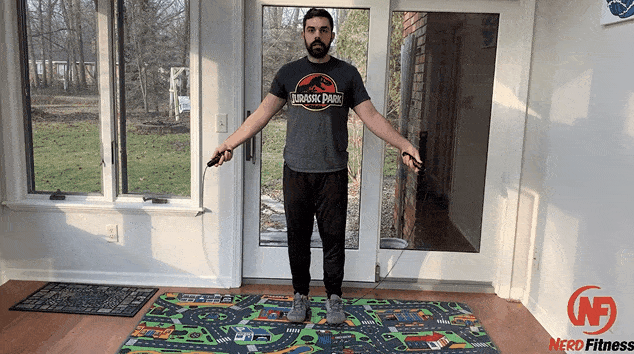
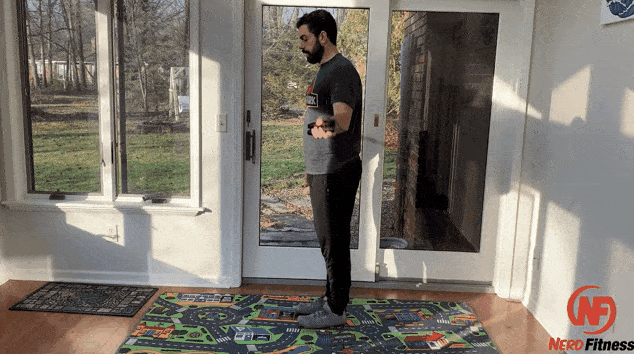
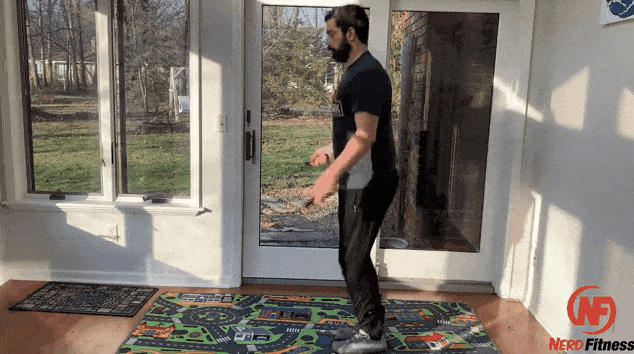
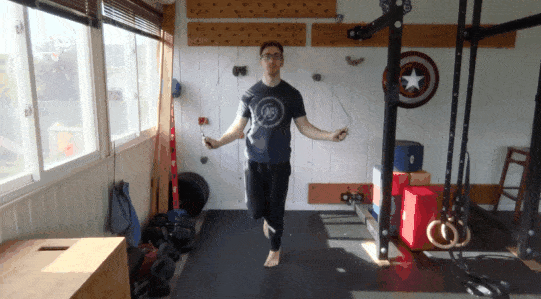
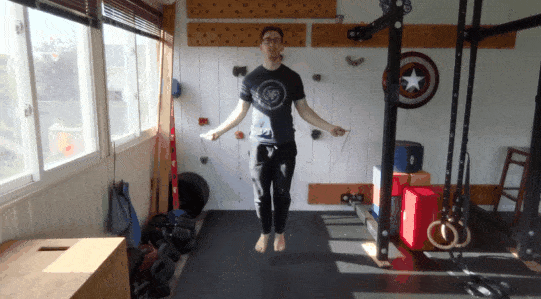
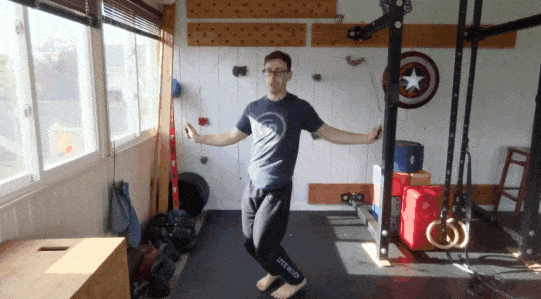
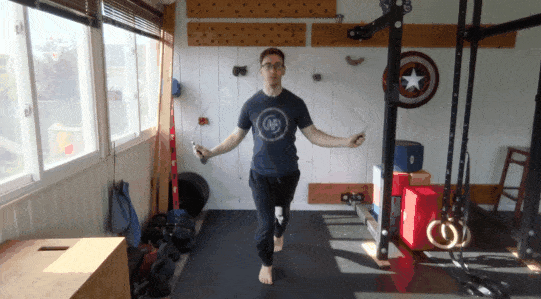
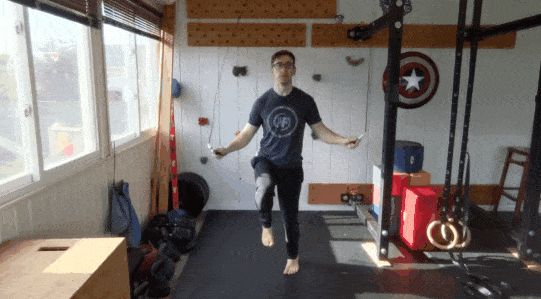
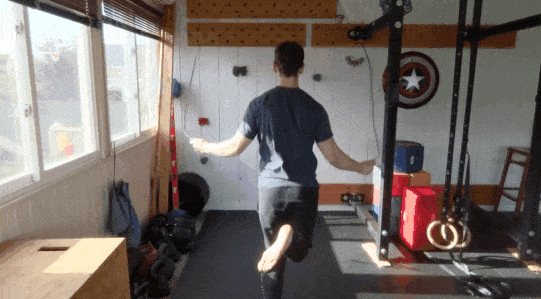
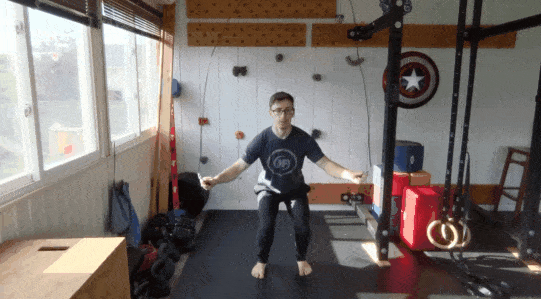
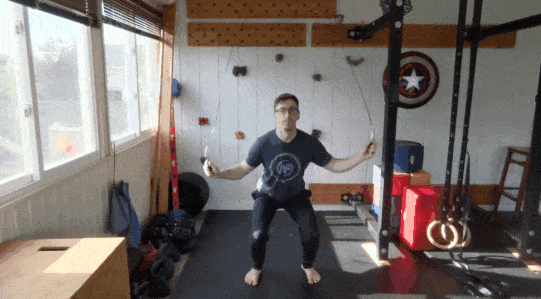
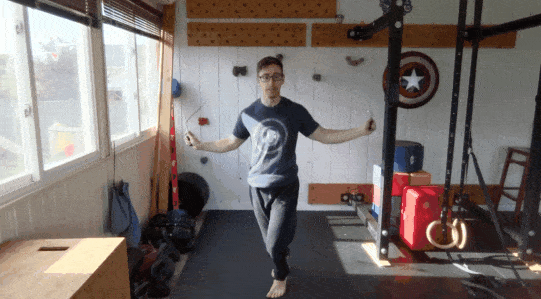
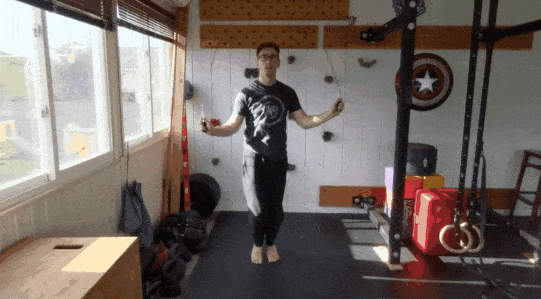
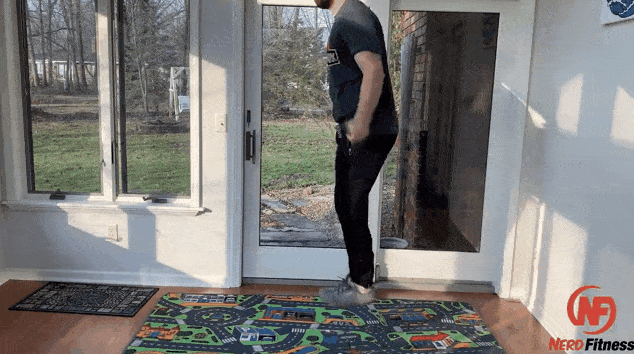
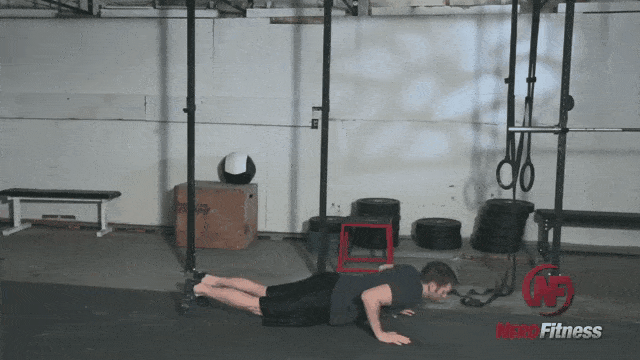
Whenever I’m strapped for time and equipment and still need a solid workout, I turn to the burpee. Burpees are bodyweight exercises, and thus require no equipment or weights. They are full body movements that engage every muscle group, require only as much space as you need to do a pushup, and can be done anywhere. You can do them slowly and methodically, or quick for a sprint-like workout. If you’re ever outdoors and need to warm up fast, a quick set of 15-20 burpees will get your body temperature up faster than anything. The pros go on and on.

Now, I don’t typically bake burpees into my week-to-week workouts. Instead, I resort to a burpee workout when I’m crunched for time, don’t have access to a gym or nice outdoor experience, or am otherwise not feeling a full-on gym workout but still want to train.

The way I usually do them is to go all out for the first 20. Catch my breath (maybe 10-20 second break). Go all out for another 10. Catch my breath. And repeat in sets of 10 reps, until I reach 100 or 150 or 200. So for me, burpee workouts are very intuitive. Rather than go for predetermined reps or rest periods, I let my body determine that stuff in real time. Give it a try. You’ll like it, or hate it, or both.

Reasons you Might Want an Alternative to the Burpee

While burpees are great for all the reasons I listed above, there are some reasons you might want an alternative movement:

  • Burpees are demanding and relatively complex. Many people start making technique mistakes toward the end of a burpee workout because they’re so fatigued and that can lead to injuries. A crisp, clean burpee is beautiful and safe and effective, but if your knees start caving in on the landing or your lower back starts dipping toward the ground and your elbows start flaring out on the pushups, you’re not just selling your own training short — you’re putting yourself at risk.
  • Burpees involve three movements people might simply not be able to do. Squats, even bodyweight ones, take a reasonable amount of mobility, flexibility, and coordination. Pushups can be a surprisingly demanding strength exercise when performed with correct form, and many people haven’t jumped in years. Stringing them all together for reps as a conditioning workout is asking a lot.
  • Burpees get old. Sometimes the last thing you want to do is another regular-old burpee, but you still like the training effect they offer.

So, here is a series of alternatives to burpees that have similar qualities and produce similar results as the burpee. See if you can try them all. Primal Health Coach Brian demonstrates all of these moves in the video at the bottom of this post.

1. Squat Thrusts

Think burpees without the pushup and the jump. Squat thrusts actually birthed the modern burpee. They involve squatting down to place hands on floor, shooting the legs back to assume the plank position, shooting them forward, then squatting back up. They’re really, really simple and for the first ten or so you’re thinking “These are too easy.” Keep doing them, though, and suddenly you’ll realize you’re getting a great workout.

2. Murpees

To do the murpee, or modified burpee: instead of shooting your legs back, dropping into an explosive pushup, leaping to your feet and springing upward, and repeating it as quickly as possible, slow everything down and rely on strength and balance instead of sheer momentum.

  1. Slowly lower yourself into a squat until you can place your hands flat on the floor in front of you.
  2. Slowly step back one leg at a time to assume the pushup position.
  3. Do a pushup (some people omit this step).
  4. Slowly, deliberately bring one leg forward, touching knee to elbow and holding it there for a moment. Draw the other leg forward. Place your feet flat on the floor until you’re in the bottom squat position. Each rep, alternate which leg you bring forward first.
  5. Either stand up or jump up. The advantage of doing everything slowly means you can muster more force for the jump and land safely.
  6. Repeat.
  7. Everything is slow and controlled and deliberate.

3. 180 Degree Burpees

Do a regular burpee with a jump, only instead of jumping in place, turn 180 degrees. Alternate which direction you turn and don’t get sloppy with the landing; the rotational momentum exerts novel forces on your body and requires greater trunk (and really full-body) stability. Beyond that, do these offer a unique training effect over regular burpees? Who knows. These sure are fun, though.

4. Broad Jump Burpees

Again, it’s a regular burpee with a jump, only instead of jumping in place, you’re broad jumping as far forward as you can. Be sure to do these on a comfortable surface with decent traction. Grass? Good. Wet muddy grass? Probably not. And do fewer of these than you would regular burpees. The maximal effort broad jump really takes a lot out of you and increases the degree of risk.

5. Jumping Jacks

You haven’t done these in years, right? Jumping jacks probably remind you of gym class, back when you’d do them half-seriously. Today, try doing them for real. Actually jump. Get your hands up there like you mean it.

6. Russian Lunges

Bodyweight lunges: easy, right? Too easy to approach the conditioning potential of the burpee. But what about jumping lunges? That’s exactly what a Russian lunge is. You lunge with one leg, then spring up and land in a lunge with the other leg forward. Keep doing it, alternating each time. You can even do this while holding a weight plate; just keep it lighter than you’d think would be necessary.

7. Get Up, Stand Ups

I’m not sure if this is the right name, but it sounds good. You start sitting down on the ground, legs straight, knees together, back tall, hands flat on the ground at your sides. Pop up by pushing off the ground with your hands and bringing your feet underneath you to stand up (throw in a vertical jump here to spice things up). Quickly return to the starting sitting position — without using your hands, if possible — and do it all over again.

8. Kettlebell Swings

If you’re looking for a self-contained comprehensive workout that will get you stronger, more explosive, and better conditioned without being a burpee, look no further than the kettlebell swing. Sure, you need a piece of equipment — the kettlebell — but I’d argue that the swing is probably safer to do repeatedly for high reps than the burpee. For every one burpee you’d normally do, do three swings.

9. Sandbag Shouldering

This is another option that requires a single piece of equipment, but it’s one you can make yourself by spending a few bucks at the surplus store and stuffing it with contractor bags filled with sand. Sandbag shouldering is exactly what it sounds like: pick the sandbag up and hoist it up to your shoulder, lower it back to the ground, repeat with the opposite shoulder. Throughout the entire movement, maintain as neutral a spine as possible. It’s essentially a deadlift (picking it up) and power clean (hoisting it up) hybrid exercise that hits almost every muscle in the body. And if you want to throw in some pushing work, you can overhead press the thing once it’s on your shoulder.

No sandbag? Fill a duffel bag with soft weighted objects – emphasis on soft so that you don’t conk yourself in the head.

10. Jump Rope

For pure conditioning’s sake, few activities beat the jump rope. It’s a mainstay in boxing, MMA, kickboxing, wrestling, and even swimming and endurance running training programs for the simple reason that it just works. Of course, jumping rope is a miserable way to improve one’s conditioning, but that’s a common problem with methods that actually work. Another advantage is that jumping rope is self-limiting. It’s really hard to jump rope with poor technique or hurt yourself doing it because you’ll just catch the rope with your foot or slam it into your shins. If you do it wrong, wrong enough to get into trouble, you won’t be able to actually jump rope.

11. Tabata Squats

Think air squats are pointless and way too easy? Okay, guy. Try this out: just squat down and back up as many times as you can in 20 seconds, rest for 10 seconds, and repeat the sequence 7 more times.

12. Mountain Climbers

Sort of like running in place from the pushup position, mountain climbers can destroy you if you’re not careful. Your abs will be sore, your chest will pound, your stamina will increase. If mountain climbers on the ground are too tough, try them on an incline; place your hands on the couch, a coffee table, a bench, or a sturdy chair.

13. Shoulder Tap Planks

Assume the plank position: arms straight, hands flat, body forming a single unbroken line. Then, ever so slowly, tap your left shoulder with your right hand. Slowly place your right hand back on the ground. Now, tap your right shoulder with your left hand. Return it to rest on the ground. Keep alternating shoulder taps. Go slow and feel the tension in your trunk muscles. Tougher than you thought, eh?

14. Thrusters

Hold two weighted objects at your shoulders. Bend your knees and lower into a squat, and rise back up to standing. Once your knees are straight again, go right into a shoulder press. These get your heart pumping in no time.

15. Sandbag Clean & Press

Start in a squat position with the sandbag at your feet. Bending at the elbows, flip the bag upward to touch your chest. Then squat and raise the sandbag over your head. Finish by dropping the sandbag onto the ground, and repeat.

Now, watch all of the moves in action!

Whether you’re looking to improve mobility, strength, conditioning, or overall fitness, the burpee is a fine choice. But it’s not the only one, or even the best one. If you’re getting tired of burpees, or just want to try something new for a change, give the exercises from today’s post a trial run. I think you’ll like them. Or maybe you’ll hate them, which means they’re probably working.

Let’s hear from you down below. Have you done any of these exercises? How do they compare to burpees? Got any other suggestions for people sick of the burpee?

Thanks for reading, everyone. Take care.

Prefer listening to reading? Get an audio recording of this blog post, and subscribe to the Primal Blueprint Podcast on iTunes for instant access to all past, present and future episodes here.

steak_sauce_640x80

The post 13 Alternatives to Burpees for When You’re Tired of Doing Burpees appeared first on Mark’s Daily Apple.

Be Nice and Share!
This post was originally published on this site

http://www.thealternativedaily.com/

Plastic water bottles not only consume petrochemicals and pollute the ocean, but they may contain a dangerous chemical that has multiple harmful effects on your health. Now more than ever, it’s important to ensure your immune system is at its best. Read on to discover the truth about your plastic water bottle and how to […]

Be Nice and Share!
This post was originally published on this site

http://www.marksdailyapple.com/

keto cancer

If you have your own success story and would like to share it with me and the Mark’s Daily Apple community please contact me here. I’ll continue to publish these as long as they keep coming in. Thank you for reading!

Folks, I have been grateful for every story that has come my way over the years. It’s an incredible privilege being on the receiving end of your reflections and evolutions, and they are why I’ve kept at it all these years—knowing the message and information have made a difference in people’s lives. I appreciate every single one. This success story comes from Registered Dietician, Primal Health Coach, and cancer survivor Martha Tettenborn. She takes us through her journey from learning to advise a low-fat, high-carb lifestyle to beating cancer using Primal principles. Enjoy! —Mark

It has become my passion to share the power of nutritional interventions for improving health overall, but especially in the treatment of cancer. I have come to this from personal experience…

I studied at University in the early 1980’s to become a dietitian, because I had an overwhelming interest in nutrition and wanted to be in a helping profession. At that time, the cholesterol and saturated fat theory of heart disease and overall health was considered cutting edge science and we were fully indoctrinated into the low-fat approach to almost all health issues. The only exception was using a high calorie, high protein approach to under-nutrition (such as with failure-to-thrive or cancer patients), and in that situation, we recommended using sugar or honey, butter or cream, and other added fats and simple carbs to increase the caloric density of foods.

I have been a Registered Dietitian for over 30 years, basing my practice for most of that time on the standard paradigm of low fat foods, heavily carb-based meals, fruits and vegetables, lower fat meats. Personally, our family spent many years eating no red meats, using turkey “bacon,” ground chicken and other processed foods, but avoiding beef and pork – and feeling virtuous while doing that.

Professionally, I have spent the last 20 years working in geriatrics, contracting my services to long term care facilities. I care for many residents with the end stage consequences of the Standard American (and Canadian) Diet – diabetes, strokes and of course, dementia, both vascular and Alzheimer’s. It is rare that a resident has simple osteoarthritis or other simple wearing out of old age. Most of them are younger and slowly dying for years with the chronic “diseases of civilization.”

About 10 years ago, I started down the path of alternative nutrition, starting with Seth Robert’s ideas, called the Shangri La Diet, using flavourless oil shots to impact on appetite control in the brain. I was successful in losing about 18 lbs that had been quite stubborn prior to that time. Shortly after that, I found Mark’s Daily Apple and the concept of the Primal Diet, eating an Ancestral pattern that suited our physiology. It resonated so strongly with me that this was correct, although it went against all of my training. The strength of the science won me over; however, I spent hours on the MDA forums, reading scientific discussions, success stories, recipe and meal planning ideas and journals from the MDA community.

About 3 years ago, I decided that I wanted to take my interest in low-carb, high-fat (LCHF) and start up a private practice. In order to update my knowledge, I completed the Primal Health Coach certification – an excellently presented and in-depth course. As an RD and member of a Registered Health Profession, with a regulatory college, I had to establish a private practice that met with the regulatory guidelines of my
profession, so I started Primal RD in July 2017. Because of my counter-conventional approach, I have had no support from local doctors and getting my practice going in my small Ontario community has been slow.


Instantly download your copy of the Keto Reset Diet Recipe Sampler


Last summer, I discovered the presence of a large ovarian cyst in my abdomen and had it surgically removed in late September. The cyst was a simple fluid-filled balloon, but huge, holding 1.5 litres of fluid (over 50 oz – 6 cups!). Despite nobody expecting it, it turned out to be Stage 1 high grade serous carcinoma – ovarian cancer. It had been intentionally ruptured to make laparoscopic removal possible, so that was considered a “spill” and a second surgery for hysterectomy and chemotherapy were highly recommended.

I was 58 years old and in stellar health prior to this diagnosis. In fact, a great deal of my self-identity was wrapped up in being “super-healthy” and this sudden change to “cancer patient” was a huge crisis for me. However, as a naturally optimistic and curious person, I headed down the rabbit hole of research to determine what I could do for myself to impact on my health journey and return myself to my formerly stellar good health.

What I discovered was startling. That cancer is no longer considered by some to be a genetic disease, but rather a disease of disordered metabolism. That this information was first discovered and described by Otto Warburg in the 1920’s, for which he received a Nobel Prize. That this scientific information was then lost by virtue of it being of German origin, and the Germans lost the Second World War. And that this critical understanding of the metabolic nature of cancer has only been brought back to light in the past 10 years through the work of dedicated researchers who are working outside of the medical establishment.

Cancer, although it is thought of as a genetic disease, and that it is thought of as many different diseases, has one almost universal underlying common characteristic. Almost all cancers have damaged and malfunctioning mitochondria, the fuel-processing organelles that create the energy for all cellular life. Instead, they produce energy by the ancient process of fermentation in the cytoplasm of the cell, an inefficient process that is entirely dependent on glucose or glutamine for substrate. Cancer cells have no ability to burn fatty acids or ketone bodies. That’s their Achilles heel.

keto cancer

By using a ketogenic diet throughout my chemotherapy, I was able to deprive any remaining cancer cells from having access to elevated circulating insulin or glucose. And by producing ketones through the diet and through fasting for 72 hours each chemo administration, I was able to starve the cancer cells of their preferred fuel, while putting my body further into ketosis, thus supplying my healthy cells with adequate fuel. My healthy cells down-regulated their metabolism in response to the fasting, going into “stealth mode” and escaping notice by the chemo drugs (essentially poisons aimed at fast-metabolizing cells). This turned out to be powerfully protective in preventing most side effects. I had no nausea, emesis (vomiting0, gastrointestinal damage, nerve damage, tingling or neuropathy, no joint or muscle pains. I did experience hair loss and bone marrow suppression, the 2nd week effects of the chemo, but these were moderate, not requiring any additional medication. Overall, I sailed through chemo with a few “low energy” days, but mostly it was life as normal, just with no hair. This was decidedly NOT the expected course for this type of chemo.

A friend said to me when I was starting down the cancer path that it appeared that everything in my life to this point (becoming a low carb dietitian, the PHC certification, and my passion for researching health) had prepared me for this day – that I would be the “Keto Cancer Dietitian.” The idea stuck, and a passion for sharing what I had learned about how powerful nutrition can be in the cancer journey was born.

As I went through chemo, I started blogging about my experiences and my journey so that others could read my story and gain hope and understand the power that we each have to impact on our own health, even in the face of daunting obstacles like a cancer diagnosis. I write about my experiences at my website, Powerful Beyond Measure, at www.marthatettenborn.com.

I feel very blessed for so many reasons. Firstly, that I had found the low carb Primal way of eating and had a solid basis of good health prior to starting this cancer journey. Secondly, that I had the knowledge and skills to research the metabolic nature of cancer and implement specific nutritional interventions (namely ketogenic diet and therapeutic fasting) for impacting on the chemotherapy experience. And thirdly, that I am now able to share that knowledge with others so that we can change the cancer and cancer treatment experience for the better. I was not a helpless “victim” of cancer and I was not fighting a war against my cancer. I was an empowered and effective partner in my own healthcare, positively impacting my response to conventional treatment.

That’s what I wish to share with others.

Mark has been so generous to share his knowledge with the goal of changing lives and that’s what I hope to do as well, from the perspective of a Registered Dietitian, a Primal Health Coach, a lifelong “healthy eater” and a cancer survivor thriver. I’m just at the beginning of that journey.

Martha Tettenborn, RD
Owen Sound, Ontario, Canada

Golden_Collagen_640x80

The post Success Story: Traveling the Cancer Journey appeared first on Mark’s Daily Apple.

Be Nice and Share!
This post was originally published on this site

Originally Posted At: https://breakingmuscle.com/feed/rss

Fixing low estrogen in women enhances muscle recovery, strength, and performance.


read more

Be Nice and Share!
This post was originally published on this site

http://www.marksdailyapple.com/

The low-carb community was pretty pumped when coffee shops first started to serve sous vide egg bites. Until then, most breakfast options came between a couple of slices of a bagel or croissant. Coming in around $5 for two little egg bites, it was only a matter of time before people started looking for make-at-home versions.

Do You Need a Sous Vide to Make Egg Bites?

Let’s first put it out there that food cooked sous vide is delicious. The temperature is so precisely controlled that there’s virtually no risk of overcooking or undercooking, and for the most part, it’s a hands-off cooking method. Still, it’s cost-prohibitive for a lot of kitchens – you’re looking at a couple hundred dollars for a decent system, which is more than the average household wants to spend on an appliance they’ll use only occasionally.

The solution? These adorable little egg bites are not actually made in a sous vide, but instead in an Instant Pot. The end result is a light and fluffy egg bite bursting with flavor. Ideally, these egg bites would be made in a silicone egg mold, but they also turn out well in ½ pint mason jars. If you don’t have an Instant Pot, there is an oven modification below.

This recipe makes 10 egg bites (5 egg bites of each flavor) which are great for an on-the-go breakfast or protein-packed snack. Feel free to experiment with your favorite add-ins.

Instant Pot “Sous Vide” Egg Bites Recipe

Serves: 5

Time in the kitchen: 25 minutes, including 18 minutes cook time

Ingredients

  • 7 large eggs
  • 3 Tbsp. milk of choice (unsweetened and unflavored if you’re using non-dairy milk)
  • ½ cup chopped cooked broccoli florets
  • 1 oz. Crumbled Feta Cheese
  • 3 slices crumbled Cooked Bacon
  • ½ cup Chopped Spinach, cooked and drained well
  • Salt and Pepper
  • Primal Kitchen® Avocado Oil Spray

Directions

Combine the eggs, milk and a pinch of salt and pepper. For a fluffier egg bite, swap out the milk for ¼ cup of cottage cheese. Blitz them together in a blender, and separate the beaten eggs evenly into two bowls.

In one bowl, add the chopped broccoli and feta and whisk to combine. In the second bowl, add the crumbled bacon and spinach and whisk to combine.

Liberally spray the insides of your mason jars with Primal Kitchen Avocado Oil spray. Each bowl of egg mixture will make 5 egg bites. Scoop out about ¼ cup of the feta broccoli egg batter into the jars, until the mixture is equally divided between 5. Do the same with the bacon, spinach, and egg mixture. If you are using an egg mold, fill the egg molds until they are a little more than ¾ of the way full.

Cover the mouth of each mason jar with a small piece of foil. If you are using an egg mold, cover them with the accompanying lid (if oven safe) or with foil.

Add 1.25 cups of water to the Instant Pot, and place the metal trivet into the pot. Nestle 5-7 mason jars into the Instant Pot on top of the trivet. Place the lid on the pot and select the “Pressure Cook” option. Set it for 10 minutes at Low Pressure. Once the cooking cycle is over, allow the pressure to naturally release for 6 minutes before moving the nozzle to the vent position. Carefully remove the lid and jars from the Instant Pot and allow them to rest for 1-2 minutes to cool slightly. Carefully run a knife around the egg bite and give the jar a gentle shake to release the egg bite from the jar. Add an additional ¼-½ cup of water to the bottom of the Instant Pot and repeat with the remaining jars.

Sous Vide Egg Bites – Oven Method

If you do not have an Instant Pot, you can fill the silicone egg molds and place them in a large baking dish or dutch oven filled with ?-½ full of water. Cover the mold with foil and bake the eggs at 325 degrees for at least 40 minutes, or until the eggs are firm (note that you cannot use mason jars in the oven).

Nutrition Information, per egg bite (recipe makes 10):

Calories: 79
Total Carbs: 0 grams
Net Carbs: 0 grams
Fat: 6 grams
Protein: 6 grams

Chocolate_Coconut_640x80

The post Instant Pot “Sous Vide” Egg Bites Recipe appeared first on Mark’s Daily Apple.

Be Nice and Share!
This post was originally published on this site

http://www.thealternativedaily.com/

Many of us reach for the cough syrup whenever we get seasonal ills and chills but ever since I learned about their potentially harmful ingredients and questionable efficacy, I avoid these toxic pseudo-medicines like the plague. Instead, I head out to my backyard tea garden and pluck fresh herbs, which nourish and heal my body naturally. […]

Be Nice and Share!
This post was originally published on this site

Originally posted at: http://www.nerdfitness.com/

A LEGO boxer, who clearly jumps rope, fighting some stormtroopers.

Let’s learn how to jump rope!

Even if you’re stuck at home, a jump rope can provide a great cardio workout.

You just gotta know what you’re doing so you don’t keep hitting yourself in the shins.

Have no fear, even if you’ve never touched a jump rope before, we’ll get you started. 

We specialize in helping people train from home, with little to no equipment whatsoever. Today, we’ll share with you a beginner jump rope workout routine that you can do anywhere. 

If you’re in a hurry, sign-up for our free weekly newsletter and we’ll send you PDFs of our “Work Out at Home” guides!


Here’s what we’ll cover:

Cue the Rocky theme song… 

…and let’s do this!

How Do I Jump Rope? (Video for Noobs)

Coach Matt, from our Online Coaching program, guides you through learning how to jump rope in the video above.

Matt breaks down jumping rope into three parts: 

  1. The Jump
  2. The Arm Swing
  3. Timing

First up…

#1) The Jump

First, let’s just practice jumping.

Stand tall, feet about hip-width apart. 

Then, practice jumping up and down in one spot.

When first learning how to jump rope, just focus on the hop at first, as shown by Coach Matt here.

Most of your power will come from your ankle and toes. It’s really more of a “hop” than jump. 

If you have trouble with this, Coach Matt recommends drawing some type of “X” or mark on the ground so you stay in one place. 

Another tip from Coach Matt: keep a little tension throughout your body. If you’re too loose, you might flail around a bit and get off your mark. 

#2) The Arm Swing

Your arms will remain mostly stable when powering the rope. We want to keep the movement narrow, mostly coming from your wrists.

As you can see here, to jump rope, control of the rope really comes from your wrist.

The name of the game with jumping rope is “in control.” Swinging from the wrists will help you maintain control of the rope. 

Resist trying to rotate with a lot of elbow movement (try to keep them stable instead). 

For the position of your arms, you want your hands out roughly at the height of your hips. Your arms will go downward at about a 45-degree angle. 

To start, you might even just try getting the rhythm down with one hand:

When learning to jump rope, just practice the arm swing without jumping, as shown here by Coach Matt.

Don’t even worry about jumping at first. 

Once you’re comfortable swinging from both hands, it’s time to think about putting it all together.

#3) Timing

When you first get going, go slow with the arms, and do two hops per one rope revolution. 

It looks like this:

When you start jump roping, you may want to do two hops per arm swing, as shown here.

When starting with this position, you might find your elbows flailing out a bit since they’re moving slow. So you’ll have less wrist control.

That’s okay. 

Once you get comfortable with the rhythm, try one hope per rope revolution to tighten it all up. You may find it easier to keep your arms and elbows stable moving faster. 

Here’s a great point from Coach Matt: as a beginner, the rope itself will be your coach.

If you hit your shins or toes with the rope, something went wrong. Maybe you hopped too high or your elbows went a little off.

No problem. Just accept that the rope is providing you with immediate feedback, and try again.

Getting the rhythm and timing down with a jump rope can be tricky, so hang in there and be patient.

Once you get the feel of it, it’s time to do some workouts. 

The Nerd Fitness Jump Rope Workout (With Video Tutorial)

Coach Matt walks you through 5 different levels of difficulty for your jump rope workout. 

If you’re familiar with High-Intensity Interval Training, you’ll notice it’s the strategy for our beginner jump rope workouts.

Let’s go over each level now.

Jump Rope Workout Level 1:

  • Single Unders: 30 Seconds
  • Rest: 30 Seconds
  • Single Unders: 30 Seconds
  • Rest: 30 Seconds
  • Single Unders: 30 Seconds
  • Rest: 30 Seconds
  • Single Unders: 30 Seconds
  • Rest: 30 Seconds
  • Single Unders: 30 Seconds
  • Rest: 30 Seconds

Total time: 5 minutes

If this is too much, feel free to increase your rest period. Meaning you can rest for 45 seconds, no problem. 

For the next level, we’ll do the same moves, but we’ll increase your single under duration

Jump Rope Workout Level 2:

  • Single Unders: 45 Seconds
  • Rest: 15 Seconds
  • Single Unders: 45 Seconds
  • Rest: 15 Seconds
  • Single Unders: 45 Seconds
  • Rest: 15 Seconds
  • Single Unders: 45 Seconds
  • Rest: 15 Seconds
  • Single Unders: 45 Seconds
  • Rest: 15 Seconds

Total time: 5 minutes

On Level 3, it’s time to mix in double unders.

Coach Jim showing you jump rope double unders

During our jump interval, you can do every other, so one single under followed by one single double under (1 jump, 2 rotations of the rope). 

If this is too tricky, do a double under for every four normal jumps.

Just try to keep it consistent, as this will help your rhythm. 

The mission with Level 3 is to get comfortable performing double unders.

Jump Rope Workout Level 3:

  • Single/Double Under Mix: 30 Seconds
  • Rest: 30 Seconds
  • Single/Double Under Mix: 30 Seconds
  • Rest: 30 Seconds
  • Single/Double Under Mix: 30 Seconds
  • Rest: 30 Seconds
  • Single/Double Under Mix: 30 Seconds
  • Rest: 30 Seconds
  • Single/Double Under Mix: 30 Seconds
  • Rest: 30 Seconds

Total time: 5 minutes

Now that you’re at Level 4, it’s all double unders, all the time. 

We’re going to focus on building power, so we’ll do intervals for 15 seconds, then rest for 45.

Jump Rope Workout Level 4:

  • Double Unders: 15 Seconds
  • Rest: 45 Seconds
  • Double Unders: 15 Seconds
  • Rest: 45 Seconds
  • Double Unders: 15 Seconds
  • Rest: 45 Seconds
  • Double Unders: 15 Seconds
  • Rest: 45 Seconds
  • Double Unders: 15 Seconds
  • Rest: 45 Seconds

Total time: 5 minutes

With our last workout today, we’re bumping up the duration of double unders to 30 seconds, then resting for the same time. 

This might be challenging. 

Jump Rope Workout Level 5:

  • Double Unders: 30 Seconds
  • Rest: 30 Seconds
  • Double Unders: 30 Seconds
  • Rest: 30 Seconds
  • Double Unders: 30 Seconds
  • Rest: 30 Seconds
  • Double Unders: 30 Seconds
  • Rest: 30 Seconds
  • Double Unders: 30 Seconds
  • Rest: 30 Seconds

Total time: 5 minutes

If single and double jumps get boring, have no fear.

We’ll cover additional exercises you can do to level up your jump rope game now. 

Feel free to mix and match any of the moves below into your workout.

After a while, your rest period might be normal hops, while your interval period can be one of these sweet moves. 

The 13 Best Jump Rope Exercises

This boxer never fights for his full body workout.

Now that you have the basics down on how to jump rope, let’s cover some moves so you can expand your workouts.

#1) The Single Under

A gif of Coach Matt showing you the single under, which is one hop per rope revolution.

This is the most basic jump rope exercise. One hop per rope revolution, both feet together.  

Get this down before you move on from here.

#2) Double Single Foot Jumps

A gif of Coach Matt hopping on one foot while jump roping.

Once you get the single under down, try hopping on one foot.

To really test your balance, jump twice from the same foot. 

An example beat would go left foot, left foot, right foot, right foot, with one rope revolution between. 

#3) Kick Out Jumps

Here, Coach Matt sticks out one leg for every hop with his rope.

Here, you’ll alternate taking one foot forward every jump. 

So while your left is down, your right foot will be kicking out.

You’ll hop and switch feet between rope revolutions. This is trickier than it looks. 

#4) Jump Rope Jacks

The upper body is doing normal jump rope swings, while the lower body does jumping jacks.

Your feet will act as they would in a normal jumping jack, jumping wide apart every other hop.

Your arms will stay as they would during a normal single under, so it’s more of a “half jack.”

#5) Twist Jumps

Coach Matt performing the twist jump, which has you rotating from the hips as you jump rope.

This jump rope exercise is all about rotating your torso.

Your feet will jump together, but will be rotating about 180 degrees from left to right, twisting from your hip.

Your shoulders will stay firm, which will keep the rope in place. 

#6) Skiers

Much like jump rope jacks, but with the legs going the other dimension, with one going in front and the other going in back.

The feet will land together for your skiers, but one leg will be in front and the other will be behind. 

You’ll alternate leg positions between jumps, in a scissor like motion. 

#7) High Knees

Coach Matt showing you the jump rope high knees, which has alternating legs bringing the knee up for hops.

Alternate jumping from one leg to the other with your hops. The trick here is to bring your knees up high as you do so.

#8) Butt Kicks

Coach Matt showing you the jump rope butt kicks, which has alternating bringing your foot back as far as you can for every hop.

These are much like your high knees, but in reverse, as you’re trying to bring your foot back to the point where it meets your glute (butt).

A good counter exercise for your high knees.

#9) Squat Jumps

Coach Matt doing jump rope hops while in a squat position.

If you want to really challenge your lower body, hold a squat position while doing your hops.

Your entire lower body will be engaged for this exercise.

#10) Squat Jacks

Here, you do normal jump rope jacks, but when you land, come down in a squat position.

Just like the name would suggest, here we are combining our squat jumps with jumping jacks.

To do it, perform jump rope jacks, but land in a squat position when your legs are kicked out wide. 

This will get challenging quickly.

#11) Criss Cross Jacks

Like jump rope jacks, but you cross your feet when bringing them together.

These are like jumping jacks, but instead of bringing your feet together, you cross one foot in front of the other. 

Your feet will go wide, then left in front of right, then wide, then right in front of left, then wide.

After some practice you’ll get the coordination down. 

#12) Jump Rope Figure 8

This has you rotating like the twist jump, but you bring your arms together to whip them around one side.

We’re gonna have fun with this one.

This exercise has you doing four normal hops, followed by four twist jumps.

Here’s the fun part: when you rotate, bring your arms together and have the rope do a revolution on the side you’re twisting away from. Alternate to the other side, combining your twist, hop, and whip.

Don’t feel bad if this takes some practice. This is starting to get into the “jump rope tricks” territory. 

#13) The Double Under

This gif shows Coach Matt doing two rope revolutions per single hop.

This is one of the more advanced jump rope moves, as you need to swing the rope under you twice per hop.

If you get this down consistently, you’re no longer a jump rope noob.

If you want someone to check your form or offer guidance with any of these jump moves, we’ve been doing this as part of Nerd Fitness Prime. Members take a video of their workout and upload it to our private Discord channel. 

A Nerd Fitness Coach (or maybe me!) can review it and let you know what we think.  


How Do I Choose a Jump Rope? (Type and Length)

This looks like a brown speed jump rope.

There are a couple of things to consider when choosing a jump rope: type and length.

Let’s discuss both.

There are generally three types of jump ropes you’ll run into.

#1) Speed Ropes

The speed rope pictured here is the most common type of jump rope.

This is the most common type of jump rope you’ll come across. It’s also what Coach Matt uses in his videos above. 

Speed ropes are lightweight, which will help when doing certain moves like the double under.

Coach Matt’s speed rope has a plastic covering, but occasionally you’ll find these with just the wire. This makes them even lighter. The danger here is that if you hit yourself…it’s with a bare wire…

Ouch.

WOD Nation has a decent coated speed jump rope that isn’t sold out (unlike a lot of other gym equipment).

#2) Beaded Ropes

The beaded jump rope shown here is likely what you came across during grade school.

This rope is probably what you used as a kid on the playground.

Beaded jump ropes don’t tangle as easily as speed ropes and weigh a bit more. 

They are also clunkier and will make double unders tougher, but the little bit of extra weight might make them easier for a beginner to handle.

Rogue Fitness has some pretty cool ones to check out. 

#3) Weighted Ropes

The weighted jump rope shown here is going to be for advanced jump ropers.

For more advanced jumpers, we have weighted ropes.

These can range from a one-pound rope to a six-pound rope.

Why the additional weight?

With extra weight added, your upper body gets a more intense workout.

If you’re a beginner, it’s probably best to skip these for now (hehe), but something to consider as you level up your jump rope skills.

For those interested, this is a decent weighted jump rope that’s still available to buy.

The next question we want to answer: how long should my jump rope be?

The good news here: most jump ropes you purchase will be adjustable. 

When properly adjusted, step on your jump rope with one foot, and both handles should reach right around your armpit:

As Coach Matt shows here, you want your jump rope to double up to about your arm pit.

If it’s a little higher or lower than that, you may be okay, but you’ll likely need good jump rope technique to skip correctly.

Where Should I Jump Rope?

This asphalt probably isn't the most ideal place to jump rope, not just because there's a turtle there.

The cool thing about a jump rope is that you can pretty much use it anywhere, as long as you have room to maneuver.

That doesn’t really mean you SHOULD jump wherever, as not all surfaces are created equal for jumping.

In the videos and gifs above, you’ll notice that both Nerd Fitness Coaches use mats for their jump rope practice.

This is a good idea. 

A gif claiming someone is smart, probably because they jump rope on a mat.

Jumping on a mat will put less stress on your joints, lowering your chance of injury. 

If you do jump on a harder surface like concrete or asphalt, it’s okay, just focus on less intense moves like single unders. You might want to save the fancy moves and double unders for when you have a more forgiving surface under you.  

The other thing to consider is your footwear. 

Something with good shock absorption will help as your feet make contact with the ground. 

You don’t necessarily need a running shoe, since you’ll be coming up and down from your toes. But you probably don’t want to jump barefoot either, because that rope hitting unprotected toes won’t be fun.

Here’s our guide on healthy feet that includes some general shoe recommendations. 

Will Jumping Rope Help Me Lose Weight?

Buddha isn't trying to lose weight. But he's also zen about you trying to.

If you’re trying to lose weight, a jump rope and one of the workouts above could be a great part of the plan.

The other part of the plan should be your nutrition!

As we lay out in our Coaching Program, throughout Nerd Fitness Prime, and our massive guide on “Healthy Eating,” we believe that nutrition is 80-90% of the equation for weight loss.

No joke.

It’s by far the biggest factor for success.

So will you lose weight jumping rope?

Definitely maybe!

If you fix your diet AND begin to incorporate a jump rope workout a few times per week, you’ll find yourself building muscle, losing fat, and getting stronger!

That’s because a jump rope will you train your:

  • Calves
  • Rear Deltoids
  • Abdominals
  • Quads
  • Hamstrings

As long as you do it correctly:

This is a gif of someone dressed up as a cartoon bear and trying to jump rope.

My point is jumping rope needs to be part of a larger picture for weight loss. 

So how do you fix your diet?

Great question.

Whether you choose to follow a Keto Diet, Paleo Diet, Mediterranean Diet, or something like Intermittent Fasting, the best path will be up to your goals, your situation, and your habits.

Here are some basic tips though (as we cover in The 5 Rules of Weight Loss):

  1. If your goal is weight loss, you have to eat less than you burn each day. This can be through eating less and burning more (from the resistance band workout above)
  2. Processed foods and junk food make it really tough to lose weight: They have lots of calories and carbs, low nutritional value, don’t fill you up, and cause you to overeat.
  3. Vegetables are your friends. If you don’t like veggies, here’s how to make vegetables taste good.
  4. Liquid calories are sabotaging your efforts. Soda, juice, sports drinks: they’re all pretty much high-calorie sugar water with minimal nutritional value. Get your caffeine from black coffee or tea, fizzy-drink fix from sparkling water.
  5. Eat more protein! Protein helps rebuild muscle and can help you stay under your calorie limit because it’s satiating and filling. Here’s exactly how much protein you should be eating every day.

Those tips should get you started, but if you want more specific instruction and guidance, check out the NF Coaching Program – Your Coach will build a routine tailored to your individual needs and what equipment you have available:


How to Build a Jump Rope Workout (Next Steps)

Yep, clearly this boxer's jump rope skills lead him to victory.

The only question left to answer with this guide is “When should you do your jump rope workouts?”

You have a bunch of different options for that, with a few considerations.

#1) Jumping rope for warm-ups

All Nerd Fitness Workouts have a note to warm-up before you start.

It can be five minutes of simple exercises like arm circles:

Arm circles like so are a great way to get your heart rate up before doing HIIT.

Or jumping jacks.

Jumping jacks are a great way to warm up for your at-home workout.

Do you know what else it can be? Five minutes of jump rope! 

Coach Jim showing you jump rope singles

A short round of jump rope is a perfect warm-up for any workout you pick.

Is your gym closed? No problem, check out our guide The 7 Best at Home Workouts.

#2) Jump rope for active recovery

Active recovery is any gentle movement designed to help your muscles heal after training. 

If you hop with low intensity, a jump rope workout can fit this bill perfectly.

In between your strength training workouts, you can mix in some jump rope, stretching, or even a little yoga for active recovery. 

If you don’t want to jump with low intensity, you have another path.

#3) Jump rope as a full-body workout

With enough intensity, a jump rope can provide a great full-body workout.

You can up the intensity by working up to double unders or other advanced jump rope exercises. 

Or you can look into a weighted rope once you get the swing of things.

The other thing to consider would be circuit training, where you mix in jumping rope with some bodyweight exercises

Maybe you alternate burpees with your jump rope intervals. 

The infamous burpee bodyweight exercise!

Lots of HIIT workouts include jump rope sessions, so you have tons of ways to bring your jump rope into your training.

Once you get your technique nailed down, the world will become your jump rope playground:

If you need any help pulling this all together, Nerd Fitness is here for you.

We have three great options for continuing your journey with us. 

Option #1) If you want a professional coach in your pocket, who can do video form checks, provide feedback, and adjust your workouts based on the equipment you have available, check out our 1-on-1 Online Coaching Program

For example, let’s say you find yourself stuck indoors during a pandemic, and you want somebody to custom-build you a workout program based on the furniture and equipment you have (like a jump rope). That’s where an online coach is a game-changer! 

Personally, I’ve been working with the same online coach since 2015 and it’s changed my life. You can learn more by clicking on the box below: 


2) Exercising at home and need a plan to follow? Have questions you need answered? Join Nerd Fitness Prime!

Nerd Fitness Prime is our premium membership program that contains at-home exercise routines, live-streamed workouts with NF Coaches, a supportive online community, group challenges, and much more! 


Option #3) Become part of the Rebellion! We need good people like you in our community, the Nerd Fitness Rebellion.

Sign up in the box below to enlist and get our Rebel Starter Kit, which includes all of our “work out from home” guides.

Alright, I want to hear from you and your experience with jumping rope! 

Do you train with jump ropes?

Any exercises or tricks we’re missing?

Are you one of those people who hasn’t touched a jump rope since grade school?

Let me know in the comments!

-Steve

P.S. If you’re looking for ways to do interval training without a gym, check out The 20-Min HIIT Workout for Home

###

Photo Source: Speed Jump Rope, Beaded Jump Rope, Weighted Jump Rope, 166/366, Boxing a gentleman’s sport, Jump Rope, Laughing Buddha, Eastern Box Turtle, 167/366

Be Nice and Share!
This post was originally published on this site

http://chriskresser.com/

In this episode of Revolution Health Radio, I’m joined by health coach Will Welch in a discussion about COVID-19. We talk about the challenges we’re facing as a culture, whether we succeeded in flattening the curve, what the end of the pandemic may look like, and much more.

The post RHR: COVID-19: My Thoughts on Where We Are Now, and Where We’re Headed appeared first on Chris Kresser.

Be Nice and Share!