
Originally posted at: http://www.nerdfitness.com/
I need to share something very important with you:
I’m 95% certain you’re doing your push-ups incorrectly.
I’ll explain why shortly.
Let’s start here: push-ups are one of the best exercises ever invented (thanks random fit caveperson, whoever you were).
They require zero equipment, build strength in all of the right places, have hundreds of variations to keep things fresh, and are easily quantifiable so keeping track of progression is a breeze.
Push-ups and push-up variations are a HUGE part of Nerd Fitness and things that we encourage you to have in your routine. That’s why I’m so damn glad you’re reading this article – because push-ups are AMAZING.
I’m going to answer every question you have about push-ups and give you the confidence to do them correctly.
To answer that first question: want to know how I know you’re probably doing push-ups incorrectly?
Because pretty much EVERYBODY does push-ups incorrectly!
I see it every day in the gym.
Don’t worry though, I ALSO used to do push-ups incorrectly, and did so for YEARS without knowing any better.
They say ignorance is bliss, but that does not apply to getting stronger and healthier – I spent years doing push-ups and training in a gym and saw no results – it’s because I was following the wrong workout and eating strategy.
I seriously wasted 6 years doing this! Doh.
There’s nothing worse than training hard, dutifully doing your exercises and strength training – or even doing exercise you HATE – and seeing NO results after months (or in my case, years) of hard of work.
We want to avoid that scenario like the plague! We also want to avoid the plague.
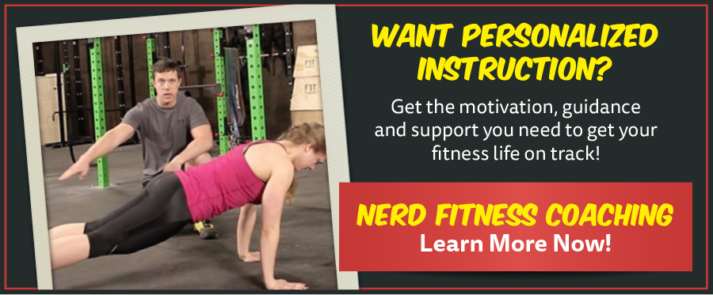
If you’re somebody that doesn’t have time to waste and just wants to start getting results, or if you’ve struggled to get in shape for years, consider checking out our 1-on-1 Online Coaching Program.
You’ll get form checks, nutritional guidance, and a custom workout program from a coach that gets to know you and how to fit all of this into your busy life! You can learn more about schedule a free call with our coaches by clicking on the image below:
Okay, let’s dig into the ins and outs – or ups and downs, I should say – of how to do a proper push-up!
How to set up for a proper push up

When it comes to push ups, your form is crucial. Each push up needs to be done perfectly so that your total reps measured from workout to workout are on equal footing.
If you did thirty perfect push ups two days ago, and then today you did sixty push ups by only going down halfway, sticking your ass up in the air, etc., it’s absolutely impossible to tell if you got any stronger.
Here’s how to get set up to do a push up:
- When down on the ground, set your hands at a distance that is slightly wider than shoulder-width apart. Another good cue: draw a straight line down from your chest/nipple – it should be directly over your thumbnail. Depending on your strength and experience, your hands should be angled in a way that feels comfortable to you. For me, my hands are set up so that my middle finger points straight up and away from me.
- To alleviate wrist pain (if you have poor wrist flexibility) do your push ups holding onto push-up handles (so your wrists aren’t as compromised), or a bar (see Staci’s video below doing elevated push-ups for example). If you’re hardcore, you can do them on your knuckles (as long as you’re on a semi-soft surface like grass or carpet).
- Your feet should be set up in a way that feels right and comfortable to you. For some, that might be shoulder width apart. For others, it might be with your feet touching. Generally speaking, the wider apart your feet, the more stable you’ll be for your push ups.
- Think of your body as one giant straight line – from the top of your head down through your heels. Your butt shouldn’t be sticking way up in the air or sagging.
- If you have a problem getting the proper form with your body, try this: clench your butt, and then tighten your abs as if you’re bracing to get punched. Your core will be engaged, and your body should be in that straight line. If you’ve been doing push ups incorrectly, this might be a big change for you. Record a video of yourself to make sure you’re doing it correctly.
- Your head should be looking slightly ahead of you, not straight down (yeah I know I’m looking straight down in my top picture, I hadn’t started yet!). I read somewhere that said “if you’re doing them right, your chin should be the first part of your head to touch the floor, not your nose.” Looking up helps you keep your body in line, but feel free to look down if that helps you concentrate more.
- At the top of your push up, your arms should be straight and supporting your weight. You’re now ready to do a push up.

How to complete a push up
Alright, now that you’re actually all set up and eager to begin, let’s get you through one repetition. Remember that good form is crucial, so keep your focus through each movement and start to set good habits.
Watch this quick 5 minute video to take you through EACH of the steps of a push-up, including some variations!
Here’s how to complete one repetition of a push up:
- With your arms straight, butt clenched, and abs braced, steadily lower yourself until your elbows are at a 90 degree angle or smaller. Depending on your level of experience, age, and flexibility, 90 degrees might be the lowest you’re able to go. Personally, I like to go down until my chest (not my face), hits the floor. That way, I know I’m going the same distance each and every time.
- Try not to let your elbows go flying way out with each repetition. Keep them relatively close to your body, and keep note of when they start to fly out when you get tired.
- Once your chest touches the floor (or your arms go down to a 90 degree angle), pause slightly and then explode back up until you’re back in the same position.
- Congratulations, you just did a proper push up. Do as many as you can until you start to feel your form slip (even slightly); you are done for that set. Ten good push ups and 5 crappy ones are tough to quantify against eleven good push ups. If you can only do ten of something, write down your results and aim for 11 next time. Perfect form allows you to keep track of your improvements week over week.

“But I can’t do a push up!”
That’s okay, here’s a plan that will help you get there.
You need to start with an easier push movement, and work up to progressively more difficult types of moves that will eventually result in you doing true push ups.
Start with Wall Push Ups:
Just like with a regular push up, clench your butt, brace your abs, and set your hands on a wall at a width that’s wider than shoulder-width apart. Walk backwards with your feet until your arms are fully extended and supporting your weight (generally one decent sized step back with both feet will suffice). Keeping the rest of your body in a straight line, steadily lower yourself towards the wall until your nose almost touches the wall, and then explode back up to the starting position.
Do 4 sets of wall push ups with a 2-minute rest between sets, every other day. Keep track of how many repetitions you can do WITH PROPER FORM for each set in a notebook for easy comparison to previous workouts. Once you can do 4 sets of 20 repetitions of wall push ups, you can progress to elevated (or incline) push ups.
Here’s an example of Elevated Push Ups (in this video from our flagship online course, The Nerd Fitness Academy):
Elevated push ups are just what they sound like – your hands are on an elevated surface, whether it’s something as tall as a kitchen table or as low as a few blocks that are inches off the ground. This will depend on your level of strength and experience.
If you’ve just progressed from wall push ups, pick something that is at a level that’s right for you – I generally find the back of a park bench or the side of a picnic table to be a perfect height for doing incline push ups.
Do 4 sets of elevated push ups with a 2-minute rest between sets, every other day. Again, keep track of all of your stats for how many proper form repetitions you can do in each set. Once you can do 4 sets of 20 repetitions, it’s time to either move to regular push ups, knee push ups, or a lower height for your hands to be supported.
To work on progression, try to doing your elevated push ups on the stairs in your house. As you get stronger, you can move your hands to lower and lower steps until your hands are on the ground.
Now, once you’re cranking out four sets of proper form elevated push ups you need to progress to either regular push ups, a lower incline push up, or push ups with your knees on the ground. In my opinion, if you can do 4 sets of 20 repetitions of incline push ups, it might be time to switch to regular push ups.
Speaking of ramping up your push-ups to get better…
It’s a great place to start with bodyweight training and developing strength:
- Complete this workout at home, no equipment required
- Avoid the common mistakes everybody makes when doing bodyweight exercises
- Learn how to finally get your first pull-up
Woman
Man
How to get better at push ups

So you’ve learned how to do a push up, you can do a few of them, but you want to get better!
Here are some tips to help you along the way:
- Get healthy! As you lose weight (which is 80% nutrition!), you will have to move less weight around than before, which will make your push ups easier to manage.
- Don’t cheat on the last few – when you’re tired, it’s easy to skip out on good form for your last few reps. As soon as you do one bad form push up, you’re done. Finish up your four sets, write down your numbers, and try to beat those numbers next time.
- When starting out don’t do push ups two days in a row. You need to give your muscles time to rebuild and recover – take off at least 48 hours in between your push up adventure. When push-ups became a warm-up exercise for you – consider a PLP program.
- Get protein into your system after finishing up your workout – protein helps rebuild the muscles you just broke down doing push ups, and it helps them rebuild those same muscles stronger than before.
- If you can do 4 sets of 20-25 perfect form push ups no sweat, then it’s time to start looking into push up variations to keep things interesting.
- Build up your core with planks – this will help keep your core strong so that it’s not the weakest link in your proper form push ups.
Push Up Variations
Basic push ups can get boring…
Fortunately there are dozens upon dozens of variations to make things more difficult for you.
Once you’re cranking out perfect form push ups like it’s your job, try some of these variations on for size.
Click on each for a video demonstration (these are some of the push-up variations pulled from The NF Academy):
One-legged Push-ups: introducing some variety and balance by removing one of your legs for less stabilization:
Decline push ups – these work your shoulders and triceps more so than normal push ups.
Diamond push ups – keep your arms tight at your side, rotate your hands outward, and keep your elbows tight as you lower your body. Works your triceps like crazy.
Dive-bomber push ups – funky, difficult, but oh so fun. I’d explain it, but just watch the video
Plyometric Push ups – these are brutal and will wear you out just after a few repetitions. Just don’t hurt yourself!
What’s Your strength building plan?

It makes me sad when we get emails from people who struggle and try and work hard to get healthier, and to better at push-ups, and just can’t seem to make any progress.
If that’s you, you’re not alone!
It’s why we built our 1-on-1 Online Coaching Program: to help busy people cut through the noise and just get results.
You’ll have your own coach that checks your form (via video) on exercises to make sure you’re doing them correctly, they’ll help you with your nutrition, and also build a workout program for you based on your specific body type, goals, and experience.
You can schedule a free call with Team NF over on our coaching page by clicking on the link below, maybe we’re a good fit for each other!

That’s all for today: go home, set up a camera or grab a friend and have them film you, and check your form on your push ups.
I hope you’ll find that your form is as good as you expected, but it’s okay if it’s not, it’ll give you something to work on.
Go do some push-ups, and work on getting better with them every day.
-Steve
PS: If you’re looking for a workout to help you do more push-ups, you can follow our free Beginner Bodyweight Routine and download our free Beginner Bodyweight Worksheet when you sign up in the box below!
- Complete this workout at home, no equipment required
- Avoid the common mistakes everybody makes when doing bodyweight exercises
- Learn how to finally get your first pull-up
Woman
Man
###
Filed under: Fitness
 For now classes are 6pm and 640pm at 2840 Wildwood st in the Boise Cloggers studio.
Book your class NOW!
click this ==>
For now classes are 6pm and 640pm at 2840 Wildwood st in the Boise Cloggers studio.
Book your class NOW!
click this ==>


