This post was originally published on this site

Originally Posted At: https://breakingmuscle.com/feed/rss

The 2023 Ohio’s Strongest contest was held in Struthers, OH on Saturday, Aug. 19, 2023, and history may have been made at this competition. Under-64-kilogram strongwoman Kira Wrixson performed a massive 18-inch deadlift of 385.5 kilograms (850 pounds), and she made it look easy.

Wrixson approached the stiff bar, which was loaded with oversized “wagon wheel” plates and elevated on boxes, before securing her “figure eight”-style lifting straps to the bar. After taking a few seconds to prepare for the moment, she began the pull and immediately stood tall with the weight. Once she locked out, the judge gave a down command, and she received cheers from the crowd watching. She was also wearing a weightlifting belt and a deadlift suit.

Wrixson and Ohio’s Strongest contest promoters have referred to this lift as a “World Record.” Breaking Muscle reached out to the promoters for confirmation and it was determined that there had been no heavier lift recorded in competition before Wrixson’s attempt. Breaking Muscle found no such lift, performed by a strongwoman in her weight class, being recognized as a World Record as well. So, unless another competitor or organization can provide evidence to the contrary, Wrixson’s lift may go down as the heaviest documented 18-inch deadlift performed by a U64KG strongwoman athlete.

Wrixson had quite a day, overall, at this contest. Less than an hour before she performed her deadlift, she had also scored a Circus Dumbbell lift of 62.9 kilograms (138.8 pounds). Promoters also called this lift a World Record and, again, no other documented record for this lift before Wrixson was found. This event included an amateur competition as well as separate events for record attempts. Wrixson only took part in the record-setting portion.

YouTube Video

The entire show had significant meaning for locals in the area because it served as tribute to “Warrior Princess” Nora Sabella, a nine-year-old girl who recently passed away following her third cancer diagnosis and a total of five years of treatment. According to promoters of the Ohio’s Strongest contest, Wrixson said she was extra motivated for her lifts because there was a 50-cent per pound donation riding on her deadlift.

Featured Image: @ladyarik_ulveskare on Instagram

The post Strongwoman Kira Wrixson (U64 KG) Locks Out 6-Times Body Weight with a Monstrous 385.5-Kilogram (850-Pound) 18-Inch Deadlift appeared first on Breaking Muscle.

Be Nice and Share!
This post was originally published on this site

http://www.marksdailyapple.com/

Mark stands smiling with arms crossed in front of white background with text "Primal Health Coach Institute."I consider myself a “forward-thinking” guy. Meaning, I focus on what I’m pulling towards rather than dwelling too much on things gone by.

If that’s you too, don’t worry—we always have new, exciting projects in the works! 

But, as we make our way through the second half of 2023—and I embark on a new decade after turning 70—I wanted to take a moment to recognize and celebrate some milestones. I also want to express my sincerest gratitude and how proud I am of this community.

As many of you know, a foundational part of this community and one of my passion projects is the Primal Health Coach Institute. Founded in 2014, we were the first institute to bring ancestral health to the coaching industry and have  been leading the way ever since. In large part because of PHCI, it’s no longer “just me and my blog” advocating for Primal eating and living.

Together Is Better

At the Primal Health Coach Institute, we’ve graduated thousands of Certified Primal Health Coaches in 75 countries around the world. Our coaches span not only the globe but also diverse backgrounds, age groups, and areas of passion and focus. Such diversity amidst a shared calling—helping folks live and eat in ways that position them to thrive—is a powerful, beautiful thing.

To honor this diversity and better support coaches in supporting others, we now offer multiple paths for pursuing your dreams. So long as your knowledge and skills are solid, there’s no one “right way” to create a purpose-driven, profitable coaching career. Your optimal path may fall along traditional, entrepreneurial, medical, fitness, or corporate lines—or reflect an angle unique to you. 

As our suite of courses and programs continues to grow, these paths offer a roadmap. You can stick to a designed-for-you trajectory or customize and combine as you see fit.

Whichever path you choose, rest assured that we’re working behind the scenes to continuously improve, update, and evolve our offerings and curriculum. We also put tremendous thought, care, and energy into forging new, exciting, purposeful collaborations. 

We want PHCI students and grads to have the best—the best instruction, the best resources and support, the best opportunities. Intentional partnerships and places of synergy make that possible. 

We’ve partnered with: 

  • Integrative Primary Care Physician and Certified Primal Health Coach Dr. Judith Boyce, who recently retired from her medical practice to develop health and longevity coaching programs and retreats for women over 50. As the instructor of our Health Coaching in Medical Practices Specialist Certification course, she provides insider knowledge from 40+ years in healthcare to help you launch your career as a health coach in a medical practice.
  • Registered Dietitian and Certified Primal Health Coach Martha Tettenborn, who leverages her personal health journey and professional experience as a cancer keto coach. As the instructor of our Functional Therapeutic Diets Specialist Certification course, she trains coaches to implement therapeutic diets (such as ketogenic, paleo, and elimination diets) and adapt nutritional strategies to support people with conditions such as autoimmune disorders, food sensitivities, and metabolic imbalances.
  • Cardiologist and New York Times bestselling author Dr. William Davis, who—after 25 years of practicing cardiology—realized he was in the business of dispensing prescription drugs and procedures, not health. As the instructor of our Human Intestinal Microbiome in Health and Disease Specialist Certification course, he helps coaches deepen their understanding of the human microbiome and its impact on physical and mental health. He also teaches coaches to guide clients in improving digestive function, immune system resilience, and overall wellness through microbiome-focused interventions.

And, for those excited about Primal movement: 

  • Our fitness programs train experts in movement patterns that are fundamental to human biomechanics and optimal living. They teach you how to design effective workouts that improve mobility, strength, and endurance—covering fitness for every age and every stage.
  • Brad Kearns, New York Times bestselling author, Guinness World Record setting professional Speedgolfer, #1 ranked USA age 55-59 high jumper, and former US national champion and #3 world-ranked professional triathlete. Brad developed our Primal Fitness Coach Certification course. In addition to teaching you how to coach clients to achieve fitness for health and longevity, this course includes comprehensive business support—providing a competitive edge when building a fitness business.
  • Ashleigh VanHouten, one of the very first Certified Primal Health Coaches and author of Carnivore-ish and It Takes Guts, brings her extensive knowledge and background in swimming, powerlifting, CrossFit, and nationally ranked figure competition to our Strength Training for Women Specialist Certification course. As the course instructor, she gives fitness coaches the tools, resources, and know-how to address the physiological, hormonal, behavioral, mental, and cultural factors that come into play when coaching women—filling a high-demand niche that continues to grow.

As with all our courses and programs, everything above blends best practices in curricular development and delivery, business training and tools, opportunities for networking and community, and the elite-level knowledge of experts at the top of their fields.

Opportunities Abound

And that’s not all! Part of what makes this work meaningful and fun is never settling for “good enough.” Sure, we’re excited about and proud of all we’ve created. And, I take pride in my knack for spotting and seizing new opportunities. Heck, I’ve built my entire career and much of the past 70 years around that very thing.

The PHCI team backs me up in this and makes it happen. Together, we ensure those opportunities come to life and you hear about it. A few recent ones: 

  • We partnered with Simplex Health to offer a Health Coach Internship Program for students and grads looking for invaluable hands-on experience and a stepping stone to future employment opportunities as part of a collaborative healthcare team.
  • We created a live, interactive, Mentored Board-Certification Program to prepare you to become a National Board-Certified Health and Wellness Coach (NBC-HWC).
  • We collaborated with Coach Catalyst for PrimalPro™, a ready-made coaching app that can be customized to your brand and to individual client needs, while also supporting coaches looking to run challenges and scale their business.

More to Come… in Community

And, of course, the journey’s only and always just beginning. There is no final iteration—only continuous evolution within a global, ever-expanding community

In April, our team attended and connected with so many of you at KetoCon. And throughout the year, we cultivate community, connection, and conversation on the Health Coach Radio Podcast. Our most listened-to episodes in 2023 so far include:

Reviewing the past months and decades, I can say with confidence and heart that we’ve created something truly exceptional. 

We’re expanding in ways that honor, safeguard, and build on that. We’re watching the industry. We’re listening to you. We’re committed to making PHCI better and better—helping coaches earn a great living doing what they love while changing lives in the process.

Before jumping ahead to what’s next and new, I’m taking a minute to take this in. The past achievements. The world-class coaching programs and collaborations. The continued growth of our awesome, awe-inspiring community.

You are part of this. You are making an impact in the name of health, vitality, and living more fully. 

Primal_Essentials_640x80

The post Looking Back, Pulling Towards appeared first on Mark’s Daily Apple.

Be Nice and Share!
This post was originally published on this site

Originally Posted At: https://breakingmuscle.com/feed/rss

A treadmill can be an invaluable piece of home gym equipment. The best treadmill for home gyms provides an opportunity to train cardiovascular health, and research has proven that cardio training comes with endless benefits, such as lowering blood pressure, weight management, and eliminating the onset of diabetes. (1) Although many might argue using a treadmill isn’t as effective as running or walking outdoors, an at-home treadmill provides year-long opportunities to train with various inclines that emulate different types of terrain. 

With the recent surge in technological advancements, finding the right treadmill might require more effort than you think. Purchasing the wrong treadmill might lead to frustrating or ineffective workouts, or it might not fit your space. In this article, we will discuss our top picks for at-home treadmills, highlighting key features that will help you find the right one for you.

How We Chose the Best Treadmill for Home

Several of the treadmills we review below are ones that we’ve tried in our testing facility in Springfield, MO. Out of the nearly four dozen treadmills we have available, we narrowed it down to what we feel are the eight best machines.

When making our selections, we aimed to cater to a diverse range of users, including both elite athletes and casual exercisers. We included treadmills that had a justifiable price point while being able to accommodate high- and low-intensity workouts. Some of our treadmills came with a heavy price tag, but they also have top-of-the-line features and characteristics, such as interactive programming and auto-fold technology.

Because these treadmills are intended for a home gym, they need to be compatible with most spaces. To that end, some of the machines on the list below fold up for storage and have a condensed footprint. Another factor we considered was durability, so you can maximize the value of your investment while minimizing the need for frequent repairs or replacements.

Our Top Picks for the Best Treadmills for Home

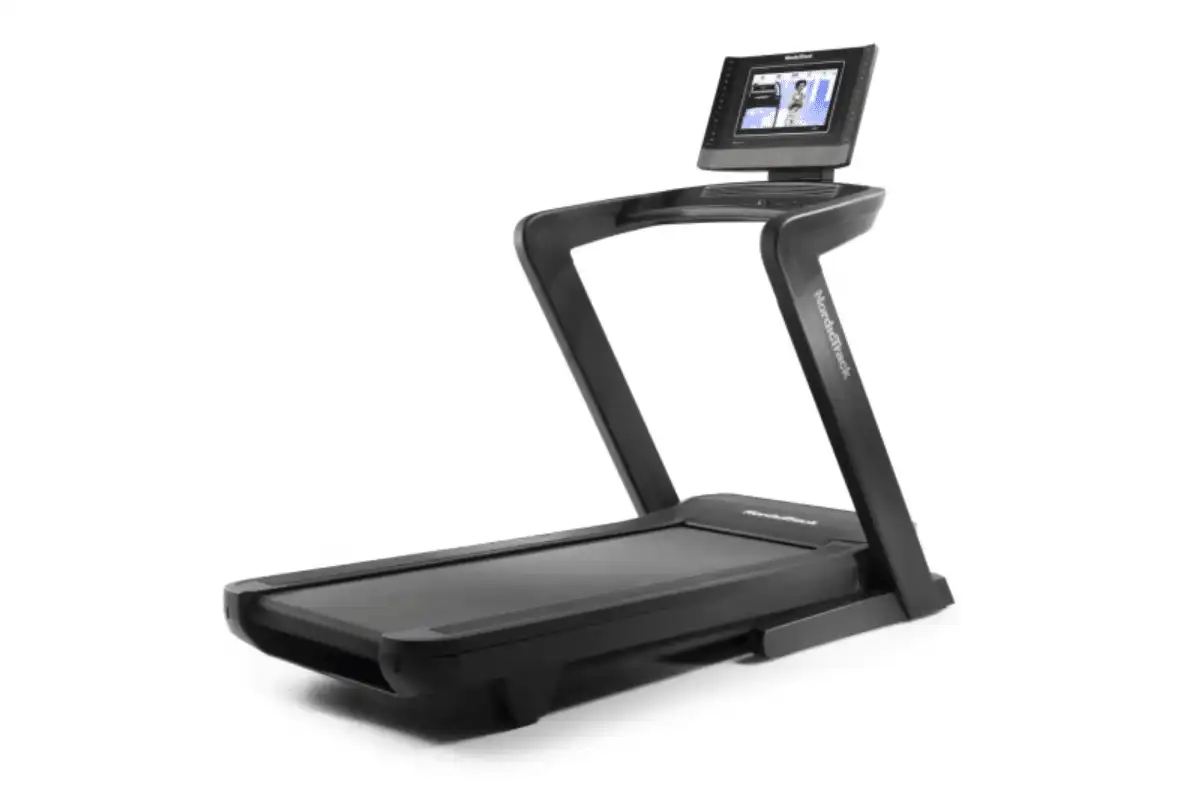
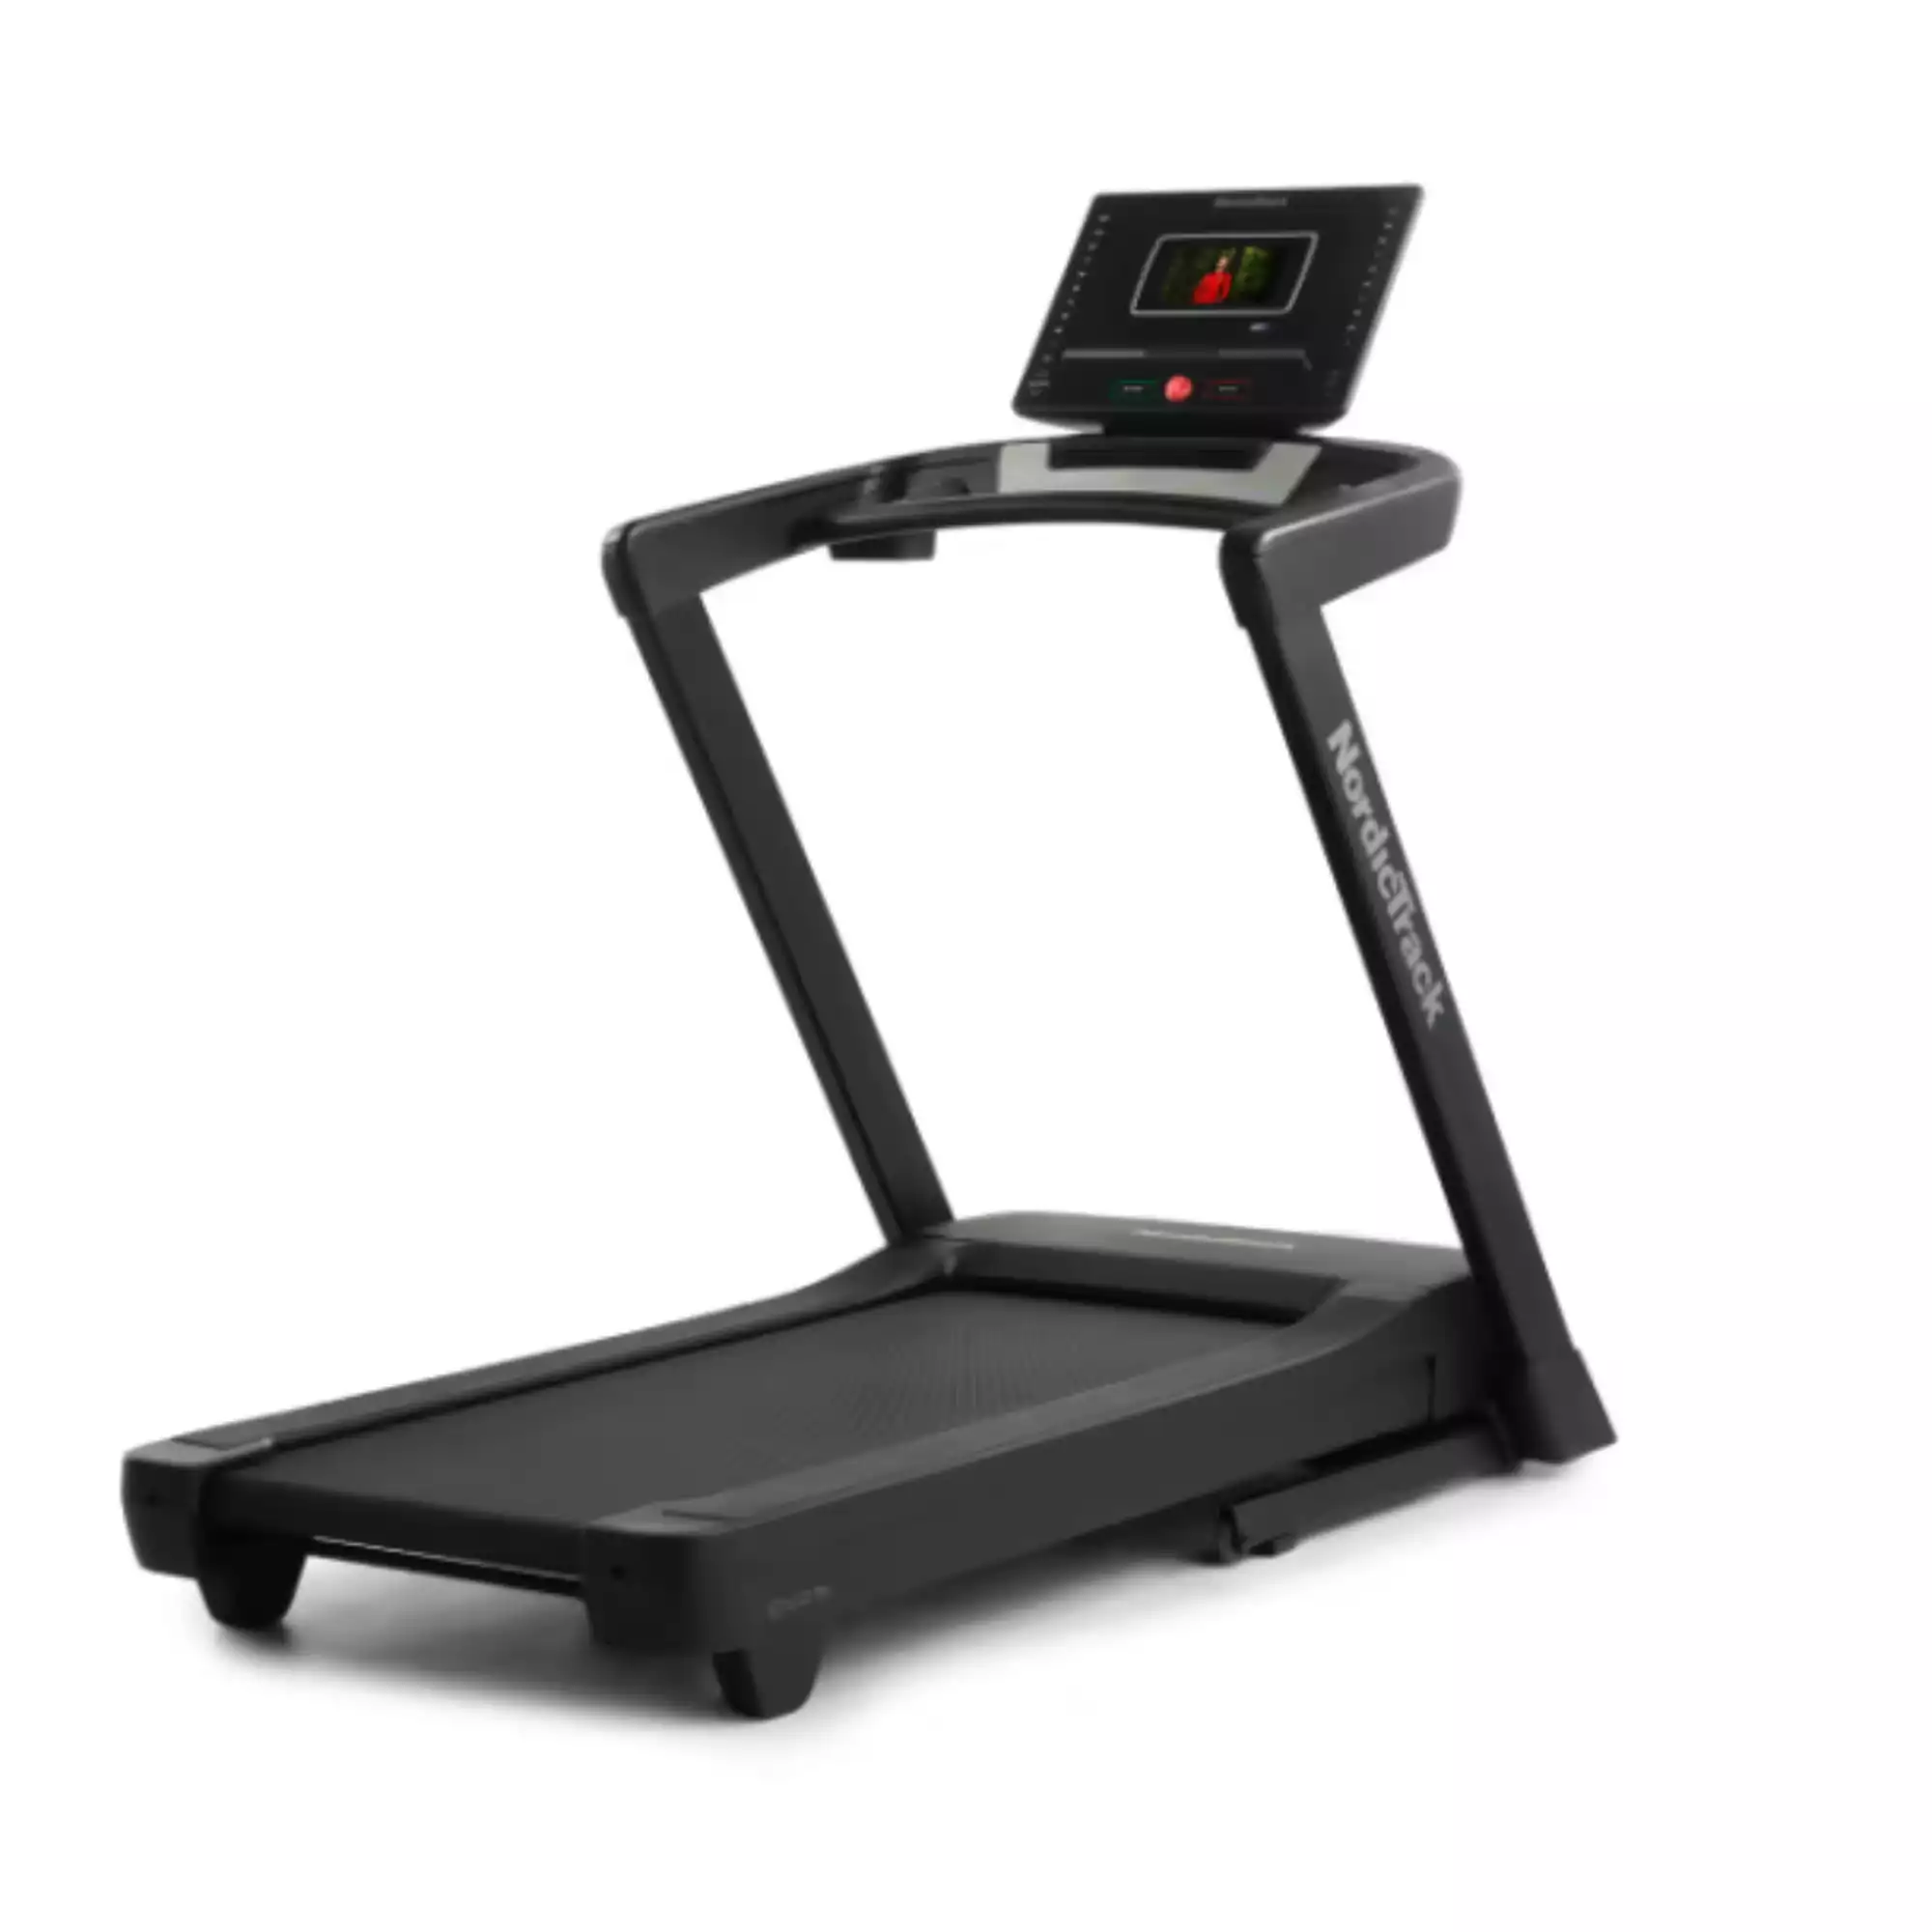
Best Treadmill for Home Overall: NordicTrack Commercial 1750


NordicTrack Commercial 1750 Treadmill

  • Overall dimensions: 80” L x 38” W x 65” H
  • Deck size: 60” L x 20” W
  • Max speed: 12 miles per hour
  • Max incline: 12 percent
  • Decline: -3 percent
  • Programming: iFit (free for 30 days, then $39 per month)
  • Motor: 3.5 CHP motor
  • Weight capacity: 300 pounds


Check Price

Pros

  • Powerful motor
  • 14-inch tilted interactive touchscreen
  • Inclines and declines
  • SpeedSaver foldable design
  • Trainer-led iFIT workouts
  • Auto-adjust technology

Cons

  • Difficult assembly
  • iFIT membership expires after 30 days unless you decide to renew

The NordicTrack Commercial 1750 wins the award for the best home gym treadmill. Its reputation stems from its stellar list of high-end features for high- or low-intensity workouts. This smart treadmill provides a powerful 3.5 CHP (continuous horsepower) motor, allowing you to run at a top speed of 12 miles per hour. It also has an impressive decline and incline range, going down to a negative three-percent decline or up to a 12-percent incline to emulate different terrain, such as road running at different elevations. 

Its 14-inch tilted interactive HD touchscreen allows you to perform trainer-led workouts through iFIT, an expansive on-demand library of more than 1,000 workouts. iFIT includes a variety of programs from high-intensity interval training (HIIT) sessions to yoga practices. It’s like having your own personal trainer. However, it costs around $39 per month after a 30-day free trial period.

When exercising, the 1750 uses SmartAdjust technology to smartly adapt to your performance, making each session personalized and efficient. SmartAdjust is a special technology that keeps track of changes you make to your NordicTrack machine while working out. It remembers these changes and uses them later to help your machine adapt to your training level for future workouts.

Furthermore, if you don’t have a lot of space in your home gym, you’ll likely appreciate that the 1750 folds up and has wheels, allowing you to easily move it out of the way when you’re not using it. 

These intuitive features come with an expensive price tag — the 1750 starts at around $2499. Plus, you’ll have to pay for iFIT if you decide to keep the subscription after your trial ends.

Difficult assembly is another potential drawback. I personally owned a NordicTrack treadmill, and it took about two days to put it together. This is also due to my busy work schedule, which I am sure could resonate with others who purchase this treadmill. But with this being one of the more advanced models, I would highly recommend researching and putting time aside in order to effectively set up your treadmill without any issues. It does come with a paper manual, and you can also access a virtual manual that shows you how to perform each step.

RELATED: Best Cardio Machines for Weight Loss, Low-Impact Workouts, and More

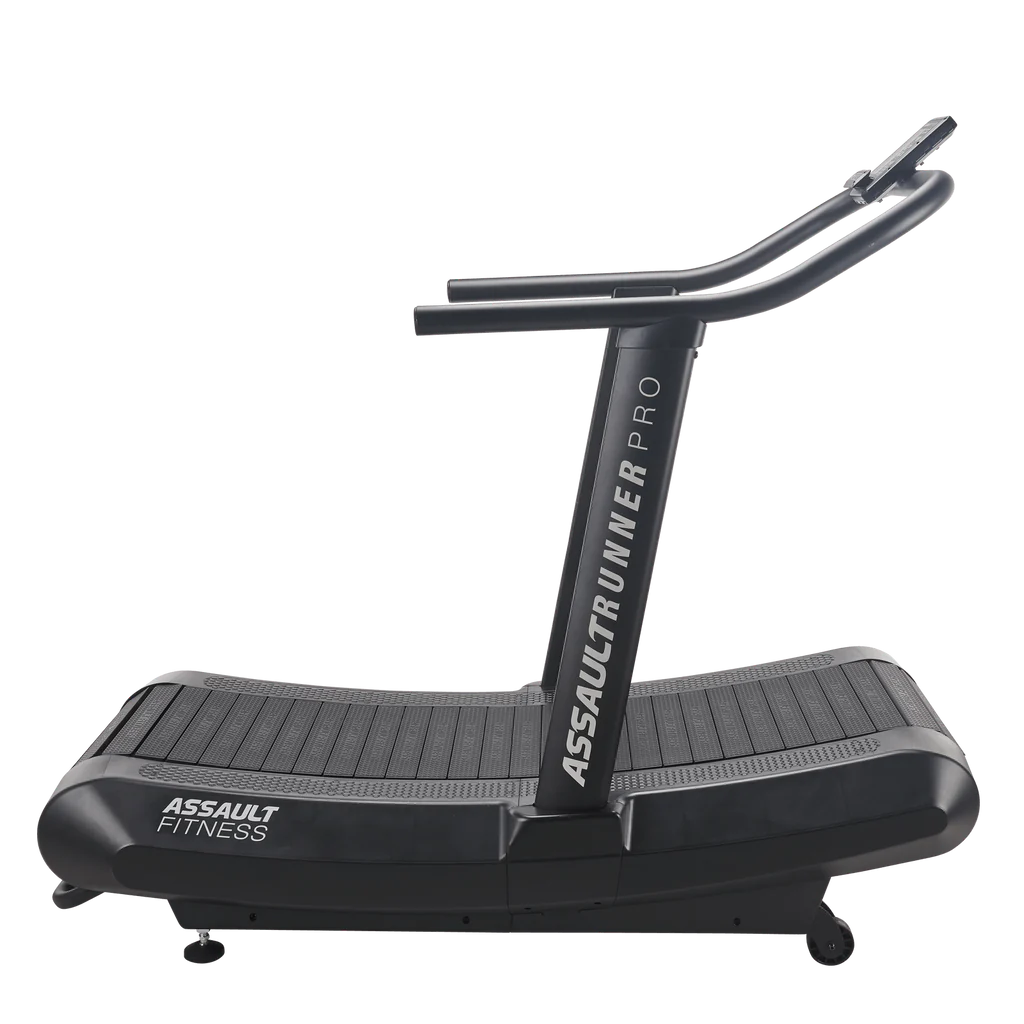
Best Home Treadmill for Running: Assault Fitness AssaultRunner Pro


Assault Fitness AssaultRunner Pro

  • Overall dimensions: 69.9” L x 31” W x 64.4” H 
  • Deck size: 17” W by 62” L
  • Max speed: As fast as you can run
  • Max incline: N/A 
  • Decline: N/A
  • Programming: Compatible with the Assault Fitness App
  • Motor: Non-electric
  • Weight capacity: 350 pounds


Check Price

Pros

  • Non-motorized treadmill
  • Athlete-friendly
  • Low-impact design for injury prevention
  • On-board programs that target time, calories, distance, speed, heart rate, and more 
  • Bluetooth connectivity  
  • Compatible with the Assault Fitness App and Zwift

Cons

  • High price  
  • Might not be suitable for non-runners
  • Not foldable  

The AssaultRunner Pro is a versatile, non-motorized, easy-to-use treadmill. Driven by your own stride, the AssaultRunner Pro matches your output and requires your full attention to ensure you maintain a consistent effort. Its uniquely curved design helps lower the risk of injury by reducing stress on your joints and provides a challenging but safe running stimulus.

The Assault Fitness AssaultRunner Pro can be a standout choice for fitness enthusiasts, especially those who run or do sprint interval training. The Bluetooth connectivity and built-in speakers enhance the overall workout experience. On-board programs targeting various metrics such as time, calories, distance, speed, and heart rate offer structured training options, although they’re not as interactive as the trainer-led iFIT programming you’ll find in more traditional treadmills.

However, the treadmill is compatible with the free Assault Fitness App, which provides trainer-led programs. It’s also compatible with Zwift (around $14.99 per month), which doesn’t offer instructor-led classes but provides virtual running workouts. The AssaultRunner Pro doesn’t have a screen you can cast on, though there is a ledge on the monitor that you can rest a phone or tablet on.

Although this treadmill requires no electricity, it does come with a high price point that starts at around $2,999. While it’s ideal for athletes or those who desire a high-intensity workout, it might not be as suitable for non-runners or individuals seeking low-intensity exercise options. You can still use this treadmill for walking, but it doesn’t provide incline or decline settings and is a very hefty machine for those who don’t plan on doing high-intensity exercise.

Additionally, the AssaultRunner Pro doesn’t fold. You can move it with the use of the handlebars under the back and the wheels located at the front, but the non-foldable design could pose challenges for those with limited space who might need a compact treadmill instead.

Best Home Treadmill for Walking: WalkingPad A1 Pro Foldable Under Desk Treadmill


WalkingPad A1 Pro Foldable Under Desk Treadmill

  • Overall dimensions: 32.5” L x 21.5” W x 5” H when folded; 56.5” L x 21.5” W x 5” H when unfolded
  • Deck size: 47” L x 16” W
  • Max speed: 3.72 miles per hour
  • Max incline: N/A
  • Decline: N/A
  • Programming: WalkingPad App
  • Motor: Brushless motor
  • Weight capacity: Between 230 and 300 pounds


Check Price

Pros

  • Space-saving and portable design 
  • Quiet 
  • Bluetooth connectivity 
  • Largest weight capacity of a walking pad on the market

Cons

  • Small deck size
  • No incline or decline options  
  • Not suitable for intense workouts

The WalkingPad A1 Pro Foldable Under Desk Treadmill is one of the most unique walking treadmills on our list. It is a walking pad, and its discrete features make it a great addition to your workout routine even if you don’t have a designated workout space. You can store it under your desk or tuck it into a small living room, transforming your living space into an at-home workout station in seconds. It also comes with an affordable price starting at around $630.

Additionally, the treadmill operates with a remarkably quiet motor, ensuring that neither your work productivity nor calm surroundings are compromised. Its portability further enhances its appeal, making it easy to move around your living space. It weighs just around 60 pounds, while other treadmills weigh around 100 to 160 pounds.

Another benefit of the WalkingPad A1 Pro is that it has the largest weight capacity among walking pads available on the market, offering enhanced durability and stability for users of various sizes. You can purchase the WalkingPad that can hold 230 pounds or the one that holds 300 pounds. 

Although this treadmill provides a strong list of benefits, it’s important to remember that it is a walking pad, and a walking pad only. It is not built to take on speeds past 3.72 miles per hour. It also doesn’t provide an incline or a decline.

Additionally, the walking space on this treadmill is a bit more narrow than it is on other treadmills. The deck size is 47 inches long and 16 inches wide, while traditional treadmills are 60 inches long and 20 inches wide.

RELATED: Best Rowing Machines for Beginners, Small Spaces, Seniors, and More

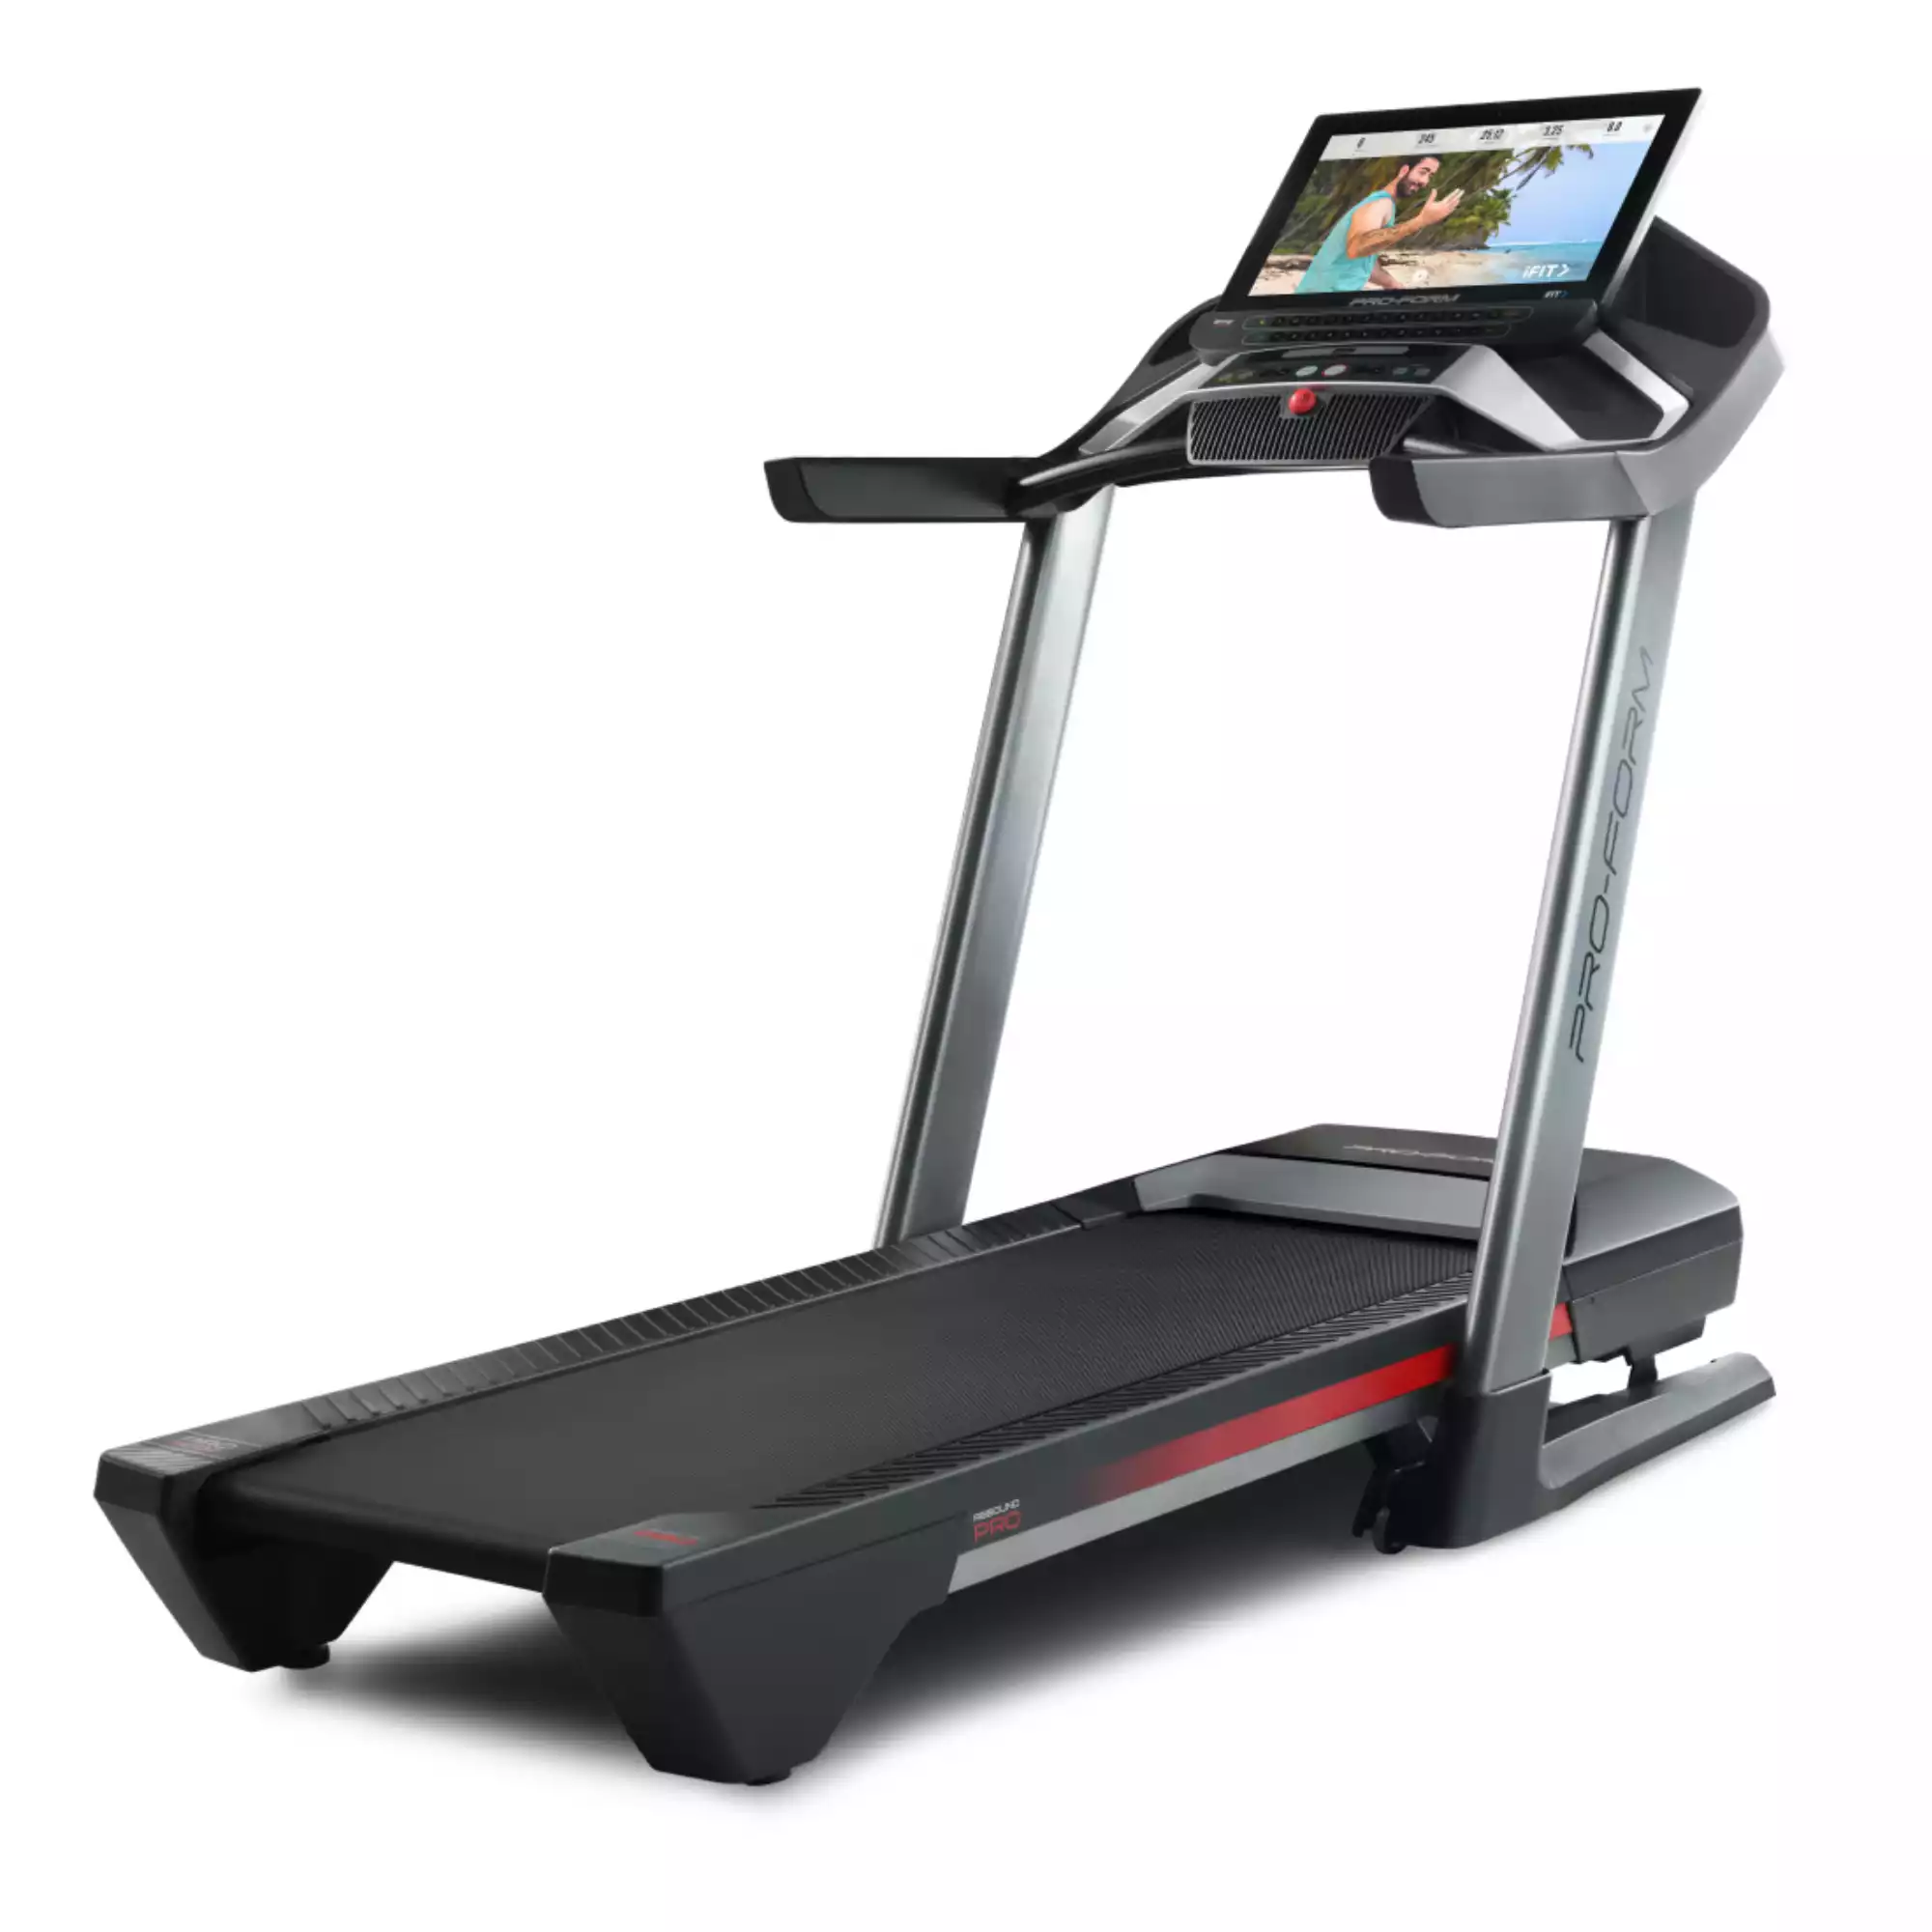
Best Incline Treadmill for Home: ProForm Pro 9000


ProForm Pro 9000

  • Overall dimensions: 77.3” L x 35.3” W x 59.6” H
  • Deck size: 60” L x 20” W
  • Max speed: 12 miles per hour
  • Max incline: 12 percent
  • Decline: -3 percent
  • Programming: iFIT (free for 30 days, then $39 per month)
  • Motor: 3.6 CHP
  • Weight capacity: 300 pounds


Check Price

Pros

  • Powerful motor 
  • 22-inch interactive touchscreen 
  • Incline and decline options
  • Foldable design 
  • Trainer-led iFIT classes for workouts on and off the treadmill

Cons

  • High price  
  • Temporary iFIT membership that expires after 30 days 

The ProForm Pro 9000’s incline and decline capabilities (up to a 12-percent incline and down to a three-percent decline) simulate different terrains, enhancing the effectiveness of any walking or running workout. With its powerful 3.6 CHP motor, this treadmill is well-equipped to accommodate a wide range of fitness levels, making it an excellent choice for both beginners and seasoned athletes. 

The interactive 22-inch touchscreen allows you to use the iFIT programming to perform trainer-led workouts. These workouts can be performed on or off the treadmill, but the monitor doesn’t move, so you might have to strategically place yourself off the treadmill to see the screen. You get a 30-day free trial to iFIT with your purchase, but it costs around $39 per month afterward.

To enhance your workout even further, you can purchase the SmartBeat Forearm Heart Rate Monitor for just under $100. This optional device easily syncs to the Pro 9000 to give you a continuous heart rate reading on the screen, which is beneficial if you like to train in specific heart rate zones.

The one drawback of the ProForm Pro 900 is that it comes with a higher price point. It starts at just under $2,300, but its technologically advanced features may make it worth the investment for those who have the budget for it. 

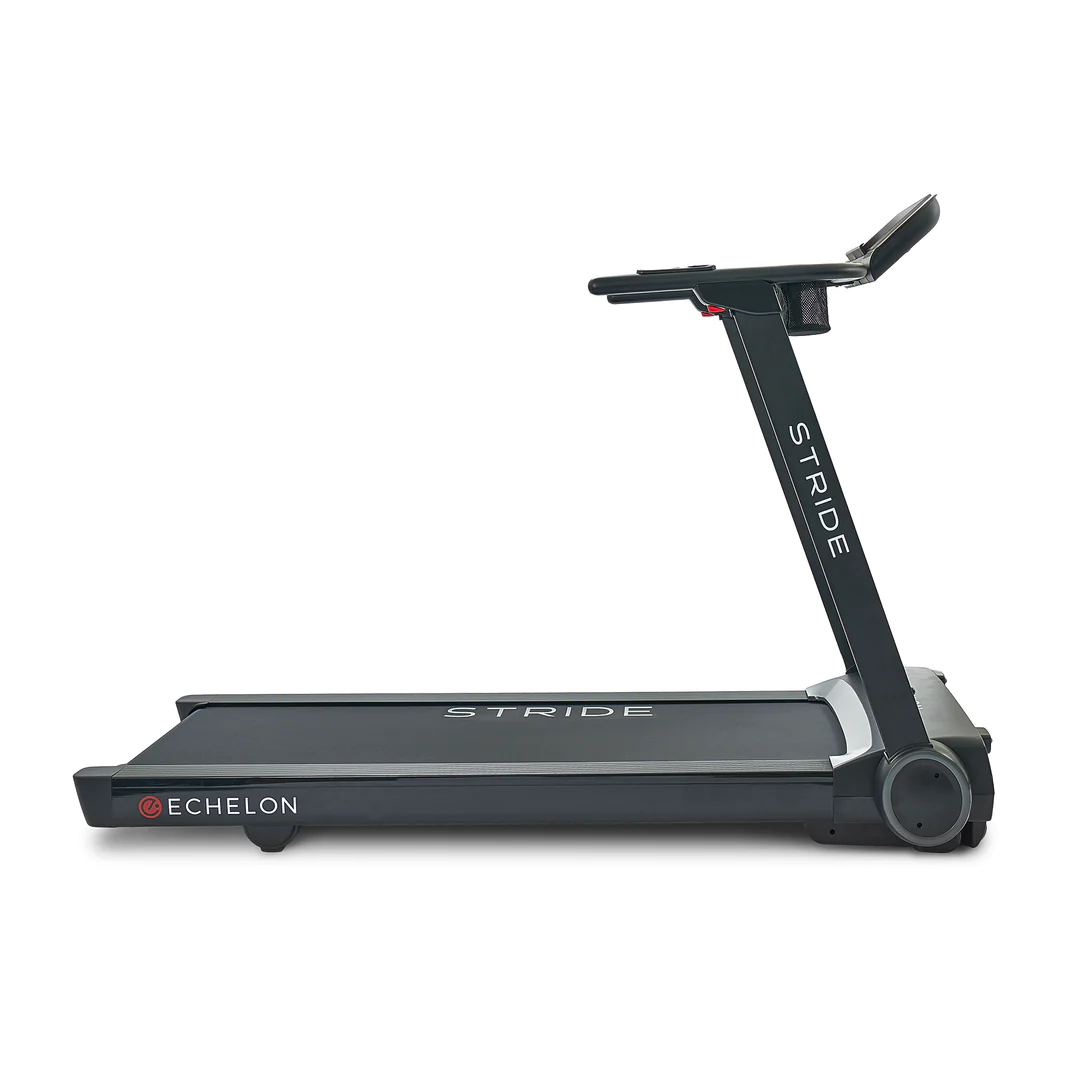
Best Small Treadmill for Home: Echelon Stride


Echelon Stride

  • Overall dimensions: 69” L x 31” W x 49” H 
  • Deck size: 20” W x 55” L
  • Max speed: 12 miles per hour
  • Max incline: 10 percent
  • Decline: N/A
  • Programming: Eight programmed workouts provided
  • Motor: Brushless DC motor; 1.75 CPH
  • Weight capacity: 300 pounds


Check Price

Pros

  • Affordable
  • Built-in smart device holder
  • Patented auto-fold feature that reduces the height to 10 inches
  • Integrated handrail sensors for heart rate monitoring
  • Console screen with eight programmed workouts
  • Impact-absorbing rubber running deck

Cons

  • No decline 
  • Subscription required for interactive features

The Echelon Stride treadmill is one of the best small treadmills for a studio or home gym. It offers a unique blend of convenience, compactness, and interactive technology. One of the standout features comes from its foldable design, reducing its height to 10 inches for storage. This makes it an excellent solution for individuals seeking to integrate a treadmill into their living space without sacrificing room. 

This treadmill auto folds on its own. When you’re done working out, you tilt the monitor flat, squeeze the red button on the handles to release them upward, then step off the treadmill and click on a pedal to make the machine flat for storage. It also has wheels that make it easy to relocate throughout your home. 

Even if you don’t fold it, the Echelon Stride is a compact treadmill. It is 69 inches long and 31 inches wide, much smaller than other treadmills on this list like the NordicTrack Commercial 1750, which is 80 inches long and 38 inches wide. 

The integrated handlebars can monitor progress and metrics such as heart rate without requiring you to sync it to other devices. This ensures you stay within your target heart rate zone for optimal training (in other words, maintaining a heart rate that is about 60 to 80 percent of your heart rate maximum, or the highest number of heartbeats your heart can reach when it’s under stress).

Reaching your targeted heart rate could come from one of the Echelon Stride’s eight programmed workouts. These workouts include various intervals and intensities for those who want to perform HIIT workouts or engage in easier training sessions.

The Echelon Stride can provide a ton of interactive features, but they are only available for those who purchase the Echelon Premier subscription. This subscription starts at $399 and provides over 6,000 classes, with more than 1,200 live classes each month. In addition, there is no decline feature.

Still, the Echelon Stride treadmill can be a great purchase for those who don’t have room for a larger treadmill, especially with a friendlier price point that starts at $1,299, which is almost half the price of the more high-end products on our list.

Best Folding Treadmill for Home: Horizon T101


Horizon T101

  • Overall dimensions: 71″ L x 34″ W x 57″ H when unfolded; 46″ L x 34″ W x 61″ H when folded
  • Deck size: 55” L x 20” W
  • Max speed: 10 miles per hour
  • Max incline: 10 percent
  • Decline: N/A 
  • Programming: N/A
  • Motor: 2.5 CHP
  • Weight capacity: 300 pounds


Check Price

Pros

  • Affordable
  • Bluetooth connection for media 
  • Sets up in 30 minutes or less
  • EasyDial controls for rapid change in intensity
  • 55-inch three-zone cushioned deck supports runners, joggers, and walkers
  • Effortless storage

Cons

  • Limited running space
  • No additional technology 

The Horizon T101 is a foldable treadmill that is just 46″ L x 34″ W x 61″ H when folded. This can be great for a workout space that you share with other equipment such as dumbbell sets or a weight bench. It also leaves you plenty of floor space to do other exercises such as sit-ups or push-ups.

Starting at just under $650, the Horizon T101 is a cost-effective solution with valuable features, such as Bluetooth connectivity and a tablet holder. You can sync your device to the speakers and stream classes or catch up on your favorite Netflix shows during your workout.

Another great feature of this home gym treadmill is its quick and easy assembly. A complex assembly process can be a big turnoff for treadmill shoppers, but most able-bodied individuals should be able to set up the Horizon T101 within 30 minutes. 

But like all great treadmills, there are some drawbacks. The Horizon T101 provides 55 inches of running space, while other treadmills have 60 inches or more. The small running area can potentially make it difficult to perform higher-intensity exercises such as sprints, as longer strides can help you reach higher speeds. The shorter deck may also be an issue for tall runners, who also have long strides. 

Best Treadmill for Home Under $500: XTERRA TR Folding Treadmill


XTERRA Fitness TR Folding Treadmill

  • Overall dimensions: 63.4″ L x 28.75″ W x 51.4″ H
  • Deck size: 50” L x 16” W
  • Max speed: 10 miles per hour
  • Max incline: Three levels
  • Decline: N/A 
  • Programming: 12 preset programs
  • Motor: 2.25 HP motor
  • Weight capacity: 250 pounds


Check Price

Pros

  • Reasonable price point
  • Space-saving design
  • Lightweight
  • Effortless storage capabilities

Cons

  • Limited running surface and weight capacity
  • Small LCD display
  • No convenience features such as Bluetooth speakers

The XTERRA TR Folding Treadmill stands out as the best budget-friendly treadmill choice, costing just under $500 on Amazon. Its compact design makes it compatible with most small spaces, especially with its effortless storage and lightweight features. You can fold this treadmill upright and roll it on the transport wheels at the front. Plus, it only weighs 97 pounds. If your workout space serves multiple purposes, you should be able to easily move the machine out of the way when needed.

With 12 preset programs at your fingertips, the XTERRA TR Folding Treadmill also offers a diverse range of workout options. Each program is 30 minutes long, a bonus for those who don’t have time for long runs, and you can override the automatic increases and decreases in speed to tailor the workout to your needs.

Despite the XTERRA TR Folding Treadmill’s advantages, there are a couple of limitations to consider. Its running space might be somewhat constrained, providing a mere 16-inch width for you to exercise on. The Breaking Muscle reviews team tested this treadmill at our warehouse in Springfield, MO. One of our reviewers who’s about six feet tall couldn’t stand on it with his feet hip-width apart without his feet coming off the belt.

The small LCD display could also limit the amount of data available. It can monitor and display your pulse, speed, distance, time, and calories burned, but it doesn’t provide as interactive of a screen as you would see with other treadmills on this list. The device holder makes it easy to follow along with workouts streamed from a tablet or phone, though the treadmill doesn’t have Bluetooth-enabled speakers.

Lastly, this treadmill has a lower weight capacity compared to others on this list, as it only provides enough strength to tolerate up to 250 pounds. Most of the stronger treadmills can withstand up to 350 pounds.

Best Portable Treadmill for Home: NordicTrack EXP 7i


NordicTrack EXP 7i

  • Overall dimensions: 70.8” L x 34.9” W x 59.7” H
  • Deck size: 55” L x 20” W
  • Max speed: 10 miles per hour
  • Max incline: 12 percent
  • Decline: N/A
  • Programming: iFIT
  • Motor: 2.6 CHP Plus Motor
  • Weight capacity: 300 pounds


Check Price

Pros

  • Seven-inch tilted interactive touchscreen 
  • SpeedSaver foldable design
  • Trainer-led iFIT workouts available
  • SmartAdjust machine learning technology
  • Affordable

Cons

  • Small LCD display
  • iFIt membership required

The NordicTrack EXP 7i treadmill comes is our choice for the best portable treadmill due to its foldable design. It can be collapsed easily by lifting the base of the treadmill upward to lock it into place, and it has wheels and a handle to help with transporting it around your space.

The NordicTrack EXP 7i treadmill is a strong counterpart to the NordicTrack Commercial 1750. Two big differences between them are the motor and the size of the monitor. The EXP 7i has a 2.6 CHP Plus Motor while the Commercial 1750 has a more powerful 3.5 CHP motor. The EXP 7i has a seven-inch monitor, which is half the size of the Commercial 1750’s 14-inch monitor. The small display might present challenges for those who want better clarity and visibility. The monitor on the 1750 also rotates, while the one on the EXP 7i does not, which can make it difficult to do workouts off the treadmill.

Regardless, the EXP 7i has some notable features that can make it a solid choice. For example, it has SmartAdjust machine learning technology that keeps track of changes you make during your workout. It remembers these changes and uses them later to help your machine adapt to your training level for future workouts.

An additional strength lies in the integration of trainer-led iFIT workouts, making the NordicTrack EXP 7i a smart choice for those seeking on-demand training sessions. These workouts are tailored to various fitness goals and experience levels, so you shouldn’t have a problem finding a program that suits your needs. The treadmill comes with a 30-day free trial to iFIT, but a subscription costs around $39 per month once the trial ends.

The NordicTrack EXP 7i’s advantages are noteworthy, and considering its features and affordability, this smart treadmill would be worthy of anyone prepared to create their very own home gym. 

RELATED: Best Home Gym Machines

Why Should You Buy a Treadmill?

Although you can walk or run outside, an at-home treadmill provides year-long opportunities to train, and it’s a convenient way to get your workout in if you can’t make it to the gym. In the long run, you’ll also likely save some money — but more on that below.

Convenience and Accessibility

Walking or running outside is an effective way to get more movement throughout the day, but what if you work out early in the morning or late at night and are concerned about your safety? Or perhaps there is inconsistent terrain that makes working out too difficult? When using a treadmill, you can walk or run safely and control the intensity of each session. 

Weather-Proof Workouts

With a treadmill, there is no need to worry about strategically planning your fitness around bad weather. You can train at any time with the simple push of a button, regardless of whether it’s snowing or raining.

Time Efficiency

Being able to train from home can save you a lot of time. You don’t have to commute to a gym or plan your day around a fitness studio’s class times. You can even work, read, or catch up on your favorite TV shows and movies while using your treadmill from the comfort of your home.

Health Monitoring

A big benefit to the treadmill is its ability to track performance data. It can measure your heart rate and caloric expenditure. Some machines can monitor your walking and running mechanics to automatically adjust to your performance. Other treadmills can allow you to integrate your own technology, such as heart rate monitors, to keep measurements on point, accurate, and insightful for future performance. 

Long-Term Savings

Investing in a high-quality treadmill can lead to significant long-term savings. Some of these savings could be a reduction in gym membership costs, transportation expenses, and potential health-related expenses due to the cardiovascular benefits of exercise. 

What to Consider When Buying a Treadmill

Our list provides a ton of great treadmills with different features. So how do you narrow it down to the best one for you? When buying a treadmill, you must consider the following:

Goals and Training Style

One of the most important considerations in purchasing a treadmill is your goals and training style. If you plan to walk, jog, or sprint to max capacity, this should be the driving force behind your decision. Not all treadmills are built the same, and some can only handle low-impact workouts or walking, so it’s important to find the one that meets your needs. 

Overall Dimensions

The size of your treadmill might limit your selection. Some of the treadmills on our list have foldable features, making them vertical and easy to place within your home. Others, like the WalkingPad, are portable and can be stored in several spaces. Knowing the dimensions of your workout space can make a difference in which treadmill you choose. 

Deck Size

The deck size of the treadmill refers to the area you run or walk on. For those who plan to use their treadmill for walking and low-intensity exercise, a narrow deck size of 16 inches could be sufficient. However, if you plan to jog, run, or sprint, you would want to consider a larger deck of  at least 20 inches wide and 54 inches long to meet the needs of how you will mechanically operate during movement. 

Another thing to consider is your height. If you’re six feet or taller, you may want a treadmill that’s at least 60 inches long and can accommodate a longer stride.

Technology

Technology plays a pivotal role in enhancing the treadmill experience. Modern treadmills integrate advanced features like touchscreen displays, interactive workout programs, and connectivity options. These innovations provide engaging and customizable workouts, real-time performance tracking, and the ability to sync with fitness apps like Garmin or Strava. 

Available Programming

Many treadmills now offer various programs and apps to provide different types of programming. You can potentially have access to hundreds of workouts and possibly an “at-home” trainer to make your workouts more challenging. This is a huge asset to anyone who needs the motivation and guidance to stick with their routine. 

Price

The price of treadmills can vary depending on the features provided. On our list, it ranges from $600 to just under $3,000. Having more features and technological advancements can amplify the price tag, but you do get a better at-home workout experience. Justifying a large purchase is much easier when considering the capabilities of your machine and how they can change your fitness forever. 

Noise Level

One concern of many treadmill users is noise. I have owned a few treadmills and the noise level can make a difference, especially when you share your space with others. Many treadmills now offer improved cushioning and shock absorption capabilities that keep the noise level as minimal as possible. 

Motor Size

Depending on your goals, you might need a horsepower motor as strong as 3.6 CHP that can help support high-velocity movement. Smaller motors of 2.6 CHP or less are better suited for low-impact exercise. Essentially, the more intense the workout, the greater the need for a stronger motor.

Some treadmills are unique, though, like the AssaultRunner Pro which is non-electric. This device matches the output of your stride, making it an ideal choice for those who want to be able to manually control their running speed.  

Warranty

A warranty provides reassurance against potential malfunctions and defects. It’s important to seek a treadmill with a comprehensive warranty covering both parts and labor. Some treadmills carry a one-year warranty for labor and a two- to three-year warranty for parts. This should ideally encompass key components such as the frame and motor.

Additionally, some manufacturers offer extended warranty options that start as low as $20 and could cover an extra year for parts and labor. 

Weight Capacity

Weight capacity is another fundamental consideration when choosing a treadmill. The typical weight capacity of a treadmill is between 250 to 300 pounds. Ensuring that the treadmill’s weight capacity aligns with your body weight prevents unnecessary strain on the machine. Opting for a treadmill with a weight capacity that surpasses your weight is wise, as it is more likely to provide a stable and reliable workout experience.

Assembly

Treadmills vary in terms of assembly complexity. It’s recommended to evaluate the assembly process by reviewing the provided user manual and considering the tools required for setup. Some treadmills might offer user-friendly assembly instructions and even include the necessary tools, while others may provide the option for professional assembly at an additional cost.

How To Care for a New Treadmill

Taking care of a treadmill is essential for longevity, optimal performance, and safety while using it. Here’s a guide to maintaining your treadmill:

Belt Lubrication

Some treadmills require regular belt lubrication to reduce friction and extend the treadmill belt’s lifespan. Follow the manufacturer’s guidelines on how often to lubricate and what type of lubricant to use for improving the lifetime of your belt. Most treadmills require a 100-percent silicone lubricant, which you can find on Amazon.

Power Source

Use a surge protector to safeguard the treadmill from power fluctuations. Ensure the power cord is properly connected and doesn’t get pinched or tangled. Having an incompatible power source could alter the function of your treadmill, or even ruin it. The voltage of most treadmills is said to be around 120 volts. 

Level Surface

Place the treadmill on a level surface to prevent strain on the frame and belt. Use a treadmill mat to protect your floors and dampen vibrations.

Belt Tension and Alignment

Regularly check the belt tension and alignment. A loose or misaligned belt can lead to uneven wear and decreased performance. The belt tension and alignment change through use, so the more you use your treadmill, the more often you will have to make these adjustments.

Most treadmill belts can be adjusted using an L-wrench or special tool (provided by the manufacturer) that can be used to tighten or loosen the belt around the base of the treadmill. However, the user’s manual will provide instructions on how to adjust the belt. 

Periodic Checkup

I highly recommend that you have periodic check-ups, especially if you use your treadmill frequently. Consider scheduling a professional maintenance check-up every year or as recommended by the manufacturer. A technician can identify and address any potential issues before they worsen. Some things to observe for a check-up include the belt’s tightness and belt alignment on the deck. 

Final Thoughts

Choosing the right treadmill requires you to consider your fitness goals, available space, and budget. Our list of the best treadmills caters to a diverse range of needs and preferences, highlighting key features and considerations to guide your decision-making process. From technologically advanced treadmills to compact and portable machines, each device offers unique benefits. 

Knowing these treadmills, how they work, and why you should purchase them are other aspects to consider during your research. The more you understand each treadmill’s capabilities, the easier your decision will be. Whether you seek high-intensity training or convenient walking options, the right treadmill will be the centerpiece of your home fitness journey. 

Best Treadmills for Home: Side-by-Side Comparison

Best Treadmill for Home Overall

Best Home Treadmill for Running

Best Home Treadmill for Walking

Best Incline Treadmill for Home

Best Small Treadmill for Home

Best Folding Treadmill for Home

Best Treadmill for Home Under $500

Best Portable Treadmill for Home

Description:
  • Overall dimensions: 80” L x 38” W x 65” H
  • Deck size: 60” L x 20” W
  • Max speed: 12 miles per hour
  • Max incline: 12 percent
  • Decline: -3 percent
  • Programming: iFIT (free for 30 days, then $39 per month)
  • Motor: 3.5 CHP motor
  • Weight capacity: 300 pounds

Description:
  • Overall dimensions: 69.9” L x 31” W x 64.4” H 
  • Deck size: 17” W by 62” L
  • Max speed: As fast as you can run
  • Max incline: N/A 
  • Decline: N/A
  • Programming: Compatible with the Assault Fitness App
  • Motor: Non-electric
  • Weight capacity: 350 pounds

Description:
  • Overall dimensions: 32.5” L x 21.5” W x 5” H when folded; 56.5” L x 21.5” W x 5” H when unfolded
  • Deck size: 47” L x 16” W
  • Max speed: 3.72 miles per hour
  • Max incline: N/A
  • Decline: N/A
  • Programming: WalkingPad App
  • Motor: Brushless motor
  • Weight capacity: Between 230 and 300 pounds

Description:
  • Overall dimensions: 77.3” L x 35.3” W x 59.6” H
  • Deck size: 60” L x 20” W
  • Max speed: 12 miles per hour
  • Max incline: 12 percent
  • Decline: -3 percent
  • Programming: iFIT (free for 30 days, then $39 per month)
  • Motor: 3.6 CHP
  • Weight capacity: 300 pounds

Description:
  • Overall dimensions: 69” L x 31” W x 49” H 
  • Deck size: 20” W x 55” L
  • Max speed: 12 miles per hour
  • Max incline: 10 percent
  • Decline: N/A
  • Programming: Eight programmed workouts provided
  • Motor: Brushless DC motor; 1.75 CPH
  • Weight capacity: 300 pounds

Description:
  • Overall dimensions: 71″ L x 34″ W x 57″ H when unfolded; 46″ L x 34″ W x 61″ H when folded
  • Deck size: 55” L x 20” W
  • Max speed: 10 miles per hour
  • Max incline: 10 percent
  • Decline: N/A 
  • Programming: N/A
  • Motor: 2.5 CHP
  • Weight capacity: 300 pounds

Description:
  • Overall dimensions: 63.4″ L x 28.75″ W x 51.4″ H
  • Deck size: 50” L x 16” W
  • Max speed: 10 miles per hour
  • Max incline: Three levels
  • Decline: N/A 
  • Programming: 12 preset programs
  • Motor: 2.25 HP motor
  • Weight capacity: 250 pounds

Description:
  • Overall dimensions: 70.8” L x 34.9” W x 59.7” H
  • Deck size: 55” L x 20” W
  • Max speed: 10 miles per hour
  • Max incline: 12 percent
  • Decline: N/A
  • Programming: iFIT
  • Motor: 2.6 CHP Plus Motor
  • Weight capacity: 300 pounds

Best Treadmill for Home Overall

Description:
  • Overall dimensions: 80” L x 38” W x 65” H
  • Deck size: 60” L x 20” W
  • Max speed: 12 miles per hour
  • Max incline: 12 percent
  • Decline: -3 percent
  • Programming: iFIT (free for 30 days, then $39 per month)
  • Motor: 3.5 CHP motor
  • Weight capacity: 300 pounds

Best Home Treadmill for Running

Description:
  • Overall dimensions: 69.9” L x 31” W x 64.4” H 
  • Deck size: 17” W by 62” L
  • Max speed: As fast as you can run
  • Max incline: N/A 
  • Decline: N/A
  • Programming: Compatible with the Assault Fitness App
  • Motor: Non-electric
  • Weight capacity: 350 pounds

Best Home Treadmill for Walking

Description:
  • Overall dimensions: 32.5” L x 21.5” W x 5” H when folded; 56.5” L x 21.5” W x 5” H when unfolded
  • Deck size: 47” L x 16” W
  • Max speed: 3.72 miles per hour
  • Max incline: N/A
  • Decline: N/A
  • Programming: WalkingPad App
  • Motor: Brushless motor
  • Weight capacity: Between 230 and 300 pounds

Best Incline Treadmill for Home

Description:
  • Overall dimensions: 77.3” L x 35.3” W x 59.6” H
  • Deck size: 60” L x 20” W
  • Max speed: 12 miles per hour
  • Max incline: 12 percent
  • Decline: -3 percent
  • Programming: iFIT (free for 30 days, then $39 per month)
  • Motor: 3.6 CHP
  • Weight capacity: 300 pounds

Best Small Treadmill for Home

Description:
  • Overall dimensions: 69” L x 31” W x 49” H 
  • Deck size: 20” W x 55” L
  • Max speed: 12 miles per hour
  • Max incline: 10 percent
  • Decline: N/A
  • Programming: Eight programmed workouts provided
  • Motor: Brushless DC motor; 1.75 CPH
  • Weight capacity: 300 pounds

Best Folding Treadmill for Home

Description:
  • Overall dimensions: 71″ L x 34″ W x 57″ H when unfolded; 46″ L x 34″ W x 61″ H when folded
  • Deck size: 55” L x 20” W
  • Max speed: 10 miles per hour
  • Max incline: 10 percent
  • Decline: N/A 
  • Programming: N/A
  • Motor: 2.5 CHP
  • Weight capacity: 300 pounds

Best Treadmill for Home Under $500

Description:
  • Overall dimensions: 63.4″ L x 28.75″ W x 51.4″ H
  • Deck size: 50” L x 16” W
  • Max speed: 10 miles per hour
  • Max incline: Three levels
  • Decline: N/A 
  • Programming: 12 preset programs
  • Motor: 2.25 HP motor
  • Weight capacity: 250 pounds

Best Portable Treadmill for Home

Description:
  • Overall dimensions: 70.8” L x 34.9” W x 59.7” H
  • Deck size: 55” L x 20” W
  • Max speed: 10 miles per hour
  • Max incline: 12 percent
  • Decline: N/A
  • Programming: iFIT
  • Motor: 2.6 CHP Plus Motor
  • Weight capacity: 300 pounds

FAQs

What is the best treadmill for home?

The best treadmill for home gyms is the NordicTrack Commercial 1750. It provides a ton of features, including a powerful motor that allows you to run as fast as 12 miles per hour and the ability to walk or run at a decline or an incline. Its 14-inch tilted interactive touchscreen also allows you to perform hundreds of trainer-led iFIT workouts. 

What are some features of a good treadmill for home use?

Some of the features to look for in a good treadmill are the deck size, noise level, weight capacity, technology, storage options, and price.

Are NordicTrack treadmills worth the money?

NordicTrack treadmills are worth the money, as they provide a ton of features to enhance your exercise experience. One of the top features is the optional iFIT membership subscription, which gives you a library of hundreds of workouts to perform on and off the treadmill. Other benefits include a powerful motor, 300-pound weight capacity, and multiple speed and incline settings. 

Resources

  1. 7 Heart benefits of exercise. (2021, August 8). Johns Hopkins Medicine. https://www.hopkinsmedicine.org/health/wellness-and-prevention/7-heart-benefits-of-exercise

The post Best Treadmills for Home for Running, Walking, and More (2023) appeared first on Breaking Muscle.

Be Nice and Share!
This post was originally published on this site

Originally Posted At: https://breakingmuscle.com/feed/rss

2019 World’s Strongest Man (WSM) and 2022 Arnold Strongman Classic (ASC) champion Martins Licis had taken time away from competing to focus on business and personal ventures as well as filming his “Strength Unknown” YouTube series.

However, it appears he hasn’t let those priorities affect his training and the former champion may be poised to return to strength sports in the near future. Licis posted an Instagram reel of himself deadlifting 365 kilograms (804 pounds) for three reps while training in Wreck It Gym in El Segundo, CA.

Licis was wearing knee sleeves and using lifting straps, but he didn’t have on a deadlift suit or even a weightlifting belt for added support. Using a “rolling start,” Licis dipped his hips low and rolled the bar away from his feet before pulling the bar in toward his legs and locking out the first rep with no trouble. After he returned the weight to the floor, he rolled it out and back in again for rep number two. He repeated that motion one more time for his final rep. The champion strongman made the third rep looked so easy, he possibly could’ve done another rep (or more) if he wanted to.

According to the caption of the post, this set meant more to Licis than a standard work set. It served as notice to a fellow WSM and ASC champion, Mitchell Hooper, that he may be on his way back to competing next year.

“I promised [2023 World’s Strongest Man Mitchell Hooper] that if I could start repping this weight, it would be a good sign for me competing again next year,” he wrote, adding a biceps and fist bump emoji. “So alright buddy, it looks like I’ll be back. Just gotta keep it slowly creepin’ up for the [Arnold] strongman classic and beyond. I’m excited!”

The 2024 Arnold Strongman Classic is set to take place on Mar. 1-2, 2024 in Columbus, OH. If Licis makes it to that contest, and if Hooper chooses to defend his title, then the two most recent ASC champions would be trading lifts in Columbus to potentially determine the 2024 champion. 

There was already buzz for that contest because three-time ASC winner and 2018 WSM Hafthor Bjornsson had announced he would come back from a short-term retirement to attempt winning a fourth title in 2024. His first three titles came in 2018, 2019, and 2020. However, Bjornsson suffered a pec tear during a powerlifting meet in April 2023. His recovery and preparation status for the 2024 ASC is currently unknown. If Bjornsson was to compete alongside Licis and Hooper, then every champion from 2018 to 2023 would be on the roster for the contest. There was no ASC held in 2021.

As for Licis, he is already slated to return as the captain for Team USA in the 2023 World’s Strongest Nation (WSN) contest on Nov. 18, 2023. The UK team captain will once again be 2017 WSM Eddie Hall, whose team won the 2022 WSN. Licis has not competed in a strongman contest since the loss.

Featured Image: @martinslicis on Instagram

The post Martins Licis Deadlifts 365 Kilograms (804 Pounds) for 3 Reps, Ready for a Return to Strongman appeared first on Breaking Muscle.

Be Nice and Share!
This post was originally published on this site

Originally Posted At: https://breakingmuscle.com/feed/rss

In a quest for upper back size and strength, and the muscular silhouette that comes with it, lifters are increasingly finding room for a unique rowing exercise in their back-building routines. The barbell high row, sometimes called the wide row, is a bent-over barbell row performed with a distinctive setup and arm path that hammers the entire upper half of your back, especially your mid-back and shoulders.

While bent-over rows and reverse flyes are traditional choices to target these regions, the barbell high row offers distinct mechanical advantages that promote targeted loading and honest form.

Long-haired person in gym preparing to lift barbell off ground
Credit: Jacob Lund / Shutterstock

The barbell high row is an old school exercise enjoying widespread recognition. Whether you use it to round out an intense back workout or to round out the backsides of your shoulders, the barbell high row is a solid addition to any lifting routine.

Barbell High Row

Barbell High Row Video Guide

Dr. Merrick Lincoln, the article’s author, provides an instruction video explaining the barbell high row. Watch the demonstration, then check out the step-by-step analysis with more form tips.

YouTube Video

How to Do the Barbell High Row Step By Step

To get the benefits of the barbell high row, you’ll need to focus on crisp, strict form. Execute pristine barbell high rows with these four steps.

Step 1 — Take a Wide Grip

Dr. Merrick Lincoln in gym demonstrating barbell row
Credit: Merrick Lincoln, DPT, CSCS / YouTube

The barbell high row uses a significantly wide overhand grip — specifically, a “snatch grip” similar to the Olympic weightlifting exercise. Your hands should grab the bar substantially beyond your shoulders and approximately the distance between the points of your elbows when your arms are outstretched at shoulder-height.

Form Tip: Rather than getting the measuring tape, a simple technique to determine an appropriate grip width is to grab the bar in the “scarecrow position:” bend forward, flare your elbows to shoulder-height, and allow your forearms to hang with your elbows at an approximately 90-degree angle. Grab the bar at this width. 

Step 2 — Stand Up, Then Hinge Down

Dr. Merrick Lincoln in gym demonstrating barbell row
Credit: Merrick Lincoln, DPT, CSCS / YouTube

Grip the bar firmly and stand up straight, allowing your elbows to straighten with the barbell resting near your hips. Hinge forward at your hips, letting your hips flex as your buttock travels backward to keep you balanced. The position of your spine should remain virtually unchanged — no rounding. Keep a slight bend in your knees throughout the movement.

Form Tip: Lower until you feel a stretch in your hamstrings (behind your thighs) or when the plates are hovering just above the ground, whichever comes first. 

Step 3 — Pull High and Wide

Dr. Merrick Lincoln in gym demonstrating barbell row
Credit: Merrick Lincoln, DPT, CSCS / YouTube

Hold the bent position and pull the barbell toward your upper chest, or just below your collarbone, by simultaneously driving your elbows out to your sides while drawing your shoulder blades together. Not all lifters will be able to touch the barbell to the upper chest, and that is okay.

Form Tip: Think about “stretching” the bar or making it longer as you pull. This cue reinforces proper arm path. Ensure your elbows remain flared to the sides and not alongside your ribs.

Step 4 — Lower With Control

Dr. Merrick Lincoln demonstrating barbell row
Credit: Merrick Lincoln, DPT, CSCS / YouTube

Lower the barbell toward the floor by allowing your elbows to straighten and your shoulder blades to be pulled apart, moving forward around your ribcage. Maintain the hinged forward position and repeat the pull for additional rowing repetitions

Form Tip: Don’t miss out on the stretch across your mid-back at the bottom. Ensure your trunk angle or hip hinge depth allows you to get a full range of motion without the barbell plates touching the ground. If you’re flexible and the weight plates hit the floor before you feel the stretch, reset your trunk angle by extending your hips or load the bar with smaller diameter plates.

Barbell High Row Mistakes to Avoid

The barbell high row involves stability and a degree of coordination between your upper and lower body. Keep exercise quality high by avoiding these recurring errors.

Using Too Much Biceps

Training your biceps is nice, but hitting the target muscles of your shoulders and back is nicer. It has been suggested that rowing with greater than 90-degrees of elbow flexion increases contribution of the biceps brachii. (1)

Muscular man performing barbell row exercise
Credit: Miljan Zivkovic / Shutterstock

Moreover, rowing with excessive elbow flexion reduces the resistance arm, or perpendicular distance between the barbell and the shoulder joint, which ultimately reduces demand on the shoulder musculature. 

Avoid it: Avoid letting your biceps steal the row by using appropriate grip placement, setup, and technique. First, ensure your grip is overhand and spaced approximately the distance between your elbows when your arms are at shoulder-height. Second, when you hinge forward to set up, ensure the bar is hanging underneath your upper chest. Finally, pull toward your upper chest, not your stomach.

Poor “Scapulohumeral Rhythm”

As you pull your arms back, or horizontally abduct your shoulder joint, your shoulder blades ought to come together, or retract. The coupling of shoulder joint motions with appropriate shoulder blade motions is called scapulohumeral rhythm. If your blades aren’t working with your shoulder joints, well, you’ve got no rhythm.

Muscular person in gym performing barbell row
Credit: Jasminko Ibrakovic / Shutterstock

Avoid it: Draw your shoulder blades back as you perform the upward movement phase of the row. A useful cue is to create progressively more space between the front of your shoulder and the floor as you row. (2) Then, allow this space to shrink as you perform the downward movement phase.

Momentum from Your Hips or Trunk

While the upward movement phase of the repetition should be performed with powerful intent, form should not be compromised. If the angle between your trunk and the floor dramatically changes during each repetition, with your torso dipping up and down, you’re cheating and likely sacrificing tension on the target muscles.

Bald person in gym doing barbell deadlift
Credit: UfaBiaPhoto / Shutterstock

Avoid it: If you cannot fix this error by stiffening your midsection and consciously keeping a tight core, it may be time to reduce the weight and put in some more practice sets.

How to Progress the Barbell High Row

Once the barbell high row begins to feel relatively easy, you need progression to ensure ongoing gains. Based on your goals and preferences, consider the following strategies.

Add Repetition Volume

Unlike the bench press, no one will ever ask how much weight you can barbell high row, because no one really cares. So, rather than adding weight when your sets of barbell high rows start to feel “easy,” simply add another repetition or two per set.

Provided your sets have not become miniature endurance events limited by other energy systems, gradually progressing into higher repetition ranges can be effective for building muscle. (3)

If you’re a physique-focused lifter who enjoys moderate-to-high volume sets, and your sets are still under 25 or 30 repetitions, continue to add repetitions until your sets become challenging again.

Increase the Weight

Adding more repetitions may stimulate ongoing muscle growth, but it may not be the best option for building strength in your back and shoulders. Strength, defined as the ability to exert force in a measurable and meaningful way, is logically best developed using progressively heavier loads.

If you are a strength-focused athlete who is consistently hitting six or more repetitions per set with some in the tank, it may be time to add some change plates to the bar. For your working sets, start by adding increments of 2 to 5% of the total weight.

Consider an Eccentric Tempo

Popular wisdom in the gym suggests using a relatively slow tempo during the downward movement (eccentric phase) can improve your gains. However, this topic is more controversial than it seems. Research on intentionally slow eccentric training is mixed when it comes to hypertrophy and appears decidedly unwise for strength goals. (4)

Tattooed woman preparing to lift barbell
Credit: Jacob Lund / Shutterstock

However, if you find yourself unable or unwilling to progress barbell high rows via the traditional methods discussed above (e.g., injury, lack of additional weights, or good old-fashioned stubbornness), applying an eccentric tempo may be worth consideration. 

If using an intentionally slow tempo during the eccentric requires you to decrease the weight or reduce the repetitions performed, it likely does not represent a progression. (4) To be clear, using an eccentric tempo is only a progression if you impose it upon the repetitions and load your body is accustomed to. If you choose to experiment with eccentric tempo work, a lowering phase that lasts for a full three-to-four count is a reasonable target.

Finally, intentionally slowing the upward movement (concentric phase) of a lift has little to no physiological benefit. (5) So you will still want to strike the balance between intent for bar speed and control during the concentric.

Benefits of the Barbell High Row

Why are more and more lifters choosing the barbell high row to build their shoulders and backs? Because this rediscovered exercise has advantages that other common options cannot match.

Robust Shoulder Complex Training

The shoulder complex includes the shoulder joint proper (i.e., glenohumeral joint), the shoulder girdle (i.e., shoulder blade and collar bone), along with all associated muscles. While other types of rows may hit your latissimus dorsi harder, arguably no common row variation trains the back of the shoulder complex as robustly as the barbell high row. 

Although we tend to classify all rowing exercises as “horizontal pulling,” the uniqueness of the high row is all about differences in angles and arm paths. Most row variations bias your shoulder extensors due to relatively narrow and low arm paths. These muscles are also trained in neutral-grip lat pulldowns, neutral-grip pull-ups, chin-ups, and other similar exercises.

However, the barbell high row trains your shoulder horizontal abductors due to the high and wide arm path. These muscles include the rear deltoid, part of the middle deltoid, and even several muscles of the rotator cuff.

Muscular person in gym preparing to lift barbell
Credit: Paul Aiken / Shutterstock

High rows may better target your mid-back, namely the middle trapezius, compared to row variations with lower arm paths (6) This finding makes sense, because the high and wide resistance applied through your arms maximizes resistance to the scapula retractor muscles.

If you are already hitting pulldowns or bent-over rows, the barbell high row might be a great addition to round out your training for the back of the shoulder complex. It can also serve as a substitute for reverse flyes, as discussed below.

Hard to Cheat

Compared to reverse flyes, a dumbbell exercise for your rear deltoids and mid-back, the barbell high row promotes strict form. It is a little too easy to generate momentum at the bottom part of a reverse flye, and that momentum helps to carry the dumbbells to the top position without significant muscular activation.

The barbell high row, on the other hand, leaves little room for generating arm swing because tension never really comes off the working muscles. What’s true for both exercises, however, is that you must still remain vigilant to avoid momentum from your hips. This can be accomplished by carefully maintaining the same trunk angle, or distance between your trunk and the floor, throughout the exercise. 

Low Back Health

If you could collect a dollar every time you see an exercise purported to “bulletproof” the low back, you could quickly buy a barbell and build strength and endurance with hip hinge or forward-bent exercises.

Barbell exercises that load the hip hinge include deadlifts, good mornings, bent-over rows, and high rows. They’re all effective for training the spinal erector muscles. For this reason, among others, these exercises may be useful for combating low back problems. For example, the Pendlay row has been used as a part of an effective resistance training protocol for individuals with low back pain. (7)

The barbell high row is an effective exercise for building low back strength and endurance. Will the exercise “bulletproof” your low back? Not in the literal sense, but it may be worth a shot for potentially preventing back problems or treating appropriate types of low back pain.

Disclaimer: All brands of low back pain are different. If you are suffering from low back pain or injury, you should get checked out by a sports medicine physician or physical therapist.

Muscles Worked by Barbell High Row

While traditional bent-over rows and reverse grip bent-over rows are great for building lats due to their narrower grip and lower bar path, the barbell high row biases different muscles of your back. It’s also a phenomenal shoulder-builder.

Middle Trapezius and Rhomboids

Your mid-back muscles include the rhomboids major, rhomboids minor, and the middle part of the trapezius. Rhomboids retract your scapulae, or pull the shoulder blades together, and assist with downward rotation and elevation.

Muscular person flexing back and shoulder muscles
Credit: PeopleImages.com – Yuri A / Shutterstock

The muscle fibers of the middle part of the trapezius, sometimes called “middle traps,” are oriented horizontally, so they exclusively perform scapula retraction. Since retraction is the predominant resisted movement of the shoulder blades during the barbell high row, it hits middle trapezius and rhomboids.

Rear and Middle Deltoids

Your deltoids are the round muscles that sit atop and envelop your shoulder joints. Well-built deltoids have a “capped” or rounded appearance, which requires training the front, middle, and rear portions of the muscle. The barbell high row hammers the rear deltoids and also hits some of the middle fibers.

Rotator Cuff

The rotator cuff consists of four deep muscles and tendons that surround the ball and socket joint of the shoulder. They are typically considered stabilizing muscles, working to counteract or modify forces imposed on the joint by much larger superficial muscles. During rows, the subscapularis, or anterior rotator cuff, has been shown to be most active. (8)

In addition, anatomical analysis of the posterior rotator cuff (infraspinatus and teres minor) suggests these muscles may also be trained along with the posterior deltoid during the barbell high row. Both muscles pass behind the shoulder joint and are mechanically suited to act as horizontal abductors.

How to Program the Barbell High Row

The barbell high row can be programmed in a full-body workout or in a variety of workout splits. As a multi-joint pulling exercise, the barbell high row can be used to build functional strength or as an efficient way to pack on mid-back and shoulder muscle.

As a Moderate Weight Back-Builder

Lifters with hypertrophy or muscle-building goals should focus on moderate weight sets of barbell high rows. As a rule of thumb, you will use 30-50% less weight for the barbell high row than you do for standard bent-over barbell rows.

For those reaching for calculators or scrolling for calculator apps, relax. There is no need to overthink the weight and repetition range. As long as your sets are high effort, or carried out close to muscular failure, they will be effective at virtually any weight. (3)(9) To put on muscle, perform three or four sets of eight or more repetitions, taking each working set to within two or three repetitions of failure. Rest two or three minutes between sets.

As a Strength Staple

Load barbell high rows with relatively heavy weight, and you’ve got a potent exercise for building upper back and shoulder strength. As the weight increases, stay disciplined with your form. Extending your hips to initiate the row shifts emphasis from your upper body to your lower body.

To build pulling strength, perform three or four sets of four to six repetitions using a challenging weight. Rest two to four minutes between sets.

As Part of a Superset

Using supersets refers to two different exercises performed back-to-back without a rest interval in between. It’s a time-efficient training method, if you’re tough enough to handle it. In the strictest sense, the two exercises comprising a superset should target antagonistic or opposite muscle groups.

Man outdoors on flat bench lifting dumbbells
Credit: MDV Edwards / Shutterstock

Since the barbell high row is a horizontal pulling exercise primarily targeting the back and rear deltoids, its superset counterpart should be a horizontal pushing exercise that hits the chest and front of the shoulders. Appropriate “pushing” exercise options for this push-pull superset include the time-honored bench press, the dumbbell hex press, or the dumbbell bench press

Supersets save time, and research indicates lifters experience similar hypertrophy gains compared to straight sets. (10) While supersets are known to result in greater perceived exertion and discomfort, most lifters prefer them over traditional straight sets. (11) For an efficient workout, perform a pressing exercise immediately followed by the barbell high row with no rest in between.

Barbell High Row Variations

Looking for other effective exercises to build your mid-back and shoulders? The row variations below use barbells, dumbbells, resistance bands, and machines to spice up your workout. 

Meadows Row

Another increasingly popular type of exercise uses a barbell as a lever. They’re called landmine exercises. (2) The Meadows row is a single-arm high row landmine exercise. It was popularized by the late coach John Meadows, MS, CSCS.

YouTube Video

Aside from the ability to perform the movement unilaterally, a feature making the Meadows row unique is the resistance curve of the exercise. The barbell lever makes the row “heavier” at the bottom position. (2) Keep in mind, you’re stronger at the bottom of the rowing motion than you are at the top. (2)

Also, the target muscles of the mid back and shoulders are stretched at the bottom position while they are exposed to greater loads. These features can make the Meadows row incredibly effective for building pulling capacity and stimulating stretch-mediated hypertrophy.

Resistance Band High Row

Resistance band exercises are great for warm-ups, accessory exercises, pump-work, and travel. The resistance band high row allows for quick setup and performance of the high row movement in an upright position.

YouTube Video

To perform resistance band high rows, simply anchor a resistance band securely at the level of your upper chest and take an overhand grip on the band — slightly wider than shoulder-width if using a loop-style resistance band. With your arms at shoulder height, back up into tension. Pull the handles high and wide, leading with your elbows, to bring the band to your upper chest before returning to the starting position. Be sure not to turn the movement into a face pull by pulling the band to eye-level.

Three-Point Dumbbell Wide Row

The dumbbell wide row is the single-arm version of the barbell high row. (1) Using a three-point stance on a bench provides the support you may need to zero-in on target muscles.

YouTube Video

Set up by placing the non-working side knee and palm on the bench, with your working-side foot on the floor, and the dumbbell in the working-side hand. Drive your elbow out the side as you pull toward the upper chest. Return to the starting position while allowing your shoulder blade to “wrap forward” around your ribcage.

Machine Wide Row

Support and guidance offered by a well-built machine can help to ensure your rear deltoids and mid-back receive the intended training stimulus from wide rows. The machine can also minimize demands on your low back, which can be useful when managing fatigue throughout a grueling workout.

YouTube Video

Find a row machine with wide-set horizontal handles. Adjust the seat to allow a high arm path toward your upper chest. Take overhand grips on the handles and draw the machine’s movement arms back. Like the barbell version, drive your elbows out to your sides and retract your shoulder blades as you pull. Reverse the movement to return to the start position.

FAQs

What’s the difference between the barbell high row and the bent-over barbell row?

While both exercises are performed from the hip hinge position with overhand grips, the barbell high row uses a significantly wider grip. Due to the wider grip, the natural bar path for the high row is “higher” as the bar is pulled toward the upper chest, while the bent-over row is pulled toward the lower chest or upper stomach.

What’s the difference between the barbell high row and the Pendlay row?

The barbell high row uses a grip significantly wider than the shoulders and begins with the barbell suspended in the air while maintaining a hip hinge position. The Pendlay row uses an overhand grip that’s slightly wider than the shoulders and each repetition begins from a dead-stop on the floor.
Once again, the difference in grip width results in different natural bar paths. While the barbell high row bar path leads toward the upper chest, the Pendlay row is directed toward the lower chest. (7)

“Should I squeeze my shoulder blades together before I row?”

Some coaches encourage lifters to retract or set their shoulder blades prior to initiating the row. While this could be useful as a very early teaching drill, training using this technique is misguided. 
During functional movements like a row, the shoulder joints and shoulder blades should work together to accomplish the task. While retraction is the appropriate movement of the scapulae, performing it prior to the row limits the tension the mid-back is exposed to during the row. The dynamic retraction work is already complete before movement of the upper arm bone amplifies the resistance arm.
We know muscles are stronger isometrically than concentrically, so simply holding the retracted position during the most challenging portions of the row will fail to stimulate as much mid-back growth as performing rows the correct way — retract as you row.

Barbell high rows for low back health? Why not deadlift instead?

That’s an option. Both exercises train your spinal erector muscles. Deadlifts were part of the low back pain protocol study discussed above, and additional evidence suggests deadlifts may be useful for individuals suffering from low back pain. (7)(12)(13)
However, there are a few reasons the barbell high row might be favored over deadlifts. The barbell high row uses substantially less weight than deadlifts, which may result in less compressive loading through the spine. But the bar path of the high row is farther from the lumbar spine than it is in the deadlift, meaning the barbell has a larger resistance moment arm. The longer resistance arm applies proportionately larger torque or demand on the low back, which is ultimately counteracted by the spinal erectors.
Finally, during the row, the lifter remains hinged forward at the hips throughout the entire set, which may lead to the development of greater muscular endurance in the low back. Both are great exercises. Again, if you are suffering from back issues, consult a sports medicine physician or physical therapist for individualized advice.

Build a Top-Level Physique with the Barbell High Row

The barbell high row is an effective exercise for adding muscular thickness behind the shoulders and between the shoulder blades. Over time, this new muscle will fill out the top half of your physique. Better yet, to help keep you in the gym long enough to realize those gains, the barbell high row also promotes shoulder and low back stability.

References

  1. Hedrick, A., & Herl, M. (2021). Technique of the unilateral dumbbell wide row. Strength & Conditioning Journal43(4), 121-123.
  2. Lincoln, M. A., et al. (2023). Exercise Technique: The Landmine Row. Strength & Conditioning Journal45(3), 371-378.
  3. Schoenfeld, B., et al. (2021). Resistance training recommendations to maximize muscle hypertrophy in an athletic population: Position stand of the IUSCA. International Journal of Strength and Conditioning1(1), 1-30.
  4. Suchomel, T. J., et al. (2019). Implementing eccentric resistance training—part 1: a brief review of existing methods. Journal of Functional Morphology and Kinesiology4(2), 38.
  5. Hermes, M. J., & Fry, A. C. (2023). Intentionally Slow Concentric Velocity Resistance Exercise and Strength Adaptations: A Meta-Analysis. Journal of Strength and Conditioning Research37(8), e470-e484.
  6. Lim, J. Y., et al. (2015). A comparison of trapezius muscle activities of different shoulder abduction angles and rotation conditions during prone horizontal abduction. Journal of Physical Therapy Science27(1), 97-100.
  7. Tjøsvoll, S. O., et al. (2020). Periodized resistance training for persistent non-specific low back pain: a mixed methods feasibility study. BMC Sports Science, Medicine and Rehabilitation12, 1-12.
  8. Wattanaprakornkul, D., et al. (2011). Direction-specific recruitment of rotator cuff muscles during bench press and row. Journal of Electromyography and Kinesiology21(6), 1041-1049.
  9. Weakley, J., et al. (2023). Physiological Responses and Adaptations to Lower Load Resistance Training: Implications for Health and Performance. Sports Medicine-Open9(1), 1-10.
  10. Fink, J., et al. (2021). Physiological Responses to Agonist–Antagonist Superset Resistance Training. Journal of Science in Sport and Exercise3, 355-363.
  11. Andersen, V., et al. (2022). A comparison of affective responses between time efficient and traditional resistance training. Frontiers in Psychology13, 912368.
  12. Aasa, B., et al. (2015). Individualized low-load motor control exercises and education versus a high-load lifting exercise and education to improve activity, pain intensity, and physical performance in patients with low back pain: a randomized controlled trial. Journal of Orthopaedic & Sports Physical Therapy45(2), 77-85.
  13. Welch, N., et al. (2015). The effects of a free-weight-based resistance training intervention on pain, squat biomechanics and MRI-defined lumbar fat infiltration and functional cross-sectional area in those with chronic low back. BMJ Open Sport & Exercise Medicine1(1), e000050.

Featured Image: Paul Aiken / Shutterstock

The post How to Do the Barbell High Row for a Powerful, Muscular Upper Back appeared first on Breaking Muscle.

Be Nice and Share!
This post was originally published on this site

Originally Posted At: https://breakingmuscle.com/feed/rss

2022 Mr. Olympia runner-up Derek Lunsford has his sights set on becoming the 18th man to win the title at the 2023 Olympia Weekend in Orlando, FL on Nov. 2-5, 2023. The former NPC USA winner (2017) and 212 Olympia champion (2021) will have to be his all-time best if he wants to win the world championship of his sport. 

Lunsford has been keeping his fans up to date on his progress leading up to that contest on social media, including training videos like the one he released documenting a shoulder workout at MI40 Gym in Tampa, FL just 11 weeks before the big show. The video below was shared on his YouTube channel on Aug. 21, 2023.

YouTube Video

Machine Lateral Raise

Lunsford began the session with machine lateral raises to focus on his side delts. He’s already lean enough that you can see the muscles working as he lifted the handles of the machine. The weight he was working with wasn’t shown, but he appeared to be in full control throughout his sets.

He would occasionally perform poses between sets to analyze his physique and prepare for the multiple rounds of posing he’ll have to do on stage at the contest. He gave the fans extra details about his training at this stage of his prep.

“I like to train six days in a row, take the seventh day off,” he said. “Occasionally in the offseason, I’ll take two days rest but, pretty much between here and the Olympia, six days a week. Today’s day five. Shoulders today. Yesterday I did legs.”

The camera briefly showed the pin set on the weight stack at 190 pounds (86.2 kilograms), which Lunsford performs for 12 reps on his third set. He ultimately pinned the entire stack of 250 pounds (113.4 kilograms) and worked a final set to failure plus several partial reps, which he counted as 15 total reps. After five total sets, he moved on to the next exercise.

Standing Dumbbell Lateral Raise

The second movement was another lateral raise, this time using a free weight version with classic standing dumbbell laterals. Five total sets were shown on camera, with the third set shown in its entirety for 12 reps. His fourth set was for 12 full range reps plus partials, and he showed the camera that the gym’s 33-kilogram dumbbells he used are equivalent to 72.7 pounds, indicating that he’s feeling strong at this phase of his prep.

“Not my best ever, but it’s still over 70 pounds.”

Lunsford then finished with a back-off set using 28 kilograms (61.7 pounds), so he could better control the weight, before moving on.

Seated Smith Machine Press

With two lateral delt-focused movements completed, Lunsford focused on the front delts with seated overhead presses on a Smith machine. Lunsford used a moderately wide grip and lowered the bar to about chin-height before pressing it up. He would also stop short of lockout to keep tension on the working muscles. He had elbows sleeves on, as well.

Lunsford began with one 45-pound plate per side, then went up to two. He would eventually add a 25-pound plate per side for a third set with a spotter providing assistance at the end. He would remove those 25s for two additional sets, keeping with his training philosophy of using back-down sets.

“I like to do back-off sets periodically in my training … you do a couple of warm-up sets, do a top set or two, and then that last set. Do one more set but back it down and try to get better control and get as many reps as you can … So instead of, ‘Well, I got 15 reps. Might not have been controlled, but I still got 15 reps, let me go heavier,’ Actually, let’s get better time under tension. Let’s get better control of the weight. Let’s get a few more reps that are clean. What is that gonna do? That’s going to stimulate the muscle more and prevent injury. Smarter.”

Front Raises

Lunsford’s next exercise was an isolation movement with a twist. He would perform three sets of front raises with his palms facing each other, followed by three more sets with his palms facing down. He told the camera that each set would be done for 10 to 12 reps. However, he would keep the rest to no more than 40 seconds between each set. He saved even more time by working both shoulders simultaneously.

Reverse Pec-Deck

The bodybuilder then shifted focus to his rear delts, beginning with a reverse pec-deck. The former Olympia 212 champion would use the horizontal handles for a palms-down grip, and the camera panned over to Lunsford’s side, where you could see the rear delts working. Not all sets were shown, but he later said he did three sets in total.

Rear Lateral Raise

Following that exercise, Lunsford opted for a free weight movement. He sat on the end of a bench with dumbbells in his hands and performed bent-over lateral raises to target the rear delts again. He progressed to doing sets standing, with his torso bent at a 45-degree angle. Like the front raises, he deliberately changed his hand position with the two rear delt movements — having his palms facing down during the reverse pec-deck and facing his palms together with the bent-over lateral raises. He explained why these details matter.

“Switching up the hand positioning is going to help you target a little bit different portion of the delts.”

Cable Lateral Raise and Cable Upright Row

Lunsford felt the need to target the side delts one last time. So, he went to a seated cable row station with two cables and performed a unique cable lateral raise variation. He lied back on the pad and pulled the cable handles out to his sides, as if he was doing a standing lateral raise. He performed one set in this manner, followed by the final exercise of the day — three sets of a cable upright row in the same reclined position on the seated row bench.

3D Shoulder Workout

If you want to give Lunsford’s style of training a try for yourself, you can follow the sample workout below.

  • Machine Lateral Raise — 5 x 12-15
  • Standing Dumbbell Lateral Raise — 5 x 12-15 (Final set with reduced weight)
  • Seated Smith Machine Press — 5 x 10-12 (Final set with reduced weight)
  • Front Raise — 6 x 10-12 (30-40 seconds rest, 3 sets palms-in/3 sets palms-down)
  • Reverse Pec-Deck — 3 x 10-12 (Palms-down)
  • Rear Lateral Raise — 3 x 10-12 (Palms-in)
  • Cable Lateral Raise — 1 x 12
  • Cable Upright Row — 3 x 10-12

Lunsford finished one spot behind champion Hadi Choopan at the 2022 Mr. Olympia in Las Vegas, NV. He will look to take that final step toward the prestigious Sandow trophy and Olympia title in November.

If he’s able to defeat Choopan, as well as fellow top contenders including Nick Walker, Samson Dauda, and former champions Brandon Curry (2019 Mr. Olympia) and Mamdouh “Big Ramy” Elssbiay (2020-2021 Mr. Olympia), then Lunsford will be the first man in history to have won the Olympia in two different divisions — the 212 and Men’s Open. This is an exciting time for Lunsford, on and off the stage, because he recently revealed that he and his wife are expecting their first child together.

Featured Image: Derek Lunsford / YouTube

The post Derek Lunsford Builds Rounded Delts with Shoulder Workout 11 Weeks Out of 2023 Mr. Olympia appeared first on Breaking Muscle.

Be Nice and Share!
This post was originally published on this site

Originally Posted At: https://breakingmuscle.com/feed/rss

Many lifters that squat in the gym don’t simply want to “train their legs,” they want to get stronger and move serious weight, as well. Jesus Olivares knows a thing or two about squatting a lot of weight. As a matter of fact, he knows at least three things.

Not only has Olivares squatted over 1,000 pounds three times in powerlifting competition — always lifting raw, breaking the barrier twice in the same meet — but he’s willing to share his knowledge with his 138,000 plus followers on Instagram. In a recent post, he shared a total of four tips that he applies to every squat he performs in training or competition.

Find Your Best “Shelf”

When Olivares referred to the shelf, he’s talking about where the bar would be sitting on his upper back and shoulders. 

“The “shelf” is the first point of contact between you and the bar. It’s going to determine a lot such as bar placement and bar path … Whatever you decide, I urge [you] to find the perfect combo between stability and comfort, sometimes you can’t have both. So pick whichever you prioritize!”

He went on to talk about three positions that the barbell could be placed on the shoulders — low, mid, and high. Olivares could be considered a low-bar squatter based on his personal lifting style. He explained that the goal should be to flex your back around that placement for comfort and stability.

He also emphasized hand placement so the bar can be kept in place throughout the lift. The goal should be a balance between comfort and stability. You may have to compromise one to emphasize the other, according to the 120-kilogram-plus athlete who holds the All-Time World Record powerlifting total.

Have a Strong, Stable Walkout

Wasting time and energy is counterproductive when it comes to the squat. Lifting the bar from the rack, and then taking several steps to walk it out, and then trying to adjust while the weight settles can not only make the attempt harder, it could lead to injury.

Olivares advocates for a short and sweet pick and settling of the weight before going down into the hole. Take no more than four steps to get into position and make sure the bar is stable on your back. 

“This is a game of efficiency and proficiency. Be patient but do not take any more time than what you need … Practice makes improvement.”

If you’re making an attempt in competition, then you don’t have much time to do this. Practicing with lighter weights in training would be a wise move.

Breathe and Brace Correctly

The squat is always associated with leg training, but it really is a full-body movement. Your legs are the primary driver, but Olivares emphasized the importance of a strong and dependable core to transfer power and improve overall technique.

“Bracing isn’t just flexing your abs but also incorporating obliques and mid/low back. The action of engaging your entire midsection is what will protect your low back while also creating the rigidity you require.”

Bonus Tip: Time Your Descent to Explode Out of the Hole

Whether you’re in the gym or on the platform, you don’t want to be under the bar any longer than necessary. Taking a long negative can show control, but it can also zap the body of energy. Olivares isn’t getting paid by the hour when he competes. Even though he wants to be in control throughout the rep, he wants to get down and up as quickly as possible so he builds tightness as he lowers into the bottom position before “blowing up” to rise out of the hold.

” … you feel your internal pressure increase as you go into the hole of the squat and at your lowest and deepest point is where you’ll feel the most pressure. It is at this point where you want to time the reversal of momentum to help you on your way up!”

Jesus Olivares — All-Time Raw Competition Bests (+120KG)

  • Squat — 470 kilograms (1036.1 pounds)
  • Bench — 272.5 kilograms (600.7 pounds)
  • Deadlift — 410 kilograms (903.9 pounds) — IPF World Record
  • Total — 1,152.5 kilograms (2,540.8 pounds) — IPF All-Time World Record

Olivares last competed in June 2023 at the 2023 IPF World Classic Powerlifting Championships, where he won the 120-plus kilogram championship with a World Record total of 1,080 kilograms (2,381 pounds), including a 455-kilogram (1,003.1-pound) squat. His personal best competition squat is 470 kilograms (1,036.1 pounds), which he achieved at the 2023 IPF Sheffield Powerlifting Championships in March. As of this writing, there is no word on when he will compete again.

Featured Image: @mega.gojira on Instagram

The post World-Record Setting Powerlifter Jesus Olivares Shares Four Technique Tips to Squat More Weight appeared first on Breaking Muscle.

Be Nice and Share!
This post was originally published on this site

Originally Posted At: https://breakingmuscle.com/feed/rss

The 2023 Shaw Classic, which took place August 19-20 in Loveland, CO, was notable not only because it’s become one of the most prestigious contests in the pro strongman circuit, nor because this year was its first time delivering the title of “The Strongest Man on Earth” to the winner. It was extra-special to fans of the sport because it marked the final competitive appearance of the show’s namesake, organizer, promoter, and eventual winner — Brian Shaw.

In February 2023, Shaw announced that this year’s Shaw Classic would mark his retirement from competing in professional strongman contests. Shaw won the inaugural Shaw Classic in 2020 and was runner-up to Trey Mitchell in the 2021 and 2022 editions of the contest.

The 2023 Shaw Classic saw athletes compete in eight events over the two-day contest: Log Medley, Max Hummer Tire Deadlift, Wheelbarrow/Arm-Over-Arm Medley, Bag Toss, Car Leg Press, Atlas Stones, Standing Bench Press, and Fingal’s Fingers/Power Stairs Medley.

Shaw claimed victory by winning both the Car Leg Press and Standing Bench Press, while placing second in the Atlas Stones and Max Hummer Tire Deadlift. The 2023 Shaw Classic podium was rounded out with runner-up Mitchell Hooper (2023 World’s Strongest Man) and third place contestant Tom Stoltman (2021-2022 World’s Strongest Man).

YouTube Video

Shaw began as a strongman winning his first amateur contest, the 2005 Denver’s Strongest Man. He would go on to have a legendary professional career spanning 16 years, from 2007 to 2023, while tallying up a total of 29 wins and 15 runner-up placings across 68 competitions.

Brian Shaw Strongman Career Highlights

  • World’s Strongest Man — Four-time winner: 2011, 2013, 2015-2016
  • Arnold Pro Strongman World Series — Four-time winner: 2015-2018
  • Strongman Super Series — Four-time winner: 2009-2010 (two contests per year)
  • Arnold Strongman Classic — Three-time winner: 2011, 2015, 2017
  • Forca Bruta — Three-time winner: 2013, 2015-2016
  • Shaw Classic — Two-time winner: 2020, 2023
  • America’s Strongest Man — Two-time winner: 2013, 2016

At 41 years old, Shaw’s competition days may be over, but it’s clear he’s going to be a mainstay in Strongman. He’s made it clear that he plans to continue organizing his eponymous contest each year, helping to grow the strength sport by offering a stage for elite athletes. No doubt he’ll also carry on as an example for strongmen and strongwomen competitors looking to follow in his massive footprints.

Featured Image: SHAWSTRENGTH / YouTube

The post Brian Shaw Wins 2023 Shaw Classic, Becomes The Strongest Man on Earth in His Final Contest appeared first on Breaking Muscle.

Be Nice and Share!
This post was originally published on this site

Originally Posted At: https://breakingmuscle.com/feed/rss

Something magical happens near the beginning of every dedicated lifter’s love affair with resistance training. There’s a period of unprecedented gains in strength and size. Some refer to the muscular adaptations realized during this stage as “newbie gains.” 

Don’t let the derogatory connotation fool you. Newbie gains are awesome. You’ll hit frequent personal bests, stack on pounds of lean muscle mass, and dial-in natural lifting technique. 

Long-haired person in gym holding barbell for front squat
Credit: Ground Picture / Shutterstock

What’s the best way for a new lifter to take advantage of this honeymoon period of gains? Easy. Get your hands on a weight set and train consistently with the basic barbell lifts. Built around barbell basics, this program provides everything you need for serious muscle.

Beginner’s Barbell Workout

How to Warm-up for Your Barbell Workout

Starting a workout cold may lead to reduced performance, so learn good habits from the start. Don’t skip your warm-up. Warm-ups typically begin with a four-to-six-minute session of cardio to increase body temperature and circulation, ultimately improving oxygen delivery to your muscles and improving metabolite clearance. Common options for the cardio warm-up include skipping rope, riding a stationary bike, or taking a quick jog

Next, mobilize and activate the joints and muscles of the body involved in the upcoming workout. Since you’re warming up for a full-body workout, you could burn a lot of gym time here, so it’s best to focus on a few key areas such as your hips, shoulders, and spine. Below is a two-movement mobility and activation sequence for these regions. Perform three rounds of following movements:

  • Plank to Pike with Alternating Reach: Assume a “high plank” position — the top position of a push-up — then use your upper body to push your hips back over your heels until you feel a hamstring stretch. This “upside down V” is called the pike position. Maintain the pike position and reach your right hand toward your left foot, return your hand to center, then reach your left hand toward your right foot. Return to a high plank by lowering your hips. That’s one repetition. Perform 8 repetitions.
YouTube Video

  • Plank to Deep Lunge with Rotations: Begin in the high plank position and drive your left leg forward and plant your foot as close to the outside of your hand as your mobility allows. Then, lift your left hand and reach out and up toward the ceiling as you rotate your trunk to the left as far as you can. Rotate back and return your hand to the floor, then step back to high plank. Repeat on the right side. That’s one repetition. Perform 8 repetitions. 
YouTube Video

Once you finally get your hands on the barbell, remember to perform several “work-up sets” of each exercise using lighter weights. Work-up sets allow you to dial-in technique and help you to identify appropriate weights for the sets that count.

Barbell Basics for Size and Strength

A barbell with plates is possibly the most versatile tool for resistance training. In addition to being the requisite piece of equipment for common exercises, it’s loadable, allowing you to scale the intensity of your training to your current level of strength. Paired with an adjustable bench and sturdy rack, a barbell set gives you the means to train your entire body. 

Fortunately, beginner lifters don’t need to live at the gym to experience newbie gains. A large meta-analysis compared the effects of less than five weekly sets per muscle group, five to nine weekly sets, and ten or more. (1) For hypertrophy and strength results, this analysis concluded beginners and novice lifters should target five to nine sets per week per major muscle group. (1)

Of course, this recommendation does not imply all sets should be performed in the same workout. Full-body workouts help to maximize training frequency, or the number of times each muscle group is trained per week. Higher frequency training allows for greater weekly sets while avoiding marathon-length workouts. 

The workout below consists of 15 sets of barbell exercises. If repeated two or three times per week, this workout puts beginner and novice lifters squarely into the target range for weekly sets. (1) It might be the only resistance training program you need to take your physique from entry-level to next-level.

Barbell Basics Workout Plan

  • Front Squat — 3 x 6-10
  • Bench-Supported Barbell Row — 3 x 8-12
  • Romanian Deadlift — 2 x 8-12
  • Incline Bench Press — 3 x 6-10
  • Barbell Rollout — 2 x 12-16
  • Barbell Curl — 2 x 8-12

Front Squat

Set the tone of your workout by hitting squats first. Specifically, front squats, which hammer your thighs and glutes. The front squat differs from the back squat in several ways. First, as the name implies, the front squat requires carriage of the bar in front of the body, while back squats are performed with the bar across the upper back.

The front carriage or “front rack” position may be more forgiving for those with shoulder instability, and it tends to promote a more upright trunk position. Compared to back squat, the front squat also tends to require relatively less weight to elicit a similar training effect. (2

YouTube Video

Why favor an exercise that uses less weight? This is a full-body workout, and we are just getting started. Less load spares the body from excessive fatigue accumulation, which might interfere with subsequent exercises. Front squats will toast your quads without burning through all your matches. 

  • How to Do it: Set up for the front squat by placing the bar at chest height in the rack. For safety, set the spotter arms to approximately one increment below the lowest point you anticipate the bar reaching during the movement. Place your fingers over the bar, slightly outside shoulder-width and dip under the bar as you point your elbows straight ahead. Step back a half step from the rack, place your feet approximately shoulder width, and squat down, keeping your elbows high and chest up. Descend as far as possible while remaining upright with heels on the floor, then return to standing. 
  • Sets and Repetitions: 3 x 6-10
  • Rest time: Rest three minutes between sets .

Benefits of the Front Squat

  • The “front rack” bar position promotes an upright trunk, which may be beneficial for lifters who tend to fold excessively forward during squats.
  • Front squats build big, strong quadriceps. Quadriceps can be further biased by placing wedges or small plates under the heels.
  • The exercise promotes athleticism. Front squats have direct carryover to Olympic weightlifting movements (i.e., clean & jerk) and are shown to improve vertical jump performance more effectively than heavy hip thrusts. (3)

Bench-Supported Barbell Row

The next exercise is an upper body pulling movement. Barbell rows are known to build wide lats. This bench-supported variation spares your spinal erectors (the lower back muscles that support your back) for the next exercise. (4) Spoiler alert: deadlifts are next, so you’ll need a fresh set of erectors. In addition to your latissimus dorsi, barbell rows hit your rear deltoids and trapezius. (4)

YouTube Video

The bench support also allows you to dial-in natural rowing technique because you do not have to worry about maintaining trunk or hip positions as in the bent over row. Rows should involve the entire shoulder complex, not just the ball and socket joint of the shoulder. Meaning when you pull, your shoulder blades out to retract, or squeeze together. To re-enforce proper shoulder blade movement, focus on creating more space between the front of your shoulders and floor as you row the barbell. (5)

  • How to Do it: Set an adjustable bench to a roughly 35-to-45-degree angle. Lie on your stomach with your chest supported by the top several inches of the bench. Grasp the barbell with an overhand grip slightly beyond shoulder-width. Draw the bar toward the underside of the bench, then return to the bottom position, ensuring motion comes from the shoulder joint and shoulder blades.
  • Sets and Repetitions: 3 x 8-12
  • Rest time: Rest two minutes between sets.

Benefits of the Bench-Supported Barbell Row

  • The bench support prevents unnecessary fatigue and allows for greater focus and emphasis on the target muscles — lats, mid-back, and rear delts.
  • Using a moderate-width, overhand grip promotes balanced development of mid-back and lat muscles for back thickness and width.
  • The bench-supported row is great for shoulder health. In addition to building your back, rows train the rotator cuff, namely the subscapularis, as a dynamic stabilizer. (6)

Romanian Deadlift

When programmed earnestly, conventional deadlifts tend to be unforgiving. They place heavy demands on your grip, trunk, and legs. The Romanian deadlift (RDL) is a deadlift variation beginning at the top position of the lift and executed with minimal bend at the knees. It’s a smarter barbell lift for targeting hamstrings at this stage of the workout.

YouTube Video

Following the same rationale as programming front squats rather than back squats to reduce systemic demand and ensuing fatigue, the RDL is favored for this full-body workout. At 70% of one-repetition maximum, conventional deadlifts and RDLs place similar mechanical demands on the hips and show similar hamstring muscle activity. (7)

However, the RDL one-repetition maximum is substantially lower than the conventional deadlift. Sure, conventional deadlifts are shown to hit the quadriceps harder than RDLs, but you’ve already toasted your quads with the front squat. (7) Savor the stretch of RDLs as you build an impressive set of “hanging hamstrings.”

  • How to Do it: Stand with either an overhand or mixed (“over/under”) grip on the barbell. Maintain a slight bend in your knees as you lower the bar by bending at the hips. Lower the weight until you feel a strong stretch behind your thighs in the bottom position, then return to standing. Keep your torso stiff as you bend at the hips and avoid curving your back forward.
  • Sets and Repetitions: 2 x 8-12
  • Rest time: Rest three minutes between sets.

Benefits of the Romanian Deadlift

  • The RDL builds “strength at length.” By keeping your knees relatively straight while you bend forward at the hips, you stretch the hamstrings under load, which promotes simultaneous gains in hypertrophy and flexibility. (8)(9)
  • Romanian deadlifts activate the hamstrings to similar levels as conventional deadlift. (7) RDLs likely exposes the hamstrings to greater tension due the increases stretch across three of the four hamstring muscles — semitendinosus, semimembranosus, and biceps femoris long head.

Incline Bench Press

No full-body barbell workout is complete without a press. Rather than default to the ever popular bench press or classic military press, we’re striking middle ground by programming the incline bench. The incline bench press not only hits the middle and lower fibers of your pectoralis major — the largest and most prominent chest muscles — but it also hammers the upper (clavicular) fibers. (10) Since your shoulders are trained through a larger range of motion, the incline bench press is also an effective choice for building your deltoids, specifically the front portion. 

YouTube Video

Still not convinced the incline bench is the right press for you? Results of an eight-week training study showed similar gains in muscle thickness in the middle and lower regions of pectoralis between a group training exclusively traditional bench press and a group training exclusively incline bench press. (11) However, the thickness gains were significantly greater in the upper pectoral region for the incline bench group. (11)

Most surprisingly, improvements in a lab-based test of horizontal pressing strength at the end of the study were similar between groups. (11) As a disclaimer, those looking to compete in the sport of powerlifting should still program traditional bench press, as the principle of training specificity still applies.

  • How to Do it: Set an adjustable bench to the 45-degree incline position. Retract your shoulder blades so they lie flat when you lean against the pad with an arched back. Ensure the spotter arms are positioned one notch lower than your anticipated range of motion. Take a closed overhand grip on the bar, ensuring the bar rests on the heels of your hands. Keep your forearms vertical and bend at the elbows to lower the bar to your mid or upper chest. Avoid bouncing the bar off your chest before driving it back up to the lockout position. 
  • Sets and Repetitions: 3 x 6-10
  • Rest time: Rest two minutes between sets.

Benefits of the Incline Bench Press

  • The incline bench press delivers robust chest training by hitting all parts of your pectoralis major, as well as your front deltoids and triceps. (10)
  • Incline pressing builds mid and lower pec size (sternocostal head) while also building strength similarly to the traditional flat bench press, with the added benefit of stacking on more upper pec muscle (clavicular head). (11)
  • Working on an incline delivered efficient results while requiring about 20% lower weights than traditional bench press. (12)

Barbell Rollout

The front squat and RDL have already trained your spinal erectors (the core muscles on the back of the trunk), but no exercise so far has directly targeted the anterior core, or abdominals. Enter the barbell rollout exercise. Essentially, it’s an ab wheel rollout performed with a barbell and plates. Sure, you could use the cheap plastic, purpose-built device, but wouldn’t you rather chisel your abs with steel rather than something that looks like it was lifted from a toddler’s tricycle?

YouTube Video

Exercise biomechanics of the barbell rollout are virtually identical to the classic ab wheel rollout. The ab wheel rollout is known to produce higher upper abdominal, lower abdominal, and external oblique muscle activity that crunches and reverse crunches. (13) In addition to training your anterior core, the rollout also hits your shoulder extensors. (13)

Since these shoulder muscles are trained through a relatively long range of motion, the rollout may provide added benefits of shoulder mobility and latissimus dorsi flexibility. (9) Ultimately, if you are not accustomed to this style of core training, get ready for serious delayed onset abdominal soreness.

  • How to Do it: Load a plate and a collar on each side of the barbell. Kneel in front of the barbell and take a shoulder-width overhand grip. Use your abdominals to draw your rib cage slightly downward and tilt your pelvis slightly back — “tuck your tail.” Keeping your hips extended and without allowing your spine to arch, roll the bar forward as far as you can comfortably control. Use your shoulders to pull yourself back to an upright position.
  • Sets and Repetitions: 2 x 12-16
  • Rest time: Rest 30 to 60 seconds between sets.

Benefits of the Barbell Rollout

  • The rollout is an anti-extension abdominal exercise that also builds shoulder strength and mobility.
  • Barbell rollouts tend to be more challenging than other common core exercises, such as crunches and reverse crunches.
  • Rather than adjusting the weight, the barbell rollout can be made less difficult by limiting your range of motion forward.

Barbell Curl

No weight training workout is complete without “pump work” for the glamor muscles. Everyone’s favorite showcase muscle, the biceps brachii, will have received some training stimulus during the row, but you cannot earnestly count those as three sets of biceps training. (14

YouTube Video

As old school as it may feel, the straight barbell is an effective choice for building big strong arms. During the downward movement phase of the exercise, the barbell curl elicits more biceps brachii activity than the dumbbell curl. (15) During the upward movement phase, the barbell curl is more effective than the dumbbell curl for stimulating muscle activity in the brachioradialis muscle, the thumb-side muscle that crosses in front of your elbow. (15)

Finally, from a practical standpoint, the straight barbell always stays in front of your body during curls, which keeps tension on the target muscles. Compared to dumbbell curls, it is much more difficult to “cheat” on barbell biceps curls by swinging the weight. 

  • How to Do it: Stand upright with an underhand shoulder-width grip on the barbell. Keeping your arms at your sides or slightly in front of your ribs, curl the barbell by flexing your elbow. Maintain a vertical torso and don’t use your hips to swing the weight. Return to the bottom position with control.
  • Sets and Repetitions: 2 x 8-12
  • Rest time: Rest 30 to 60 seconds between sets.

Benefits of the Barbell Curl

  • Barbell curls are equally effective to EZ-bar curls for activating the biceps brachii. (15) However, barbell curls require full forearm supination throughout the movement, which may further emphasize your biceps brachii. (16)
  • For those interested in forearm training, barbell curls appear better suited for training brachioradialis than the dumbbell curl. (15)

Maximizing Your Iron Investment

This 15-set, barbell-only workout hits all major muscle groups. For best results, perform it two or three times per week with at least one full day of recovery between sessions. 

As your strength and muscularity steadily increase, you might come to realize your weight set (or gym membership) was the best investment you’ve ever made. But there’s no such thing as passive return on this investment.  Even “newbie gains” require regular deposits of sweat and effort.

References

  1. Ralston, G. W., et al. (2017). The effect of weekly set volume on strength gain: a meta-analysis. Sports Medicine, 47, 2585-2601.
  2. Bird, S. P., & Casey, S. (2012). Exploring the front squat. Strength & Conditioning Journal, 34(2), 27-33.
  3. Contreras, B., et al. (2017). Effects of a six-week hip thrust vs. front squat resistance training program on performance in adolescent males: a randomized controlled trial. Journal of Strength and Conditioning Research, 31(4), 999-1008.
  4. García-Jaén, M., et al. (2021). Electromyographical responses of the lumbar, dorsal and shoulder musculature during the bent-over row exercise: a comparison between standing and bench postures (a preliminary study). Journal of Physical Education and Sport, 21(4), 1871-1877.
  5. Lincoln, M. A., et al. (2023). Exercise technique: The landmine row. Strength & Conditioning Journal, 45(3), 371-378.
  6. Wattanaprakornkul, D., et al. (2011). Direction-specific recruitment of rotator cuff muscles during bench press and row. Journal of Electromyography and Kinesiology, 21(6), 1041-1049.
  7. Lee, S., Schultz, J., Timgren, J., Staelgraeve, K., Miller, M., & Liu, Y. (2018). An electromyographic and kinetic comparison of conventional and Romanian deadlifts. Journal of Exercise Science & Fitness, 16(3), 87-93.
  8. Wolf, M., Androulakis-Korakakis, P., Fisher, J., Schoenfeld, B., & Steele, J. (2023). Partial vs full range of motion resistance training: A systematic review and meta-analysis. International Journal of Strength and Conditioning, 3(1).
  9. Afonso, J., et al. (2021). Strength training versus stretching for improving range of motion: a systematic review and meta-analysis. Healthcare 9(4), 427.
  10. dos Santos Albarello, et al. (2022). Non-uniform excitation of pectoralis major induced by changes in bench press inclination leads to uneven variations in the cross-sectional area measured by panoramic ultrasonography. Journal of Electromyography and Kinesiology67, 102722.
  11. Chaves, S. F., et al. (2020). Effects of horizontal and incline bench press on neuromuscular adaptations in untrained young men. International Journal of Exercise Science, 13(6), 859-872.
  12. Saeterbakken, A. H., et al. (2017). The effects of bench press variations in competitive athletes on muscle activity and performance. Journal of Human Kinetics, 57(1), 61-71.
  13. Escamilla, R. F., et al. (2006). Electromyographic analysis of traditional and nontraditional abdominal exercises: implications for rehabilitation and training. Physical Therapy, 86(5), 656-671.
  14. Schoenfeld, B. J., Grgic, J., Haun, C., Itagaki, T., & Helms, E. R. (2019). Calculating set-volume for the limb muscles with the performance of multi-joint exercises: implications for resistance training prescription. Sports, 7(7), 177.
  15. Marcolin, G., et al. (2018). Differences in electromyographic activity of biceps brachii and brachioradialis while performing three variants of curl. PeerJ, 6, e5165.
  16. Murray, W. M., Delp, S. L., & Buchanan, T. S. (1995). Variation of muscle moment arms with elbow and forearm position. Journal of Biomechanics, 28(5), 513-525.

Featured Image: Benoit Daoust / Shutterstock

The post Your Beginner Barbell Workout: A Starter Plan for Strength and Muscle appeared first on Breaking Muscle.

Be Nice and Share!
This post was originally published on this site

http://www.marksdailyapple.com/

Research of the Week

The ancient Andes hosted hunters, herders, and farmers.

There are many genetic differences in skin cancer risk. People from high-sun countries (Singapore) have lower risk than people from low-sun countries (Britain).

Genetic underpinnings of food fussiness.

Eating breakfast could help late-sleepers get to bed earlier.

If they think about God, people are more likely to accept AI.

New Primal Kitchen Podcasts

Primal Kitchen Podcast: Dr. Casey Means on Sugar Highs, Naked Carbs, and Glucose Monitoring for Every Body

Media, Schmedia

Peer review isn’t what you think it is.

Italy may ban synthetic food.

Interesting Blog Posts

How much muscle glycogen do you really need?

A Hawaii water official refused to release water to use against the fire in West Maui.

Social Notes

A typical walk in France.

Everything Else

Nice story about a fisherman.

Things I’m Up to and Interested In

Interesting paper: How the idea of “relative risk” has been used to promote statins.

Reminder: Cultured steak probably doesn’t even exist.

Seed oils are bad: Bowel cancer on the rise in young people.

Common side effect: Low salt diets seem to increase blood sugar.

You know things are bad when: The Dutch aren’t eating enough calcium.

Question I’m Asking

How’s your summer been?

Recipe Corner

Time Capsule

One year ago (Aug 12 – Aug 18)

Comment of the Week

Hi Mark,

Can I still count on you as an expert :).

I can ensure you that I will never lie and I’ll always adjust my views in light of the facts.

Oil_&_Vinegar_640x80

The post New and Noteworthy: What I Read This Week—Edition 234 appeared first on Mark’s Daily Apple.

Be Nice and Share!