
Originally Posted At: https://breakingmuscle.com/feed/rss
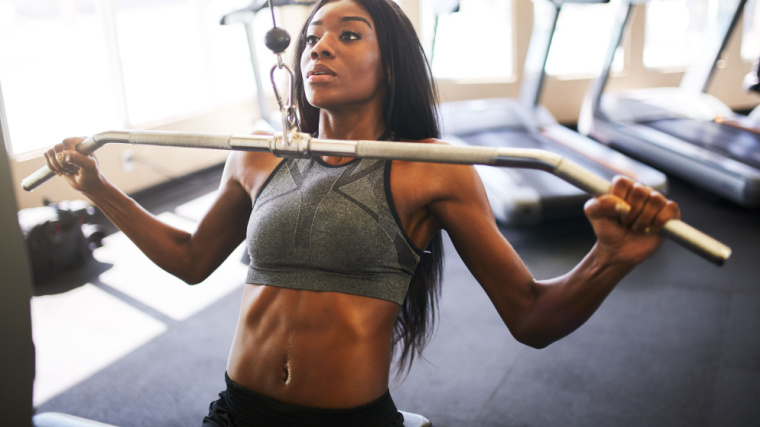
When it comes to buying cardio machines for home gyms, rowers are often overlooked in favor of treadmills, exercise bikes, and ellipticals. But few exercise machines offer as challenging or effective of a cardio workout as the rower. Despite being low-impact and easy on the joints, it works multiple large muscle groups in the upper and lower body and can burn hundreds of calories in just 30 minutes.
Buying a rower can feel overwhelming because there are so many options available with different types of resistance and unique sets of features. Most rowers aren’t cheap, which can further complicate things if you’re on a strict budget. Fortunately, I’ve done the research for you and compiled a list of the best rowing machines, so you can find the right one for you regardless of your fitness goals.
Our Top Picks for the Best Rowing Machines
- Best Overall Rowing Machine: Concept2 RowErg
- Best Budget Rowing Machine: YOSUDA Rowing Machine 100R
- Best Beginner Rowing Machine: Aviron Impact Series
- Best Water Rowing Machine: WaterRower Natural Rowing Machine S4
- Best Magnetic Rowing Machine: Hydrow Wave
- Best Foldable Rowing Machine: NordicTrack RW600
- Best Rowing Machine For Seniors: Sunny Health & Fitness SF-RW5515
Best Overall Rowing Machine: Concept2 RowErg
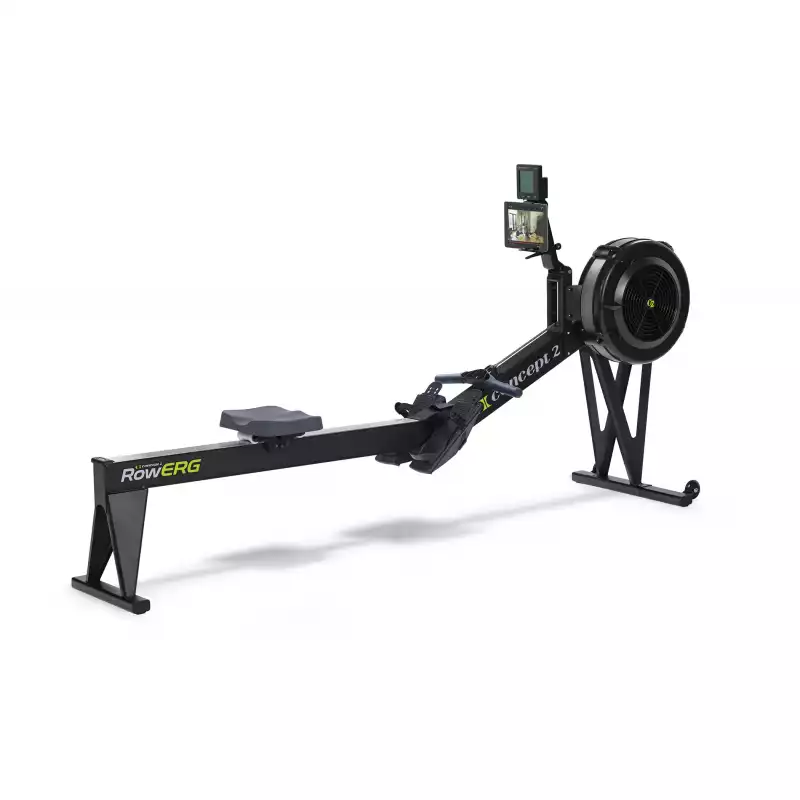
Concept2 RowErg
- Frame is made of heavy-duty aluminum
- Ergonomic handlebar and seat
- PM5 monitor comes with Bluetooth capabilities
- Accomodates users up to 6’6 and 500 pounds
- Comes with a limited five-year warranty
Pros
- Quick and easy assembly
- Doesn’t need to be placed near an outlet because it’s battery-operated
- Minimal maintenance required
- Smooth-gliding seat
Cons
- No instructor-led classes
Very rarely will you find a list of the best home gym equipment that doesn’t include the Concept2 rower. Its durability, high-quality build, and strong brand reputation make it a popular choice amongst home gym owners who want a solid, reliable rowing machine that can last a lifetime.
The frame is made of sturdy, heavy-duty aluminum that can take a beating. I have a Concept2 rower in my home gym, and I’ve accidentally had a loaded barbell roll into it and banged it against my squat rack when moving it around, and there are virtually no signs of damage. I don’t recommend mistreating it often, but if you did accidentally knock it against something, it’s unlikely that significant damage would occur.
The Concept2 RowErg, previously called the Model D, comes with a PM5 Bluetooth-enabled performance monitor that tracks metrics such as stroke rate, watts, calories, and distance. It doesn’t offer instructor-led classes, but you can put your phone or a small tablet in the device holder and stream classes from there.
You can also create custom workouts in the ErgData mobile app and sync them to the monitor. I use the app often for rowing interval workouts, and I love not having to keep track of my intervals myself since the app does it for me.
It uses air to create resistance via a flywheel at the front, and how hard you pull determines how much resistance you feel. The damper setting you choose also dictates how much resistance there is because it controls how much air flows into the machine. Lower damper settings allow less air to flow through the flywheel cage and makes rowing easier, while higher damper settings allow more air in and force you to work harder to get the flywheel to spin.
The seat glides effortlessly along the monorail, and the chain doesn’t snag. The ergonomically-designed seat has contoured areas for your legs and tailbone. The handlebars have a 10-degree bend to allow a more natural grip and are covered with molded rubber to help absorb sweat. However, the handlebars may cause blisters, especially for newer rowers who don’t have calluses built up yet.
To store it, you can break the rower down into two pieces. I do this frequently with my Concept2 rower, and it takes just a few seconds to break down. Putting it back together takes some getting used to because the flywheel piece is cumbersome to handle, but once you get the hang of it, that process also takes less than 10 seconds. Concept2 doesn’t recommend storing the rower vertically, but I’ve been to many CrossFit gyms that store their rowers this way and never had any issues.
Best Budget Rowing Machine: YOSUDA Rowing Machine 100R
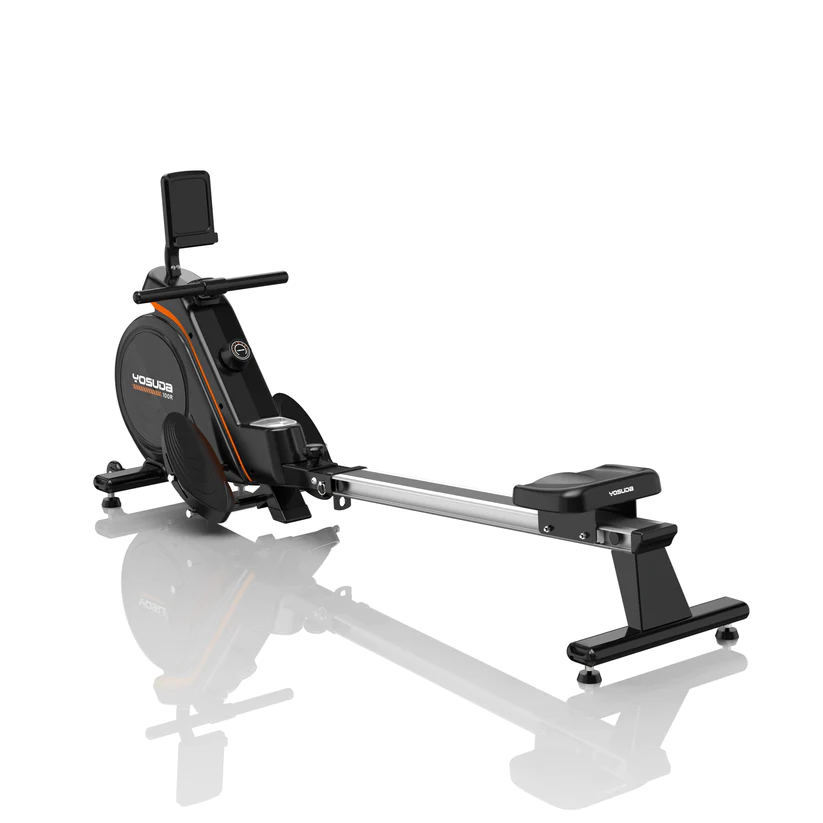
YOSUDA Rowing Machine 100R
- Dimensions: 75” L x 19.3” W x 27.5” H
- Storage: Stores upright
- Resistance: Magnetic
- Weight capacity: 350 pounds
- Display: 3.45-inch LCD monitor
- Available programming: None
Pros
- Quiet
- Comes with balance regulators to make it more stable
- Takes up just 2.22 square feet when stored upright
- Foam-padded handles for extra comfort
- Accommodates users up to 6’2 tall
Cons
- No pre-programmed workouts
- Basic display and stats tracking
- Resistance levels may not go high enough for advanced rowers
The YOSUDA Rowing Machine 100R comes with a low price tag, but it doesn’t skimp on quality. The frame consists of commercial-quality alloy steel, and the foot pedals and flywheel cage are made of heavy-duty plastic. It also has wide, long legs that give it a stable base and prevent it from wobbling. If the room you place it on has uneven flooring, you can use the balance regulators (rubberized feet that screw into the bottom of the legs) to make the rower more level.
It’s a magnetic rower, so it’s quieter than other types of rowers because it doesn’t use air or water for resistance. This is a plus for those who work out early in the morning or late at night while other people in the home are sleeping. It also allows you to watch TV or listen to music without the sounds of the machine drowning out your entertainment.
The foot pedals can accommodate nearly any shoe size and have a non-slip texture, so your feet will stay in place even if you don’t strap them in. The foam-padded handle is comfortable to hold for long workouts and helps prevent blisters on your hands, and the 42-inch long monorail allows users up to 6’2 in height to straighten their legs all the way during the drive (the portion of the row where you open the hips and lean back slightly).
The built-in monitor only displays strokes per minute, calories, time, and stroke count, so this rower isn’t suitable for experienced rowers who want to track more advanced metrics like watts or 500-meter splits. But for those who want a challenging at-home workout without spending thousands of dollars, the YOSUDA Rowing Machine 100R is a solid choice.
Best Beginner Rowing Machine: Aviron Impact Series

Aviron Impact Series Rower
Dimensions: 97” L x 21” W x 43” H
Storage: Folds in half for storage
Resistance: Air and magnetic
Weight capacity: 397 pounds
Display: 22-inch HD touchscreen
Available programming: Coached workouts, scenic rows, games, virtual competitions
Pros
- 20-inch seat height makes it easier to get on
- Provides up to 100 pounds of resistance
- Quiet belt drive
- Has four wheels and folds up for easy storage
Cons
- Expensive
- Requires a membership to get access to all of the workout programs
The impressive number of interactive programs offered on the Aviron Impact Series Rower makes it the best rower for beginners. It includes guided workouts, coached programs, and scenic rows from picturesque locations like Lake Atter in Austria. Having a large variety of workouts to choose from can help prevent boredom and make working out feel more exciting, which is a plus for newbies.
If the regular workouts start to feel stale, you can participate in virtual races or play games instead. For days when you just want to zone out to some entertainment while on the rower, you can stream content from Netflix, Hulu, Disney+, and other compatible streaming services.
The Aviron Impact Series Rower also tracks a wide range of metrics, such as meters, stroke rate, total time, watts, and calories burned.
The rower consists of heavy-duty steel and aluminum, and while it weighs 97 pounds, it’s easy to move around thanks to its four wheels and foldable design. It has a rotating handlebar for optimal wrist positioning and an adjustable footplate to accommodate nearly any shoe size. Compared to other rowers with seat heights of 14 or 15 inches, the padded seat on the Aviron rower is 20 inches off the floor, so you don’t have to bend too low to get on it.
A unique feature of the Aviron Impact Series Rower is that it uses both air and magnetic resistance. This dual resistance system allows you to enjoy the quietness a magnetic rower offers while experiencing the real-world feel of rowing on open water that an air rower provides.
To take advantage of everything Aviron offers, you need a monthly membership. You get a 30-day free trial of it with your purchase, but once it expires, it costs around $24 per month. The machine alone costs nearly $2,000, so this isn’t the most budget-friendly option, but the price may be worth it for those seeking an immersive rowing experience.
Best Water Rowing Machine: WaterRower Natural Rowing Machine S4
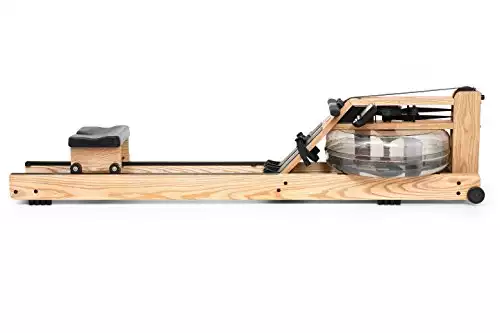
WaterRower Natural Rowing Machine S4
- Dimensions: 84″ L x 21″ W x 22″ H
- Storage: Stores upright
- Resistance: Water
- Weight capacity: 700 pounds
- Display: LCD monitor
- Available programming: None
Pros
- Made in the US
- Wood construction absorbs sounds and vibrations
- Contoured seat and sweat-resistance handlebars
- Comes with four water purification tablets
- Can sync it with a heart rate monitor
Cons
- Requires more maintenance than air or magnetic rowers
- Water tank may leak
- No built-in programs or classes
If you want to experience the feeling of rowing on open water, the WaterRower is the machine for you. It features a water tank at the front with paddles inside it connected to a chained handlebar, and you can adjust the resistance by adding or removing water. The sounds of the water sloshing around the tank also help provide a soothing and pleasant rowing experience. The machine has a 700-pound weight capacity and supports users with an inseam of up to 37 inches, so it’s suitable for a wide range of body types.
The sleek wood construction can elevate the aesthetic of your home gym, though it’s not as durable as steel or aluminum. The contoured seat glides smoothly over the rails, but you need to have good mobility to sit on it and get back up because it’s only 12.2 inches high. There are four rubber feet on the frame to provide traction and protect your floors. However, the water tank is prone to leaking, so if you leave the rower on wood floors, you may want to put a rubber mat underneath it.
During your workout, the LCD monitor provides information about your intensity, stroke rate, duration, and distance. It also measures how you’re performing against customized intensity, stroke rate, or heart rate zones. There are no pre-programmed workouts available, but you can purchase a device holder separately to easily follow along with classes streamed from a mobile app (such as Ergatta) on your phone or tablet.
The WaterRower requires regular maintenance to keep the water and tank clean. You get four water purification tablets with the machine, though, which helps cut back on the amount of manual cleaning you have to do. Once you get through those four tablets, you can contact the company for more.
Best Magnetic Rowing Machine: Hydrow Wave
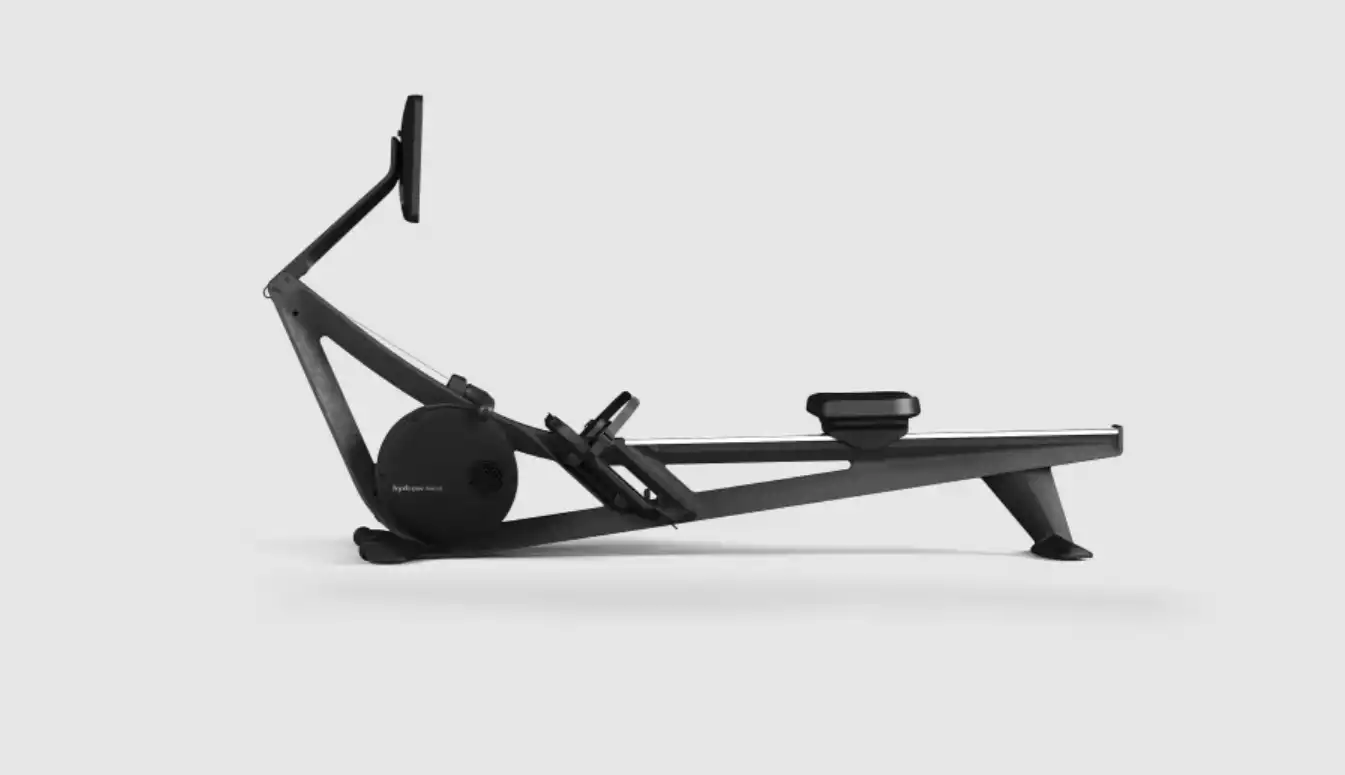
Hydrow Wave Rower
Dimensions: 80″ L x 19″ W x 43″ H
Storage: Stores upright
Resistance: Magnetic
Weight capacity: 375 pounds
Display: 16-inch HD touchscreen
Available programming: Live and on-demand workouts, scenic rows
Pros
- Smooth and silent operation
- 30 percent lighter and smaller than the original Hydrow rower
- Affordably priced for a smart rower
- Available in black or your choice of four other colors
Cons
- Vertical storage anchor isn’t included
- Needs to be plugged into an outlet
- Requires a monthly subscription
Magnetic resistance rowers are excellent for home gyms because they are quieter than air or water rowers, and the Hydrow Wave is no exception. It’s virtually silent, so you can row early in the morning or late at night without disrupting anyone else in your home. You also won’t struggle to hear the instructors during one of Hydrow’s guided workouts.
The Hydrow Wave features a durable thermoplastic polymer frame, a cushioned ergonomic seat, and an angled handlebar to enhance wrist comfort. The 80-inch long stainless steel track can accommodate users with up to a 36-inch inseam, and the machine has a 375-pound weight capacity, making it suitable for most individuals.
You’ll need a monthly membership to the Hydrow app, which costs around $44 per month, to get the most out of this rower. While more expensive than subscriptions to other smart rowers, the Hydrow app offers access to over 4,000 immersive workout options, including interval training programs, steady-state endurance rows, and scenic rows through lakes and rivers from all over the world. When you need a break from the rower, you can take one of Hydrow’s yoga, strength, or circuit training classes instead.
Despite having a smaller footprint than the original Hydrow, which measures 86” L x 25” W x 47” H, the Hydrow Wave is still a large machine. It doesn’t fold, and you need a ceiling height of at least 83 inches to store it upright since it’s 82 inches high when lifted vertically. You also need to purchase a vertical storage anchor separately to keep it secure when it’s upright. And at 102 pounds, it’s not the easiest to move around, but there are caster wheels at the front for portability.
RELATED: Hydrow Review – Total Body Home Happiness
Best Foldable Rowing Machine: NordicTrack RW600
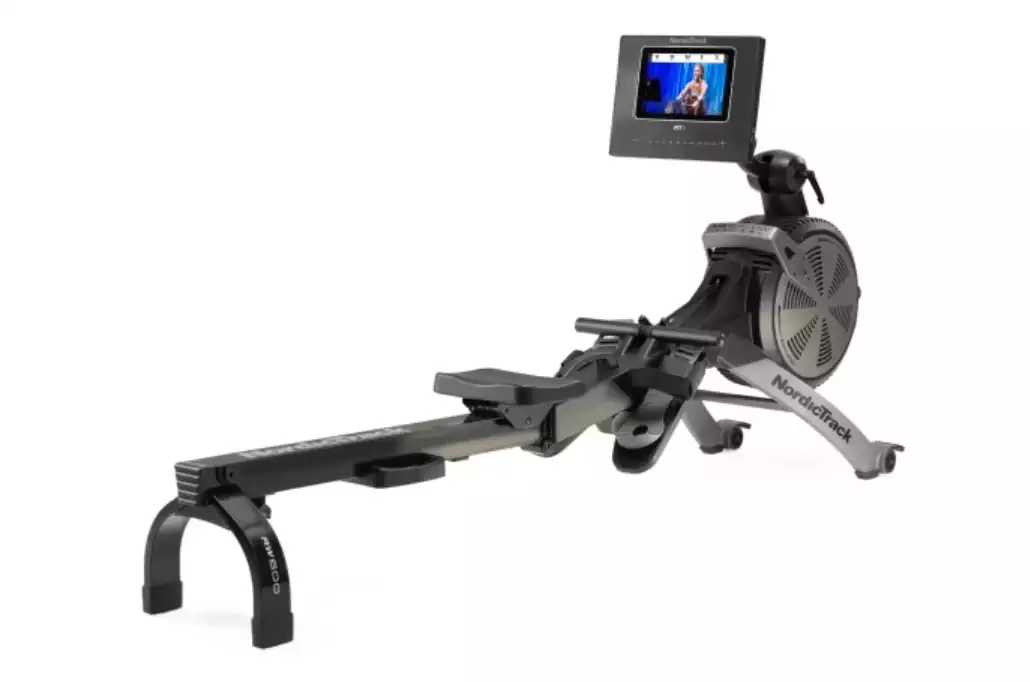
NordicTrack RW600
Dimensions: 87.02″ L x 22.0″ W x 47.24″ H
Storage: Folds in half for vertical storage
Resistance: Air and magnetic
Weight capacity: 250 pounds
Display: 10-inch smart HD touchscreen
Available programming: Live and on-demand workouts, scenic rows
Pros
- 26 levels of resistance that auto-adjust based on your intensity
- Oversized, pivoting foot pedals with quick-release nylon straps
- 10-year frame warranty
Cons
- Requires an iFIT membership
- Takes up a lot of space when open
One of the reasons home gym owners shy away from rowing machines is that they take up so much space. At 87 inches long and just over 47 inches high, the NordicTrack RW600 is one of the larger rowers on this list. But the foldable design makes it ideal for small gyms, as it can easily fit into a corner when not in use.
The NordicTrack RW600 also comes with several features to accommodate a wide variety of users. The pivoting pedals allow for natural movement of the feet and remove pressure on the ankles, a plus for those with mobility issues. The soft-touch handlebar is beneficial for preventing blisters, and the molded seat helps reduce discomfort on the tailbone during long rows. The seat is about 19 inches off the ground, so most people can get on and off it without much of a struggle.
The machine offers 26 levels of magnetic resistance, but it also has an inertia-enhanced flywheel to produce varying levels of air resistance. The dual resistance allows you to get a more challenging workout than you could get with one type of resistance alone. Plus, if you follow along with a guided workout on the 10-inch touchscreen monitor, the machine will automatically adjust the resistance level for you based on how hard you’re working.
You get a 30-day free trial to iFIT with your purchase. An iFIT membership costs about $39 per month after the trial period, but the rower itself costs just under $1,000 — much lower than other smart rowers we’ve come across. If you like the idea of built-in live and on-demand classes but don’t want to pay a premium price, this may be the rower for you.
Best Rowing Machine For Seniors: Sunny Health & Fitness SF-RW5515
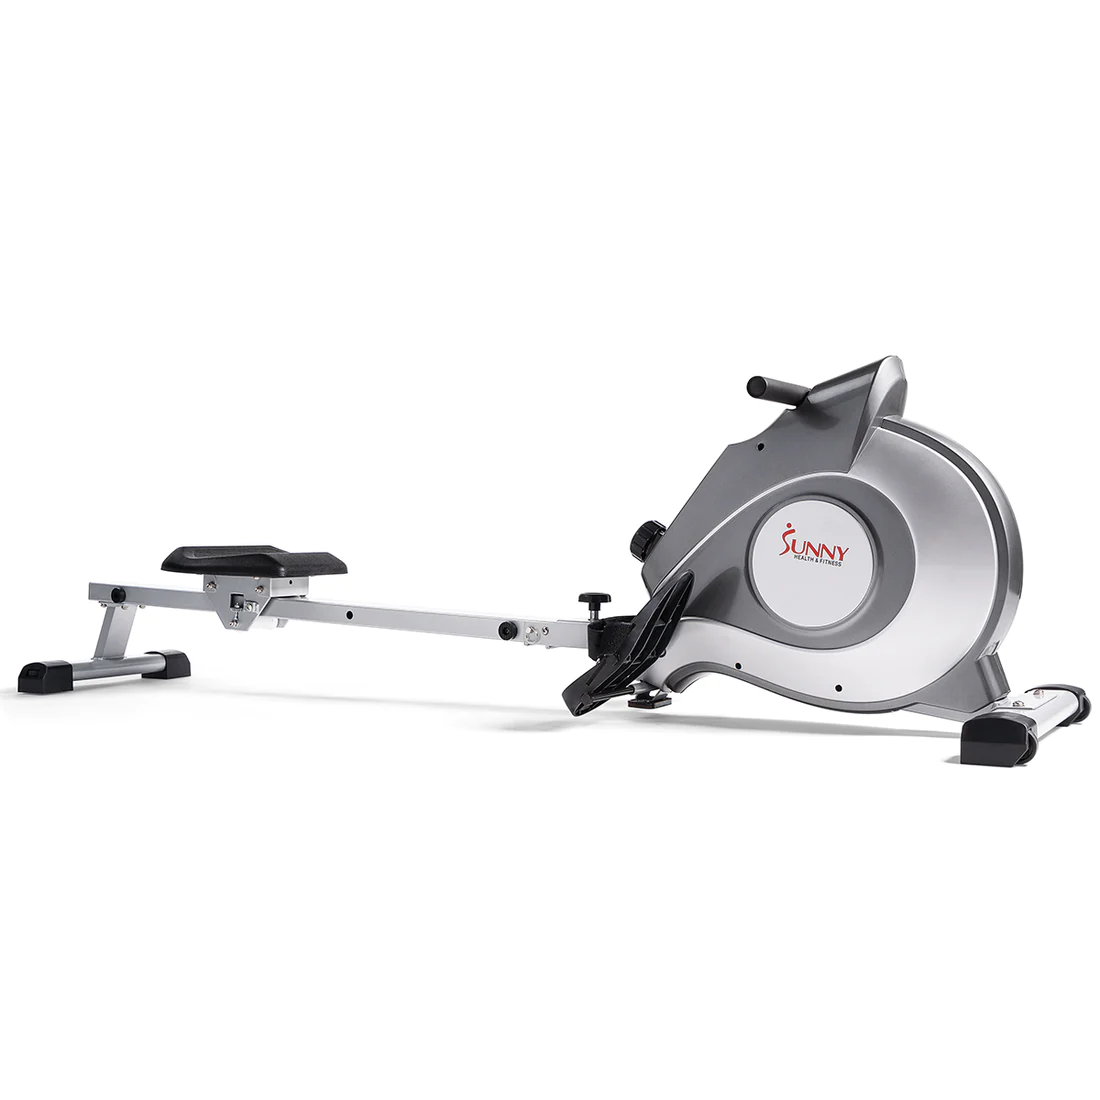
Sunny Health & Fitness SF-RW5515
- Dimensions: 89″ D x 18.9 “W x 23.6” H
- Storage: Folds in half for vertical storage
- Resistance: Magnetic
- Weight capacity: 250 pounds
- Display: LCD monitor
- Available programming: None
Pros
- Can accommodate users with up to a 44-inch inseam
- Weighs just under 61 pounds and has front roller wheels for portability
- Pivoting, non-slip foot pedals and adjustable foot straps keep your feet secure
- Magnetic resistance provides a smooth and quiet stroke
- Stabilizers on the back help prevent tipping and wobbling
Cons
- Basic display monitor
The Sunny Health & Fitness SF-RW5515 is as straightforward as you can get in a rowing machine. Advanced athletes will find it lacking, but it’s suitable for seniors who don’t need all the bells and whistles of a fancier rower. It doesn’t have a fancy, high-tech monitor or offer built-in workouts and only offers eight resistance levels, but this is likely sufficient for seniors who aren’t interested in high-intensity workouts.
The seat sits almost 12 inches off the ground, which is low compared to other rowers, but it has extra cushioning to keep you pain-free during your workouts. The pivoting pedals can help seniors who may have poor mobility achieve sufficient ankle dorsiflexion during the catch, and the padded slip-resistant handlebars offer a comfortable grip.
At 61 pounds, the Sunny Health & Fitness SF-RW5515 is among the lightest rowers we’ve seen. It folds vertically and has two wheels at the front, so it’s not too challenging to move out of the way when not in use — another plus for older individuals who may struggle to move heavy and bulky items on their own.
How We Chose the Best Rowing Machines
We evaluated many different factors in selecting the best rowing machines, including resistance type, noise level, built-in programming options, and stats tracking. To help as many people as possible find a rower that fits their budget, we included options ranging from less than $300 to over $2,000. We also looked at construction quality and durability to ensure you get a lot of value out of your machine and can have it for years to come.
Different Types of Rowing Machines
The four main types of rowing machines are air, water, magnetic, and hydraulic. Each type has its advantages and disadvantages, which can factor into your decision of which one to buy.
Air
Air rowers like the Concept2 RowErg use air to create resistance. They have handles that are chained to a flywheel, and pulling the handle circulates air throughout the flywheel cage. The air then creates drag and requires you to use more force to keep spinning the flywheel. Pulling on the handle faster creates more resistance.
Some air rowers also have damper settings that determine how much air circulates through the flywheel. A higher damper setting opens up the cage more to allow more airflow, thus creating more resistance. A lower damper setting does the opposite.
Water
Water rowers like the WaterRower Natural Rowing Machine S4 have water tanks with paddles inside that are connected to a chain and handlebar. As you pull the handle, the paddles move water around the tank, which creates resistance. Rowing faster will provide more resistance because it forces the paddles to move more water. How much water is in the tank can also determine how much resistance there is.
Many people find that water rowers best simulate the feeling of rowing on open water and enjoy the calming sounds of water sloshing around the tank. Some water rowers require a lot of maintenance because the water can get cloudy and the tank can get moldy, but many brands provide purification tablets with their rowers that help keep the water clean for several months.
Magnetic
Magnetic rowers like the YOSUDA Rowing Machine 100R use magnets and flywheels to create resistance. They often have a dial at the front that adjusts how close the magnets are to the flywheel and, thus, the level of resistance provided. The closer the magnets are to the flywheel, the harder it becomes to spin the wheel.
Magnetic rowers are quieter than air and water rowers, which is beneficial if you want to listen to music, watch TV, or not disturb your family members while rowing. They also offer a smooth stroke and more consistent resistance levels, allowing for a more enjoyable rowing experience.
Hydraulic
Hydraulic rowers are simpler machines than air, water, or magnetic rowers. In many cases, they don’t have a seat that slides back and forth along a rail or a single handlebar attached to a chain. Instead, they have arm handles on either side that move back and forth and are attached to hydraulic pistons.
Because you use little to no leg drive on a hydraulic rower, it doesn’t truly replicate the motion of rowing in a boat or provide a total-body workout. We didn’t include hydraulic rowers on the list above for these reasons.
Benefits of Rowing Machines
Rowing machines offer a way to train the entire body while improving stamina and endurance. You can bump up the resistance to work on your strength or use them for steady-state or high-intensity interval training (HIIT) workouts — but more on that below.
They’re Low-Impact
Rowing machines are suitable for people of all fitness levels because they are low-impact. Since they don’t put a lot of stress on your joints, they can be used by older individuals, those rehabbing an injury, or anyone who needs a break from high-impact activities like running and jumping.
They Provide a Full-Body Workout
The pushing and pulling motions of rowing work nearly every major lower and upper body muscle group, including the quads, hamstrings, glutes, biceps, triceps, shoulders, upper back, and core. It’s not the same as resistance training, but for anyone who wants to strengthen the entire body (including the heart) with one machine, a rower can be a great choice.
They Burn a Lot of Calories
A 30-minute moderate-intensity rowing session can burn up to 300 calories. This makes rowing an excellent exercise for those trying to lose weight, though you should note that diet is also an important element of weight loss. You can burn hundreds of calories on the rower but still not lose weight if your caloric intake is too high.
They Help Increase Cardiorespiratory and Muscular Endurance
Rowing is an excellent way to improve your muscles’ ability to perform repetitive motions for longer periods. It can also help strengthen your cardiorespiratory system so you can sustain bouts of physical activity for longer durations.
They Are Versatile
Like most forms of cardio, rowing can sometimes feel monotonous. But what’s great about rowing machines is that you can easily use them for intervals to make your workouts more engaging. Examples of interval workouts you can do on a rower include:
- One-to-one intervals – rowing for 30 seconds and resting for 30 seconds for 20 to 30 minutes
- Tabatas – rowing as hard as you can for 20 seconds, then resting for 10 seconds for a total of eight minutes
- Fartleks – alternating between easy and hard paces for randomly timed intervals
Many at-home rowing machines also offer built-in workout programs, and you can stream instructor-led classes on the monitor or your mobile device. Furthermore, on rowers with fixed resistance levels, you can crank up the resistance to get more of a strength training workout. The variety can help prevent you from getting bored and encourage you to stick with your fitness routine.
What To Look For When Buying a Rowing Machine
Choosing a rowing machine for your home gym is no simple feat. You have to consider the cost, durability, the resistance type, how well it will fit into your space, and how comfortable it is to use. If you’re a competitive rower, you’ll need to find a machine that tracks the metrics that are most important for your training. How well-suited the rower is for your body proportions and whether or not it provides built-in workouts can weigh into your decision, too.
Price
Indoor rowing machines range in price from around $300 to $2,500 or more. The more expensive rowers come with advanced features, such as Bluetooth connectivity and touchscreen display monitors with built-in classes. But you can just as easily buy a less expensive rower and stream workouts from your TV, phone, or tablet to save money.
Build Quality
A rowing machine’s construction quality and price often go hand in hand. Look for materials such as commercial-grade aluminum or steel, as these will last the longest. Cheaper rowers consist of lesser-quality materials that may break or malfunction after just a few months, so if you have the budget, it’s worth it to spend more money on a rower that will last for years.
Resistance Type
As you saw above, rowing machines offer water, magnetic, or air resistance. Water rowers are great for those who want to zone out to the sounds of swooshing water during their workouts, but some require more maintenance than others to keep the water and tank clean. Due to their quiet operation, magnetic rowers are ideal for those who live with others. They’re also good for beginners because they offer a smooth and consistent rowing stroke. Air rowers make a lot of noise due to the air circulating around the flywheel cage, but they tend to be cheaper.
Which type of resistance you get depends on your budget, the rowing experience you’re looking for, how quiet you want your machine to be, and how much maintenance you’re willing to put into it.
Size and Storage Options
If you don’t have enough room to keep your rower out all the time, look for a compact option with a shorter monorail, like the Aviron Impact Series rower. Folding rowers like the NordicTrack RW600 are also great for small home gyms. There are even rowers like the Concept2 RowErg that break down into two pieces for easy storage.
Weight Capacity
Every rowing machine comes with a maximum weight capacity, so be sure to choose one that can support your body weight. It’s also a good idea to look for a rower that can handle much more than your current weight to avoid excess wear and tear on its parts.
For example, if you weigh 240 pounds and buy a rower with a 250-pound weight capacity, you may put excess stress on the machine because you’re nearing the upper limit of its weight threshold. A rower with a 300-pound weight capacity may be a better option.
Display and Stats Tracking
At the very least, your rower should track distance, total time, and stroke count and display them in clear, easy-to-read numbers. Most rowing machines also display heart rate and calories burned. These numbers can be off by as much as 30%, but you can still use them as a reference for how hard you’re working.
Also, consider what metrics you need for the types of workouts you do most often. In CrossFit, for example, workouts that include rowing for a certain distance are based on the meters on a Concept2 RowErg. You can use a different rower, but it may over or underestimate the number of meters you covered.
Similarly, if you’re a competitive rower looking for an indoor rowing machine to train on, you may want one that tracks advanced metrics like split times or watts.
Comfortable Seat, Foot Pedals, and Handlebars
Sitting on a row erg will never be as comfortable as lounging on a recliner, but it shouldn’t feel like torture. Ergonomic foot pedals allow for more ankle flexion during the catch portion of the stroke, and foam- or rubber-coated handles can help prevent blisters. Many rowers have a contoured seat, but if it’s still too uncomfortable, you can buy a padded seat cushion to keep the tailbone area pain-free.
Monorail Length
The rail on a rowing machine should be long enough for you to extend your legs all the way on the drive. To check for this, you’ll need to look up the rail length of your preferred rower and compare it against your inseam. Height alone isn’t always a good metric to use because two people can be the same height but have different inseams.
Additional Features
If you struggle with motivation or just don’t know how to create an effective rowing workout, you may want a rowing machine that comes with pre-programmed workouts or allows you to stream virtual classes from its monitor. As mentioned above, you can stream workouts from another device if your preferred rower doesn’t offer that functionality. But in that case, you should look for one with a device holder so you can easily follow along with the classes.
Rowers that sync to mobile apps are also worth considering if you want to track and monitor your performance over time or engage in some healthy competition with other athletes.
How To Use a Rowing Machine
Rowing isn’t a highly technical exercise, but many people don’t know how to use proper rowing form. Therefore, they don’t get as much out of their workouts as they can and make themselves more susceptible to injury.
There are four phases or stages of rowing:
- The catch is where you begin your rowing stroke. Hold onto the handlebar with straight arms and maintain tension in your upper back. Lean forward slightly while keeping your chest up, and avoid rounding your shoulders. The seat should be about six to eight inches away from your feet, and your shins should be as close to vertical as possible.
- The drive occurs as you push your legs to move the seat backward. With your quads, glutes, and hamstrings engaged, drive your heels to begin straightening your legs. Keep your arms straight and chest up until your legs are fully extended, then open the hips and lean back slightly.
- The finish is the phase in which you pull the handlebar into your body. Keep your wrists in line with your forearms and the elbows aligned with the handle. A good reference point to pull to is around the lower portion of the ribs.
- The recovery is when you return to the starting position. As you saw from the previous steps, the sequence of the first three phases is legs-hips-arms. In the recovery, the sequence goes arms-hips-legs. Straighten your arms until they’re past your knees, then bend your knees and slide the seat forward until you’re back in the catch position.
As you row, maintain a smooth and consistent stroke. If you pause at any point, you’ll lose power and momentum. It’s better to row with a lower stroke rate (strokes per minute) but be able to keep moving consistently than to strive for a high stroke rate and not be able to hold a steady pace.
RELATED: 5 Common Rowing Mistakes
Final Thoughts
The rower is an often overlooked piece of fitness equipment, but adding one to your home gym can help you make some serious gains in your cardiovascular fitness. Because it also offers some level of resistance and recruits all of the large muscle groups in the body, it can also help you get stronger and improve your muscular endurance.
Rowers can be long, bulky pieces of equipment, but there are several foldable options and models that break down into two parts for when you need to stow them away. If you’re worried about getting bored, you can choose from one of the several smart rowers on the list above that offer hundreds (or even thousands) of workout options. And if comfort is a concern for you, look for a rower with an ergonomic seat and padded handles to help make your rowing experience more pleasant and enjoyable.
FAQs
Magnetic rowing machines like the YOSUDA Rowing Machine 100R are best for home use because they’re quieter and more compact than water or air rowers. If noise isn’t a concern but space is an issue, foldable rowers like the NordicTrack RW600 or those that can break down for easier storage, like the Concept2 RowErg, are good options.
Rowing can help you lose belly fat if you’re also in a caloric deficit, or eating fewer calories than you burn each day. It will not help you lose belly fat if you have a poor diet. It’s also important to note that you can’t control where you lose fat from. Depending on your genetics, you might not lose belly fat from rowing alone.
Whether 30 minutes of rowing a day is enough depends on your goals. If you’re rowing for overall health and wellness, 30 minutes a day at a moderate intensity is sufficient. If you compete in a specific sport and are using rowing to increase your endurance and stamina, you may need to row for closer to 45 to 60 minutes.
You can use a rowing machine every day, but it’s best not to train hard every day because it can lead to overtraining or burnout. Alternating high-intensity, moderate-intensity, and low-intensity workout days on the rower will allow you to train daily while still recovering properly.
However, rowing every day may become boring after a while and can lead to overuse injuries since you use the same muscle groups repeatedly. You may want to incorporate other types of training into your routine, such as running, lifting weights, or cycling, to prevent boredom and offer your muscles a different training stimulus.
The post Best Rowing Machines for Beginners, Small Spaces, Seniors, and More appeared first on Breaking Muscle.


 For now classes are 6pm and 640pm at 2840 Wildwood st in the Boise Cloggers studio.
Book your class NOW!
click this ==>
For now classes are 6pm and 640pm at 2840 Wildwood st in the Boise Cloggers studio.
Book your class NOW!
click this ==>


