Originally Posted At: https://breakingmuscle.com/feed/rss
At age 49, with four Mr. Olympia titles (2006-2007, 2009-2010) to his name, Jay Cutler has nothing to prove. He’s one of the greatest bodybuilders of all time, bar none. Yet, after an Oct. 14, 2022, Instagram post from fitness apparel company Schiek Sports Inc. — where Cutler posed and looked ripped next to fitness influencer Lexx Little — speculation arose that the retired athlete was planning a return to the stage.
On Oct. 17, 2022, Cutler addressed the rumors of his potential competitive return as a Masters bodybuilder (ages 45-plus). Amidst his clarification and thoughts for the future, the icon clarified that he has no intention of competing soon. According to Cutler, his new lean physique that lit up the strength sports sphere was about him taking better care of himself.
Cutler wastes no time shooting down any thought of his competitive return in his video testimonial.
“Well, those pictures are floating on the internet right now from when I was in Venice [CA], and they’re starting to say, ‘Oh, Jay is coming back for the Masters,’” said Cutler. “We need to squash it.”
On Feb. 12, 2022, during an episode of his podcast, Olympia President Jake Wood signaled that, after an absence, the Masters Olympia would potentially return sometime in the year 2023. (Note: At the time of this article’s publication, there has not been an official update on this front.) With that door open, some in the bodybuilding community thought Cutler would intend to walk through it.
Cutler shot down that specific assertion, as well, by saying too much was read into his brush with Little.
“Jake [Wood] is having it [the Masters Olympia], right? … It sounds about right. Jake would do something like that,” Cutler mused. “Drop the picture of me posing with Lexx Little, who’s a pretty popular influencer. So we did a video together. He conned me into going to the posing room.”
Per Cutler, he thought his posing stunt with Little would be of little consequence and appeared to have fun with it more than anything. It seems to have just been an unfortunate oversight.
“You know me; I don’t pose,” Cutler said. “I don’t want to say ‘conned,’ but he [Little] asked me, and I said, ‘You know what, I’ll go in there.’ I didn’t realize it would go so viral. Now it’s floating everywhere.”
“I’m doing this body transformation challenge just to try to look my best,” Cutler explained. “That means being leaner, and I don’t know what my physique is going to look like, to be honest. Like right now, I’m really lean, but I could tighten up a few areas. I want to get a little fuller. I don’t know if that necessarily means bigger on a scale, but that’s kind of the goal.”
Despite that plan, even if he won’t formally compete, Cutler didn’t rule out potential guest-posing cameos.
“I’m not going on a competition stage, but you know what I would like if I felt confident enough; if my body actually came around enough, I would actually consider posing,” Cutler said. ” … I’m still getting a ton of requests to come out and pop into events. So, it could be a possibility.”
Even if Cutler won’t be competing on any Olympia stage in the near future, it’s clear he’s committed to taking care of his health. For this bodybuilding legend, the grind never stopped — it just shifted in focus.
Originally Posted At: https://breakingmuscle.com/feed/rss
On Oct. 15, 2022, during the 2022 USA Powerlifting (USAPL) Carolina Primetime contest, powerlifter Jen Thompson set an American Record in the 67.5-kilogram weight class when she scored a 148.5-kilogram (327.5-pound) raw bench press. The competition took place in Greenville, SC.
Notably, if Thompson had featured in an international competition with this press, it would’ve exceeded the current International Powerlifting Federation (IPF) World Record of 144 kilograms (317.4 pounds) in the IPF’s 69-kilogram weight class. Thompson also owns that mark, which she achieved during a second-place performance at the 2017 IPF Reykjavík International Games. The athlete performed the press without a lifting belt and wore just wrist wraps to help her notch the feat.
With her latest official record, Thompson can now boast the top American bench press mark in USAPL’s 60-kilogram, 67.5-kilogram, and 76-kilogram weight classes. Plus, according to Open Powerlifting, while her latest bench press isn’t an official World Record, it surpasses Thompson’s all-time competition best of 145.4 kilograms (320.7 pounds) from the 2022 USAPL Arnold A7 Pro Bench Bash. Thompson competed in the Masters 45-49 division at that contest, which was a bench press-only meet and a part of the overall 2022 Arnold Classic.
Her press aside, Thompson also fared quite well with her other staple numbers, logging respective PRs on her squat, deadlift, and her total. (Note: Based on her recent contest history, Thompson often exclusively focuses on her bench press, frequently competing in bench press-only meets of late.)
Here’s an overview of the top stats from the athlete’s performance at the 2022 USAPL Carolina Primetime competition:
Jen Thompson (67.5KG) | 2022 USAPL Carolina Primetime Top Stats
Squat — 160 kilograms (352 pounds) | Personal Competition Best
Bench Press — 148.5 kilograms (327.5 pounds) | American Record | Personal Competition Best
Deadlift — 202.5 kilograms (446.5 pounds)
Total — 511 kilograms (1,126.5 pounds) | Personal Competition Best
Thompson might have left more on the table with her latest record. In the caption of her Instagram post, the athlete wrote that her bench press was “smooth like butter” and that she was “kicking” herself for not attempting a 149.7-kilogram (330-pound) press. That said, Thompson apparently trained differently and “tweaked her programming” in advance of this contest. The eventual results seemed to pay off in spades.
For many athletes, this sort of accomplishment would be a benchmark for their resume. For Thompson, one of the arguable greatest powerlifters of all time — with a plethora of victories to her name over a two-plus decade career — it’s just the latest example of her unique prowess.
Originally Posted At: https://breakingmuscle.com/feed/rss
Big biceps. For some lifters, that’s the ultimate weightlifting goal. Not winning gold medals in competition or hoisting hundreds of pounds overhead. Just building some eye-catching sleeve-stretchers. And, frankly, there’s not a thing wrong with that.
Credit: charnsitr / Shutterstock
Changing your physique to suit your own goals, and building muscle for muscle’s sake, is still perfectly acceptable, despite the recent prevalence of functional training, obstacle racing, or performance-driven workouts. Nevermind the fact that directly training your biceps can contribute to joint health and may actually boost performance in many lifts. So, in the spirit of getting big ol’ arms, here are some of the best ways to grow your biceps.
Performing the cheat curl is doing the wrong thing for the right reason. Instead of a strict barbell curl, which can be effective on its own, you’re deliberately using some body English to drive a heavy weight to the top position and then controlling the eccentric (negative or lowering phase).
By using your hips and legs purposefully to lift the weights, rather than accidentally loosening technique due to fatigue, you remain in control of the exercise and reduce the risk of injury while benefiting from heavier weights and increased muscle tension.
How to Do the Cheat Curl
Stand with an underhand, shoulder-width grip on a barbell. Slightly bend your knees and push your hips toward the wall behind you. Keep your back straight and slide the bar down along your thighs. Forcefully straighten your body while curling the weight toward chin-level. Brace your abs in the top position and slowly lower the weight. Keep your elbows pinned to your sides while straightening your arms.
Repeat the entire process for each repetition. Be sure to use your legs and hips to drive the weight up, not simply your hips and lower back. Take roughly three seconds, or longer, to lower the weight on each repetition.
Benefits of the Cheat Curl
The hip drive and increased muscle recruitment allows relatively heavier weights to be used, which can contribute to building size and strength.
Lowering the weight slowly can help to build more muscle than lowering at a faster speed. (1)
EZ-Bar Curl
The EZ-bar allows a semi-supinated (angled) grip, which reduces the wrist strain many lifters from using a fully supinated (palms up) grip on a straight barbell. The shift in hand position also affects muscle recruitment by activating more forearm musculature than a straight bar.
The multiple sections of an EZ-bar also allows you to easily change your grip width from “wide,” to “moderate,” to “close.” Grip width will affect your effective range of motion, which will influence muscle activation.
How to Do the EZ-Bar Curl
Stand with a shoulder-width, underhand grip on the bar. Pull your shoulders back and keep your torso upright. Slightly bend your knees and set your stance to a comfortable width. Keep your elbows stationary as you curl the weight toward the front of your shoulders. Pause briefly before lowering the weight to full extension.
Benefits of the EZ-Bar Curl
The EZ-bar increases brachioradialis activation compared to many other biceps exercises. (2)
The angled hand position reduces stress on the wrist joint, making the exercise more comfortable for lifters with mobility problems or joint issues.
Chin-Up
Many lifters consider the chin-up to be primarily a back exercise, but the supinated (palms up) grip drastically increases biceps recruitment during the exercise. This makes it ideal for a biceps-focused workout, especially if it’s preceded or followed with additional direct biceps training to increase cumulative fatigue on the muscle.
By flipping your grip, you increase the leverage for your biceps to contribute during the movement, which places more stress directly on them and relatively less stress on the larger back muscles.
How to Do the Chin-Up
Grab an overhead pull-up bar with a shoulder-width, palm-up grip. Allow your body to be supported by your straight arms. Pinch your shoulder blades together as you pull your body toward the bar. Keep your neck in a neutral position and avoid extending your chin to the bar. When your mouth is roughly level with the bar, pause briefly before lowering your body to full extension.
Benefits of the Chin-Up
The chin-up is one of relatively few compound (multi-joint) exercises which primarily work the biceps. Compound movements are highly effective at building strength and size (3)
This movement allows for using potentially heavy weights compared to other biceps exercises, which is beneficial for size and strength.
Alternating Supinating Curl
This exercise puts a twist — pun completely intended — on the classic dumbbell curl to deliver increased muscle recruitment. Supinating, or rotating, your hand as you curl the weight up allows you to activate additional arm muscles and it works the biceps to their fullest capacity.
Each repetition takes your arm through a significant range of motion and complete muscle contraction by turning the wrist from a neutral position to a fully supinated (palm up) position, which maximally recruits the muscles of the biceps and forearm.
How to Do the Alternating Supinating Curl
Stand holding a pair of dumbbells by your sides with your palms facing your hips. Curl one arm upwards, keeping your thumb up in a neutral position. As your hand passes your ab-level, begin rotating to a palm-up position as you continue curling. In the top position, your pinky should be slightly higher than your index finger. Reverse the motion to lower the weight, and then perform a repetition with the opposite arm.
Benefits of the Alternating Supinating Curl
The biceps muscle plays a significant role in supinating the forearm as well as flexing (bending) your arm. (4) This is one of the very few exercises to specifically incorporate the supinating function, which increases overall activation of the biceps.
Using a neutral grip in the initial portion of the exercise recruits the brachialis and brachioradialis, making the alternating supinating curl an efficient way to train the biceps and forearms.
Alternating arms and performing the movement unilaterally (curling one arm at a time) allows you to use a slightly heavier weight than curling both dumbbells together. (5)
Barbell Spider Curl
The barbell spider curl works the biceps from a unique angle for a variation in training stimulus. This is essentially a “reverse incline curl,” because it requires lying chest-down on an incline bench and allowing your arms to hang vertically down.
By positioning your upper arm in front of your torso, the short head of the biceps is more strongly recruited than the long head. Some lifters may not notice a significant difference in the development of either head, but for physique-conscious lifters, emphasizing either biceps head can play a significant role in building an aesthetic physique.
How to Do the Barbell Spider Curl
Set an incline bench to a low-to-moderate angle, roughly 30 or 45-degrees. Lie your chest on the bench while holding a barbell with a supinated (palm up) grip at roughly shoulder-width. Let your arms hang straight toward the ground. Curl the weight without moving at the shoulder. Your upper arms and elbows should remain pointed at the ground as the weight moves. Pause briefly in the top position to maximize the peak contraction. Lower slowly with control and avoid swinging the weight.
Benefits of the Barbell Spider Curl
The short head of the biceps is recruited relatively more than the long head due to the position of the upper arm relative to the torso. The long head is involved in working the shoulder joint, which is essentially “immobilized” due to hanging straight down.
The barbell spider curl creates an extremely strong peak contraction due to the angle of the bench and the leverage of the weight against gravity. This can help many lifters improve the mind-muscle connection with their biceps, which can ultimately benefit muscle growth. (6)(7)
Incline Dumbbell Curl
The incline dumbbell curl is a classic bodybuilding exercise, known for its unique angle which puts the biceps and shoulder into a stretched position and increases recruitment of the long head of the biceps.
While the stretched position is essential for the incline curl, it may be stressful on your shoulder joint. You can adjust the incline as needed, higher or lower, to accommodate your own mobility and flexibility. The key is to maintain bench-contact with your head, shoulder blades, and lower back to ensure an inclined position.
How to Do the Incline Dumbbell Curl
Lie back on an incline bench set to roughly 45-degrees with a dumbbell in each hand. Keep your head, shoulders, and tailbone against the bench throughout the entire movement. Straighten your arms and rotate your palms forward. Keep your palms facing up as you curl both weights toward your biceps. Your elbows should remain pointed to the floor and should not move forward. Slowly lower the weights to a full stretch.
Benefits of the Incline Dumbbell Curl
Training the biceps with a unique angle, in an inclined position, contributes to more muscle growth than performing exercises which are too similar to one another. (8)
The incline dumbbell curl puts the shoulder into a stretched position. Because the long head of the biceps crosses over the shoulder joint and is involved in shoulder flexion, this curl variation emphasizes the long head more than the short head. (9)
The stretched position of the arm can contribute to improved shoulder mobility and biceps tendon strength. (10)
Single-Arm Preacher Curl
The barbell or EZ-bar preacher curl is a time-tested muscle-builder, but performing the exercise with one arm at a time can allow even greater focus on the muscle. Unilateral (single-side) training will improve muscle recruitment and emphasize on each arm more than a barbell exercise.
The upper arm support and stationary shoulder position de-emphasize the long head of the biceps and increase recruitment of the short head.
How to Do the Single-Arm Preacher Curl
Start with a dumbbell curled to your shoulder, with your palm facing your body. Press your chest against the flat side of a preacher curl bench and rest both underarms snugly on top of the pad. Lay your elbow and triceps on the angled side of the bench, keeping the dumbbell in the top position. Maintain a palms-up grip as you slowly lower the weight. When your arm is nearly straight, curl the weight back to the starting position.
Benefits of the Single-Arm Preacher Curl
The preacher curl bench supports the upper arm which reinforces strict technique and limits cheating or momentum.
The single-arm preacher curl emphasizes the short head of the biceps.
The unilateral movement allows lifters to address common muscle asymmetries between arms by focusing on each arm individually.
Single-Arm Low Cable Curl
The low cable pulley puts the biceps under constant tension, compared to barbells or dumbbells which rely on gravity and leverage to provide resistance. This results in cables offering greater time under tension and a stronger muscle-building stimulus. (11)
The single-arm low cable curl can be done either facing the cable stack or facing away from it. Facing away will put a greater stretch on the biceps, similar to an incline curl, and is the more effective option.
How to Do the Single-Arm Low Cable Curl
Attack a single handle to a low cable pulley. Grab the handle, turn your back to the weight stack, and take one or two small steps forward. With a palms-up grip and your hand by your side, your straight arm should be very slightly “pulled” behind your torso by the weight. Keep your elbow stationary while curling the handle toward your shoulder. From the top position, fully straighten your arm before repeating the next repetition.
Benefits of the Single-Arm Low Cable Curl
This cable curl variation puts the muscle under constant muscular tension which can increase muscle growth.
The long time under tension and long range of motion make the exercise highly effective with relatively light weight, making it ideal for lifters whose joints cannot tolerate heavy loads.
Concentration Curl
The concentration curl is a classic biceps exercise, often performed by beginning lifters instinctively without formal direction. It can be an extremely effective way to target the biceps with minimal recruitment of other muscles.
The setup of the concentration curl allows you to, rightfully, concentrate on the working arm during each set. Not only is the movement strictly performed by one arm at a time, but you’re looking directly at your muscle as it contracts and stretches for each repetition.
How to Do the Concentration Curl
With a dumbbell in one hand, sit on a bench or chair with your feet set well-beyond shoulder-width. Brace the triceps of the working arm near the same-side knee. Curl the weight toward your face while maintaining a palm-up grip. Don’t allow your legs or torso to swing the weight up. Slowly lower the weight to complete extension.
Benefits of the Concentration Curl
This exercise is ideal for using the “touch training” technique — using your non-working hand to touch the working muscle during each repetition. This can improve the mind-muscle connection and may increase muscle growth. (12)
This movement allows for strict exercise performance with little to no momentum due to the braced stance and arm support.
The concentration curl allows variety from standard dumbbell curls without needing additional equipment like a preacher curl bench or cable pulley.
Zottman Curl
The Zottman curl, named for American strongman George Zottman, working the biceps and forearms through a variety of motions for maximum muscle recruitment. It combines a standard dumbbell curl and a reverse curl, while testing and building wrist mobility.
If you can manage the necessary coordination (which is less complicated than patting your head while rubbing your stomach), then you can build bigger, stronger arms with this efficient movement.
How to Do the Zottman Curl
Stand holding a dumbbell in each hand by your sides. Curl one arm palm-up toward your shoulder. In the top position, rotate your hand palm-down and lower the weight to full extension. Next, curl the opposite hand palm-up toward your shoulder before rotating it palm-down for the lowering phase. When you’re comfortable with the basic movement, aim to move your arms at the same time — raising one hand palm-up while simultaneously lowering the other palm-down.
Benefits of the Zottman Curl
The Zottman curl recruits multiple muscles of the arm — including the biceps, brachialis, and brachioradialis — during the multiple phases of the exercise.
The varied hand positions and use of supination and pronation (turning the palm up and down, respectively) will help to build overall wrist mobility and may improve wrist and elbow health.
Hammer Curl
This simple adjustment to the standard dumbbell curl increases recruitment of the forearm muscles, allows you to move relatively heavier weights, and builds grip strength.
The thumbs-up position emphasizes the brachialis and brachioradialis, along with the biceps, making it an efficient way to train the forearm as well as the upper arm.
How to Do the Hammer Curl
Stand holding a pair of dumbbells at your sides with your hands facing your hips. Curl both weights up toward your shoulder while keeping your thumbs up. Allow your elbows to move slightly forward as you bring the weight into the top position — this can increase overall muscle recruitment. Pause briefly before lowering to full extension.
Benefits of the Hammer Curl
The hammer curl allows you to lift heavier weights than any palms-up curl, which can benefit size and strength gains.
The neutral-grip hand position emphasizes the brachialis and brachioradialis, which are not significantly recruited during other biceps curl variations.
EZ-Bar Reverse Curl
The EZ-bar reverse curl shares many of the benefits of the standard EZ-bar curl — reduced wrist strain and a consistent gauge for adjusting grip width — and it offers even greater recruitment of forearm muscles due to the angled palms-down grip.
The semi-pronated (partially palms-down) grip increases activation of the brachialis, brachioradialis, and wrist extensors, along with some recruitment of the biceps. This makes the movement a very efficient way to train the lower arms.
How to Do the EZ-Bar Reverse Curl
Stand with a shoulder-width, palms-down grip on the bar. Pull your shoulders back and keep your torso upright. Slightly bend your knees and set your stance to a comfortable width. Keep your elbows stationary as you curl the weight toward the front of your shoulders. Pause briefly before lowering the weight to full extension.
You may find the exercise more comfortable using a thumbless or “false” grip, placing your thumb next to your index finger instead of wrapping it around the bar. This technique will require greater grip strength as you squeeze the bar harder throughout the movement.
Benefits of the EZ-Bar Reverse Curl
The combination of using an EZ-bar and a predominantly pronated (overhand or palms-down) grip significantly increases brachialis, brachioradialis, and forearm activation compared to supinated (palms-up) biceps exercises.
The angled hand position reduces stress on the wrist joint, making the exercise more comfortable for lifters with mobility problems or joint issues.
The Biceps Muscles
It sounds counterintuitive, but “the biceps” are actually just made of your biceps. Several closely related muscles in the upper and lower arm need to be developed for a great looking set of biceps.
Biceps Brachii
The primary biceps muscle on the front of the upper arm is composed of two heads working together. The short head of the biceps, sometimes called the “inner head,” runs from near the elbow to the top of the upper arm. The long head, sometimes called the “outer head,” runs from the elbow over the shoulder joint and attaches to the shoulder blade.
Credit: YAKOBCHUK VIACHESLAV / Shutterstock
The biceps are well-known for working to flex (bend) your elbow, but they also function to pronate and supinate your wrist and forearm — turning your palm up and down. This is one reason why exercises like the alternating supinating curl result in stronger muscle contractions and greater overall growth.
Brachioradialis
The brachioradialis runs along the thumb-side of the forearm from the wrist area to the lower part of the biceps. It is heavily activated when curling, particularly when the hand is in a neutral (thumbs up) position. The brachioradialis also plays a role in stabilizing the forearm muscle during and after supination or pronation.
Brachialis
This often under-appreciated muscle is actually located “beneath” the biceps, near the elbow joint. When the brachialis increases in size, it has the effect of “lifting” the biceps to make it appear larger. The brachialis becomes the primary arm flexor when using a neutral grip, which is why movements like the hammer curl target it efficiently.
Forearms
The wrist flexors and wrist extensors, on the lower and upper part of the forearm respectively, are largely responsible for lifting the hand at the wrist joint. These muscles are often statically trained during most biceps curl variations, to stabilize the hand and wrist.
However, exercises like the Zottman curl or the cheat curl may recruit the flexors or extensors more significantly due to the involvement of more dynamic lifting technique.
How Often Should You Train the Biceps
Direct biceps training will be a factor of your specific goal and your overall training split. Two effective approaches are to either perform a moderate amount of biceps work immediately after training a larger body part or to perform a low amount of biceps training more frequently.
Because your biceps are recruited during almost all back exercises, ending your back workout with two or three biceps exercises (each for two to four sets of eight to 12 reps) is an efficient way to fully exhaust the biceps.
With this approach, the exercises should be as varied as possible. For example, performing the cheat curl, EZ-bar curl, and single-arm cable curl would all train the biceps with a similar stimulus. Performing the EZ-bar curl, incline curl, and Zottman curl would deliver greater variety, increased muscle recruitment, and stronger stimulus for growth.
Credit: MDV Edwards / Shutterstock
An effective alternative is to perform one biceps exercise for two to three sets of six to 15 reps at the end of your workout three to five days per week. With this high-frequency approach, your biceps are trained often, but the low volume allows for optimal recovery and growth. (13)
The lower volume per workout also prevents biceps fatigue from interfering with your other training for other body parts. For this method to be most efficient, use different exercises and/or a different set/rep scheme in each workout. For example, perform cheat curls for four sets of six in the first workout, single-arm preacher curls for three sets of 12 in the next workout, hammer curls for three sets of eight in the next session, etc.
How to Progress Your Biceps Training
One essential element for maximizing your biceps growth is training with a variety of hand positions and arm angles, either in a single workout or throughout the week. This will optimize overall muscle recruitment and balance activation of the major arm flexors — biceps long head, biceps short head, brachialis, and brachioradialis. (14)
Be sure to incorporate “classic” palm-up curls like the barbell spider curl, palms-down curls such as the EZ-bar reverse curl, movements with your upper arm in front of your torso like the chin-up, and movements with your upper arm angled behind your torso including the incline curl.
Credit: RutySoft / Shutterstock
One particularly effective technique to increase training intensity and volume is the mechanical advantage drop set. This is a specific type of superset which pairs similar movements with simple adjustments to improve leverage in order to perform more total repetitions.
For example, when you might begin with alternating supinating curls. When you approach muscular fatigue, transition immediately (without setting the dumbbells down) and begin performing hammer curls. Because hammer curls put the brachialis in a stronger position to contract, you will be able to complete additional repetitions before again reaching muscular fatigue.
Many people accidentally stumble onto this technique when performing strict barbell curls, as they inadvertently transition to cheat curls to complete a challenging set.
How to Warm-Up Your Biceps
While the elbow joint is most commonly overstressed or aggravated by certain triceps exercises, biceps training can also play a critical role in determining joint health. Because the elbow is held in position during most biceps exercises, the joint can be put under significant strain. A thorough warm-up can go a long way toward preventing any excessive stress.
Before any biceps training, get blood flowing throughout your upper body. Alternating low-rep push-ups with high-rep band pull-aparts for two or three sets is a good start. Following that with (perhaps counterintuitively), a light weight, high rep triceps exercise alternated with a light weight, high rep biceps exercise for two sets. With those four movements, you’ve got an efficient way to approach your biceps warm-up. Continue the training with a relatively light first set on each biceps exercise, and get to work.
Don’t Be Scared to Train for Big Arms
Direct biceps training has developed an unfortunate reputation in recent years, with some lifters thinking it’s purely for “vanity.” First of all, no it isn’t. Setting a goal of lean, muscular 17-inch arms isn’t “vanity” any more than setting a goal to squat five plates per side. Secondly, biceps training can play a performance-boosting role in upper body strength, stability when handling heavy weight, and shoulder, elbow, and wrist joint health. So, you want to build your biceps? Excellent. You’re now armed with the most effective ways to get there.
References
Wilk, M., Zajac, A. & Tufano, J.J. The Influence of Movement Tempo During Resistance Training on Muscular Strength and Hypertrophy Responses: A Review. Sports Med 51, 1629–1650 (2021). https://doi.org/10.1007/s40279-021-01465-2
Marcolin, G., Panizzolo, F. A., Petrone, N., Moro, T., Grigoletto, D., Piccolo, D., & Paoli, A. (2018). Differences in electromyographic activity of biceps brachii and brachioradialis while performing three variants of curl. PeerJ, 6, e5165. https://doi.org/10.7717/peerj.5165
Paoli, A., Gentil, P., Moro, T., Marcolin, G., & Bianco, A. (2017). Resistance Training with Single vs. Multi-joint Exercises at Equal Total Load Volume: Effects on Body Composition, Cardiorespiratory Fitness, and Muscle Strength. Frontiers in physiology, 8, 1105. https://doi.org/10.3389/fphys.2017.01105
Tiwana MS, Charlick M, Varacallo M. Anatomy, Shoulder and Upper Limb, Biceps Muscle. [Updated 2021 Aug 11]. In: StatPearls [Internet]. Treasure Island (FL): StatPearls Publishing; 2022 Jan-. Available from: https://www.ncbi.nlm.nih.gov/books/NBK519538/
Costa E, Moreira A, Cavalcanti B, Krinski K, Aoki M. Effect of unilateral and bilateral resistance exercise on maximal voluntary strength, total volume of load lifted, and perceptual and metabolic responses. Biol Sport. 2015;32(1):35-40. doi:10.5604/20831862.1126326
Calatayud, J., Vinstrup, J., Jakobsen, M. D., Sundstrup, E., Brandt, M., Jay, K., Colado, J. C., & Andersen, L. L. (2016). Importance of mind-muscle connection during progressive resistance training. European journal of applied physiology, 116(3), 527–533. https://doi.org/10.1007/s00421-015-3305-7
Schoenfeld, B. J., Vigotsky, A., Contreras, B., Golden, S., Alto, A., Larson, R., … & Paoli, A. (2018). Differential effects of attentional focus strategies during long-term resistance training. European Journal of Sport Science, 18(5), 705-712.
Costa B.V.D., Kassiano, W., Nunes, J. P., Kunevaliki, G., Castro-E-Souza, P., Rodacki, A., … & de Sousa Fortes, L. (2021). Does Performing Different Resistance Exercises for the Same Muscle Group Induce Non-homogeneous Hypertrophy?. International Journal of Sports Medicine, 42(09), 803-811.
Schoenfeld, Brad CSCS. Accentuating Muscular Development Through Active Insufficiency and Passive Tension. Strength and Conditioning Journal: August 2002 – Volume 24 – Issue 4 – p 20-22
Wiesinger, H. P., Kösters, A., Müller, E., & Seynnes, O. R. (2015). Effects of Increased Loading on In Vivo Tendon Properties: A Systematic Review. Medicine and science in sports and exercise, 47(9), 1885–1895. https://doi.org/10.1249/MSS.0000000000000603
Burd, N. A., Andrews, R. J., West, D. W., Little, J. P., Cochran, A. J., Hector, A. J., Cashaback, J. G., Gibala, M. J., Potvin, J. R., Baker, S. K., & Phillips, S. M. (2012). Muscle time under tension during resistance exercise stimulates differential muscle protein sub-fractional synthetic responses in men. The Journal of physiology, 590(2), 351–362. https://doi.org/10.1113/jphysiol.2011.221200
Oshita, Kazushige. (2021). Effect of internal focus of attention with touching cue on the agonist muscle activity during exercise. 10.14198/jhse.2021.16.Proc2.04.
Schoenfeld, B. J., Grgic, J., & Krieger, J. (2019). How many times per week should a muscle be trained to maximize muscle hypertrophy? A systematic review and meta-analysis of studies examining the effects of resistance training frequency. Journal of sports sciences, 37(11), 1286–1295. https://doi.org/10.1080/02640414.2018.1555906
Kleiber, T., Kunz, L., & Disselhorst-Klug, C. (2015). Muscular coordination of biceps brachii and brachioradialis in elbow flexion with respect to hand position. Frontiers in physiology, 6, 215. https://doi.org/10.3389/fphys.2015.00215
Originally Posted At: https://breakingmuscle.com/feed/rss
Back in the day, your only weight training options in the gym were machines, barbells, or dumbbells. Sure, it got the job done well enough, but lifters were missing out on a versatile, effective, and truly old school piece of equipment for building muscle, strength, power, and conditioning.
Kettlebells have a centuries-long history around the world and, fortunately, they’ve become more and more commonplace in commercial gyms in recent years. They’re also a efficient space-saving option for any home gym. While kettlebell training does require slightly more attention than exercising with dumbbells, the payoff is well-worth the effort.
Here are the best exercises to begin your kettlebell experience. You’ll find some irreplaceable exercises that build explosive power, head-to-toe strength and stability, and a muscle-building stimulus you just can’t duplicate with any other equipment. While some exercises require a pair of matched weights, there are plenty of great movements using just one ‘bell.
The goblet squat is a very accessible way for anyone to learn how to squat with added resistance. The idea of the movement is that you are “sitting into your squat” with a weight in front of your body. It sounds pretty simple in theory and, in reality, it is.
The movement is much easier to learn compared to a back squat which requires more shoulder mobility and upper body attention. A goblet squat can help you feel what it’s like to hold tension in a squat while focusing on your lower body. It’s not strictly for beginners because you can progress to the heaviest kettlebell you have access to before moving on to a barbell.
How to Do the Goblet Squat
Hold the kettlebell handles at your chest. Press your palms toward each other in order to keep tension in your upper body. Keep your chest up and don’t let the weight pull you forward. Push your hips back, drive your knees out, and sit “into” your hips — don’t just fall down.
When your thighs are slightly below parallel to the ground, push your feet through the floor and drive yourself back up to a standing position. Throughout the entire repetition, keep the weight as close to your body as possible and make sure you have control of the weight.
Benefits of the Goblet Squat
Goblet squats are a great way to build strength in your legs and core.
Goblet squats allow you to master squat technique, build mobility, and progress gradually over time.
Goblet squats are ideal for lifters unable to squat with a 35 or 45-pound barbell.
Kettlebell Deadlift
Kettlebell deadlifts are a great way to learn deadlift technique and strengthen the involved muscles without needing to load 65 to 135 pounds on a barbell. Many times, deadlifts are associated with powerlifters moving hundreds and hundreds (and hundreds) of pounds, but a “deadlift” is simply a way of hinging from your hips and picking up a weight from the ground efficiently.
The kettlebell deadlift helps you understand how to turn your lats on during the exercise, which improves upper body stability and strength during the pull. The exercise also grooves the hip hinge movement pattern to improve technique.
How to Do the Kettlebell Deadlift
Set your feet slightly wider than hip-distance apart, with a kettlebell between your feet. Push your hips back and hinge your upper body forward. Grip the top kettlebell handle with both hands. Your torso should be slightly above parallel to the ground, with your chest above your hip-line. Keep your arms straight and feel tension in your lats — the muscles on either side of your back behind your ribs. Pull your shoulders away from your ears.
Slightly bend your knees and take a deep breath in to brace your core (holding tension and position). Drive through the floor and stand up by pushing your hips forward and pulling your shoulders back. Don’t lean too far back in the top position or you’ll shift focus to your lower back.
Once you’re standing upright, descend by driving your hips back behind you and keeping the weight close to your legs. Unlock your knees and “find the floor” with the kettlebell. Remember that a “deadlift” means that there is a dead-stop on the floor. Each time the weight gets to the ground, breathe and to reset your position.
Benefits of the Kettlebell Deadlift
Deadlifts are a functional movement done in everyday life, whether it’s picking up the laundry basket, your kid, heavy grocery bags, or the end of a couch. The kettlebell deadlift teaches how to safely keep weight close to your body while efficiently lifting from the floor.
The exercise strengthens your legs, back, shoulders, core, and grip.
Farmer’s Carry
Farmer’s carries, also known as farmer’s walks, are one of the most effective ways to simultaneously build your strength and endurance. It also works nearly every part of your body from your core and grip to your shoulders and calves.
If you’ve ever carried more than one grocery bag from the car to the house, you’ve done a farmer’s carry. The goal is to get the snacks home safely, right? At the gym, the goal is to carry the weight with control so, when you think about it, the farmer’s carry is a functional exercise to keep your groceries safe. In any case, the idea is to walk for total distance or time while holding heavy weights and maintaining good posture and control of the weights.
How to Do the Farmer’s Carry
Stand with your feet roughly hip-distance apart with a kettlebell at outside of each foot. Hinge your hips back, pull your shoulders away from your ears, and feel tension in your lats as you pick up the kettlebells. This should remind you of doing a deadlift, because it is. The only difference is having a weight near each hip instead of one weight at your body’s centerline. And instead of putting the weights right back down, you are going for a simple walk.
The main focus is to control the weights while walking. Focus on holding your body in good alignment with your shoulders pulled back in muscular tension to prevent the weights from swinging. If you find you are losing your balance, you are likely not controlling the kettlebells. After you’ve reached your distance or time, set up in the starting stance, hinge your hips back, and bring the weights to the floor.
Benefits of the Farmer’s Carry
Farmer’s carries are incredibly applicable to life from a functional strength-perspective, safely and efficiently moving with weights at arm’s length.
The exercise is effective for building core strength and grip strength.
This total-body movement also builds endurance and conditioning more efficiently than low intensity aerobic exercise like walking on a treadmill.
Gorilla Row
This movement is powerful and, honestly, fun. A gorilla row is similar to a bent-over dumbbell row, but instead of pressing into a bench with one arm, you’re using the opposing weight to create force and stability.
This row variation helps to reinforce good hip hinge patterns. It requires you to hold your lower back and core in a strong position, otherwise you find that doing the actual row becomes much harder. The wide stance also reduces lower back strain, making it a good choice for lifters with recurring back problems.
How to Do the Gorilla Row
Stand with your feet wide out and a pair of kettlebells on the ground at your center. Bend forward at your hips and squat down to grip the weights with your palms facing each other. Pressing down into one of the kettlebells while pulling the other toward your waist. Don’t allow your upper body to rotate as you pull and push. You can either alternate pulling sides with each repetition or stick to one side for all reps before switching.
This movement is meant to be done powerfully, not slowly. If you have a hard time being in the hinge position without your back rounding, elevate the kettlebells on blocks to make them a bit higher. This will take some of the pressure on your hamstrings and lower back by reducing the range of motion.
Benefits of the Gorilla Row
Gorilla row is an effective rowing variation, which can be beneficial for building strength and muscle. (1)
This movement incorporated your entire body, using your legs and core for stability, compared to a more lat-focused row.
The core engagement and body position reduces lower back strain compared to other rowing movements.
Kettlebell Halo
The halo is one of the most complete shoulder exercises you can do. The benefits include strength, mobility, and stability. The halo is versatile and can be done either during a workout or as part of a warm-up.
You can make the movement easier or harder by adjusting the bell’s position in your hands, by alternating directions with each repetition or performing one direction at a time, or by changing your stance from standing to kneeling.
How to Do the Kettlebell Halo
Stand while grabbing the side handles a kettlebell, with the your thumbs in front of your face. Think about an actual halo — a halo is a circle over your head, so create a circular motion around your eye-line. As you bring the weight to the side of your head, start to turn the bottom of the kettlebell up toward the ceiling.
As it moves around the back of your head, the bottom of the kettlebell should be facing the ceiling and your elbows point up to the sky. As the weight finishes the circle around your head, rotate the bottom of the weight to face the floor. You should be in the starting position again.
Don’t allow your head to move forward. Get the range of motion from your shoulders, not from your neck. Pretend you’re stuck in cement from the chest down. This will work on your core stability.
Benefits of the Kettlebell Halo
The halo efficiently builds core stability and upper body mobility3.
The shoulders and upper back are worked through a very significant range of motion, making it an ideal drill for improving joint health by addressing scapular stability and mobility.
The exercise can be performed with several basic variations, making it accessible for people with different abilities and experience levels.
Front Rack Reverse Lunge
All lunges are hard, but front rack reverse lunges (sometimes called back lunges) are an extra-level of hard. It takes a lot of core and mid-back strength to perform this “lower body exercise” because you have to keep the kettlebells held near your chest during the movement.
The beauty of the front rack reverse lunge is that you get your leg work done while also training your upper body and core at the same time. Doing the exercise with one kettlebell will increase the core challenge even further since you need to stabilize your torso from being pulled down on one side.
How to Do the Front Rack Reverse Lunge
Stand while holding a pair of kettlebells at shoulder-height with your knuckles either touching or fairly close to each other. Think of a classic prayer position without your hands actually interlocking. This is the “front rack” position.
Step one foot back, hinging slightly at your hips as you bend your front leg and lower your back knee down towards the floor. Lightly graze the floor with your knee — don’t just drop your knee to the ground. Focus on keeping your torso strong and your chest up, pointing your knuckles up toward the sky. Once you’ve grazed the ground with your leg, push up through your front leg with the back leg only helping slightly You can either continue all reps with one leg or you can alternate sides.
Benefits of the Front Rack Reverse Lunge
The front rack position adds a big element of core strength to the reverse lunge, especially if performed with a weight in one arm instead of two.
Your upper back, shoulders and arms will also be challenged to support the weight during this movement.
The front rack reverse lunge helps to build lower body strength and mobility as you reach a deep lunge position, stretching the hip flexors of the back leg and strengthening the quadriceps, hamstrings, and glutes of the front leg.
Front Rack Push Press
It’s common to see a basic overhead press, but a front rack push press is a whole different ballgame. You can do the standard overhead press with kettlebells in a slow and controlled fashion, but when you add the front rack position and a lower body push, you’ve now created a relatively unstable environment that you have to work really hard to control.
By using leg drive, you challenge your core to transfer that power from your lower body through to your shoulders. You’re also able to use relatively heavier weights, which can build more strength and power.
How to Do the Front Rack Push Press
Hold a pair of kettlebells in the front rack position — in front of your face with your palms facing each other. Dip your knees and sit very slightly down while keeping your chest tall. From that position, quickly stand straight and punch the weights up. Imaging you’re jumping to create enough power through the floor and send the weights toward the ceiling.
Because you’re creating so much force, you’ll need to make sure that your shoulders are in a stable position to catch the weights at the top. Brace your core as you lockout the weights overhead. Once you’ve stabilized the weights at the top, lower them towards your chest as you sit again to “catch” the force coming down. Repeat the movement by punching upward.
Benefits of the Front Rack Push Press
Kettlebells are more unstable than dumbbells due to the offset center of gravity and their position in your hand and on your arm. This adds an even greater element of core strength and shoulder stability to each repetition as you must work harder to control the weight overhead.
The front rack push press allows heavier weights than a strict press, which helps improve strength and force development.
Incorporating leg drive makes the front rack push press a total-body exercise, creating a more efficient movement for conditioning.
Suitcase Deadlift and Carry
This movement is similar to the farmer’s carry except, instead of practicing carrying groceries, you’re practicing carrying luggage. Using just one kettlebell creates a pull on one side of your body which forces your core, specifically your oblique muscles on the sides of your abdominals, to work extra-hard to keep you upright.
The suitcase deadlift is a single-arm, core-intensive variation of the standard kettlebell deadlift. The suitcase carry is a single-arm, core-intensive variation of the farmer’s carry. Combining the two creates an efficient exercise to build total-body strength and a strong, supportive core.
How to Do the Suitcase Deadlift and Carry
Stand with one kettlebell on the floor next to your foot. Hinge your hips back, bend your legs slightly, and grab the weight with your palm facing your leg. Pull your shoulders away from your ears and create tension in your shoulder. Keep your back neutral and your shoulders level as you drive through the floor and pick up the weight. Walk for total distance or time.
As you are walking, you will feel a bit lopsided, but that is the point. Fight that using your core. Squeeze your free hand hard to help create tension and prevent the weight from pulling you to one side. (2) Once you are done with the set, hinge your hips back, place the weight on the floor and repeat with the other hand.
Benefits of the Suitcase Deadlift and Carry
The suitcase deadlift and carry addresses natural asymmetries and helps to reduce the risk of injuries by improving core stability.
The single-sided loading is highly functional and prepares the body for real-world scenarios ranging from walking an energetic dog to carrying a child on your hip.
Kettlebell Clean
This is a dynamic and powerful movement that only feels good when it’s done properly. When it’s done wrong, it can tell you it’s wrong by bruising your wrist and forearm — not all exercises talk back to you like that, but kettlebell cleans definitely will.
The clean is a fundamental exercise that builds strength to get your kettlebells up the front rack position, so learning it will benefit your presses, squats, lunges, and more.
How to Do the Kettlebell Clean
With the kettlebell between your feet, and your feet a little wider than hip-width apart, drive your hips back. Bend your knees and put one hand on the bell with a palm-down grip. Make sure that your chest is up so you can look in front of you — you don’t want to be looking at the floor or the bell. Drive up to pull the weight off the floor. As it reaches your hips, start to turn your hand so the weight will land in the front rack position.
Here’s the important thing: you shouldn’t be doing much pulling with your arm. Some, sure, but most of the power to get the weight from the ground to chest-height comes from your hips. You are almost “throwing” the weight up to the sky with a lot of momentum and power from the hips, and then guiding it into the front rack position.
Some key tips would be not to pull off the ground too fast, so you can gather enough power. Also, relax your hand as the bell is turning, to allow a smoother rotation and cut down on calluses. The kettlebell clean does take a lot of practice before you might have a smooth lift, so it’s a good idea to start light and taking your time to increase the weight.
Benefits of the Kettlebell Clean
Kettlebell cleans are a very effective explosive power exercise.
The clean is the most efficient way to bring a kettlebell to the front rack position before performing squats, lunges, presses or similar exercises.
As a total-body movement, it’s an excellent way to train cardio and conditioning while targeting the legs, core, and upper back.
Kettlebell Swing
Kettlebell swings might be the most popular kettlebell exercise around, and for plenty of good reasons. They are one of the best hip extension exercises and target the glutes and hamstrings. They are powerful, they are fun, and they are unconventional cardio.
Because your hips and glutes are some of the strongest muscles in your body, you can swing a lot more weight than you realize when you are using the proper momentum, power, and position.
How to Do the Kettlebell Swing
Start standing about a foot behind the kettlebell, with your feet wider than hip-distance apart. Your body should be in a hinged position with both hands palm-down on the bell. Think about hiking a football back behind you. Keep your chest tall, take a deep breath in, and “hike” the kettlebell behind your legs. Once the kettlebell is at its peak, aggressively drive your hips forward and come to a standing position while the kettlebell swings forward in front of you to about chest-height. Do not lift the kettlebell with your arms. Keep your arms loose.
Imagine a slingshot. As you bring the weight back, you’re pulling the sling back and once you release the sling, the weight should shoot forward. In this case, you will be guiding it forward and slightly up. Once the kettlebell is in front of you at its maximum height, actively pull it down through your legs, but very closer to your hips than your knees. A graphic but memorable saying to keep in mind is “thumb in the bum.” Keep the bell high and close between your legs to generate the most power. When the bell swings up, make sure you have fully extended your hips without leaning backward and overextend with your lower back.
Benefits of the Kettlebell Swing
Kettlebell swings are a great way to change up your cardio workouts.
Swings build explosive power and strength.
The movements is highly effective for targeting the glutes and training hip extension, which can benefit athleticism, sports performance, and muscle growth.
Kettlebell Tall Kneeling Plank
Are you bored of planks and also need to work on your shoulder mobility? Here’s the solution. There are many ways to work your core and static exercises where you resist movement, such as basic planks, are great to build stability.
This tall kneeling plank is also great because you will be working on your hip extension and shoulder mobility at the same time. The kettlebell tall kneeling plank is a great way to work on holding our spine in a neutral position, which will translate to many other exercises.
How to Do the Kettlebell Tall Kneeling Plank
The “tall kneeling” position means that you will be on both knees with your thighs toward the ceiling, not sitting on your heels. Grab the handle of a kettlebell with both hands behind you. Your palms will be facing away from your body and you will want to keep your arms as straight as possible.
Actively extend (straighten) at the hips and hold your ribs in alignment directly above your waist. Try not to let the kettlebell rest on your body. You don’t have to pull it far away, but you want to stay active and engage your shoulders and arms in this hold.
Benefits of the Kettlebell Tall Kneeling Plank
This exercise is a great way to open up your chest and shoulders, improve mobility and stretch your upper body.
If you can’t perform basic planks due to wrist or elbow problems, this is a great alternative.
Turkish Get-Up
The Turkish get-up is a strength, stability, and mobility exercise wrapped up into one. It can be broken down into parts where it becomes a sit-up, a crab bridge, a lunge, an overhead hold… there is a lot going on. The main idea is that you begin lying on the ground holding a weight locked out overhead and have to move into a standing position.
This is a big, involved movement broken down into a step-by-step process. The focus is keeping your shoulders in a stable position so the weight remains perpendicular to the ground the entire time. Even beginning with bodyweight alone, without any weigh in your hand, can be challenging to some people.
How to Do the Turkish Get-Up
Lie on your back with your right foot flat on the floor, your right knee bent to 90-degrees, and your left leg straight out. Your right arm begins locked straight above your chest with a kettlebell in-hand. Your left arm is out to the side at the same angle as your left leg. While looking at the weight and pressing your arm away from you, push into the floor with your right foot and prop up onto your left elbow.
Keep pressing your left arm into the floor and come up the palm of that hand. Keep your shoulders stacked in-line. Press your hips up to the sky with your left leg out straight. Press through your left palm and right foot, and bring your left leg under your body into a kneeling position.
With your knee on the ground, take your left palm off the floor and extend your arm sideways for balance. Press through your legs into a standing position. This is the top of the get-up — the halfway point of one repetition. Stabilize the kettlebell locked overhead and brace your core.
With your left leg, step back into a half-kneeling (lunge) position. Hinge your hips back as you lean to the left side and place your left palm on the ground. Bring your left leg through to a straight ahead position. Bend your left arm and lower to your forearm, and then slowly lower yourself flat onto your back. You should end in the same starting position, with the kettlebell locked straight over your chest. Switch the weight to the other hand and repeat.
Benefits of the Turkish Get-Up
The Turkish get-up truly is a whole-body exercise. It’s arguably the most involved movement you can do in the gym and everything is working, as you can tell from the extra-long steps on how to perform the exercise
The movement works shoulder stability and mobility, lower body stability and strength, and core strength.
Benefits of Kettlebell Training
Kettlebells can be used for all sorts of strength exercises, just like you would use dumbbells. The big difference is weight distribution due to the way the kettlebell is shaped and how you hold it. The offset size of the kettlebell can make many exercises much more challenging than similar movements using a dumbbell.
The other major beauty of almost any kettlebell exercise is that you easily flow from movement to movement. For example, you can smoothly transition from a kettlebell swing to a clean to a push press to a front rack reverse lunge all without ever putting the weight down.
Credit: Nata Kotliar / Shutterstock
This type of exercise flow is similar to using supersets and is an efficient way to train multiple muscle groups with a high level of continuous tension.
How to Program Kettlebell Exercises
Kettlebells are generally used for developing power over raw strength because they can be used explosively but weights are relatively limited. One of the most popular examples would be a kettlebell swing. It’s powerful movement that is best done with a kettlebell rather than a dumbbell or an improvised, homemade kettlebell-like alternative.
Kettlebell exercises can be incorporated into any conventional workout and mixed with standard exercises. For example, performing the front rack push press before dumbbell lateral raises during a shoulder workout.
You can also create a kettlebell-only workout for a plan requiring minimal equipment. For example, performing the goblet squat, swings, and front rack reverse lunge as a complete leg workout. You could also get an intense and effective cardio workout performing the farmer’s carry followed by the Turkish get-up.
How to Warm-Up with a Kettlebell
Because the kettlebell takes up barely any space in the gym, it can be the key to getting a quick and effective warm-up before any workout. Stringing together several exercises, performing each for several repetitions, can be an ideal way to prepare your entire body for any training session. Try this simple circuit:
Unweighted Turkish Get-Up: Lie flat on the ground with your hand raised to the ceiling. Roll to the opposite side, prop yourself up, swing the leg of your non-working arm through to the back, and stand up. Keep your hand pointed completely vertical the entire time. Reverse the process to lie back down and repeat with the other arm. Perform two reps per side before moving to the next exercise.
Goblet Squat: Hold a kettlebell with both hands in front of your chest. Pull your shoulders back, engage your core, and sit back into your hips. Descend as low as possible, aiming to increase your depth with each repetition. Perform five repetitions before moving to the next repetition.
Kettlebell Clean: Take the kettlebell in one hand, handing between your legs near your knees. Hinge forward at the hips and slightly bend your knees. Explode upwards while pulling the weight to shoulder-level. Bend your arm and “catch” the weight with bent legs. Stand upright and reset before lowering the weight to the starting position. Perform three repetitions per arm before moving to the next exercise.
Front Rack Push Press: Begin with the kettlebell at shoulder-level. Bend your legs and sit down slightly before quickly standing up while pressing the weight overhead to full lockout. Lower the bell to shoulder-level and “catch” it with bent legs. Perform three repetitions per arm before repeating the first exercise. Perform a total of three circuits.
One Bell, Endless Results
There’s a reason kettlebells have been used around the entire world for well-over a century. Without needing a fully equipped gym, you can train your entire body for strength, muscle, mobility, and conditioning. Kettlebell training might seem complicated, imposing, or even intimidating. But it’s really not. All it takes is patience, practice, and proper instruction. You just got the last piece, but the first two are up to you.
References
Baz-Valle, E., Schoenfeld, B. J., Torres-Unda, J., Santos-Concejero, J., & Balsalobre-Fernández, C. (2019). The effects of exercise variation in muscle thickness, maximal strength and motivation in resistance trained men. PloS one, 14(12), e0226989. https://doi.org/10.1371/journal.pone.0226989
Gontijo, L. B., Pereira, P. D., Neves, C. D., Santos, A. P., Machado, D., & Bastos, V. H. (2012). Evaluation of strength and irradiated movement pattern resulting from trunk motions of the proprioceptive neuromuscular facilitation. Rehabilitation research and practice, 2012, 281937. https://doi.org/10.1155/2012/281937
I don’t consider myself a biohacker, but I do intentionally engage in practices that I believe will extend my healthspan and lifespan. Cold plunges are one of them. Cold exposure goes into the bucket along with things like resistance training, intermittent fasting, sun on your skin, and sauna—all stimuli that stress the body and prompt it to become stronger and more resistant to chronic and acute health issues.
I’m tempted to say that cold plunges are an easy way to challenge your system, but if you’ve ever stepped up to the edge of an icy stream or cold pool, you know there’s nothing easy about forcing yourself to get in, sink down to your neck, and make the intentional choice to stay there. Veteran cold plungers and winter swimmers will tell you that over time your body acclimates so it becomes easier to tolerate the cold. You’ll even come to eagerly anticipate your next plunge. That’s all true. But there will always be a part of your brain that tells you, “You don’t have to do this. C’mon, stay warm and dry.”
Each plunge requires you to overcome that little voice. It’s not easy, but it’s simple in the sense that just about everyone can find a way to harness the power of cold. And everyone should because the benefits of cold exposure are pretty impressive:
Reduces inflammation by lowering pro-inflammatory cytokines and increasing anti-inflammatory cytokines
Triggers the release of immune cells that can ward off illness
Converts white fat into more metabolically active brown or beige fat
More than these physical benefits, the fact that it’s not easy is arguably the biggest upside of all. The mental fortitude you build when you intentionally and repeatedly put yourself in uncomfortable situations is undeniable. One of the most profound disconnects between our modern world and the one our ancestors inhabited is just how comfortable we are most of the time. We now have to go out of our way to simulate the physical and mental challenges that for most of history were just a part of everyday life.
I’ve been regularly immersing myself in cold water for years now, and I’m convinced that that’s one of the reasons why I still feel as good as ever mentally and physically. Here’s how to get started.
How I Cold Plunge
Early in the day, I like colder temperature for shorter duration. Generally that means water in the mid to low 40s for a minute or two. (That’s Fahrenheit; 4 to 7 degrees Celsius.) Get out, lightly towel off, dress. Don’t do anything special to warm up. Go about your day energized and refreshed.
Later in the day, I like a little less cold (48 to 51 degrees F, 8 to 10 degrees C) but for a longer duration, anywhere from 3 to 5 minutes. If it’s after 6 p.m. and my intention is to prepare myself for a better night’s sleep, I want to be a little chilly (shiver slightly) after I get out, but only for 20 or 30 minutes. If you overdo it, shivering into the night can be a bit uncomfortable (and I have done that). So if I feel I’ve gone too long, I might take a warm shower to bring my body temperature up a bit. Sometimes I hit the sauna for 12 minutes before I plunge. That can buy me a few more minutes in the cold.
My favorite is in summer to plunge for a few minutes and then air dry in the warm sunshine. Depending on where I’m at in the world, I might do my plunges in an unheated swimming pool, lake, or ocean. More recently, I received a cold plunge tub (looks like a bathtub) for my home by Plunge, and I’ve been having fun playing around with the ability to manipulate the temperature.
Now, this is just what I prefer. I crafted this protocol, if you can call it that, by looking at the research, talking to friends who are experts in performance and recovery, and mostly doing what feels good to me. I’m not overly concerned with getting it “right” every time. And I don’t really plunge for exercise recovery. I do it for the mental challenge and the great feeling after I get out. The “buzzy” feeling and energy I enjoy afterward tell me I’m accessing the benefits.
Cold Plunge Best Practices
When I talk to people about cold exposure, first they tell me how much they hate the cold and could never do it. Then they all have the same questions: How cold does the water have to be? How long do I have to stay in? How often? Can I just take cold showers instead?
First, the water should be cold enough to make you want to get out. That’s not specific, and that’s kind of the point. Hormetic stressors only work when they fall in that Cinderella zone between too much (so stressful that they do more harm than good) and not enough to force the body to adapt. Everyone’s “just right” place will depend on their personal cold tolerance, baseline health, and how many other stressors they’re juggling.
Likewise, optimal time and frequency are also somewhat subjective. Generally, I like to stay in for a few minutes each time. More if the water is a bit warmer, less if it’s really frigid. Stanford neuroscientist and popular podcaster Andrew Huberman suggests that 11 minutes total per week, broken up into two to four sessions, might be best for boosting metabolism. Ten to fifteen minutes per week seems like a reasonable goal to me.
Cold exposure—swimming in arctic waters, sitting in the snow wearing little to nothing for as long as possible—has become the extreme sport du jour. But that’s not what we’re talking about here. There is no medal for long-distance endurance in the cold plunge. Do what feels right. I have stayed in too long a few times (to set records for myself) and then regretted it because I overstressed my body. The idea is a brief hormetic stress and immune boost. Doing too much can have the opposite effect.
Cold plunges versus cold showers
Years ago, cold showers were all the rage. Now cold plunges rein supreme. Both have their merits, but I’m partial to plunges over showers. Fully immersing yourself in cold water is the most efficient way to stimulate the vasoconstriction and hormone release we want. In a cold shower, the water only hits some of your skin, so you don’t get as cold as fast. It’s too easy to “cheat” by keeping more of your body out of the water (even unintentionally).
That said, cold showers are certainly better than nothing, and it doesn’t have to be either-or. You can do both. Studies have also found cranking your thermostat down to 62 degrees Fahrenheit (19 degrees Celsius) for a couple of hours a day stimulates brown fat.1 That’s not even that cold. You can also take advantage of nature’s thermostat and go outside in cold weather slightly, not dangerously, underdressed.
Nothing entirely takes the place cold water immersion, though, especially when it comes to the mental benefits of doing hard things. Yes, you have to steel yourself to crank the faucet all the way to cold if you’re enjoying a nice warm shower. But it’s not the same as fully submerging yourself.
Crafting Your Cold Plunge Routine
Here is how I would start incorporating cold plunges if I was a beginner:
Start slow. Gradually work your way up to colder and/or longer plunges (to a point—you can only go so cold and so long before it becomes dangerous).
Aim for 10 to 15 minutes per week as a baseline.
For the biggest benefits, submerge up to your neck and keep hands and feet under (or alternate dunking them in and out).
When you get out, dry off and allow your body to warm up naturally if possible. Dress in climate-appropriate clothing, but don’t blast the heater or start chugging tea unless you’re shivering uncontrollably. Some shivering is to be expected.
Supplement cold plunges with less intense cold exposure via turning down the thermostat, taking cooler showers, and going outside slightly underdressed. Be aware of your total stress load. Don’t overdo it.
Adjust your plunges based on your subjective experience each time.
I’ll say it again: this is not a competition. What is tough for you might be easy for someone else, and vice versa. What’s tolerable for you today might feel almost unbearably difficult for you next week if other life stressors pile up.
The goal with each plunge is to challenge yourself in a way that feels hard but adaptive. If you’ve ever purposefully put yourself in a hard situation—cold exposure, training for a marathon, climbing a mountain, or anything else where you butt up against your ability to endure—you’re familiar with wanting to quit and simultaneously wanting to continue because you feel yourself getting stronger in the moment. That’s the razor’s edge you’re aiming for. If it just plain hurts, cut the plunge short. Come back another day.
As you become more accustomed to cold plunging, experiment. Play around with water temperature, duration, and time of day. You might incorporate breathing exercises to bring a meditative aspect to your plunges (never practice controlled hyperventilation in water, though). Try getting in and out multiple times. Move your limbs around underwater. This disrupts the pocket of warm water that forms near your skin’s surface and makes the plunge feel colder.
Be Safe
The beauty of cold exposure is that you can start mild and get more intense, monitoring how you feel along the way. Cold plunges of the type I’m talking about here are generally safe, but they are stressful. If you are concerned about your ability to handle the stress, listen to your gut or talk to your doctor.
Plunging in very cold water elicits a cold shock response. This can be dangerous for people who have asthma or cardiovascular conditions. I’d caution even the most hale and hearty readers, if you decide to take this to extreme levels, take the time to acclimate to cold water and learn proper safety precautions. The Outdoor Swimming Society is a good place to start.
All right, that’s what I do. I’m interested to hear what you’re up to. Who among you is already doing regular cold plunges? Who wants to start?
There’s nothing better than enjoying a fresh scone with your morning coffee or tea. Since fall is now in full swing it’s only appropriate that even morning scones have a hint of pumpkin. Not only does pumpkin mix well with spices such as cinnamon, ginger, cardamon but there are also numerous health benefits to pumpkin. Plus, this recipe for pumpkin scones calls for almond flour, making it gluten-free. If you’re looking for more texture, add chopped nuts to the scone dough like pecans or walnuts.
How to make gluten-free pumpkin scones
First, preheat your oven to 375 degrees Fahrenheit. Next, combine the milk and vinegar and let rest for about 5 minutes. While you’re waiting combine the almond flour, 5.5 tablespoons of tapioca, sugar, coconut flour, baking powder, spices and salt in a bowl. Add the cold butter to the bowl and cut the butter into the flour mixture using a fork or pastry cutter. In the end, the butter should be in very tiny pieces incorporated into the flour and the resulting flour should look like crumbly sand.
Add the milk mixture, pumpkin and vanilla to the bowl and mix together with a spatula or spoon until just combined. Let the dough rest for 2-3 minutes. Place a piece of parchment or a silicone mat on a sheet pan and sprinkle the remaining tapioca starch on it. Scoop the dough out on the pan and form it into a ball. Form the dough into a flattened round disk about an inch or so thick. Use a large knife to cut the disk into 6 or 8 sections.
Place the pan in the oven at 375 degrees for about 20 minutes. Remove the pan from the oven and use a knife to cut deeper into the slices. Place the pan back in the oven for 10 more minutes. Remove the pan from the oven again and use the knife to carefully separate the cut sections so each scone is a separate triangle so each side of the scone can be exposed to the heat in the oven. Reduce the heat to 350 degrees and continue baking for about 10-15 minutes, or until the undersides of the scones are slightly golden. Let the scones cool before handling them.
Enjoy the scones as is, or drizzle them with your choice of melted coconut butter mixed with stevia or monkfruit drops, or an icing made from powdered sugar or sugar substitute like powdered erythritol and milk.
There’s nothing better than enjoying a fresh scone with your morning coffee or tea. Since fall is now in full swing it’s only appropriate that even morning scones have a hint of pumpkin.
Ingredients
1 1/3 cup fine almond flour
6 Tbsp tapioca starch
5.5 Tbsp coconut sugar (or you can use any granulated sugar substitute)
2.5 Tbsp coconut flour
2 tsp baking powder
1 tsp cinnamon
1 tsp ginger
1/8 teaspoon cardamom
Pinch of salt
5 Tbsp very cold salted butter, cut into small cubes
1/4 cup milk of choice
1 tsp apple cider vinegar
¼ cup pumpkin puree
1 tsp vanilla extract
Instructions
Preheat your oven to 375 degrees Fahrenheit. Combine the milk and vinegar and let rest for about 5 minutes.
Combine the almond flour, 5.5 tablespoons of tapioca, sugar, coconut flour, baking powder, spices and salt in a bowl. Add the cold butter to the bowl and cut the butter into the flour mixture using a fork or pastry cutter. In the end, the butter should be in very tiny pieces incorporated into the flour and the resulting flour should look like crumbly sand.
Add the milk mixture, pumpkin and vanilla to the bowl and mix together with a spatula or spoon until just combined. Let the dough rest for 2-3 minutes.
Place a piece of parchment or a silicone mat on a sheet pan and sprinkle the remaining tapioca starch on it. Scoop the dough out on the pan and form it into a ball. Form the dough into a flattened round disk about an inch or so thick. Use a large knife to cut the disk into 6 or 8 sections.
Place the pan in the oven at 375 degrees for about 20 minutes. Remove the pan from the oven and use a knife to cut deeper into the slices. Place the pan back in the oven for 10 more minutes.
Remove the pan from the oven again and use the knife to carefully separate the cut sections so each scone is a separate triangle so each side of the scone can be exposed to the heat in the oven.
Reduce the heat to 350 degrees and continue baking for about 10-15 minutes, or until the undersides of the scones are slightly golden. Let the scones cool before handling them.
Enjoy the scones as is, or drizzle them with your choice of melted coconut butter mixed with stevia or monkfruit drops, or an icing made from powdered sugar or sugar substitute like powdered erythritol and milk.
Notes
To reduce the carb count, use a granulated sugar substitute in lieu of the coconut sugar. Brown sugar swerve is a good option.
For more texture, add chopped nuts to the scone dough like pecans or walnuts.
To make a sugar icing, sift about 1/4 cup of powdered sugar or powdered sugar substitute (powdered erythritol, swerve or lakanto monkfruit sweetener) into a bowl and add in your milk of choice 1/2 teaspoon at a time until a thin paste forms. Drizzle all over the scones.
To make a coconut butter icing, melt your coconut butter, then add drops of stevia or monkfruit sweetener to taste. Drizzle the melted coconut butter all over the scones.
Originally Posted At: https://breakingmuscle.com/feed/rss
Sam Sikora started competitive powerlifting roughly a year ago, in March 2021. With a mix of learning experiences and great flourishes, it seems the 19-year-old athlete is only improving. His latest performance might be something to put a pin in for the future.
On Oct. 15, 2022, Sikora shared a post on his Instagram detailing his complete performance at the 2022 Powerlifting America (AMP) Elite Season Classic. (Note: The contest occurred on the same day in Kenmore, NY.) In a first-place outing in the Men’s Raw Junior 105-kilogram weight class, Sikora logged a personal record (PR) on each of his staple lifts, eventually finishing with a 712.5-kilogram (1,570.8-pound) raw PR total.
Notably, the entirety of Sikora’s performance saw the athlete successfully lock out all nine attempts (three each, respectively) on his squat, bench press, and deadlift. Sikora wore a lifting belt for each lift and had additional wrist wraps on during his squat and bench press.
Here’s a complete overview of Sikora’s performance at the 2022 AMP Elite Season Classic:
Sam Sikora (105KG) Junior | 2022 AMP Elite Season Classic Top Stats
Squat — 275 kilograms (606.3 pounds)
Bench Press — 167.5 kilograms (369.3 pounds)
Deadlift — 270 kilograms (595.2 pounds)
Total — 712.5 kilograms (1,570.8 pounds)
In what might be Sikora’s best showing to date, the athlete shattered each of his previous raw all-time competition bests. According to Open Powerlifting, his new top squat is 25 kilograms (55.2 pounds) more than his past top mark. His top bench press is 22.4 kilograms (50 pounds) more than his previous best figure. His top deadlift is 15.1 pounds more than his past competition PR. Finally, Sikora’s total is an astonishing 62.5 kilograms (138 pounds) more than his best ever.
Each of these previous marks was from the 2022 USA Powerlifting (USAPL) Teen Nationals in late March 2022, showcasing how far Sikora has come with his strength and training in roughly half a year’s time. In Sikora’s Instagram post, the athlete detailed that the lead-up to the 2022 AMP Elite Season Classic was his “first perfect prep” since his competitive debut and that he had “no failures.” He has the results to show for it.
Here’s a rundown of the complete results from Sikora’s career to date:
Sam Sikora | Complete Career Results
2021 USAPL Madness Open — Fifth place (Open); First place (Teen)
2021 USAPL High School and Teen National Championships (Varsity) — 16th place
2021 USAPL Michigan State Championships — 10th place (Open); First place (Teen)
Sikora is wasting no time preparing for his next contest. The athlete wrote that he next plans to compete in the 2023 AMP High School Nationals. Those will take place on March 31-April 2, 2023, in Scranton, PA. Judging by how he fared with time between his last competition, the ascending Sikora may well shatter his competition bests once more come next year.
Originally Posted At: https://breakingmuscle.com/feed/rss
On Sept. 3, 2022, athlete Devin Burger showed off his strength by completing a 498.9-kilogram (1,100-pound) Silver Dollar deadlift during the United States Strongest (USS) Texas Strongest Veteran competition. According to Burger’s Instagram profile and the official results, the massive Silver Dollar deadlift is a Texas State record for an 18-inch deadlift in the under-275-kilogram weight class. Burger wore knee sleeves, a lifting belt, and utilized lifting straps to help him with this deadlift.
Given the ease with which Burger seemingly completes his pull, the athlete could vault himself up the Silver Dollar deadlift annals soon enough. That’s because his achievement compares well with his peers. If Burger had competed and managed his pull during the recent 2022 World Deadlift Council (WDC) World Silver Dollar Championships, his 1,100-pound milestone would’ve ranked fifth among all his peers. Ben Thompson set a then-World Record of 577.2 kilograms (1,272.5 pounds) during the contest in a first-place performance.
Notably, the Silver Dollar record has changed several times in the 2022 calendar year.
Thompson’s record from mid-May 2022 eclipsed Sean Hayes’ former record mark, who pulled 560 kilograms (1,235-pound) Silver dollar deadlift during the 2022 Strongman Corporation Canada King & Queen Of The Throne contest. Hayes had previously surpassed Anthony Pernice’s past figure of 550 kilograms (1,212 pounds) from the 2020 USS Farm Strong Record Breaker. Estonian Strongman Rauno Heinla captured the current World Record with a pull of579.7 kilograms (1,278 pounds) at the 2022 Silver Dollar Deadlift Estonian Championship in early June.
Burger has a long way to go before he can start challenging the new record. However, given the context, he seems to be on the right track.
Though he competes on a domestic level, at the time of this writing, Burger does not appear to possess any significant international competitive strongman experience. A general perusal of Burger’s social media showcases the athlete performing and training various traditional strongman staples like the Log Press and Atlas Stones.
When he’s not preparing for strongman competition, Burger spends much of his time working as a certified personal trainer. The athlete appears to run his own independent business entitled “Camp Gladiator,” where he offers coaching centered around a prospective person’s nutrition and fitness. According to his Instagram bio, Burger characterizes his personal training as a means to “help normal people with health and fitness.”
At the time of this article’s publication, Burger doesn’t have any pending strongman contests on his plate. With his Silver Dollar deadlift feat in mind, the athlete might be someone to watch in the future.
Originally Posted At: https://breakingmuscle.com/feed/rss
In the current pantheon of strongman, Martins Licis is one of the inarguable pillars of the sport. The 32-year-old athlete can boast a World’s Strongest Man (WSM) title to his name (2019) and seemingly finds a way to finish near the top of many contests he features in. With another tentpole competition on the horizon, Licis is training to make his usual waves once more.
On Oct. 17, 2022, Licis shared a video of himself capturing a 455-kilogram (1,003-pound) block-pull deadlift for four reps. Per the caption of his post, Licis apparently had “plenty more in reserve” even after finishing the set. Notably, Licis did not disclose the precise heights of the blocks. However, judging by the video, they appear to be roughly half the height of the 6-foot-3 strongman’s calves when standing straight up. The athlete wore a lifting belt and lifting straps, and completed the set while donning just his socks.
Licis’ unique deadlift training is part of his preparation for the upcoming 2022 Rogue Invitational. The American strongman is the defending champion of the contest that will take place on Oct. 28-30, 2022, in Austin, TX. According to Strongman Archives, it will also be Licis’ first appearance in a formal competitive strongman setting since he finished in second place to Tom Stoltman at the 2022 WSM.
Licis is one of the more decorated and accomplished active strongmen. His 2019 WSM title aside, the athlete has also never failed to qualify for the WSM finals in five appearances. His overall precedent shows that he usually fares well amongst his peers in other competitions, too.
Here’s an overview of the more significant results from Licis’ illustrious career to this point:
Martins Licis | Notable Career Results
2015 America’s Strongest Man — Second place
2017-2018 Ultimate Strongman Summermania — First place
This latest deadlift pull might be an example of Licis ramping up his training as he gets set to compete again. Should the strongman successfully repeat as Rogue Invitational champion, it’ll undoubtedly be another impressive notch in the belt for one of the biggest names in strongman.
Originally Posted At: https://breakingmuscle.com/feed/rss
William Bonac has been a mainstay in the Men’s Open division for a few years. Yet, despite the bodybuilder’s consistency and a career-high second-place finish in 2019, he’s never quite been able to reach the summit of the Mr. Olympia. A recent demanding training session centered around his chest might be an integral step forward in shifting his fortunes this late fall.
On Oct. 14, 2022, Bonac posted a video to his YouTube channel where he quickly shredded up his chest as part of his formal prep for the 2022 Mr. Olympia on Dec. 16-18, 2022, in Las Vegas, NV. With the athlete seeking to capture his first-ever title at the prestigious contest, it seems he’s pulling out all the stops.
Here’s a quick overview of Bonac’s recent “Olympia prep” chest workout.
Cable Crossover
Bonac begins his routine with some cable crossovers. He warms up for a set before putting the pedal to the metal. Notably, Bonac doesn’t actually cross the cables in a downward motion but straight ahead across his chest.
Smith Machine Incline
For the next segment of his workout, Bonac performs an incline bench press on a Smith machine. The bodybuilder clarifies that he appreciates the incline movement more because he thinks it helps balance his physique well.
“I do [incline] because it’s for my upper chest,” Bonac explains. “I do them because mine is undeveloped. It doesn’t match with the total of my chest. I need to bring it up more. When you train chest, you need to hit it from every angle, you understand. I want the ball over here [directs to chest] so that I can put a glass on it. I use most of my strength and energy for the incline.”
Smith Machine Flat Bench Press
Following the incline press, Bonac stays in the Smith machine and lowers the bench to a flat setting for a classic bench press. The hard-training lifter explains that performing multiple exercises in one machine is a time-saving strategy.
Smith Machine Decline Bench Press
After appropriately working the upper and middle parts of his chest, Bonac quickly shifts to giving his lower chest some attention with some sets of a decline bench press on the Smith machine. For Bonac, he appears to appreciate cycling through slight variations of these different chest exercises.
Standing Machine Chest Fly
After moving on from the Smith machine, Bonac performs a few sets of pectoral flys on a standing chest machine.
Diamond Push-Ups
To close his workout, Bonac elects to rep out some diamond push-ups — a more challenging variation of the traditional push-up, where an athlete’s hands come together to form a diamond shape. This last piece for Bonac appears to be more about getting a quality pump rather than pushing himself to the limit. Especially since he apparently finished this workout with limited pain.
“Normally, when I train my chest, I have a lot of pain and joint pain in my elbows,” Bonac said. “At this moment, since I started my off-season prep, I don’t have any issues with that anymore. I’m pretty happy with that.”
Bonac faces tall odds to topple two-time reigning champion Mamdouh “Big Ramy” Elssbiay for his first-ever Mr. Olympia title. However, with a physique hovering around 265 pounds from his last check-in of the offseason, along with this taxing chest workout — Bonac might be in a prime position for an upstart performance on the Las Vegas stage.
For now classes are 6pm and 640pm at 2840 Wildwood st in the Boise Cloggers studio.
Book your class NOW!
click this ==>
Warrior Fit Testimonials
First, I want to say thank you for convincing me to do Tabata! I was struggling to lose weight and Finally I found something that helped! I really appreciate your coaching! - Craig T.
Ever since I was convinced to do Tabata I have seen huge results, I lost 6 pounds and gained energy in the first 3 weeks. I have been working out for 3 months before I decided to do Tabata and I struggled to lose weight.
At first I thought "How am I losing weight by bringing my heart rate up then cooling down then bringing it up again?" I don’t know how it works but it does!
Thank you!! - Theresa F.
The first day of Tabata, I wondered WHAT AM I DOING - I AM 56 !! Five weeks later I knew that it was what I needed. I learned that I could push myself well beyond my comfort zone and feel good later. I have a marked improvement in physical as well as emotional endurance. - Lyn C.
When I was first told about Tabata I was very excited from the word go, however that excitement stemmed from the fact that I had no clue what it meant. I missed the first week of class b/c I was traveling for work so when I came in during the 2nd week I had some making it up to do.
It was hard at first b/c my body wasn't used to working out at such a fast pace, but once I got into a rhythm I started to feel very good. These classes are no joke. If you stick with it you will leave there feeling stronger, healthier and overall better about yourself and what you've accomplished.
I would recommend these classes to anyone. Darrin is a great trainer and he'll keep you going with his energy.
- Jami L.
Warriors Fit Audio
Warrior Fit uses High Intensity Music to get ya Moooovin' So we can all "Get Our Sweat On"
The link below will give ya a freeee shot at Audible plus a couple audio books just to try it out and if you haven't used audio books on your commutes you are missing out. Get pumped up before you get to where you are going and exercise your mind. I use it Everyday. Go get yours now!

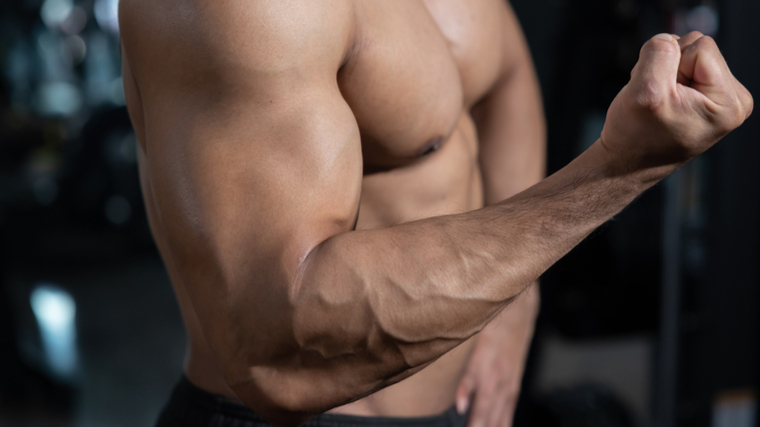
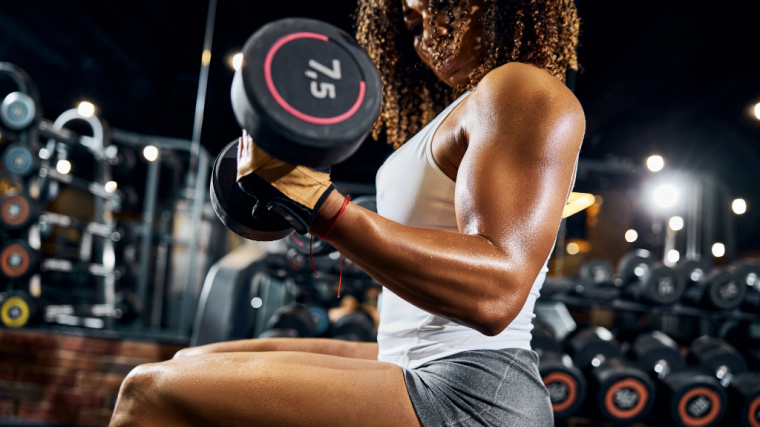
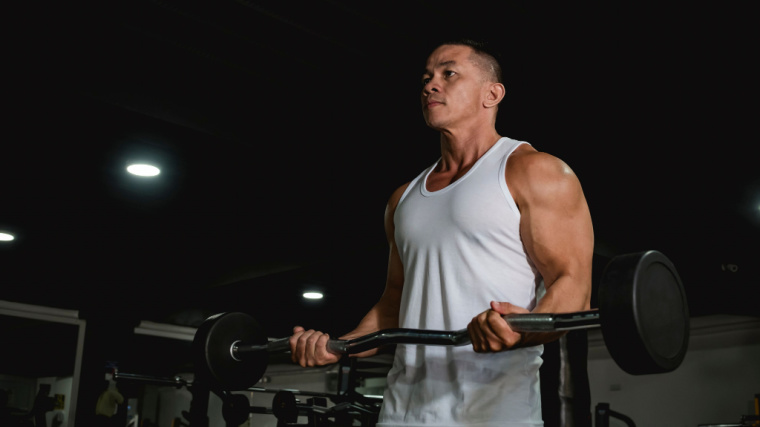
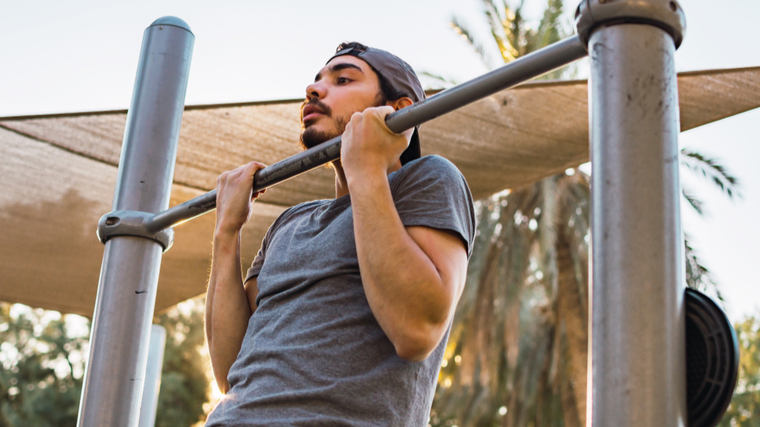
 I don’t consider myself a biohacker, but I do intentionally engage in practices that I believe will extend my healthspan and lifespan. Cold plunges are one of them. Cold exposure goes into the bucket along with things like resistance training, intermittent fasting, sun on your skin, and sauna—all stimuli that stress the body and prompt it to become stronger and more resistant to chronic and acute health issues.
 There’s nothing better than enjoying a fresh scone with your morning coffee or tea. Since fall is now in full swing it’s only appropriate that even morning scones have a hint of pumpkin. Not only does pumpkin mix well with spices such as cinnamon, ginger, cardamon but there are also numerous


 For now classes are 6pm and 640pm at 2840 Wildwood st in the Boise Cloggers studio.
Book your class NOW!
click this ==>
For now classes are 6pm and 640pm at 2840 Wildwood st in the Boise Cloggers studio.
Book your class NOW!
click this ==>


