Now, it appears that Mackey is backing off of the iron and eyeing the stage.
On June 7, 2022, Mackey shared where his physique stands through a mutual post on Battle Up Productions’ Instagram. The update shows off Mackey’s body as he prepares for the 2022 IFBB Pro League Texas Pro on August 12-13, 2022, in Irving, Texas.
Notably, the 2022 Texas Pro winner automatically qualifies for the 2022 Mr. Olympia on December 16-18, 2022, in Las Vegas, NV. While Mackey hasn’t confirmed this year’s Mr. Olympia is his long-term goal, it likely adds more incentive for the 37-year-old athlete. Mackey has not competed in a Mr. Olympia to this point in his career.
In this regard, Mackey sits in an interesting position. The bodybuilder routinely shares videos of himself attacking a variety of arms and leg workouts on his social media. That he trains strength like this while polishing his gargantuan physique is a delicate balance to juggle.
Given Mackey’s plans for training his body, it doesn’t seem to be much of an issue for him. He confirmed as much in another recent Instagram post.
“Having a plan every time I go to the gym has been what’s kept me successful with my training and my strength and shape,” Mackey wrote. “I know exactly how many reps, drop sets, and movements I’ll do per body part.”
Mackey’s Bodybuilding Life
Mackey first burst onto the competitive bodybuilding scene when he won the 2015 Ronnie Coleman Classic as a super-heavyweight (225-plus pounds). He eventually earned his IFBB Pro League Card by finishing in second place at the 2016 National Physique Committee (NPC) Nationals. To date, through five professional competitions, Mackey’s highest-ever result is an eighth-place finish at the 2020 Tampa Pro. His most recent bodybuilding contest was the 2021 Chicago Pro, where he took home a 12th-place result.
As a Texas native, history might even be on Mackey’s side. Bodybuilding legend Ronnie Coleman also hails from the Lone Star State, as does rising star Hunter Labrada.
Winning the 2022 Texas Pro outright would be a sizable step forward for Mackey. Whether he intends to relay a potential fantastic result to a Mr. Olympia stage might be a conversation he has after this next contest.
The 2022 IFBB Pro League Texas Pro will take place on August 12-13, 2022, in Irving, Texas.
Originally Posted At: https://breakingmuscle.com/feed/rss
In competition, Olympic weightlifters don’t have to worry about having a powerful squat. That didn’t stop Mattie Rogers from showing off some of her recent gains on the compound lift.
On June 8, 2022, the 26-year-old Rogers locked out a 190-kilogram (419-pound) squat for a new personal record (PR). Rogers wore a lifting belt and knee wraps for the impressive feat.
In the caption of her post on social media, Rogers says she’s been on a long journey in trying to improve her squat. Her post compares her improved squat strength from June 2020 to June 2022, but even that doesn’t tell the whole story.
Before that 171-kilogram (370-pound) squat in 2020, Rogers maintains her top figure hadn’t noticeably changed much in almost half a decade.
“It’s been a long journey trying to get my eight-foot-long legs stronger,” Rogers writes. “I am a notoriously ‘bad’ squatter (or very efficient lifter), and prior to the 171-kilogram PR from 2020, I hadn’t improved my squat (from 170) in about four years (and just about [expletive] myself trying to do so).”
It seems Rogers’ efforts and struggles with her squat might have been worth any potential frustrations. Considering she says she also weighed more (undisclosed) on her previous top PR, the Olympian can hold her head high over her achievement.
“Back squats are still my absolute least favorite thing to do most days,” Rogers writes. “But an eight-kilogram PR on the day is nothing to be mad at.”
Rogers at a Glance
While Rogers has taken some time to improve her squat, she certainly hasn’t neglected the lifts she dedicates most of her attention to — the clean & jerk and snatch. Rogers is the current American Record holder for the snatch, clean & jerk, and total in the 81-kilogram competitive weight class. Rogers achieved each of those marks at the 2021 USA Weightlifting (USAW) National Championships.
Here are Rogers’ all-time best stats:
Mattie Rogers | Personal Best Stats
Snatch — 112 kilograms (246 pounds) | American Record (81KG)
Clean & Jerk — 143 kilograms (315.2 pounds) | American Record (81KG)
Total — 255 kilograms (562.1 pounds) | American Record (81KG)
In addition to her respective U.S. records, Rogers is a three-time silver medalist (2017, 2019, 2021) at the International Weightlifting Federation (IWF) World Weightlifting Championships. She was also a member of the United States Olympic weightlifting team and teammates with Katherine Nye at the 2020 Tokyo Summer Olympics. Notably, that competition was her first time competing in the 87-kilogram weight class, which might explain her eventual sixth-place finish.
Rogers will next compete at the 2022 IWF World Weightlifting Championships, and she’ll be competing as a 76-kilogram athlete. At the time of this writing, those will take place in Bogotá, Colombia, sometime from November to December 2022. While Rogers’ new squat prowess won’t be necessary there, she can at least take solace in her improved leg strength and power.
Luke Stoltman is the defending champion of this competition. He captured the top spot in 2021 after Evan Singleton and his brother, Tom Stoltman, moved so fast during a head-to-head Atlas Stones event that they both mishandled a stone and threw off their times. A single point separated the Stoltman brothers between first and second place, while Singleton finished a mere four points behind.
After just narrowly missing out on a victory, both athletes will assuredly be looking for redemption and a chance to unseat Luke Stoltman in Scotland this October.
What to Expect
The Giants Live organization has yet to announce the events for the 2022 World Tour Finals.
Given that the competition is in Scotland, some have speculated that the Nicol Stones — functionally similar to the Scottish tradition of the famed Dinnie Stones — will likely be featured. The Nicol Stones weigh 114 kilograms (251 pounds) and 138 kilograms (304.2 pounds), respectively, while the Dinnie Stones weigh 144.5 kilograms (318.5 pounds) and 188 kilograms (414.5 pounds)
Kevin Faires might particularly excel during this event. Faires owns the Nicol Stones World Record of 22.2 meters from the 2021 World Tour Finals. He also possesses the Dinnie Stones World Record of 25 feet, which he achieved at the 2022 Rogue Record Breakers.
If the Log Lift makes a comeback, expect the Stoltman brothers to duke it out for top status. Both Luke and Tom managed to press a 150-kilogram (330.7-pound) log overhead for nine reps in 2021. Maxime Boudreault wasn’t far behind with eight presses. Chieck Sanou is the current Log Lift World Record holder with a press of 229 kilograms (504 pounds) from the 2021 Giants Live World Tour Finals.
Finally, as a staple of many strongman contests, the trademark Atlas Stones will probably make a return. Boudrealt is the reigning winner of this event after he loaded five stones in 19.55 seconds during the last iteration of the World Tour Finals. However, watch out for Tom “King of the Stones” Stoltman.
Once Giants Live announces the events, there will be a clearer idea of expected contenders for the competition. For now, with multiple WSM champions and a variety of different top-notch skill sets, it seems like anyone could win this contest. It’ll be a tall order for anyone to separate themselves — even for defending champion Luke Stoltman.
The 2022 Giants Live World Tour Finals will take place on October 8, 2022, in Glasgow, Scotland.
Originally Posted At: https://breakingmuscle.com/feed/rss
Strongwoman/powerlifter Rhianon Lovelace is undoubtedly one of the strongest people on the planet. The 2018 World’s Strongest Woman (WSW) Champion proved it again during a recent session at the gym.
On June 7, 2022, Lovelace shared footage of herself locking out a 240-kilogram (528-pound) axle bar deadlift in a training session. Lovelace did not disclose precisely when this deadlift happened. The figure unofficially exceeds Lovelace’s own axle deadlift World Record of 233.5 kilograms (515 pounds) from mid-May 2022. Lovelace wore lifting straps and a lifting suit for the pull.
Lovelace completes the axle deadlift relatively easily. She alludes to that reality in her Instagram post, saying it was “piss-easy.” The main distinction between an axle bar deadlift and a deadlift with a traditional barbell is that the axle bar is several inches thicker, which tests an athlete’s grip strength even more than a “normal” deadlift. There’s also no flex in an axle bar, making the weight feel harder throughout the entirety of the lift.
Notably, Lovelace is the current British raw traditional deadlift record holder with a pull of 241 kilograms (530 pounds). She achieved that mark at the 2022 British Powerlifting Union (BPU) Single Lift British Championships. That Lovelace can excel so well with both deadlift bars is a testament to her power.
A Surprise Setback
Unfortunately for Lovelace, she couldn’t bask in her axle deadlift training feat as much as she might have wanted to.
Per her Instagram caption, the British athlete went to the hospital with pneumonia about two days after her staggering axle bar pull. As a result, Lovelace withdrew her apparent official attempt at the axle deadlift World Record that was going to take place on the weekend of June 10-12, 2022.
“Feels absolutely pants to do, just a really [expletive] feeling,” Lovelace wrote. “But after being discharged from the hospital last week with a severe case of pneumonia, we’re left with no other sensible option. I genuinely thought I was just run down with back-to-back records, with a tough cough, but things went south pretty quickly, and I ended up not in a great way in the hospital.”
In the aftermath of her bout with pneumonia, Lovelace says she lost eight percent of her (undisclosed) bodyweight. That might throw a wrench into the rest of her competitive year in 2022. In the near purview, Lovelace has a spot in the 2022 Arnold Sports Festival UK on September 23-25, 2022, in Birmingham, England. At the time of this writing, it is unclear if she will still move forward with those plans.
However, it doesn’t seem like she’s letting this step back ruin her long-term goals.
“I’m hopeful of another deadlift attempt this year, but right now, I’m unsure if full competitions come into this season for me,” Lovelace wrote. “I’ll get to work, I know what I need to do, but these things can’t be rushed. When I’m ready, I’ll be back.”
Featured image: @rhianon.lovelace.kaosstrength on Instagram
Originally Posted At: https://breakingmuscle.com/feed/rss
Last year, Nick “The Mutant” Walker had one of the better competitive outputs for a bodybuilder in recent memory. The 27-year-old International Federation of Bodybuilding and Fitness (IFBB) Pro League athlete won both the 2021 New York Pro and the 2021 Arnold Classic. He also came in fifth place at the 2021 Mr. Olympia — his debut at the illustrious competition.
On June 8, 2022, Walker shared an update on his 295-pound physique and his current training. It’s part of his ongoing preparation for the 2022 Mr. Olympia on December 16-18 in Las Vegas, NV.
About six months before the 2022 Mr. Olympia, Walker’s current body weight is 45 pounds more than his most recent competition weight of 250 pounds. The bodybuilder states that he’s starting the recomposition phase (or losing fat while continuing to gain muscle) of his training. Even with such a shift, consistency seems to be the name of the game for Walker.
“Week one of re-comp [recomposition] phase, diet this week will remain the same, training remains the same,” Walker wrote on Instagram. “I don’t like changing the training. I like to keep as heavy as possible.”
Walker says he’s full steam ahead in his workouts because he’s not changing much aside from a shift to the next step of his process.
“Digestion is on point; everything is feeling really good,” Walker writes. “I’m ready to get into prep.”
About Nick Walker
Thanks to his stellar 2021 competitive year, Walker established himself as one of the top rising names to watch in the bodybuilding sphere.
In May, Walker’s win at the 2021 New York Pro earned him an automatic qualification to the 2021 Mr. Olympia. Later that year, at the 2021 Arnold Classic in September, Walker won the show in his debut. That victory was especially noteworthy considering the bodybuilder predicted he would win in advance. To notch that title, he even beat more experienced veterans Iain Valliere and Steve Kuclo.
Finally, when it came to the Mr. Olympia in December, a fifth-place debut result was nothing to sneeze at. It might point to a potentially even more impressive result the next time he steps onto that stage.
Walker routinely provides countless updates on his physique and training on his social media. One recent challenging leg workout saw the bodybuilder joined by former 212 Olympia Champion (2019) Kamal Elgargni.
As he begins his formal prep for this year’s Mr. Olympia, Walker is training with a new coach. After Walker and his long-time coach Matt Jansen recently parted ways on friendly terms, the bodybuilding pro started working out with Dominick Mustacio.
The hype for Walker’s second go-around at bodybuilding’s most prestigious competition will undoubtedly continue to grow. Only time will tell how his training routine and new coach help him fare. The 2022 Mr. Olympia will take place on December 16-18, 2022 in Las Vegas, NV.
Today my pal Ryan from GMB Fitness is back with part 2 of his strength and mobility series. Check out part 1 here.
What if you could spend a few minutes per day using nothing but your body weight to build functional upper body strength, train your core, and improve your hip mobility? No equipment necessary, and no gym membership, either.
It might sound too good to be true, but you can. We’ll show you the exact animal movements you need and how to do them. We’ll cover three specific exercises: the Bear, Monkey, and Frogger. They’re all similar in that they contribute to full body strength, control, and mobility, but they serve you in different ways.
Try These Three Animal Movements for Strong Shoulders, a Stable Core, and Flexible Hips
Why should you walk around on your hands and feet like an animal? To start, it’s surprisingly good for you.
This form of movement is called locomotion because you’re moving your body through space. Walking is a good example of locomotion. We use animal movements due to the stimulus it provides for the entire body and because it’s way different from anything else you do during your day.
For most of the day, you’re in the typical upright position with your head on top of the body. When you get down on all fours, you’re actively getting out of this posture and into a novel one where you’re inverted and your head is hanging down toward the ground.
For instance, look at Ryan’s head position here doing the Bear:
Inverting yourself helps load your shoulders and provides traction for the spine. That allows for some decompression of the spine and neck. When you start to move around with intention, you will notice some relief in tension that we all tend to hold in our back and neck.
Another positive aspect of getting inverted is the shift in body position allows for a change in circulation and respiratory responses, counteracting a lot of the sitting we’re doing on a daily basis.
When you do these movements regularly, you’ll build a strong upper back and shoulders, which carries over to activities that require any amount of upper body strength. You’ll also strengthen your core and improve your stability as you’re forced to balance yourself while you work through these exercises.
Here’s exactly how to do each animal movement.
Getting Started with Bear Walks
How to do the Bear:
Get down on all fours (hands and feet) with your arms straight and keeping a slight bend in your knees.
Now start to move by lifting your right hand and left foot, pushing them forward.
Repeat the same thing with your left hand and right foot, walking forward. You can keep up this pattern moving forward or backward.
The Bear loads your shoulders and upper back, allowing you to build strength as you get comfortable with the movement. It also gets you into spinal extension and allows for some decompression of the spine in the inverted position.
Another benefit is the hamstring and calf flexibility that will come from doing the movement more regularly. As you walk back and forth, you’ll work on core stabilization to maintain balance and keep from falling over.
The next movement that makes sense to move onto from here is the Frogger.
Stronger, More Mobile Hips with the Frogger
How to do the Frogger:
Squat down with your hands out in front of you.
Reach out and place your palms flat on the ground.
Shift your bodyweight forward onto your hands (think of pulling your body toward your hands instead of pushing with your legs).
Shift forward by pulling yourself with your arms and torso, then hop like a frog to return to the starting position.
The Frogger, similar to the Bear, is good for the shoulders and upper back because you’re stabilizing your bodyweight with your hands. But because it has you in the deep squat position, you’re simultaneously working on your hip strength and mobility.
Once you’re comfortable with the Frogger, the Monkey is another good one to try.
Test Your Core and Upper Body Strength with the Monkey
How to do the Monkey:
Begin in a squat position and then reach your hands to the right. You want one hand outside of your right foot and the other just inside.
Lean toward your right hand, shifting your weight to the side. Think of pulling yourself to the right.
With your weight on your hands, lift your hips while picking up the left foot, and hop back to the squat position you started in.
Repeat the movement in the opposite direction. Like the Bear and Frogger, the Monkey is strengthening your spine and encouraging core stability as you move from side to side. It’s also good for your shoulder and wrists as you balance yourself with your hands throughout the movement. Due to the squat position, you’ll also be working on hip strength and mobility as well.
The best way to do these movements is to set a timer for anywhere from 2 to 5 minutes each and work through them doing as many reps as you can safely and with good form. You’re free to take as many breaks as you want. We really want you to focus on getting comfortable with the movements and doing them as best you can. We are more concerned with quality reps as opposed to breaking form and doing as much as you can in the time period.
Animal Movements Make You Strong, Mobile, and Athletic
Depending on your primary form of training, the way you use animal movements might differ. You can use them as part of your warmup before starting your gym sessions, or you can do them as a stand-alone workout at home.
At GMB, we use these animal movements as a way to create strength, mobility, and to build full body control for more athletic movement.
To get more animal-based movement in, check out GMB’s free 15-minute Mobility Boost. You can use it as a warm-up, or a way to destress and loosen up after a long day.
After a training accident ended his competitive gymnastics career, Ryan moved to Japan and competed in various martial arts until another injury made him reevaluate his priorities in life. As Head Coach at GMB Fitness, his mission is to show everyone that you can define your own fitness as a sustainable and enjoyable part of your life. You can follow GMB Fitness on Facebook, Twitter, Instagram, and YouTube.
Originally Posted At: https://breakingmuscle.com/feed/rss
Powerlifter Sherine Marcelle is on a mission. With recent strength feats like a 233.6-kilogram (515-pound) beltless deadlift personal record (PR) from early June 2022, and a 274.4-kilogram (605-pound) squat from late May 2022, she’s leaving no stone unturned. Marcelle’s latest achievement might be her best yet.
On June 6, 2022, Marcelle squatted 297 kilograms (655 pounds) raw with wraps during a training session for a new PR. The new number surpasses her previous all-time raw squat with wraps PR of 280 kilograms (617.3 pounds) from the 2022 World Raw Powerlifting Federation (WRPF) Ghost Clash in February 2022.
Marcelle’s new top squat also exceeds the current squat with wraps World Record for a competitor in the 90-kilogram weight class. Though, it is unofficial because it occurred during training. The still-current record holder is Crystal Tate, who notched a 290.3-kilogram (640 pounds) squat with wraps at the 2017 Xtreme Powerlifting Coalition (XPC) Finals.
A Meaningful Mark
Capturing this squat with wraps PR still seems to mean a lot to Marcelle. As she detailed on her Instagram, the accomplishment is an apparent part of a journey through adversity.
“It’s just powerlifting, it’s just a barbell, but it saved me from me while allowing me to tap into the true nature of who I really am fearlessly,” Marcelle wrote. “I fought through injuries and a lot more, and life took a turn for the best. Last time I had 650 pounds on my back, I partially tore my quad, and today I came out injury-free.”
While it’s clear Marcelle is back on the right track when it comes to her power, she notes that she won’t be competing this year. Her mindset seems to be more about individual improvement before she steps back onto a sanctioned lifting platform.
“I won’t be stepping on the platform in wraps this year, but I will continue to perfect my craft, so once I do next year, whenever that may be, I will have zero injuries.”
Marcelle has competed as a professional powerlifter since April 2016. In that time, across 11 competitions, she can boast eight victories and two other second-place finishes. The only time Marcelle failed to qualify for the podium was a fourth-place result back in March 2017.
As Marcelle moves toward the next phase of her career and continues to work on her “craft,” it might not be a stretch to say she’ll continue this impressive run. If her latest heavy squat with wraps hints at anything grand in the future, the next phase might be the best yet.
Originally Posted At: https://breakingmuscle.com/feed/rss
On June 6, during the 2022 International Powerlifting Federation (IPF) World Classic Powerlifting Championships, Heather Connor broke the raw deadlift IPF World Record for the 47-kilogram weight class with a pull of 185 kilograms (407.9 pounds). That weight is four times her official competition body weight of 46.6 kilograms (102.7 pounds).
It’s been a little while since Connor lifted on one of the more prestigious international lifting platforms. The powerlifter hadn’t competed in the IPF World Classic Powerlifting Championships since 2019, where she came in first place for the second time in her career (2017, 2019). She made her return to the 2022 edition in Sun City, South Africa, and she didn’t disappoint.
Notably, Connor surpassed her own deadlift World Record by nine kilograms (18.8 pounds). Connor previously set that figure with a pull of 176 kilograms (388 pounds) during the 2019 IPF World Championships — her last appearance at the competition before this month. Connor completed the deadlift from a conventional stance while wearing a lifting belt.
Here’s a complete rundown of the top stats from her entire performance:
Deadlift — 185 kilograms (407.9 pounds) — IPF World Record
Total — 397.5 kilograms (876.3 pounds)
Connor had been especially hard at work with her deadlift in preparation for this year’s competition. The American athlete actually pulled 195 kilograms (429 pounds) — roughly 21 kilograms more than her new World Record — during a recent May 2022 training session. She also captured that pull from a conventional stance with just a lifting belt. The powerlifter did make a 193-kilogram (423.5-pound) attempt during the competition but was unable to lock it out successfully.
Connor’s Performance in Context
Thanks to her World Record deadlift, Connor fared quite well in the overall results for the 47-kilogram weight class. Her 397.5-kilogram (876.3-pound) total was enough to finish in second place. Thanks to a few records of her own, fellow 47KG powerlifter Tiffany Chapon took home first place.
That said, while she notched a new deadlift World Record, Connor didn’t seem pleased with her results in a post on her Instagram.
“Not my best, certainly not my worst, but today is what I had in me,” Connor wrote. “The stronger lifter [Chapon] won today, and I’m perfectly okay with that.”
According to Connor, part of her second-place finish may have resulted from travel issues, which interfered with her training routine. Though, she seemed to be accepting of her unfortunate situation.
“My circumstances weren’t ideal no matter what way you look at it: Constant cancellations and five days of travel to get somewhere which at one point almost seemed impossible,” Connor wrote. “Missed training days due to these circumstances, and all I can say about it is: ‘It is what it is.’”
If it’s any consolation for Connor, making the podium at an international competition is still noteworthy in the powerlifting sphere. It might be even more impressive that she managed to do it at the IPF Worlds after not participating for two years.
There’s assuredly a lot more for Connor to achieve through the rest of her career. She might even use this second-place, deadlift-record-breaking performance as added motivation to get back to the top.
I’ve often said that walking is the human condition, but I’d like to amend that to be more accurate: loaded walking—or rucking—is the human condition. Normal unloaded walking is an important part of being an active, able human and lays the ideal foundation for a healthy fitness level. However, it can and should be elevated with occasional (or regular) walking while bearing weight.
For example, when hunting-gathering hominids walked the 12 miles back from a successful hunt, they carried the 40-pound haunch of the antelope on their shoulders—or the woven basket full of tubers, fruits, and honeycomb. When Roman legionnaires marched 18.5 miles in a day they also carried a pack weighing 45 pounds. Then they proceeded to build a defensive fort for two hours. When kids walked to school (before the ubiquity of miles-long SUV-laden drop off lines), they wore bags full of books.
Hell, the entire premise of obligate bipedalism is that it lets you walk while carrying things–tools, building materials, shelter materials, weapons, food, meat, foraged plants, and roots. These are all essential objects to be carried by bipedal humans, all increasing the pull of gravity that you must then resist.
Why You Should Ruck
Today we load our food into car trunks and drive it home—or, worse, we have it delivered to our doorstep. We drop our kids off at school and pick them up. We drive to manicured trailheads, walk for miles, and have our air-conditioned car waiting to take us back home with a smoothie stop along the way. We park at campsites and complain about the 100-yard walk in.
Now, these aren’t “bad,” but they are novel environments to the human genome that make us weaker and more vulnerable to stressors in general. As with everything, if we want to get better, stronger, and healthier despite modern comforts, we have to impose arbitrary and artificial boundaries on ourselves. One great way to do that and replicate the ancestral loaded walking environment, is to go rucking. Rucking is wearing a weighted backpack while going for walks and hikes. That’s it. And when you ruck, you’ll start seeing some real benefits.
Rucking builds grit.
It’s a total body workout that makes you stronger, fitter, faster, and everything else, but lots of exercises do that. Heck, almost all of them do. Rucking builds that intangible quality I can only describe as grit or toughness. Because rucking is hard.
Rucking makes you stronger.
You are moving under added weight—the oldest recipe in the book for getting stronger.
A rucking workout is a great way to enhance cardio without increasing speed.
It’s sort of a low/high intensity workout. It’s high intensity because you’re bearing more weight. It’s low intensity because you’re moving at walking pace. Particularly uphill/downhill rucking is a fantastic cardio workout and, if you do it carefully, easier on the joints than you might think.
How to Ruck
If you stopped reading right now and just went out wearing a heavy backpack on walks and hikes, you’d probably be okay. But there are some extra details and tips I can give that you might find helpful.
1. Get a rucksack
You can ruck with any sturdy backpack filled with rocks, sandbags, books, or weights. But if you’re really serious about it, I’d recommend a devoted rucking bag. These are solid backpacks called rucksacks designed to handle and distribute heavy loads across the body. They usually have proprietary weights that fit perfectly in the rucksack, so that the load is balanced and even.
The best-regarded brand is Go Ruck. It’s the only one I can recommend because it’s the only one I’ve ever tried, but I’m sure there are others you can use.
2. Start small—5-10 pounds less than you think you can handle
You can always add more weight the next time, but if you get in deep water with too much weight, you’ll have a bad time making it back.
3. Choose the right route
A good rule is to start rucking on a walking or hiking route you could do in your sleep. Choose one that’s already easy for you unweighted and that you enjoy doing. Don’t consider it to be a “workout.” Afterward, you can make it harder.
4. Perfect your gait and walking technique
Any small perturbations to your walking technique or gait will be magnified by the added weight, as will any damage to your joints or strains to your muscles.
Remember, rucking is loaded walking. Don’t run. Regular running with 30-40 pounds on your back is a recipe for injuries. It won’t happen to everyone, but it happens to enough people that it’s not worthy testing your luck. It’s far better to walk with weight and save the running for unweighted outings.
5. Don’t overdo it
Rucking is training; it’s not an event. When you train for anything, you don’t want to go to failure. You don’t want to leave everything on the field. Going all out like that is for competition (or life and death situations). Training is to make you stronger so when those serious situations occur, you can handle them. Leave some in the tank.
6. Gradually increase your weight
Remember to start small and once you feel comfortable, increase your weight.
Beginners: 10-15 pound ruck along a route that you’ve done many times before comfortably
Intermediate: 20-30 pound ruck along a route that you’ve done many times before comfortably
Advanced: 30-50 pound ruck along a route that you’ve done many times before comfortably
7. Tackle hills
I find that rucking uphill (and then downhill) is an incredible workout. Surprisingly, it feels better and more productive than rucking on flat ground.
Rucking Alternatives
You don’t necessarily have to buy a rucking backpack, or even wear a backpack at all. There are other options for loaded walking:
Carry a large tree branch or log across your shoulder: The best part of this is that they’re usually free for the taking on hikes and you don’t have to bring it back home with you. Just find a suitable branch or log and carry it as long as you like and then dump it on the ground when you’re done. This also works with large rocks.
Take a friend and a kettlebell with you: When one of you gets tired, hand it off. When the other person gets tired, it’s your turn again. Continue on until the walk is over.
Wear a weighted vest: This is a difference type of weight distribution, placing some of the weight across the front of your body, which brings its own challenges.
Load a sandbag or duffel bag: You can fill it with sand or gravel and carry it on your walks. Switch from shoulder to shoulder, hug it to your body, carry it like you’re carrying a bride across the threshold, or drape it over both shoulders. Just keep it up there, however you can, and walk with it.
Use a normal backpack loaded with weights: This isn’t going to be nearly as comfortable as a rucksack. The straps will dig into your shoulders, there won’t be as much load distributed to the hips, and the bag itself might break. But it does work if you’re in a pinch.
If you want to step it up a notch load a loosely-packed sandbag on top of your ruck to take your workout to the next level.
There are dozens of ways to load your walks with weight, the rucksack being the most comfortable and approachable. But the point is: incorporate loaded walks into your schedule and see your fitness skyrocket and your connection to our ancestral past solidify.
Take care, everyone. I’d love to hear about your experiences with loaded walks or rucks.
Originally Posted At: https://breakingmuscle.com/feed/rss
Back day can be one of the most enjoyable days you’ll have in the gym. Due to the sheer number of muscles in the back, it’s one of the strongest parts of the body — second only to the legs. Also, a well-developed back signals to the world that you have put in some serious effort at the gym.
There are countless exercises you can perform to build size and strength in the back. When you train the right exercises the right way, you will build your ability to move significant amounts of weight, better protect your spine, and all-around improve your performance in everyday life. Here are 18 of the best back exercises to construct your workouts around.
The deadlift — a noble member of the “Big Three” powerlifts — is best known for its ability to add size and strength to the back and leg musculature. Although it doesn’t directly work the back muscles through a long range of motion, it places a significant amount of tension across the back and entire torso, making it a unique and effective exercise for building mass.
Deadlift technique is straightforward, but it’s a skill-based exercise that takes some understanding and practice to make it safe and effective within your training program.
How to Do the Deadlift
Stand in front of a loaded barbell with your feet shoulder-width apart with the bar just a few inches from your shins — aligned over the knot of your shoelaces. Drive your hips back and allow your knees to bend slightly as you tightly grip the barbell just outside of shoulder-width with a palms-down grip. Keep your back and torso rigid and your arms straight. Push your legs into the floor as you simultaneously pull your chest and shoulders upwards to lift the bar as you stand up into a fully upright position.
Benefits of the Deadlift
It works multiple muscles in your back, plus your glutes, hamstrings, and grip strength.
When performed consistently, your strength can progress substantially, especially as your form improves.
It’s an exercise that can be performed in many different rep ranges, allowing you to build muscle and strength across the upper and lower body.
Pull-Up
The pull-up provides a potent stimulus to the muscles across the upper body with little need for specialized equipment to get the job done. All you need is any bar that can support your body weight.
If you really want to get a lot out of the movement, control the eccentric (lowering) portion of the lift and focus on keeping your torso rigid throughout the entire range of motion.
How to Do the Pull-Up
Take a pronated (overhand) grip on the bar, slightly wider than shoulder-width. With your body hanging from the bar, ensure your core is engaged to keep rigidity in your torso while minimizing swinging.
To initiate the movement, contract the muscles of the upper and mid-back. Aim to bring your chin up to or above bar level. Drive your elbows down toward your pockets. If you’re on the heavier side or a beginner new to the lift, perform more sets with fewer reps as you build up your strength.
Benefits of the Pull-Up
You can perform this exercise anywhere there is a pull-up bar, which can be in your doorway at home, in the park, or a fully equipped gym.
Learning to control and manage your body weight is a great way to build up joint stability as you get stronger.
You can work the muscles of your back and arms through a long range of motion while also challenging the muscles of your core.
Inverted Row
The inverted row can be an effective bodyweight exercise, particularly for beginners, because you aren’t required to lift your entire body weight. This makes it an effective choice to increase strength on the way to performing a pull-up.
The exercise is also extremely useful when training at home since it requires only a solid bar and a sturdy surface for support. This way, a bodyweight-only workout isn’t limited to only pull-ups to work your back.
How to Do the Inverted Row
Place a bar in a stable rack. Adjust the height of the bar so you can just reach it when lying on the ground. Lie under the bar and grab the bar with an overhand grip. With your arms locked, your body should be in a rigid plank position with a straight line from your neck to your heels.
Lift yourself by pulling your elbows toward the ground while driving your chest toward the bar. Control your body weight back down to the starting position.
Benefits of the Inverted Row
The inverted row is great for beginners and intermediate lifters aiming to build overall strength and muscle in the upper and mid-back.
This can be used as a progression to get you closer to performing your first bodyweight pull-up.
Suspension Row
The suspension row is another effective bodyweight movement that progresses the inverted row to another level. By quickly adjusting your stance and body position, you can immediately alter leverage to make the exercise more or less challenging as needed.
This is a great exercise for developing overall strength and body control while allowing for a less restricted arm path. This helps to prevent discomfort in the wrists, elbows, and shoulders.
How to Do the Suspension Row
With your feet at shoulder width, grab the handles and lean back into position. Adjust your body angle as needed to set the difficulty. The more vertical your body, the easier the exercise will be.
With your feet on the ground and your body set in a rigid plank position, drive your elbows back and pull yourself toward the handles. Don’t allow your elbows to flare out to the sides and don’t allow your shoulders to collapse forwards.
Benefits of the Suspension Row
This is another effective movement that allows the lifter to progress toward their first pull-up.
The exercise difficulty can be quickly and easily adjusted by repositioning your stance and body angle.
The suspension trainer allows for a less restrictive arm path compared to a traditional barbell, allowing you to better adapt the row to your individual structure and reduce joint strain.
Bent-Over Barbell Row
The bent-over row can add a lot of versatility to your training program. It can be performed with a traditional barbell, a hex bar, kettlebells, or dumbbells. For more efficient skill development, stick with one variation for at least several weeks before switching it up.
The basic barbell row allows you to build strength across the upper and lower body. The muscles of the posterior chain (lower back, glutes, and hamstrings) work to keep your lower body stable throughout the movement, while the muscles of your upper back, mid-back, and biceps help row the bar toward your stomach.
How to Do the Bent-Over Barbell Row
Set up as you would for the deadlift, standing with your feet hip-width apart in front of a loaded barbell. If you have exceptionally long legs, you may need to place the barbell onto blocks to allow for a more comfortable starting position. Hinge at the hips and allow your arms to hang down.
Tightly grab the bar just outside of shoulder-width with an overhand grip. Drive your elbows back and up as you focus on pulling the bar toward your upper abs, between your sternum and belly button.
Benefits of the Bent-Over Barbell Row
You can effectively train the muscles of the upper, mid, and lower back, as well as the glutes and hamstrings.
Simple variations can be performed with kettlebells, dumbbells, a hex bar, cables, or a traditional barbell.
Due to the demands of this movement, you can build up functional strength throughout your core and low back, helping you prevent injuries in your everyday life.
Single-Arm Dumbbell Row
This single-arm row variation was one of the most popular among Golden Era bodybuilders like Arnold Schwarzenegger for building muscle size and strength across the entire back.
It can also help you build arm and grip strength, as well as work on muscular asymmetries that may have developed from past injuries or time away from the gym.
How to Do the Single-Arm Dumbbell Row
Stand behind the head of a high-angle incline bench. Lean over and place one hand firmly against the top of the bench with the same-side leg forward, positioned under your shoulder.
Reach your free hand down to grab a dumbbell by your feet. Keep your palm facing your body as you drive the weight back and up until your elbow is even with, or just past, your torso. Control the dumbbell back down to the stretched position.
Benefits of the Single-Arm Dumbbell Row
By working the body unilaterally (one side at a time), you allow for more versatility with your program design, with the added ability to address any muscular imbalances.
In addition to building up muscle size and strength across the back, you will also improve your grip, which can carry over to any other movement that requires holding a weight.
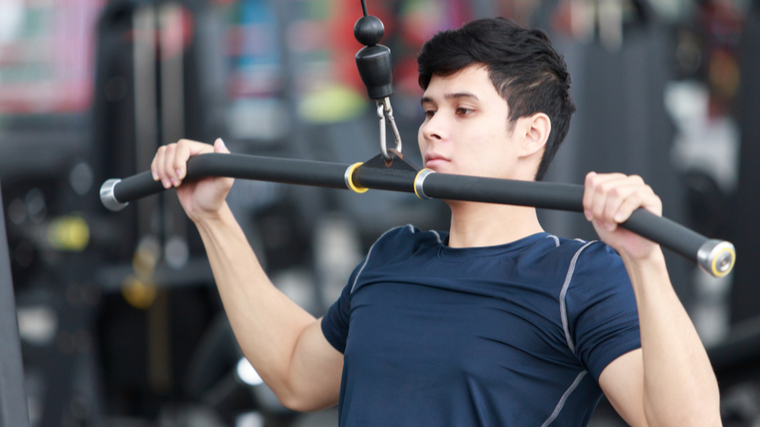
Wide-Grip Lat Pulldown
Aside from the fact that you’re sitting while performing this move, a lat pulldown is essentially the same movement pattern as a pull-up. This makes the pulldown one of the most effective weight training (non-bodyweight) exercises to work towards a pull-up.
The cable’s constant resistance helps create a more stable environment while improving time under tension, which can lead to increased muscle size.
How to Do the Wide-Grip Lat Pulldown
Grasp a long bar attachment slightly wider than shoulder-width, with a palms-down grip. Sit down and set your legs securely under the thigh pads. Keep your core tight and your torso upright while pulling the bar down toward your chest.
Think of pinching your shoulder blades together in the bottom position. Resist the weight as you slowly return to the starting position.
Benefits of the Wide-Grip Lat Pulldown
The cable’s constant resistance helps create a more stable environment while improving time under tension.
This is a great exercise to strengthen your back, arms, and grip if you are working up to your first pull-up because you can progressively add weight and build strength.
The wide, pronated grip allows you to emphasize the muscles of your upper back.
Neutral-Grip Lat Pulldown
This pulldown variation has you pulling with a neutral-grip (palms facing each other). This adjustment allows you to place more focus on your lats and biceps compared to your upper back.
A neutral-grip gives your arms a stronger biomechanical advantage by recruiting more biceps into the pulling motion, while the elbow position activates more back muscles. This allows you to move heavier weights more safely compared to other pulldown grips.
How to Do the Neutral-Grip Lat Pulldown
Grab a neutral-grip attachment (palms facing each other) and sit on the seat with your legs secured under the thigh pads. Keep your core tight and your torso upright while pulling the bar toward your chest.
Aim your elbows forward, not sideways, to ensure stress remains on the lats. Resist and control the motion back to the stretched position.
Benefits of the Neutral-Grip Lat Pulldown
This exercise gives you a way to progressively work towards your first pull-up.
The cable’s constant resistance helps create a more stable environment while improving time under tension.
The neutral-grip puts you in a great position to bias the lats and biceps compared to the upper back, adding variety and customization to your back training.
Single-Arm Kneeling Lat Pulldown
This unilateral exercise can add variety to your back training. It works the lats through a long range of motion and challenges tissues the rear delts and teres major.
The kneeling position reduces lower back strain, encourages core stability, and ensures a long range of motion. This exercise is relatively advanced because it involves both upper and lower body positioning, so take time to nail down your setup and technique.
How to Do the Single-Arm Kneeling Lat Pulldown
Grab a single handle attached to a high cable pulley. Step back with the opposite foot and kneel on the ground, keeping your front foot flat on the floor. Squeeze the handle and drive your elbow toward your hip.
Control the weight when returning to the starting position. Maintain a kneeling position as your arm, shoulder, and back are stretched before performing the next rep.
Benefits of the Single-Arm Kneeling Lat Pulldown
This exercise builds back and core strength with minimal lower back strain.
The cable’s constant resistance increases time under tension throughout the range of motion.
The setup of the exercise can be adjusted to an individual’s structure, by changing the cable’s height and distance from the pulley.
Lat-Focused Seated Cable Row
This seated row variation uses specific hand position, upper body position, and arm path to place a large amount of muscular tension on the lats.
By maintaining a slight forward lean and utilizing a neutral-grip, your body is in a better position to engage your lats during the movement and minimize the role of the upper back and traps.
How to Do the Lat-Focused Seated Cable Row
Sit in the cable row station with your feet on the platform and your hands grasping a wide attachment with a neutral-grip (palms facing one another). With your core tight and your torso position leaned slightly forward at the hip, pull toward the top of your abdomen.
Do not round your back. Control the weight as you return back to the starting position. In the stretched position, don’t allow the weight to pull you far forward out of a strong postural alignment.
Benefits of the Lat-Focused Seated Cable Row
The cable’s constant resistance creates a more stable environment while improving time under tension throughout the range of motion.
This variation is great for building size and strength in the mid-back.
The neutral-grip allows you to emphasize the lats and biceps.
Chest-Supported Dumbbell Row
The supported position takes your low back out of the equation, giving you more stability to isolate the work to the muscles in your upper and mid-back.
This exercise can be performed with dumbbells or kettlebells in a prone position on an incline bench, or more horizontally in a cable station. Both will effectively place tension across your traps, rhomboids, rear delts, and lats, but may depend on your equipment availability.
How to Do the Chest-Supported Dumbbell Row
Lie face down on an incline bench set around 45-degrees. With a dumbbell in each hand, drive your chest into the bench while rowing the weight until your elbows are even with, or just past, your torso. Slowly lower the weight to a full stretch before repeating additional reps.
Benefits of the Chest-Supported Dumbbell Row
The chest support takes stress off the lower back, increasing your ability to isolate muscles of the upper and mid-back.
This movement encourages strict form and reduces the chance of momentum-based cheating.
It’s easy to set up and only requires an adjustable bench and a pair of dumbbells or kettlebells.
Chest-Supported Machine Row
This machine-based variation has you pull the load toward your chest. Your general arm path will be similar to a seated row, which aligns the rowing motion with the muscles of the lats, rear delts, and upper back (traps, rhomboids, and teres major).
Your grip will have a significant impact on the muscles being biased during the exercise. A neutral-grip (palms facing each other) will focus more on the lats, while a semi-pronated grip (diagonally between palms facing down and facing each other) will focus more on the rear delts and upper back.
How to Do the Chest Supported Machine Row
Sit in the machine and grab the handles with your chest against the pad and your feet against the provided supports. With your chest pressed firmly into the pad, pull the handles toward you, extending your elbows behind your body. Control the weight as you return to the starting position.
Benefits of the Chest Supported Machine Row
The machine provides a clear and consistent movement path, allowing you to focus more on the muscles working and less on maintaining a steady pulling position.
The chest support and foot pads allow your entire body to brace more effectively, delivering more stability and allowing you to lift heavier loads.
The multiple grip options allow for more individualization and control over what muscles are being emphasized.
Landmine Row
This bent-over barbell row variation is effective at placing tension across the traps, rhomboids, rear delts, and lats. This movement also recruits the posterior chain (glutes and hamstrings), low back, and abs for total-body stability.
The unique leverage moves the bar along a slightly angled path rather than completely vertical, which creates different muscular stress in the top position compared to dumbbell or barbell rowing movements.
How to Do the Landmine Row
Slide a barbell into a landmine attachment sleeve or wedge it into a corner of the wall. Stand over the barbell with one foot on each side, a few small steps behind the weight plates.
Position a landmine row attachment onto the front of the barbell and grasp the handles. If your gym doesn’t have a landmine row attachment, use a rope handle or V-bar attachment and place it around the bar just behind the weight plates.
Hinge at the hips and keep your legs bent. Maintain a tight core and a neutral spine. Pull your hands toward your waist. To increase the range of motion, load the bar with 10-pound or 25-pound plates instead of larger 45-pound plates.
Benefits of the Landmine Row
This variation can be performed anywhere you have access to a barbell, whether locked in a landmine sleeve or wedged into a corner at your gym.
It challenges multiple muscles of the back, glutes, hamstrings, and abs.
Different stances and body postures can be used (such as a more upright torso or more horizontal torso) to add variety with an emphasis on different back muscles.
Meadows Row
This exercise, popularized by the late bodybuilding coach John Meadows, has become known for its ability to build up thickness in the back — specifically the rear delts and teres major.
This exercise is unique in that it’s unilateral and has the lifter standing perpendicular to the barbell positioned in a landmine setup. The landmine alters your leverage during the lift, which places unique stress on the muscles.
How to Do the Meadows Row
Assume a staggered stance with your front foot perpendicular to a barbell loaded into a landmine sleeve. Hinge at the hips and grip the bar with an overhand grip, using lifting straps to secure your grip on the bar. Rest the elbow of your non-working arm on your front thigh.
Row the weight up at an angle, so your hand ends up just outside your chest and your elbow is pulled back. Lower the weight into a full stretch. Load the bar with smaller 10-pound or 25-pound plates to ensure a long range of motion.
Benefits of the Meadows Row
The exercise builds thickness in the upper back by emphasizing key muscles, including the rear delts and teres major.
The staggered stance creates a need to resist rotation of the torso, adding a challenge to core strength and stability.
Because of the very stable base and strap-assisted grip, much heavier weights can be used compared to a dumbbell row.
Cable Upper Trap Shrug
Shrugs are typically performed with free weights such as dumbbells or a barbell. However, the movement can be optimized with the cable pulley because the angle of resistance from low cables matches the fiber alignment of the upper traps — on diagonal angle rather than strictly vertical — which increases muscle activation.
High-tension from the cables also means a more effective workout with relatively less weight, making the movement less stressful on joints and more stressful on the target muscles.
How to Do the Cable Trap Shrug
Stand in the middle of two low-cable pulleys, with your knees slightly bent and your hands firmly grasping a single handle from each pulley.
Keep your core stationary as you shrug your shoulders up and in toward your ears. Don’t swing your torso or drive with your legs. Control the weight as you slowly return back to the starting position.
Benefits of the Cable Trap Shrug
The cable resistance allows a longer time under tension, creating a greater stimulus for muscle growth.
This variation lines up the resistance with the muscle fibers of the upper traps, maximizing muscular tension while minimizing stress around the shoulder joint.
The exercise delivers significant muscular stress without extremely heavy weights, making it ideal for lifters with joint pain.
Cable Rope Pullover
The cable rope pullover, sometimes called a stiff-arm pulldown, is great for placing tension strictly on the lats. It avoids the arms-overhead stretched position required for dumbbell pullovers, making this a great alternative for lifters with upper back or shoulder mobility restrictions.
Using a longer rope or strap allows each arm to move in a more individualized arm path, which creates even less strain on the shoulder joints and more muscular stress on the lats.
How to Do the Cable Rope Pullover
Stand in front of a high-pulley cable station, holding a rope attachment with both hands. Lean slightly forward and keep a soft bend in your arms. Keep your torso rigid and abs tight while driving your upper arms down. Pull the attachment toward your hips as far as possible.
Control the weight as you return back to the starting position. Don’t allow your arms to bend when lifting or lowering the weight.
Benefits of the Cable Rope Pullover
The peak contraction of the movement creates extremely high muscle activation in the lats.
This exercise is one of the few ways to effectively isolate the lats without involvement from other back muscles.
It provides a more effective resistance compared to the dumbbell pullover because the cable resistance is constant throughout the full range of motion while a dumbbell pullover delivers less resistance at the top of the movement.
Face Pull
To facilitate increased growth and strength of larger back muscles, your smaller muscles often act as synergists. They add strength and stability to the joints connected to those muscles, which allows them to function optimally and efficiently. The face pull is effective for training the upper back muscles around your shoulder blades, helping improve postural strength and control.
Unlike several exercises on this list, the face pull shouldn’t be used to break any strength records. Go light with higher reps. As you build up strength, you can start to slowly increase the weight, but moving heavy loads is not the best use of this exercise.
How to Do the Face Pull
Attach a rope handle to a high-cable pulley and adjust it to near eye-level. Grab the rope with your palms facing each other. Take a few steps back so there’s tension in the cable and extend your arms in front of your body.
Pull the rope toward your face and flare your elbows out and back. In the contracted position, your wrists should be close to your ears and your elbows should be in-line with your shoulders
Benefits of the Face Pull
The face pull increases your scapular strength and stability, which is crucial for upper back bracing during movements like the deadlift as well as overhead pressing.
It works the muscles between the shoulder blades such as the traps and rhomboids, while also building up strength in the rotator cuff muscles, improving overall shoulder joint health.
Farmer’s Walk
This loaded carry isn’t a strict “back exercise,” but it’s effective for placing tension across the muscles of the upper and lower body simultaneously. The postural muscles of the spine, as well as the upper back and traps, are challenged to a very high degree.
When performed consistently, it can build grip strength, core strength and stability, and improves postural strength and control. This exercise mimics many activities performed in your daily life, and can be performed by all ages and experience levels.
How to Do the Farmer’s Walk
Find a stretch of open space, as long as possible, and walk while carrying a pair of dumbbells, kettlebells, or even a trap bar. Keep your hands at your sides and your shoulder blades pulled down and back, not shrugged up. Remain upright and don’t allow your back to round forward as you fatigue.
When walking with load in your hand, the challenge becomes maintaining a steady, upright position. Focus on taking slow, controlled steps while moving a straight line with total-body stability. Don’t allow the weights to make you drift laterally.
Benefits of the Farmer’s Walk
Can easily be performed anywhere you have open space and weights to hold onto.
It builds grip and core strength, while also improving postural strength and control.
It can be easily adapted to training for conditioning or fat loss by increasing the total duration or length of the walk.
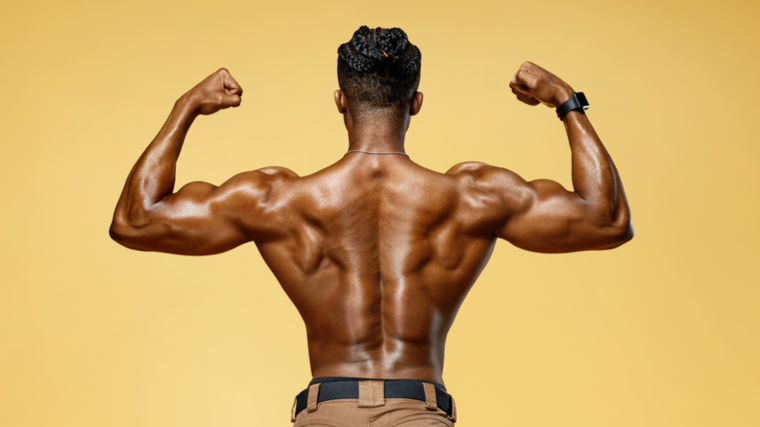
The Back Muscles
The back is made up of a group of muscles that work together to achieve a wide range of movement patterns. As such, certain muscles will be biased more or less depending on the exercise being performed.
Credit: RomarioIen / Shutterstock
The primary muscles when it comes to training the back include the latissimus dorsi (lats), teres major, trapezius (traps), rhomboids, rear delts, and erector spinae (lower back).
When training your back, you will be using both muscles anatomically located more superficially (like the lats and traps), as well as deeper (like the rhomboids or erector spinae) within the back and torso. The back muscles have many different functions and are designed to work in synchronicity with one another, or as a unit.
Latissimus Dorsi
Commonly referred to as the lats, the latissimus dorsi are most widely known for their role in adducting the arm toward the body (bringing the upper arm towards the body’s midline), as well as medially rotating the arm around the back of the body (similar to “opening your chest” during a stretch).
During back movements, the lats play many roles — most notably helping stabilize the pelvis and interacting with the abdominal muscles in everything from respiration, maintaining shoulder positioning, to protecting the spine. (1)
Teres Major
The teres major attaches on the upper arm, next to the lat attachment, and stretches across to the lower part of the scapula. Sometimes referred to as the “little lat,” this muscle, along with the teres minor, are not technically part of the rotator cuff but share many roles with the muscles of the rotator cuff when it comes to glenohumeral (shoulder) stabilization.
The teres major also assists the latissimus dorsi in adducting the arm (bringing it closer to the body), as performed during a lat pulldown motion. (2)
Trapezius
The trapezius is a big muscle that spans across the better part of your upper and mid-back. This muscle has three divisions — upper, mid, and lower — and each plays an essential role in stabilizing the shoulder blades.
All three sections of the muscle are hard at work during pulling movements to help maintain tension and stability in the back. (3)
Rhomboids
The rhomboids are positioned directly below the traps in the middle of the back (between the shoulder blades). Both the major and minor divisions of this muscle retract, elevate, and rotate the scapula.
Weakness or loss of function of the rhomboids can be a significant contributing factor to a winged scapula (when the shoulder blades “point” away from the body), which makes it even more important to keep these muscles strong and working properly. (4)
Rear Delts
Also known as the posterior deltoid, the rear delts primary function is to bring the arm back around the body (shoulder extension), assisting the lats and teres major.
A flared arm position, with the elbows aimed out to the sides, makes the rear delts a primary mover during an exercise. This type of movement is how the muscle plays a big part in your back strength and development. (5)
Erector Spinae
These muscles, also known as the spinal erectors, are positioned deep within the torso and are responsible for controlling the axial skeleton — which includes the skull, vertebral column, and ribs. The spinal erectors primarily control flexion/extension, side bending, and rotation of the spine.
The lower back, in particular, is critical for stabilizing the pelvis and spine during movements such as the deadlift or many bent-over movements previously explained. (6)
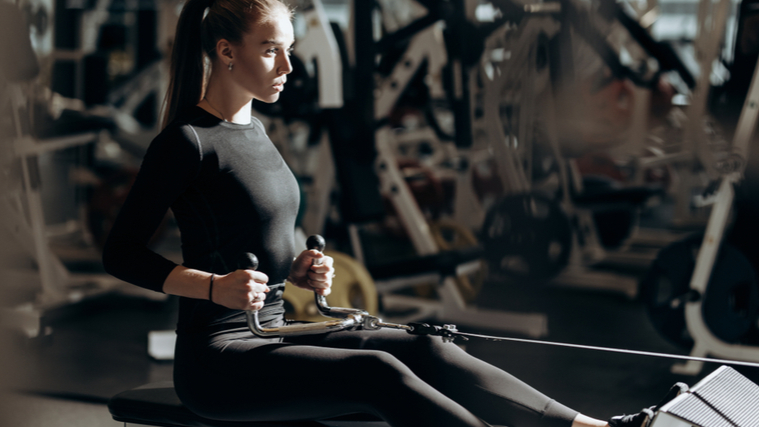
How Often Should You Train the Back
To optimize muscle growth, train your back two to three times per week, depending on how many total days per week you’re training. Since the back is filled with different muscle groups, all with different fiber alignments and jobs, it’s important to train the back using many different exercises and rep ranges.
Credit: Leika production / Shutterstock
Depending on your training split, each workout may include a different amount of training volume. Anywhere from 10 to 16 total sets per week is a great starting point. Advanced lifters could potentially exceed 18 to 20 sets per week, especially if their goal is to emphasize a specific part of the back over another.
To achieve this total volume, choose three to four exercises and divide the sets up evenly across your training week. It’s generally a good idea to have a balanced ratio of vertical pulls (pulldown or pull-up variations) and horizontal pulls (rowing variations) to ensure balanced development across the entire back.
How to Progress Your Back Training
Since the back can be trained with a wide variety of exercises, it’s possible to steadily add weight to each specific exercise every week. As little as two-and-a-half to five pounds per week can be a sufficient increase to stimulate growth when the sets are taken near failure.
Credit: MR.SOMKIAT BOONSING / Shutterstock
For multi-joint (compound) exercises like the barbell row or deadlift, you can add slightly more weight more quickly compared to an isolation-based exercise like dumbbell pullover or cable rope pullover.
If you find any exercises require more time to improve your technique, be sure to perform those movements towards the beginning of your workouts to avoid training them when fatigued.
If you’re new to lifting in general, simply improving your technique in an exercise can lead to gains in strength and muscle size across a few months’ timespan. Keep in mind that whenever you add a new exercise into your routine, it will take your body a few weeks to get used to the new challenge and nail down the technique.
How to Warm-Up Your Back
One of the most effective ways to warm-up for any muscle group is going to be with the exercises you are performing in that day’s training session. For example, if you’re performing chest-supported rows, you can warm-up by performing reps with light weight and raise the intensity (load lifted) as you proceed toward your working sets.
This ensures that the appropriate muscles and joints are being primed, reducing the risk of injury and improving your overall training performance.
If you need additional time to warm-up, include exercises that work the muscles surrounding the joints you’ll be working in that session. For a back workout, that would include the elbow and shoulder joints.
Building a Complete Back
Designing a back workout doesn’t need to be an arduous process. To be effective, choose three to four exercises that train multiple muscle groups and progress them over time with varying rep ranges. Be sure to train the back both horizontally (with rows) and vertically (with pulldowns) for complete development. This detailed list gives you plenty of options to choose from, ensuring a bigger, stronger back in the long-term.
References
Jeno SH, Varacallo M. Anatomy, Back, Latissimus Dorsi. [Updated 2020 Aug 13]. In: StatPearls [Internet]. Treasure Island (FL): StatPearls Publishing; 2021.
Barra-López, M. E., López-de-Celis, C., Pérez-Bellmunt, A., Puyalto-de-Pablo, P., Sánchez-Fernández, J. J., & Lucha-López, M. O. (2020). The supporting role of the teres major muscle, an additional component in glenohumeral stability? An anatomical and radiological study. Medical hypotheses, 141, 109728.
Ourieff J, Scheckel B, Agarwal A. Anatomy, Back, Trapezius. [Updated 2020 Aug 22]. In: StatPearls [Internet]. Treasure Island (FL): StatPearls Publishing; 2021.
Farrell C, Kiel J. Anatomy, Back, Rhomboid Muscles. [Updated 2020 Jul 27]. In: StatPearls [Internet]. Treasure Island (FL): StatPearls Publishing; 2021.
Elzanie A, Varacallo M. Anatomy, Shoulder and Upper Limb, Deltoid Muscle. [Updated 2020 Aug 22]. In: StatPearls [Internet]. Treasure Island (FL): StatPearls Publishing; 2021.
Modes RJ, Lafci Fahrioglu S. Anatomy, Back. [Updated 2021 Mar 27]. Treasure Island (FL): StatPearls Publishing; 2021.
Featured Image: MR.SOMKIAT BOONSING / Shutterstock
For now classes are 6pm and 640pm at 2840 Wildwood st in the Boise Cloggers studio.
Book your class NOW!
click this ==>
Warrior Fit Testimonials
First, I want to say thank you for convincing me to do Tabata! I was struggling to lose weight and Finally I found something that helped! I really appreciate your coaching! - Craig T.
Ever since I was convinced to do Tabata I have seen huge results, I lost 6 pounds and gained energy in the first 3 weeks. I have been working out for 3 months before I decided to do Tabata and I struggled to lose weight.
At first I thought "How am I losing weight by bringing my heart rate up then cooling down then bringing it up again?" I don’t know how it works but it does!
Thank you!! - Theresa F.
The first day of Tabata, I wondered WHAT AM I DOING - I AM 56 !! Five weeks later I knew that it was what I needed. I learned that I could push myself well beyond my comfort zone and feel good later. I have a marked improvement in physical as well as emotional endurance. - Lyn C.
When I was first told about Tabata I was very excited from the word go, however that excitement stemmed from the fact that I had no clue what it meant. I missed the first week of class b/c I was traveling for work so when I came in during the 2nd week I had some making it up to do.
It was hard at first b/c my body wasn't used to working out at such a fast pace, but once I got into a rhythm I started to feel very good. These classes are no joke. If you stick with it you will leave there feeling stronger, healthier and overall better about yourself and what you've accomplished.
I would recommend these classes to anyone. Darrin is a great trainer and he'll keep you going with his energy.
- Jami L.
Warriors Fit Audio
Warrior Fit uses High Intensity Music to get ya Moooovin' So we can all "Get Our Sweat On"
The link below will give ya a freeee shot at Audible plus a couple audio books just to try it out and if you haven't used audio books on your commutes you are missing out. Get pumped up before you get to where you are going and exercise your mind. I use it Everyday. Go get yours now!

 (@jmackey33_ifbbpro)
 What if you could spend a few minutes per day using nothing but your body weight to build functional upper body strength, train your core, and improve your hip mobility? No equipment necessary, and no gym membership, either.


 After a training accident ended his competitive gymnastics career, Ryan moved to Japan and competed in various martial arts until another injury made him reevaluate his priorities in life. As Head Coach at GMB Fitness, his mission is to show everyone that you can define your own fitness as a sustainable and enjoyable part of your life. You can follow GMB Fitness on
 (@sincerelysherine)
 I’ve often said that
 For now classes are 6pm and 640pm at 2840 Wildwood st in the Boise Cloggers studio.
Book your class NOW!
click this ==>
For now classes are 6pm and 640pm at 2840 Wildwood st in the Boise Cloggers studio.
Book your class NOW!
click this ==>


