Originally Posted At: https://breakingmuscle.com/feed/rss
On April 24, 2022, Danny Grigsby deadlifted 437.2 kilograms (964 pounds) for two reps during training. The mark is the latest in a growing line of a recent deadlift progression for the powerlifter.
Check out the staggering deadlift double below, courtesy of Grigsby’s Instagram profile:
For the pull, Grigsby forgoes all equipment save for a lifting belt. He also completes the deadlift double with relative ease from a sumo stance.
In the Instagram post’s caption, Grigsby elected for self-deprecation to describe the training session. He alluded to minor sleep troubles in a seeming joking desire to get a continuous positive airway pressure (CPAP) treatment. It doesn’t seem like Grigsby’s apparent lack of sleep prevented him from showing off his tremendous power.
“Counting down the days until I get a CPAP, so I’ll recover better and won’t feel like dog-sh** every workout,” Grigsby wrote.
A fellow powerlifter with a similar deadlift prowess, Jamal Browner, poked fun at Grigsby’s pulls, writing in a reply, “Can you please chill out?” Meanwhile, four-time Men’s Physique Olympia Champion (2014-2017) Jeremy Buendia marveled at Grigsby’s strength, quickly commenting, “Easy work, man! Incredible.”
Indeed, as long as he continues to share incredible strength feats like this, the 28-year-old Grigsby may draw attention from major corners across the strength sports world.
Pulling at Full Strength
This sort of staggering deadlift double is nothing new for Grigsby.
Recently, the powerlifter became the first person ever to deadlift 1,000 pounds in a full power meet with an all-time world record 465-kilogram pull (1,025-pound) set during the 2022 United States Powerlifting Association (USPA) Virginia Beach Classic 2. Grigsby notched the achievement while competing in the 125-kilogram weight class.
Following that record feat, Grigsby said that he was working through some minor leg ailments over social media. They were prevalent enough for him to take aspects of his training gradually — especially but not limited to his deadlift. Roughly two weeks later, in April 2022, Grigsby seemingly quelled all concerns when he pulled a 415-kilogram deadlift (915 pounds) for two reps and then crushed a 770-pound deadlift for an eight-rep, volume PR.
Grigsby accomplished each of his recent training feats, like his new deadlift training double, while wearing only a lifting belt. Suffice to say that if these pulls are what taking it easy looks like, then Grigsby certainly looks like he’s back at a full power capacity.
Only an approximate month removed from his latest meet, Grigsby has not yet confirmed his next competition in the year 2022. Whenever he’s on a sanctioned lifting platform again, his new stated goal remains unchanged — He wants to notch at least a 1,043.3-kilogram (2,300-pound) total.
Such a mark would give Grigsby the second-heaviest total for a competitor in the 125-kilogram weight class. Zac Myers holds the current world record with a 1,053-kilogram total (2,321.5-pound), set at the 2020 USPA No Luck Needed Open.
Grigsby’s continued impressive work with his deadlift will undoubtedly be a factor in capturing that achievement.
Originally Posted At: https://breakingmuscle.com/feed/rss
If you plan on being in the gym long-term, you need to avoid beating up your joints. The shoulders, in particular, can be tough to train intensely without excessive wear and tear. Fortunately, the lateral raise can be a very effective way to build the shoulders without attacking the joints.
Beyond joint-friendly training, if you want to look great but haven’t added lateral raises into your workouts, two words should convince you otherwise: boulder shoulders. You can bench and overhead press all you want, but you still won’t see a set of broad, round, fully developed shoulders in the mirror.
The lateral deltoid is underdeveloped in many lifters due to the lack of direct stimulation from many compound exercises. Add lateral raises to your program, and you’ll close the gap in developing well-rounded shoulders. Let’s break down everything you need to know about performing this beneficial exercise.
The lateral raise seems simple enough. Grab hold of some dumbbells, raise them out to the side, lower them down, and repeat.
The shoulder is a tricky piece of machinery, and if poor technical habits are engrained, they may lead to an increased risk of injury. Let’s give you the rundown on performing this exercise perfectly.
Step 1 — Find the Starting Position
Credit: Benoit Daoust / Shutterstock
Stand up straight with your arms at your sides and a dumbbell in each hand. Position your feet just inside shoulder-width apart and brace your core. Lean forward slightly and allow the weights to touch each other in front of your thighs. Your palms should be facing each other and your elbows should be very slightly bent.
Form Tip: Slightly bending at the hips will shift your center of gravity and help to keep yourself grounded as long as you also tense your core. It also elicits a greater range of motion for the shoulder to move through, compared to keeping the weights at your sides.
Step 2 — Raise to Shoulder-Level
Credit: Benoit Daoust / Shutterstock
Maintain a neutral grip (palms facing your body) and keep your elbows in a softly bent position. Initiate the raise by driving out and up through your elbows until your upper arm is parallel to the floor. As the weights come up, your hands should naturally rotate to point your palms towards the ground.
Focus on moving your elbows to lift the weight, not leading with your hands. Your shoulders should be kept down, not shrugged up towards your ears.
Form Tip: Think of standing on the face of a clock. During the movement, your left arm should be pointing between nine and ten and your right arm should be between two and three. Keeping your arms in this alignment will better serve shoulder health while maintaining tension on the muscle.
Step 3 — Lower to Stretch
Credit: Motortion Films / Shutterstock
Maintain tightness through your core and lower body as you lower the weights along the same path. Use a controlled tempo, taking one to two seconds. The dumbbells should end up in the starting position touching each other in front of your thighs.
Form Tip: Rest in the bottom position for one second before starting the next rep. This will lessen any momentum being used to drive up the dumbbells.
Lateral Raise Mistakes to Avoid
While the lateral raise may seem easy enough to perform, there are some important mistakes that must be avoided to prevent any unnecessary risk of injury.
Lifting the Dumbbells Above Your Head
While lifting with a large range of motion can sometimes provide greater benefits in building muscle, in this case more is not better.
Credit: Prostock-studio / Shutterstock
Lifting your arms too high (bringing the upper arms well-above shoulder-level) can place you at risk of an impingement in the shoulder, which is one of the most common causes of shoulder pain. (1)
Avoid It: Imagine you have a barbell across your upper back, much like when performing a barbell squat. As you raise the dumbbells upwards, think about the barbell. Once your upper arm “touches” the bar, lower the weights down.
Lifting Too Much Weight
A lot of gym-goers can be seen using a weight that is so heavy it forces them to use momentum to complete the lateral raise.
Credit: Jasminko Ibrakovic / Shutterstock
This form of “cheating” will allow you to move more weight, but it also means that you lose a lot of the tension being placed on the target muscle. This goes against the objective of the exercise, which is to maximally recruit and stimulate the lateral deltoid.
Avoid it: Leave your ego at the door. Use a weight that you can lift with control for at least six reps. Keep your entire body tensed to maximize stability and reduce any chance of momentum being used.
Over-Rotating the Wrists
In order to increase the activation of the lateral delt, many lifters dramatically rotate their wrists during each rep, tipping their thumbs towards the floor and their pinkies towards the ceiling (imagine pouring a glass of juice). (2)
Credit: Vladimir Sukhachev / Shutterstock
At first, this sounds like a great technique to implement into your training due to the increased muscle activation. However, further studies have also shown that using this technique can increase your shoulders’ vulnerability and increase your risk of injury. (1)
Avoid it: Ensure that your palms, not your thumbs, are pointed towards the ground in the top position of each rep.
Benefits of the Lateral Raise
The benefits of the lateral raise are largely aligned with strengthening the shoulder and improving muscle development through isolating the side shoulder (lateral deltoid) muscle.
Credit: Sjale / Shutterstock
Shoulder Strength
The shoulder muscle is most commonly trained with various types of overhead pressing. However, directly training the lateral deltoid head with lateral raises, similar to directly training the front and rear heads of the shoulder, carryover to improved pressing strength.
Well-Balanced Upper Body Appearance
The lateral deltoid is a muscle that is not effectively or efficiently stimulated in many compound exercises, which can leave them lagging and under-developed. The lateral raise can specifically isolate this muscle allowing you to build a more balanced and aesthetic upper body.
Muscles Worked by the Lateral Raise
The shoulder joint has a very high degree of freedom, which means the shoulder muscle can perform a variety of functions. The shoulders are anatomically split into three heads — the anterior (front), the lateral (side), and the posterior (rear).
Credit: Improvisor / Shutterstock
The lateral raise trains all three heads of the deltoids, but the movement is most effective at isolating the lateral head, hence the name of the exercise itself.
Lateral Deltoids
The lateral delts are most visible in the center part of the shoulder muscle. They connect your upper arm to the acromion process on top of your shoulder blade. This head of the shoulder assists in moving your arm out to the side and away from your body, which is the exact movement performed during the lateral raise.
Anterior Deltoids
The anterior, or front, delts are found just above the biceps. They connect your upper arm to your shoulder blade. While they primarily work to bring your arm in front of your body, they are recruited during lateral raises.
Posterior Deltoids
Your posterior, or rear, delts are on the back section of the shoulder muscles. They attach your upper arm to a different section of your shoulder blade. The rear delts function to move your arms behind your body and help control your scapulae (shoulder blades). The posterior delts are significantly recruited during lateral raises, particularly while your torso is slightly bent forward during the exercise.
Trapezius
The trapezius is a relatively large muscle found along your neck and upper back. It isn’t, and shouldn’t be, a primary mover during the lateral raise, but it’s recruited as the weight is moved during the exercise. When lateral raises are performed incorrectly (swinging the upper body or shrugging the shoulders up), the traps can “take over” and reduce deltoid activation.
Who Should Do the Lateral Raise
The lateral raise is a good shoulder strengthening exercise and a great choice for lifters who want to maximize their lateral head muscle development.
Training for Strength
The lateral raise supports overall pressing strength by helping to build the shoulders, which are required for all variations of the bench press and overhead presses. Strength athletes looking to move significant weight in any press will build shoulder strength and overall joint health by incorporating the lateral raise.
Training for Muscle
The lateral raise is one of the few exercises to target and specifically emphasize the side delt directly. When performed correctly, you can overload this section of your shoulder without relying on an excessive amount of weight, making it ideal for any lifters looking to increase shoulder size with minimal joint strain.
How to Program the Lateral Raise
To prioritize muscle growth in the side delts, the dumbbell lateral raise should be programmed earlier in the session to capitalize on energy and focus. However, the exercise can also be effective when used to completely exhaust the muscle fibers towards the end of your workout.
Moderate Weight, Moderate Repetition
To build a well-developed set of shoulders, a classic bodybuilding approach working for three to four sets in the six to 12 rep range will increase training volume for the side delts, which is beneficial for building muscle. (3)
Low Weight, High Repetition
Working for two to three sets in the 13 to 20 rep range (or higher) will deliver the best results when using lighter weights, but it is important to ensure you are not just going through the motions when reps get incredibly high. Each repetition should be performed with crisp technique, no matter how many are performed.
High-rep sets with lighter weight can increase total training volume even further. These types of “burnout sets” are ideal at the back end of your workouts to fully exhaust the muscle fibers of the side delt.
Lateral Raise Variations
While the lateral raise will forever be a time-tested movement, there are also a few variations that can be rotated into your workouts for additional lateral delt development.
Machine Lateral Raise
The machine lateral raise can make it more comfortable for lifters to target the side delt. The main benefit is the weight being placed on your forearms or upper arms instead of being held in your hands. No longer will your grip be a limiting factor.
The machine also makes it more difficult to swing the weight into position, requiring more muscle activation.
Seated Lateral Raise
The seated lateral raise makes it next-to-impossible to move your torso without noticing, which ensures the tension is maintained on the side delt and reinforces strict form.
The seated variation is nearly identical to the standing exercise. The key difference is the stable upright position of your torso, which makes any swinging of your torso immediately noticeable.
Lean-Away Cable Lateral Raise
This cable variation places the muscle under a significant amount of tension throughout its entire range of motion and allows for a more constant resistance curve.
The basic dumbbell exercise relies on gravity to provide resistance, which is minimal in the lower portion of the movement. The cable pulley provides steady resistance throughout the entire exercise.
The lean away approach also changes the arm angle so that less emphasis is placed on the rotator cuff, and a greater emphasis is placed on the lateral delt. (4)
Lateral Raise Alternatives
The lateral raise is a great exercise that targets the side delt. However, there are a few alternatives that you can rotate into your programming for variety and more diverse muscle activation.
Single-Arm Dumbbell Upright Row
This unusual but highly effective movement allows for greater freedom at the shoulder joint than the more traditional barbell upright row, which has a reputation for excessive joint stress.
The single dumbbell also allows the shoulder, elbow, and wrist joints to move and adjust for the exact range of motion that feels most comfortable and least stressful on the joints.
Cable Upright Row
This exercise may be the most effective compound movement for lateral delt development due to the significant shoulder abduction (upwards and outwards) component. Using a rope on a low cable pulley gives the shoulder joint more freedom to move, compared to attaching a straight bar to the cable.
To prevent any chance of shoulder impingement or joint strain, don’t allow your elbows to rise up above shoulder-height. To minimize the trapezius being recruited, initiate the movement by pulling the rope handle apart and out towards your shoulders, rather than straight up towards your chin.
FAQs
How heavy should I perform lateral raises?
The side delt is a relatively small muscle and does not require an extremely heavy load to stimulate the muscle. You want a weight that is challenging for the intended rep range, but not so heavy that it forces you to cheat the weight up.
Remember that the goal of the exercise is to stimulate the side deltoid, not to move the most weight.
How many times per week can I do lateral raises?
Throwing in some lateral raises twice per week is going to be more effective than once per week for maximizing growth. (5) As you become a more experienced lifter, it can be worthwhile adding in an extra day per week.
Because the lateral raise doesn’t contribute significantly to overall training stress (compared to a bigger exercise like deadlift), it can be plugged into many other workouts without drastically affecting recovery.
References
Kolber, M.J., Cheatham, S.W., Salamh, P.A., & Hanney, W.J. (2014). Characteristics of Shoulder Impingement in the Recreational Weight-Training Population. Journal of Strength and Conditioning Research, 28, 1081–1089.
Coratella, G., Tornatore, G., Longo, S., Esposito, F., & Cè, E. (2020). An Electromyographic Analysis of Lateral Raise Variations and Frontal Raise in Competitive Bodybuilders. International journal of environmental research and public health, 17(17), 6015. https://doi.org/10.3390/ijerph17176015
Schoenfeld, B. J., Contreras, B., Krieger, J., Grgic, J., Delcastillo, K., Belliard, R., & Alto, A. (2019). Resistance Training Volume Enhances Muscle Hypertrophy but Not Strength in Trained Men. Medicine and science in sports and exercise, 51(1), 94–103. https://doi.org/10.1249/MSS.0000000000001764
McMahon PJ, Debski RE, Thompson WO, Warner JJ, Fu FH, Woo SL. Shoulder muscle forces and tendon excursions during glenohumeral abduction in the scapular plane. J shoulder Elb Surg. 1995;4(3):199-208.
Schoenfeld, B. J., Ogborn, D., & Krieger, J. W. (2016). Effects of Resistance Training Frequency on Measures of Muscle Hypertrophy: A Systematic Review and Meta-Analysis. Sports medicine (Auckland, N.Z.), 46(11), 1689–1697. https://doi.org/10.1007/s40279-016-0543-8
Originally Posted At: https://breakingmuscle.com/feed/rss
Olympian weightlifters are consistently some of the world’s strongest athletes. With her latest staggering feat in training, Katherine Nye is no exception. On April 22, 2022, the Team USA weightlifter — who competes in the 76-kilogram weight class — logged a new personal record when she squatted 186 kilograms (410 pounds).
Check out the stellar PR squat below, via Nye’s Instagram profile:
Nye completed the squat while wearing a lifting belt, knee sleeves, and heeled weightlifting shoes. These shoes allowed her to use more of her ankle flexibility and better engage her quads.
In addition, Nye uses a women’s weightlifting bar, which is lighter (35 pounds) than a traditional barbell (45 pounds). Along those same lines, women’s weightlifting bars have more flexibility. That might explain why Nye’s bar bends and shakes a bit more as she finishes the PR rep.
Given that Olympic weightlifters only focus on the snatch and clean & jerk in competitions, Nye’s squat is an impressive mark. In context, amongst fellow strength sports competitors, Nye’s 186-kilogram squat (410 pounds) compares well. Per Open Powerlifting, her squat would rank as the eighth-heaviest raw squat in history by female powerlifters who compete around the approximate 76-kilogram weight class.
At only 23-years-old, Nye has built up quite the resume for an Olympic weightlifter. She last competed in the 2020 Tokyo Olympics, where she captured a silver medal for Team USA. It was her first Olympic medal in her first career Olympic Games.
Since her debut in 2016, across the Youth, Junior, and Senior divisions, Nye has made a name for herself as one of the top names in Olympic weightlifting. She’s done so well, Nye even appeared in the Forbes 30 Under 30 list in 2019.
Here are the best results on the snatch and clean & jerk from Nye’s career:
Nye has built up quite a baseline of finishes throughout her career. According to the International Weightlifting Federation (IWF), she has qualified for the podium in nine of 10 IWF events.
Here’s a tally of Nye’s overall medal tally to date:
Katherine Nye — International Medals
Gold — 5 (2019 Junior World Championships; 2019 World Championships; 2019/2021 Pan American Championships; 2019 IWF Championships)
Silver — 3 (2018 Junior World Championships; 2020 Pan American Games; 2020 Tokyo Olympics)
Bronze — 1 (2019 Pan American Games)
Note: These medal counts are medals awarded in the Total, which is the total sum of the athlete’s top snatch and top clean & jerk.
The Road to Paris
In anticipation of potential drug-related offenses, the International Olympic Committee (IOC) — the organization for the Olympics — has reorganized its categories for Olympic weightlifters. Come the 2024 Paris Olympics, Nye’s 76-kilogram weight class will no longer be a division. Nye has previously stated over Instagram that she plans to compete at 71 kilograms again — her division prior to Tokyo 2020.
Nye will undoubtedly be looking to improve upon her silver medal finish approximately two years from now. She’ll likely have to overcome the Neisi Dajomes — the reigning 76-kilogram Olympic Champion who beat Nye for the gold medal in Tokyo. If Nye’s new all-time powerful squat is any indication, she’s well on her way toward that ambitious goal.
Originally Posted At: https://breakingmuscle.com/feed/rss
The 2022 Strengthlete Collective Clash on the Coast (SCCOC) is in the books. On April 22-24, 2022, in Hilton Head Island, South Carolina, some of the best under-105-kilogram strongmen (U105KG) and under-82-kilogram strongwomen (U82KG) gathered to show off their strength and compete in the prestigious event.
Other competition highlights include new Cyr dumbbell world records for strongman Samantha Belliveau and strongman Nicolai Myers, and a new deadlift world record for Kira Wrixon.
By the event’s end, Isaac Maze won the U105KG strongman division, and Melissa Peacock was the inaugural victor in the U82KG strongwoman division.
The strongwoman part of that competition was an Invitational, with Peacock and seven other athletes heading straight to the Women’s Final on April 24, 2022. Meanwhile, the strongman segment featured Maze and 35 other athletes who had to progress through a preliminary round before the Men’s Final on April 23, 2022.
Strongman legend Nick Best was the head judge of the entire competition, while 2022 World’s Strongest Man (WSM) competitors — Maxime Boudreault and Evan Singleton — helped supervise the different events.
With her first-place finish, Peacock earned a cool $12,000 prize. Belliveau (second place) potted $5,000, while Nadia Stowers (third place) netted $3,000. On the men’s side, Maze took home $10,000 while Matthew McKeegan (second place) and Dan Hughes (third place) earned $3,000 and $2,000, respectively.
Below are the complete results of the competition:
2022 Strengthlete Collective Clash on the Coast | U105KG Strongman Results
Event 1 — Cyr dumbbell presses for reps | 95 kilograms (210 pounds) | 60-second time limit
Event 2 — Fridge carry | 50-feet | Fastest possible time
Event 3 — Axle deadlift for reps | 306 kilograms (630 pounds) | 60-second time limit
Event 4 — Yoke 362 kilograms (800 pounds) to 317.5-kilogram (700-pound) Frame Medley Carry | 50 feet each way
Event 5 — Stone Over Bar
Maze took home the victory and primary prize money with consistent finishes near the top throughout both stages of the men’s competition. A first-place finish was worth five points, which decreased successively to one earned point for fifth place.
Notably, after some challenges during an 11th-place start, the Irish athlete in McKeegan battled all the way back to finish second overall.
2022 Strengthlete Collective Clash on the Coast | U82KG Strongwoman Results
Event 4 — Flint stone deadlifts for reps | 204 kilograms (449.7 pounds) | 60-second time limit
Event 5 — 295 kilograms (650 pounds) Yoke for time | 50 feet each way | 60-second time limit
Event 6 — Loading Race | Five cycles, each object is 30 feet away from the main platform | 75-second time limit
Like Maze, Peacock enjoyed exemplary consistency, finishing at or near the top in most of the final events, leading to her eventual victory.
Notably, outside of competition, Maze and Peacock are in a relationship. With their victories in this competition, they might be in the conversation for Strongest Couple in the World.
It’s easy to see why food preservation would have been critical to our ancestors’ survival. Being able to store food to eat later meant they were protected against unsuccessful hunts and less-than-fruitful gathering. Moreover, they could migrate into regions where access to fresh food varied by season.
Drying was probably one of the earliest methods of food preservation paleolithic humans discovered, no doubt quite by accident. There’s evidence that our ancestors were drying food to preserve it as early as 10,000 to 12,000 BCE.12 Along the way, they also learned how to ferment, smoke, and use ash, salt, fat, and even peat bogs to keep food from spoiling. Each of these methods works in its own way by discouraging the growth of microorganisms that cause food to go bad. In the case of dehydrating, microbes require water to proliferate. No water, no rotting.
As food preservation methods go, drying, or dehydrating, has several advantages. Dehydrated food is shelf-stable and lightweight, making it a space-efficient and energy-efficient option—no refrigeration required. It’s perfect for homesteaders, parents, hikers, and backpackers who want to make portable, healthy snacks and meals to reconstitute later.
For DIYers, dehydrating is a great way to get started with home-preserving. It’s simpler than canning or fermenting (although those are easy to learn, too, so don’t be intimidated). Here are the basics to help you get started.
Methods of Dehydrating Food
By far, the most foolproof way to dry food is with a countertop dehydrator. Dehydrators work by using a combination of low heat and air circulation to remove moisture. An inexpensive dehydrator only costs about 40 dollars (USD), but you can spend ten times that or more on a top-tier model.
If you don’t want to invest in yet another kitchen appliance, however, you have options:
Sun is nature’s food dehydrator. This is what our ancestors used, after all. Sun drying works best in hot climates with low humidity. Food safety experts only recommend sun drying for fruit and herbs. Vegetables don’t have enough naturally occurring acid or sugar, both of which help resist molding and spoiling.
A related method is air drying, which doesn’t involve direct sunlight. Think bundles of herbs or hot peppers hanging from the rafters to dry. This method also requires low humidity and good airflow. Air drying is the preferred method for some types of dried meat like biltong.
Use your oven. This isn’t the best method because most ovens don’t have a low enough heat setting. The recommended temperature for dehydrating food is 140 degrees Fahrenheit (60 degrees Celsius), but a typical oven won’t go below 170 degrees. Ovens also don’t circulate air unless they have a convection setting. Still, you can make it work in a pinch, but you have to pay attention to avoid cooking your food instead of drying it.
Choosing a Food Dehydrator
Overall, food dehydrator appliances will deliver the most consistent results, and they’re suitable for all types of food. If you’re thinking about making your own snacks or backpacking meals, it’s worth picking one up.
Besides price, you’ll also want to consider size and materials. Many dehydrators use plastic trays, but you can pay more for stainless steel. Alternately, you can purchase inexpensive silicone mats or use parchment paper to prevent your food from touching the plastic trays if that’s something you care about.
You might also want to pay more for a model that offers different temperature settings. Although you can dehydrate pretty much anything at 140 degrees Fahrenheit, you may find you get better results with slightly cooler temperatures for herbs and vegetables and warmer temperatures for meat and seafood.
What Are the Best Foods to Dehydrate? Anything You Can’t Dehydrate?
You can dehydrate just about anything, but fruits, vegetables, herbs, and meat are the most common for home-drying. Legumes and grains are also dry-able, but that’s probably not a big selling point for Primal folks. Dried legumes are already readily available, anyway.
Foods that don’t dehydrate well are those that contain a lot of fat:
Fatty meats
Avocados
Dairy products*
Nut butters
Olives (When you see dried olives, they’re usually salt-cured and/or preserved in oil, not just dried in the traditional sense.)
*For backpacking meals or stocking your pantry, purchase commercially dried and pasteurized milk, cream, buttermilk, butter, and cheese powders. Dairy-free folks can look for dried coconut milk powder instead.
Eggs can be dehydrated at home, but salmonella is a concern. Because egg powder is also readily available online or at camping supply stores, this is another one I recommend purchasing.
And did you know you can also dehydrate dairy-free, egg-free, low-fat sauces? Great news for those of you who can’t imagine backpacking without your favorite ketchup to put on your scrambled eggs! Make “ketchup leather” to throw in your pack, and you’re good to go.
Dehydrating Food How-tos
Where to Start: Dehydrating Basics
The whole point of drying is to discourage bacteria and mold, so make sure to start with clean food, utensils, and work surfaces.
Optionally peel fruits and vegetables, then remove any damaged or bruised spots. Slice produce and meat into thin, uniform slices no more than ¼-inch thick (about 6 mm), or dice produce small. Either way, keep the pieces as consistent as possible to ensure even drying.
Place food in a single layer on the dehydrator trays. While you can put more than one type of food into a dehydrator at one time, keep them separated so that you can take them out at different times depending on how quickly they dry.
Make sure you remove as much moisture as possible without cooking or overdrying the food. Be patient. Dehydrating takes anywhere from a few hours for something delicate like kale chips to 24 hours or more for jerky or dehydrated bone broth.
Once your food is fully dried, let it cool for about an hour, then transfer it to an appropriate container.
Below are tips for drying different types of foods. I recommend looking up instructions the first time you dehydrate something new to double-check technique and timing. Note that these guidelines assume that you’re going to be consuming your dried food within a matter of months. If you’re stocking up for the apocalypse, you’ll need to follow additional steps to prepare your food for longer-term storage.
How to Dehydrate Vegetables
Before drying vegetables, blanching is recommended to preserve flavor and texture. This involves briefly exposing the vegetables to hot water or steam to deactivate enzymes that lead to spoilage. This step is not necessary if you are starting with frozen vegetables, as they were blanched before freezing.
After blanching, dry the vegetables using a clean towel. Optionally season them at this time—if you’re making kale or zucchini chips, for example—but use a light hand since flavors get concentrated during dehydrating.
Table 2 here offers recommended times for blanching and dehydrating various types of vegetables. You’ll know your dried vegetables are ready when they become very crisp and you can easily snap them.
Make homemade greens powder: Dehydration is a fantastic way to use up spinach, kale, or chard, plus greens that might otherwise go to waste such as carrot tops, beet greens, and broccoli leaves. Thoroughly dehydrate and cool the greens, then blitz them in a blender or food processor. Store the powder in a jar and add it to smoothies, soups, and baked goods.
How to Make Dried Fruit
For best results, pretreat fruit with a quick dip in an ascorbic acid (vitamin C) solution. Pick up vitamin C capsules at any store and mix 1 teaspoon of ascorbic acid powder per 2 cups of water. (One teaspoon equals six 500mg capsules.) Soak fruit for 3 to 5 minutes, then drain, dry, and dehydrate. A similar method using a sulfite dip is recommended for long-term storage.
Fruit can take anywhere from 6 hours to 48 hours to dry depending on the size and type of fruit. You’ll know it is dry when it becomes tough and leathery. Dried fruit won’t become brittle like dried vegetables.
Dried fruit needs to be conditioned before storage. This extra step helps distribute any leftover moisture evenly between the pieces of fruit to deter molding. Place the cooled dried fruit into large glass containers, leaving some space at the top. Set the containers in a warm, dry place, and give them a shake once or twice per day to keep the fruit from sticking together. If you notice any condensation in the container, the fruit needs to be dehydrated further. After a week, it will be ready to store.
Make fruit leather: Blend your fruit(s) of choice into a puree with a squeeze of lemon juice to preserve the color. You’ll need solid plastic or silicone tray liners to dehydrate the puree. Pour the puree into a thin layer and spread it as evenly as possible. Dehydrate until you can touch the fruit leather without leaving a dent. It will still be sticky.
How to Make Dried Meat and Beef Jerky
Drying meat is a little finickier, so I definitely recommend following a recipe, but here are some things you need to know to get started:
Start with lean cuts of meat and trim off as much visible fat as possible. Slice meat thinly.
The USDA recommends precooking meat to 160 degrees Fahrenheit (71 degrees Celsius) before drying to reduce E. coli risk.3 For max flavor, marinate the meat before drying.
For poultry or fish, it’s easiest to start with canned options, which are already precooked. Otherwise, cook thoroughly before drying.
You can dehydrate cooked ground beef or turkey, but typically you’d add breadcrumbs to keep the meat from becoming too hard. A Primal-friendly option is to use gluten-free breadcrumbs.
Dehydrate meats at 145 degrees Fahrenheit (63 degrees Celsius). Depending on the thickness and type of meat, this could take anywhere from 6 to 12 hours or longer.
In addition to the drying methods offered above, I’ve seen recipes for making jerky in an air fryer. I haven’t tried this myself, but I’m interested to know if it works. Leave a comment if you’ve tried it.
Drying Herbs
Herbs are quick and easy to dry in a dehydrator. They don’t require any special prep except a quick wash. Removing the leaves from the stems isn’t necessary, but you can if you want.
If your dehydrator has different settings, use a lower temperature for herbs, ideally between 95 and 125 degrees Fahrenheit (35 to 50 degrees Celsius). They’ll only take a few hours to dry.
Yes, You Can Dehydrate Bone Broth!
If you’re starting with homemade broth, cool it first and remove any excess fat from the top.
Place the broth in a saucepan and boil it down until it becomes the consistency of gravy. Transfer it to the dehydrator using silicone sheets, like when making fruit leather. Spread it into a thin, even layer, then dehydrate. Because you’re starting with something so wet, it can take two or three days, or even longer, to dry completely. Check it periodically to smooth out any thicker spots, and optionally flip it once it is solid enough to handle.
Once it’s fully dried and cooled, use a high-speed blender or food processor to grind it into the consistency of coarsely ground coffee, then store in a jar in the freezer.
How to Store Dehydrated Food
Once your food is dried and cooled, it’s time to store it. The name of the game is keeping air and moisture out. You can do that with food-safe silicone bags, mason jars, metal cans, vacuum sealers, and so on.
According to the National Center for Home Food Preservation, dried foods should be used within four months to a year.4 I’m aware that many homesteaders and survivalists store theirs for years—sometimes a decade or more. That’s probably safe under ideal conditions (food is properly pretreated, dehydrated, and stored in airtight containers at cold or moderate temperatures). Researchers at BYU say, for example, that dried apples stored in airtight cans or foil pouches with an oxygen absorber can last 15 to 30 years.5
Do your own research here, but whatever you do, don’t mess around with meat. The USDA states that homemade jerky is only good for one or two months.6 Commercially made jerkies stay fresh for up to a year, and canned meats will keep much longer.
To extend your dried food’s shelf life even more, stick it in the freezer. As with any frozen foods, make sure everything is tightly sealed in freezer-proof wrapping or containers, as trapped air leads to freezer burn.
For long-term storage, you can also purchase desiccant packs—you know, those little paper packets that come in your store-bought beef jerky and say “do not eat.” They are usually filled with non-toxic silica gel that absorbs some of the remaining moisture. Preppers and survivalists apparently store food in mylar bags with desiccants for many years with no issues. That’s beyond what we’re discussing today, but desiccants can be useful for extending your dried food’s shelf life even if you’re not stocking a bunker.
Just Try It!
Now that you know the basics, give it a try for yourself. The National Center for Home Food Preservation is a great resource for beginners. Start with one or two simple items like dried apple slices or kale chips. Once you get the hang of it, you’ll want to start preserving all that extra produce from your garden or CSA box.
Let us know in the comments what your favorite thing to dehydrate is. Favorite appliance? Any foods we simply must try dehydrating?
Dehydrating Food FAQs
Is dehydrated food as nutritious as fresh food?
Evidence suggests that, similar to freezing, dehydrating largely maintains the nutritional value of the original fresh food, with a few minor differences here and there. It may even improve the bioavailability of certain nutrients.7 Drying does concentrate any sugars, though, so pay attention if you’re counting calories or carbohydrates.
What are the best foods to dehydrate? Worst foods to dehydrate?
You can dehydrate most foods: fruits, vegetables, meat, poultry, seafood, nuts, legumes, grains, and even things like bone broth, ketchup, and marinara sauce. Fatty foods aren’t suitable for drying at home because the fat will become rancid. These include fatty meats, avocado, nut butter, olives, and dairy products.
How does a dehydrator work?
Dehydrators work by using low heat and circulating air to remove moisture from food without cooking it. Moisture allows harmful microorganisms to grow and cause the food to spoil. Removing the moisture causes those microorganisms to go dormant so food stays fresher longer.
How long does dehydrated food last?
The answer depends on the type of food and storage method. Dehydrated fruits and vegetables will last from four months to a year, while homemade beef jerky should be eaten within a month or two. They all last much longer when you keep them in the freezer.
Originally Posted At: https://breakingmuscle.com/feed/rss
The bench press is Julius Maddox’s domain, and with another recent impressive feat, it doesn’t look like that’s changing any time soon. On April 24, 2022, the powerlifter locked out a 318-kilogram bench press (700-pound) for four unbroken reps — a new personal record (PR).
Check out a video of the lift below, courtesy of Maddox’s Instagram profile:
Maddox powers through the set with relative ease. Three spotters are present to help Maddox, but they never intervene. For the lift, Maddox donned a lifting belt and wrist straps.
A Promising Rivalry
Outstanding feats on the bench press are nothing new to Maddox. To date, he has never recorded a squat or deadlift during a sanctioned competition, as he exclusively focuses on his bench press prowess. The focus paid off for the powerlifter when he captured the current all-time world record holder with a 355-kilogram bench press (782.6 pounds) at the 2021 World Raw Powerlifting Federation (WRPF) Hybrid Showdown III.
His next feat is to become the first man to bench press 800 pounds raw in a sanctioned competition.
Maddox’s rival, Daniel Zamani, is the first man to bench press 800 pounds, raw. The Iranian powerlifter notched the feat with a 365-kilogram raw bench press (804.7-pound) during a training session on February 21, 2022. As both men compete as superheavyweights, if Zamani had finished the press during a competition, he would’ve supplanted Maddox’s record.
Maddox and Zamani were to square off in a bench press battle for supremacy at the 2022 Iron Wars V, but for undisclosed reasons, that never happened.
The 800-Pound Barrier
The pair have also spent some of their recent time polishing up their work with other lifts.
In the two months since Zamani captured the unofficial bench press record, he’s been sharing videos of himself on Instagram grinding away with his deadlift. While adorned in lifting straps, the Iranian athlete has pulled as much as 345 kilograms (749.8 pounds).
Meanwhile, Maddox recently hit a 351.3-kilogram (775-pound) squat while using a Kabuki Transformer Bar during a training session. Notably, he didn’t wear a lifting belt or knee sleeves for the lift.
For Maddox especially, his squat was likely only a temporary break en route to climbing the 800-pound bench press mountain. Given his recent progress, it might only be a matter of time before the powerlifter joins Zamani in the hallowed territory. If or once that happens, the remaining elephant in the room will be whether Maddox and Zamani finally go head to head in a meet for the all-time world record. At the time of publishing, there are no plans in the works.
While Maddox continues to set PRs, the powerlifting world is certainly ready for an official round of this promising bench press rivalry.
Originally Posted At: https://breakingmuscle.com/feed/rss
On April 24, 2022, the World’s Strongest Man (WSM) organization announced that Rauno Heinla withdrew from the 2022 WSM, set to take place at the end of May. A couple of hours after the news broke, Canadian Mitchell Hooper was announced as Heinla’s replacement.
Heinla last competed in this event in the 2011 WSM. This year was to mark the Estonian athlete’s formal return to the competition. He addressed the reason for the withdrawal in a post on his Instagram profile:
In the post’s caption, Heinla writes that he had to spend some time in the hospital following a recent 536.6-kilogram Silver Dollar deadlift (1,183 pounds). It’s undoubtedly an unfortunate turn of events for the strongman.
“In short, what happened [was] bad luck this time,” Heinla writes. “I did a Silver Dollar deadlift and got a problem with [my] stomach. I was three days in a hospital [and] will not specify details.”
Heinla did not dwell on his unexpected misfortune of missing his second-ever WSM competition. After taking some needed time off, he’s already looking ahead and staying positive.
“Now I need [to] take easy two months and then will be starting again [on my] roads to my goals,” Heinla writes. “And my goals are still big.”
Heinla’s last professional competition was the 2022 Europe’s Strongest Man in early April 2022. He finished in 12th place, while Oleksii Novikov won the event.
With all things considered, Hooper is relatively new to the professional strongman scene.
According to his website, the 26-year-old Hooper broke out when he deadlifted 475 kilograms (1047.2 pounds) while weighing under 140 kilograms. Hooper did not disclose his equipment for that pull. Hooper also recently won the 2021 Static Monsters Worldwide (SMW) competition, where he initially notched a new world record total of 665 kilograms (1,466 pounds) — between the axle deadlift and the overhead log press.
Notably, following the 2021 SMW, Hooper writes that he felt he didn’t properly lock out a 200-kilogram log press (440.9 pounds). As such, he withdrew the press from his record total because he didn’t feel it was worthy of a world record. His 465-kilogram Axle deadlift (1,025 pounds) from the event remains in place.
In other near-term ambitions, Hooper says he’d like to break the current deadlift world record at the 2022 Giants Live Open and World Deadlift Championships (WDC), which will take place on August 6, 2022.
2018 WSM Champion Hafthor Björnsson possesses the deadlift mark to beat with a 501-kilogram pull (1,104.5-pound), set at the 2018 World’s Ultimate Strongman (WUS). 2017 WSM Champion Eddie Hall is the only other member of the exclusive deadlift club, with his precise 500-kilogram (1,104.5-pound) pull set at the 2016 Giants Live event. Both men wore lifting straps, a lifting belt, and deadlift suits for their respective pulls.
At the time of publishing, Hooper has not publicly acknowledged his new place in the 2022 WSM. Nonetheless, it will be his first-ever WSM competition, where he’s assuredly hoping to make an impression.
The 2022 WSM will take place on May 24-29 in Sacramento, CA.
Originally Posted At: https://breakingmuscle.com/feed/rss
When someone decides to burn fat, they often think it means surviving on a carrot and three lettuce leaves each day while jogging to and from work. Fortunately, neither of those is necessary. While you need to pay close attention to nutrition and implement a consistent, focused training plan for fat loss, you’ll get much better results when you avoid burning the fat loss candle too hot on either end.
Here’s how to set up an effective and efficient plan to burn fat without burning yourself out.
One of the most important details to keep in mind when working to burn fat is a central theme that will determine the right and wrong plan. To drastically change and improve your physique, your focus needs to be on “fat loss”, not “weight loss”.
While the difference may seem like mere semantics, it’s the type of detail that influences your approach to nutrition, your workout routine, your rate of progress, and other factors that dictate results.
Weight loss is simply changing the number on the scale. Bodyweight most commonly and most quickly decreases from basic fluid loss (anyone who’s gotten sweaty on a hot day or had a run-in with bad seafood has experienced the effect). This type of change is only temporary and often self-correcting, with the body re-gaining any “lost” weight as soon as fluids are replaced.
“Weight loss” also doesn’t distinguish fat loss from muscle loss. Catabolism, or burning muscle tissue, will decrease strength, performance, and energy, and it also changes your physique to appear less muscular. Weight loss with a high degree of muscle loss creates a soft and un-toned appearance.
Credit: winnievinzence / Shutterstock
Fat loss, specifically, is when your body burns adipose tissue — body fat. This is the type of loss that can remain indefinitely unless the fat itself is regained (which it won’t be, unless it was lost with an unsustainable plan and you crank the calories back up).
Fat loss can only occur when your caloric intake is less than your caloric output. (1) Regardless of the diet details, if you’re taking in too many calories, your body cannot lose fat. However, because the goal is to burn fat, certain steps need to be taken to preserve lean muscle tissue. That comes from balancing just enough calories being eaten (diet) with just enough calories being burned (exercise).
Understanding Your Metabolism
Your metabolism is the way your body processes, burns, or stores calories. An improved metabolism makes fat loss that much more likely. One surefire way to boost your metabolism is to focus on building and preserving lean muscle mass.
Muscle is one key factor in setting your body’s resting metabolic rate (RMR), or the amount of calories your body burns without you even trying to burn calories. People who talk about having “a slow metabolism” or “a super-fast metabolism” sometimes have actual genetic factors at work, but their lean muscle tissue is also a significant influence on their resting metabolic rate.
A coordinated plan with a specific approach to nutrition and training has been shown to be optimally effective for preserving lean muscle while burning fat, improving RMR. (2)
Insulin Sensitivity and Insulin Resistance
Many people think insulin is synonymous with blood sugar levels or managing diabetes. That’s only one part of the insulin story. It’s an incredibly influential hormone that your body uses in a variety of processes.
Insulin is released in response to eating carbohydrates (like sugar) and it can determine if those calories are used for fuel or put into storage as body fat. Insulin also plays an important role shuttling amino acids into cells to build new muscle. (3)
Because insulin plays so many critical roles, the body’s response to insulin is also critical. The body can either be “insulin sensitive”, which encourages insulin to choose calorie burning and muscle building, or the body can be “insulin resistant”, which encourages insulin to prioritize calorie storage (fat gain).
Several factors can determine the body’s level of resistance or sensitivity, including some genetic components. However, a combination of diet and exercise has been shown to reduce insulin resistance and lead to improved body composition. (4)(5)
How to Train for Fat Loss
When you think of training for fat loss, you probably think of countless hours on the treadmill daily or light weight, high-repetition exercises to “carve detail” into muscles. You can skip right over those two extremes, but you will have to do some cardio in addition to some weight training to get the best results.
Resistance Training for More Muscle and Less Fat
Your training and nutrition need to be aligned properly for optimal results. That means, when your goal is burning fat, you can’t reduce calories while also following a lifting program designed to squat 600 pounds. Your nutrition will be insufficient to allow recovery and the training sessions will be, essentially, wasted.
With that said, weight training combined with a fat loss diet has been shown to improve results compared to dieting alone. However, weight training combined with cardiovascular training and a fat loss diet has been shown to be even more effective. (6)(7)
Credit: Srdjan Randjelovic / Shutterstock
To accommodate cardio training and overall recovery, a weight training workout should be performed three or four days per week. This requires either training the whole body in each workout, alternating upper body and lower body workouts each day, or following a push/pull/legs split (training the pushing muscles of the chest, shoulders, and triceps in one session; the pulling muscles of the back and biceps in the next; and all of the leg muscles in another workout).
Prioritizing two to four sets of six to 12 reps for most exercises will allow sufficient training stimulus without excessive overall stress, and will help to preserve muscle mass during a calorie-restricted fat loss plan.
Cardio Training is Essential
Aerobic training like walking, running, or biking is typically associated with fat loss training. The popular thinking is, if you want to burn fat, you have to do some kind of cardio. And that’s fundamentally correct.
An abundance of research has shown multiple benefits to using cardiovascular exercise (in a variety of intensities) as part of a fat loss plan, ranging from straightforward calorie burning during the workout to reduced hunger after training — a welcomed side effect when calories are reduced. (8)
Cardio training, when combined with weight training, has also been shown to produce greater health benefits than either method on its own. (9)
Training (weights and cardio together) for a total of four to seven hours per week has been shown to provide significant fat loss and health benefits. (10) The exact number being dependent on a few factors, most notably the training intensity. High-intensity training cannot be performed for the same duration as lower intensity training, but the net effect is comparable.
Performing cardio exercise for 20 to 60 minutes, three or four days per week, is an effective approach when combined with weight training. Sessions can be either low to moderate intensity, like walking or biking, for longer durations or higher intensity workouts, like sprints, for shorter durations.
For overall recovery and optimal performance in each workout, either alternate days of only weight training with only cardio, or perform a cardio session immediately after lifting weights (to avoid negatively affecting the weight training stimulus).
Performing cardio on an empty stomach first thing in the morning is one popular, though mildly controversial, approach. Some lifters believe exercising without a prior meal may lead to muscle loss, but this has shown to be inaccurate and not a significant concern. (11)
The effects of fasted cardio are comparable to non-fasted cardio, so perform whichever fits best into your individual weekly schedule. (12)(13)
How to Eat for Fat Loss
The phrase “eating for fat loss” could just as easily be “not eating for fat loss”, but rather than focus on the restrictive part of a nutrition plan designed to burn fat, let’s focus on what you can have.
Calories: Not Too Many, Not Too Few
The quintessential aspect of a fat loss diet is reduced calories. People switch to “diet food” like zero-calorie beverages, plenty of vegetables, and none of the decadent desserts that might’ve become too familiar.
While some degree of calorie restriction is unavoidable, cutting too many can be counterproductive. For sustainable, efficient fat loss, reducing your intake by 500 to 700 calories per day has been repeatedly shown to be an ideal target. (14)(15)
Credit: Jacob Lund / Shutterstock
Dieting with a larger deficit is a short-term, relatively short-sighted approach which may initially seem like a great idea as pounds are shed rapidly before the body quickly rebels, progress grinds to a halt, and weight begins to return despite a drastic calorie deficit and consistent training routine. (16)(17)
The previously recommended training guidelines should be compatible with a 500 to 700 calorie deficit. If excessive fatigue or poor recovery become limiting factors, adjust the training routine to reduce volume (removing exercises or sets) before adjusting calorie intake.
Protein Intake is Key
For burning fat, as with building muscle, protein may be the most crucial macronutrient. It’s not only essential for muscle preservation, but it’s also been shown to improve satiety (curb hunger) and increase thermogenesis (calorie-burning).
As a critical and versatile nutrient, protein intake should always be kept relatively high, anywhere from 30% to 60% of total daily calories. (18) A similar, if simplified, approach to calculate total daily intake is to aim for approximately one gram per pound of bodyweight. That continues to be a reliable, multi-purpose guideline regardless of the goal.
Ideal food sources will be predominantly animal-based proteins (beef, poultry, fish, dairy, eggs, etc.), although vegetarian alternatives have been shown to be comparable when other macronutrients and total calories are accounted for.
One potential issue to be aware of is the inherent fat content of animal proteins and the fat or carbohydrate content of vegetarian proteins. To reduce overall calories, either opt for lower fat/lower carb protein sources or be sure to incorporate the food’s entire calorie into your daily plan.
Don’t Be Confused By Carbs
Many lifters believe that cutting carbs — an energy source for your body — is the single most effective way to reduce body fat. While they can certainly deliver results, low-carb diets have been repeatedly shown to be as effective, not necessarily more effective, compared to other plans (like a low-fat diet, for example). (19)
One benefit of a fat loss plan which includes sufficient carbs is generally higher energy levels which can be channeled into harder workouts, which can translate to more calories burned per session and a greater overall training stimulus.
Credit: MiniStocker / Shutterstock
On the flip side, one big benefit of a lower carb diet is the simplicity. Carbs are relatively easy to spot in a kitchen or on a menu — grains, bread, rice, potatoes, sugar-coated anything. This makes it much more simple to adhere to, compared to protein and fat combinations which may be less obvious — butter in a sauce, oil in a salad dressing, fat in a piece of steak, etc.
“Low carbs” is typically considered anywhere from 5% to 30% of daily calories from carb sources, or up to one-half (0.5) gram per pound of bodyweight per day.
Optimal carb sources, regardless of total daily carb intake, are ideally relatively fiber-dense and relatively low sugar to increase overall satiety without excessive calories. High sugar, low fiber foods are often unsatisfying and considered “empty calories.” Whole grains, legumes, potatoes, rice, fruit, and vegetables are preferred options.
Fats Don’t Make You Fat
If going low-carb is simple because they’re easy to find, going low-fat is simple because they’re so calorie-dense. In a comparable serving, fats deliver more than twice as many calories as carbohydrates, making them an extremely efficient way to reduce total daily calories. (There are four calories in a gram of carbs and protein and nine calories in a gram of fat.)
Reducing fat intake delivers more “bang for the buck” in terms of affecting total daily calories, making it an appealing choice for dieters looking to focus on a single dietary change.
An added benefit of a lower fat approach is improved cardiovascular health and comparable fat loss relative to a higher dietary fat intake. (20)
Maintaining fat intake to 20% to 35% total daily calories or roughly one-third (0.3) gram per pound of bodyweight per day is sufficient to encourage optimal hormonal and cardiovascular health while allowing fat loss. (21)
Food sources should include both animal fats (naturally occurring in protein sources) and minimally processed plant sources including avocado, olive oil, or coconut oil.
Everyone Wants a Cheat Meal
Some people become eager for a cheat meal or cheat day before completing their first full week on a fat loss plan. This type of lax dietary adherence might not seem like a good omen for significant results but, when used strategically, cheat meals may actually be beneficial.
During a calorie restricted diet, several hormones in the body try to adapt to the new physiological environment. One of the hormones, leptin, is responsible for controlling hunger. The longer or more intense the dieting, the less leptin your body produces.
Credit: Dmitry Lobanov / Shutterstock
By sporadically and deliberately spiking calorie intake above normal (no longer in a deficit), leptin level may be temporarily boosted, which may help adherence to the fat loss plan. (22)
If that sounds too good to be true, it’s because it might be. Research has also shown that cheat meals may actually lessen adherence to the initial diet plan and encourage poor nutritional behaviors. (23)
So, if hearing the phrase “cheat meal” gets you more riled up than Roger Rabbit hearing “shave and a haircut,” you’re probably not going to handle it well. You should stick with your well-designed plan and save the strategic cheating for another time. Focus on making the foods that responsibly fit into your daily macros taste better. You don’t have to eat bland food, you just need to eat lower-calorie foods.
How Many Meals Per Day?
One popular technique to burn fat is to increase meal frequency, eating multiple smaller-sized meals throughout the day rather than fewer, relatively larger meals.
Because insulin can be spiked during a meal and dropped low between meals, the intention is to maintain stable insulin levels throughout the day by minimizing the highs, lows, and duration between spikes. Increased calorie-burning and satiety are also expected due to eating more often.
Research has shown that, while there may be some potential benefits to having a meal roughly every two to three hours, there is no conclusive, significant benefit. (24) Eating anywhere from one to six times per day has been shown to deliver comparable results. Choose an approach that suits your schedule and overall nutrition plan.
How to Recover for Fat Loss
Recovery is as important for burning fat as it is for building muscle, especially since your body is operating with reduced fuel sources. Here’s how to make sure you’re avoiding burnout and maximizing results.
Plan Your Rest Days
Considering the weekly training time split between weights and cardio, you’re likely performing some type of exercise nearly every day. While the activity is different each session, cumulative fatigue can become too much to recover from without a day or two off unless the training program is extremely well-planned.
Credit: Sergey Nivens / Shutterstock
One effective approach, especially when alternating weight training days with cardio-only days, is to deliberately incorporate lower intensity cardio exercise into your cardio exercise programming. This serves as a type of “active recovery” and encourages results without significantly tapping into recovery resources. (25)
Less Sleep, More Fat
Getting enough sleep is important under ideal conditions. When training intensely with restricted calories, getting enough quality sleep becomes even more important.
Research has shown that impaired sleep can reduce metabolism, increase cravings, affect hormone levels, and impact cognitive ability. (26) Aim to get as close as possible to the time-tested eight hours per night.
Sample Fat Loss Training Program
There are countless ways to design a training plan to burn fat. As long as the general guidelines for weight training, cardio, volume (sets and reps), duration, and recovery are followed, it’s hard to go wrong. Here’s one way to set up a week in the gym. The plan in the kitchen is all up to you.
Credit: augusto mendoza / Shutterstock
Sunday
Low-intensity cardio exercise (walk or bike), 60 minutes.
Low-intensity cardio exercise (walk or bike), 60 minutes.
Tracking Progress
A plan to burn fat is only successful when you know, without a doubt, that you’re actually burning fat. For the most comprehensive data, use a variety of methods.
A once-per-week weigh-in is an excellent starting point. Even though you don’t want to focus specifically on “weight loss,” fat loss is a specific form of weight loss. If the scale isn’t dropping one to two pounds per week (an ideal and sustainable rate of progress), your daily calories are likely too high. (27) Be sure to weigh-in under identical conditions each week. Something as simple as slight dehydration, a large recent meal, or a change of clothing can skew the results.
Weekly progress pictures can be more objective than simply looking in the mirror, especially when comparing a timeline of progress with several weeks worth of selfies. Again, repeat the same conditions (same outfit, same lighting, same pose) to maintain consistency and make progress easier to monitor.
The last objective measure is, literally, tape measurements. Tracking points may include your neck, upper arm, torso or mid-chest, navel, hips, upper thighs, and calves. It’s not uncommon for certain areas to lose fat at different rates. Like photos, collecting several weeks of data and comparing them in hindsight can help to showcase results.
Body fat percentages, while seemingly useful, are too inaccurate, complicated, or inconvenient to repeat on a regular basis. If your bodyweight is slowly decreasing, and your pictures/measurements are steadily improving, and your performance in the gym is improving or holding relatively steady, your body composition is on the right track.
Fat Loss Wrap-Up
Whether it’s a ramp-up to summer, an upcoming vacation, or if it’s just finally time to crackdown and make a serious push to burn fat, you’re armed with all the info to get results. The good news is that there are plenty of different paths all leading to the same goal. The only thing left is to choose a plan and put in the work.
References
Strasser, B., Spreitzer, A., & Haber, P. (2007). Fat loss depends on energy deficit only, independently of the method for weight loss. Annals of nutrition & metabolism, 51(5), 428–432. https://doi.org/10.1159/000111162
Stiegler, P., & Cunliffe, A. (2006). The role of diet and exercise for the maintenance of fat-free mass and resting metabolic rate during weight loss. Sports medicine (Auckland, N.Z.), 36(3), 239–262. https://doi.org/10.2165/00007256-200636030-00005
Fujita, S., Rasmussen, B. B., Cadenas, J. G., Grady, J. J., & Volpi, E. (2006). Effect of insulin on human skeletal muscle protein synthesis is modulated by insulin-induced changes in muscle blood flow and amino acid availability. American journal of physiology. Endocrinology and metabolism, 291(4), E745–E754. https://doi.org/10.1152/ajpendo.00271.2005
Torjesen, P. A., Birkeland, K. I., Anderssen, S. A., Hjermann, I., Holme, I., & Urdal, P. (1997). Lifestyle changes may reverse development of the insulin resistance syndrome. The Oslo Diet and Exercise Study: a randomized trial. Diabetes care, 20(1), 26–31. https://doi.org/10.2337/diacare.20.1.26
Ross, R., Janssen, I., Dawson, J., Kungl, A. M., Kuk, J. L., Wong, S. L., Nguyen-Duy, T. B., Lee, S., Kilpatrick, K., & Hudson, R. (2004). Exercise-induced reduction in obesity and insulin resistance in women: a randomized controlled trial. Obesity research, 12(5), 789–798. https://doi.org/10.1038/oby.2004.95
Miller, T., Mull, S., Aragon, A. A., Krieger, J., & Schoenfeld, B. J. (2018). Resistance Training Combined With Diet Decreases Body Fat While Preserving Lean Mass Independent of Resting Metabolic Rate: A Randomized Trial. International journal of sport nutrition and exercise metabolism, 28(1), 46–54. https://doi.org/10.1123/ijsnem.2017-0221
Ho, S. S., Dhaliwal, S. S., Hills, A. P., & Pal, S. (2012). The effect of 12 weeks of aerobic, resistance or combination exercise training on cardiovascular risk factors in the overweight and obese in a randomized trial. BMC public health, 12, 704. https://doi.org/10.1186/1471-2458-12-704
Schubert, M. M., Desbrow, B., Sabapathy, S., & Leveritt, M. (2013). Acute exercise and subsequent energy intake. A meta-analysis. Appetite, 63, 92–104. https://doi.org/10.1016/j.appet.2012.12.010
Schroeder, Elizabeth C et al. “Comparative effectiveness of aerobic, resistance, and combined training on cardiovascular disease risk factors: A randomized controlled trial.” PloS one vol. 14,1 e0210292. 7 Jan. 2019, doi:10.1371/journal.pone.0210292
Swift DL, Johannsen NM, Lavie CJ, Earnest CP, Church TS. The role of exercise and physical activity in weight loss and maintenance. Prog Cardiovasc Dis. 2014;56(4):441-447. doi:10.1016/j.pcad.2013.09.012
Hackett D, Hagstrom AD. Effect of Overnight Fasted Exercise on Weight Loss and Body Composition: A Systematic Review and Meta-Analysis. Journal of Functional Morphology and Kinesiology. 2017; 2(4):43. https://doi.org/10.3390/jfmk2040043
Aird TP, Davies RW, Carson BP. Effects of fasted vs fed-state exercise on performance and post-exercise metabolism: A systematic review and meta-analysis. Scand J Med Sci Sports. 2018 May;28(5):1476-1493. doi: 10.1111/sms.13054. Epub 2018 Feb 23. PMID: 29315892.
Schoenfeld, B. J., Aragon, A. A., Wilborn, C. D., Krieger, J. W., & Sonmez, G. T. (2014). Body composition changes associated with fasted versus non-fasted aerobic exercise. Journal of the International Society of Sports Nutrition, 11(1), 54. https://doi.org/10.1186/s12970-014-0054-7
Champagne CM, Broyles ST, Moran LD, et al. Dietary intakes associated with successful weight loss and maintenance during the Weight Loss Maintenance trial. J Am Diet Assoc. 2011;111(12):1826-1835. doi:10.1016/j.jada.2011.09.014
Byrne NM, Meerkin JD, Laukkanen R, Ross R, Fogelholm M, Hills AP. Weight loss strategies for obese adults: personalized weight management program vs. standard care. Obesity (Silver Spring). 2006 Oct;14(10):1777-88. doi: 10.1038/oby.2006.205. PMID: 17062808.
Tremblay, A., & Chaput, J. P. (2009). Adaptive reduction in thermogenesis and resistance to lose fat in obese men. The British journal of nutrition, 102(4), 488–492. https://doi.org/10.1017/S0007114508207245
Rosenbaum M, Leibel RL. Adaptive thermogenesis in humans. Int J Obes (Lond). 2010;34 Suppl 1(0 1):S47-S55. doi:10.1038/ijo.2010.184
Hansen, T. T., Astrup, A., & Sjödin, A. (2021). Are Dietary Proteins the Key to Successful Body Weight Management? A Systematic Review and Meta-Analysis of Studies Assessing Body Weight Outcomes after Interventions with Increased Dietary Protein. Nutrients, 13(9), 3193. https://doi.org/10.3390/nu13093193
Chawla, Shreya et al. “The Effect of Low-Fat and Low-Carbohydrate Diets on Weight Loss and Lipid Levels: A Systematic Review and Meta-Analysis.” Nutrients vol. 12,12 3774. 9 Dec. 2020, doi:10.3390/nu12123774
Lu, M., Wan, Y., Yang, B., Huggins, C. E., & Li, D. (2018). Effects of low-fat compared with high-fat diet on cardiometabolic indicators in people with overweight and obesity without overt metabolic disturbance: a systematic review and meta-analysis of randomised controlled trials. The British journal of nutrition, 119(1), 96–108. https://doi.org/10.1017/S0007114517002902
Zello G. A. (2006). Dietary Reference Intakes for the macronutrients and energy: considerations for physical activity. Applied physiology, nutrition, and metabolism = Physiologie appliquee, nutrition et metabolisme, 31(1), 74–79. https://doi.org/10.1139/h05-022
Kolaczynski JW, Ohannesian JP, Considine RV, Marco CC, Caro JF. Response of leptin to short-term and prolonged overfeeding in humans. J Clin Endocrinol Metab. 1996 Nov;81(11):4162-5. doi: 10.1210/jcem.81.11.8923877. PMID: 8923877.
Murray SB, Pila E, Mond JM, Mitchison D, Blashill AJ, Sabiston CM, Griffiths S. Cheat meals: A benign or ominous variant of binge eating behavior? Appetite. 2018 Nov 1;130:274-278. doi: 10.1016/j.appet.2018.08.026. Epub 2018 Aug 23. PMID: 30144490.
Schoenfeld BJ, Aragon AA, Krieger JW. Effects of meal frequency on weight loss and body composition: a meta-analysis. Nutr Rev. 2015 Feb;73(2):69-82. doi: 10.1093/nutrit/nuu017. PMID: 26024494.
Ortiz, R. O., Jr, Sinclair Elder, A. J., Elder, C. L., & Dawes, J. J. (2019). A Systematic Review on the Effectiveness of Active Recovery Interventions on Athletic Performance of Professional-, Collegiate-, and Competitive-Level Adult Athletes. Journal of strength and conditioning research, 33(8), 2275–2287. https://doi.org/10.1519/JSC.0000000000002589
Capers PL, Fobian AD, Kaiser KA, Borah R, Allison DB. A systematic review and meta-analysis of randomized controlled trials of the impact of sleep duration on adiposity and components of energy balance. Obes Rev. 2015;16(9):771-782. doi:10.1111/obr.12296
Garthe I, Raastad T, Refsnes PE, Koivisto A, Sundgot-Borgen J. Effect of two different weight-loss rates on body composition and strength and power-related performance in elite athletes. Int J Sport Nutr Exerc Metab. 2011 Apr;21(2):97-104. doi: 10.1123/ijsnem.21.2.97. PMID: 21558571.
This recipe for baked pork chops seasoned with Chinese five spice powder and served with sautéed escarole is a fantastic way to add some flavor to your usual dinnertime meal while still keeping it quick and easy!
If you’re not familiar with these ingredients, Chinese five spice powder is a blend of—you guessed it—five different spices: star anise, fennel seeds, peppercorns (traditionally Szechuan peppercorns), cloves, and cinnamon. It really punches up these pork chops, giving them both a little heat and a sweet aromatic flavor.
You might know escarole as a salad green, but like most greens, it’s capable of so much more than that. In this recipe, a hint of vinegar, a pat of butter, and a scant drizzle of maple syrup turn escarole into a warm side dish that’s perfect with pork. It’s a bold medley of sweet, salty, and pleasantly bitter flavors. The bitter flavor of escarole can be a “love it” or “hate it” thing. This recipe is meant to woo the haters and please those who enjoy escarole’s natural bitterness.
A very large head of escarole wilts down to four small servings when cooked. Plan to serve another side with the meal, or, if you really love escarole, cook two heads instead of one.
Chinese Five Spice Baked Pork Chops with Sautéed Escarole Recipe
Preheat your oven to 375 degrees Fahrenheit (190 degrees Celsius).
Sprinkle the five spice powder, salt, and pepper on both sides of the pork chops.
Heat an oven-safe skillet on your stovetop over medium-high heat. If your pork chops have a nice fat cap, place the pork chops in the pan sticking straight up with fat touching the pan. This will render some of the fat into the pan, which you can use to sear the chops. Otherwise, heat the avocado oil in the pan.
Once hot, place the pork chops in the pan and sear for 2 to 3 minutes until browned. Flip over and repeat on the other side.
Place the pan in the oven and let the pork chops bake until they reach an internal temperature of 145 degrees Fahrenheit (62 degrees Celsius). Transfer the pork chops to a rimmed plate, pour half of the pan juices on top of the pork, and set aside.
Heat the pan again over medium-high heat. Add the vinegar and scrape up any browned bits on the bottom of the pan. When the vinegar begins to bubble and starts to evaporate, add the butter. Once the butter is melted, add the coconut aminos and maple syrup. Stir until combined, then add the escarole.
Sauté the escarole for a few minutes, until the leaves are tender. Avoid overcooking the escarole because it can develop a slimy texture when cooked for too long. Season with salt and pepper to taste.
Serve the pork chops alongside the escarole and your favorite root veggie, like roasted delicata squash.
Nutritional Information (1/4 of recipe):
Calories: 288
Fat: 22 g
Total Carbs: 2 g
Net Carbs: 1 g
Protein: 20 g
Baked pork chops seasoned with Chinese five spice powder and served with sautéed escarole add fantastic flavor to your usual dinnertime meal while still keeping it quick and easy!
Ingredients
1 Tbsp Primal Kitchen Avocado Oil 2 bone-in pork chops with fat cap, about 1” thick ¾ tsp Chinese five spice powder ½ tsp salt ¼ tsp black pepper 1 head escarole, chopped and washed well 1 Tbsp coconut aminos 1 Tbsp butter 2 tsp apple cider vinegar 1–2 tsp maple syrup
Instructions
Preheat your oven to 375 degrees Fahrenheit (190 degrees Celsius).
Sprinkle the five spice powder, salt, and pepper on both sides of the pork chops.
Heat an oven-safe skillet on your stovetop over medium-high heat. If your pork chops have a nice fat cap, place the pork chops in the pan sticking straight up with fat touching the pan. This will render some of the fat into the pan, which you can use to sear the chops. Otherwise, heat the avocado oil in the pan.
Once hot, place the pork chops in the pan and sear for 2 to 3 minutes until browned. Flip over and repeat on the other side.
Place the pan in the oven and let the pork chops bake until they reach an internal temperature of 145 degrees Fahrenheit (62 degrees Celsius). Transfer the pork chops to a rimmed plate, pour half of the pan juices on top of the pork, and set aside.
Heat the pan again over medium-high heat. Add the vinegar and scrape up any browned bits on the bottom of the pan. When the vinegar begins to bubble and starts to evaporate, add the butter. Once the butter is melted, add the coconut aminos and maple syrup. Stir until combined, then add the escarole.
Sauté the escarole for a few minutes, until the leaves are tender. Avoid overcooking the escarole because it can develop a slimy texture when cooked for too long. Season with salt and pepper to taste.
Serve the pork chops alongside the escarole and your favorite root veggie, like roasted delicata squash.
Prep Time:5 minutes
Cook Time:30 minutes
Category:Main dish
Nutrition
Serving Size:1/4 of recipe
Calories:288
Sugar:1g
Sodium:571mg
Fat:22g
Saturated Fat:8g
Trans Fat:0g
Carbohydrates:2g
Fiber:1g
Protein:20g
Cholesterol:73mg
Net Carbs:1g
Keywords: Baked pork chops, Escarole, Five spice pork chops
Originally Posted At: https://breakingmuscle.com/feed/rss
You don’t win two Classic Physique Olympias without stellar genetics, a partner who lets you live in the gym, and a gritty work ethic.
On April 21, 2022, bodybuilder Breon Ansley shared a demanding leg workout that seemingly asked everything of his lower body on his YouTube channel. At the same time, he revealed that his next competition would be the 2022 Tampa Pro, which will take place on August 5-6, 2022, in Tampa Bay, Florida.
Recently, Ansley detailed his decision to retire from the Classic Physique Division following the 2022 Classic Physique Olympia. Notably, Ansley maintained that he would change aspects of his upcoming training with a new “master plan.” The idea behind the new plan was to allow him to leave the division at his best.
As Ansley clarifies in his recent video, this leg workout is a part of that vision. Here’s a peek at one of Ansley’s first public steps on the road to his final Classic Physique Olympia competition.
Ansley’s Legs Workout
Ansley opens by offering a disclaimer that this routine is about a focus on high volume rather than lifting staggering amounts of weight. Nonetheless, he seemingly can’t hold in his excitement, saying, “We’re gonna make the intensity crazy.”
Leg Extension & Lying Hamstring Curl
Leg Extension: 2 x 6 | 1 x 10
Lying Hamstring Curl: 1 x 6 | 1 x 7 | 3 x 8
Ansley wastes no time establishing a rapid pace by super-setting leg extensions and lying hamstring curls. He says that he limits rest between sets to optimize the results.
30 seconds, 40 seconds, that’s about it. That’s all we need.
Research backs up Ansley’s assertion. One study showed that athletes who integrated supersets into their strength training saw significant gains in training efficiency and metabolic activation over a relevant time period.
However, someone like Ansley is a seasoned professional. By that same token, it was important for those with less experience not to overdo their limited rest, super-setting as it could lead to unnecessary fatigue and eventual muscle damage. (1)
Smith Machine Squat & Bodyweight Bulgarian Split Squat
Smith Machine Squat: 2 x 5 | 1 x 9
Bodyweight Bulgarian Split Squat: 1 x 9 | 1 x 11 | 1 x 15
Ansley turns to another superset, splitting his time between squats on the Smith machine and bodyweight Bulgarian split squats. He continues to praise the merits and benefits of supersets in the process.
“We love to make it the most difficult we possibly can,” Ansley says. “When we make it that challenging, that means our body looks that much better, looks that much more powerful. The more challenging you make it, the more ‘wow factor’ you have.”
That aside, Ansley might have utilized the Smith machine squats rather than the traditional barbell variation because of one specific distinction. Balance and stabilization are lesser concerns on the Smith machine in contrast to a free weight lift, letting an athlete freely and safely challenge their leg muscles. In turn, that potentially leads to a more efficient workout.
When training for volume like Ansley, increased efficiency is an understandable ask. That efficiency might even prevent eventual injury. As one study maintains, one of the most common ways an athlete can injure themselves in their training is a combination of poor technique and overuse of a specific muscle. (2)
Next in line for Ansley is one short, five-rep set on the Sissy Squat Machine — which locks an athlete’s feet and calves into a vertical position while seated to perform the Sissy Squat better. Here, he explains that an emphasis on squeezing in between reps is imperative.
“If I’m leaning on the pad and squeezing back here, I get that full contraction way at the top here by the hip flexor,” Ansley says. “We want the whole quad to be connected.”
Squeezing during quad workouts can be crucial as research shows it’s one of the more consistent ways to build girth and strength. (3)
Ansley promised intensity. Naturally, he follows with one superset of walking lunges with a barbell and sissy squats while holding a 45-pound plate.
“We like to hit everything equally as hard, equally as intense, and get some volume out of all those muscle groups, equally.”
Standing & Seated Calves Machine
The bodybuilder finishes his extensive leg workout by hitting his calves with another superset on a standing calves machine and a sitting calves machine.
Standing Calf Raise: 1 x 5 | 1 x 8
Seated Calf Raise: 1 x 5
On to the 2022 Tampa Pro
After his 2022 Tampa Pro reveal, Ansley says that he weighs 197 pounds at the moment. By the time that event rolls around, he wants his weight cap to be 180. He will feature in the Classic Physique division at the competition.
If his new master training plan continues to unfold as expected, Ansley may fare well in Tampa Bay come early August.
References:
Weakley, J.J.S. et al. (2017). The effects of traditional, superset, and tri-set resistance training structures on perceived intensity and physiological responses. European Journal of Applied Physiology. 2017 Jul; 117(9): 1877–1889.
Aicale, R., Tarantino, D. Maffuli, N. (2018). Overuse injuries in sport: a comprehensive overview. Journal of Orthopaedic Research and Surgery. 2018 Dec; 13: 309.
Lehecka, B.J., Turley, J., Stapleton, A., Waits, K. The effects of gluteal squeezes compared to bilateral bridges on gluteal strength, power, endurance, and girth. PeerJ. 2019; 7: e7287.
For now classes are 6pm and 640pm at 2840 Wildwood st in the Boise Cloggers studio.
Book your class NOW!
click this ==>
Warrior Fit Testimonials
First, I want to say thank you for convincing me to do Tabata! I was struggling to lose weight and Finally I found something that helped! I really appreciate your coaching! - Craig T.
Ever since I was convinced to do Tabata I have seen huge results, I lost 6 pounds and gained energy in the first 3 weeks. I have been working out for 3 months before I decided to do Tabata and I struggled to lose weight.
At first I thought "How am I losing weight by bringing my heart rate up then cooling down then bringing it up again?" I don’t know how it works but it does!
Thank you!! - Theresa F.
The first day of Tabata, I wondered WHAT AM I DOING - I AM 56 !! Five weeks later I knew that it was what I needed. I learned that I could push myself well beyond my comfort zone and feel good later. I have a marked improvement in physical as well as emotional endurance. - Lyn C.
When I was first told about Tabata I was very excited from the word go, however that excitement stemmed from the fact that I had no clue what it meant. I missed the first week of class b/c I was traveling for work so when I came in during the 2nd week I had some making it up to do.
It was hard at first b/c my body wasn't used to working out at such a fast pace, but once I got into a rhythm I started to feel very good. These classes are no joke. If you stick with it you will leave there feeling stronger, healthier and overall better about yourself and what you've accomplished.
I would recommend these classes to anyone. Darrin is a great trainer and he'll keep you going with his energy.
- Jami L.
Warriors Fit Audio
Warrior Fit uses High Intensity Music to get ya Moooovin' So we can all "Get Our Sweat On"
The link below will give ya a freeee shot at Audible plus a couple audio books just to try it out and if you haven't used audio books on your commutes you are missing out. Get pumped up before you get to where you are going and exercise your mind. I use it Everyday. Go get yours now!

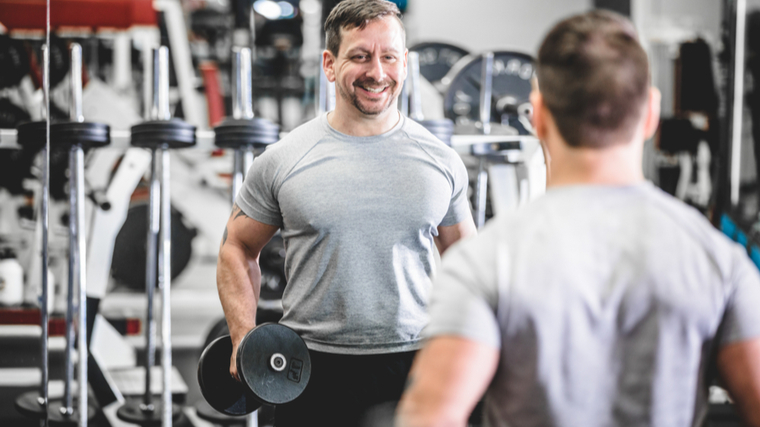
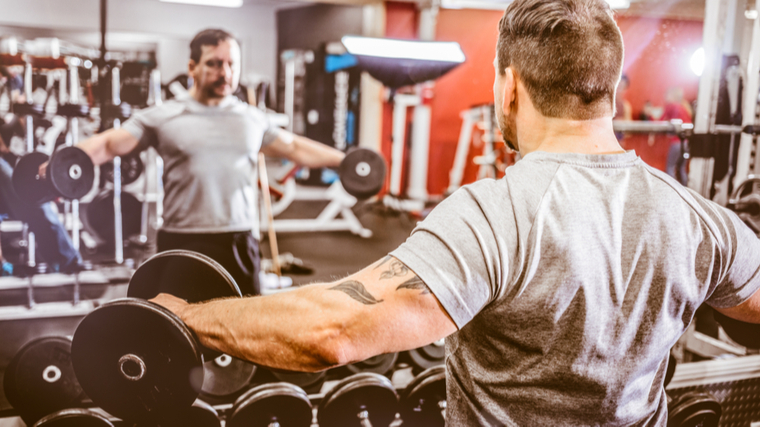
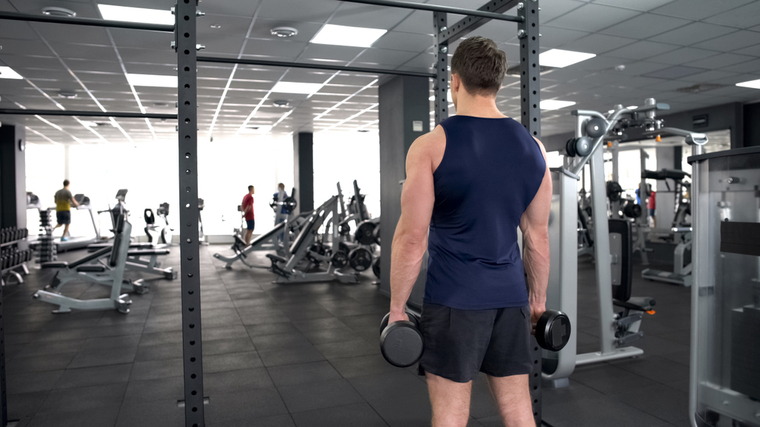
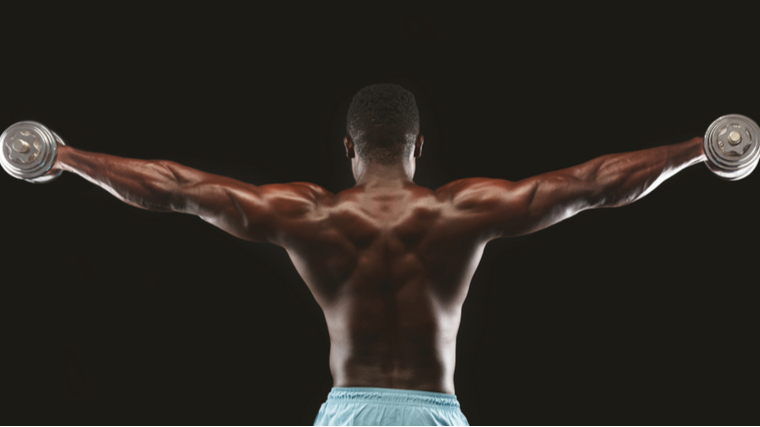
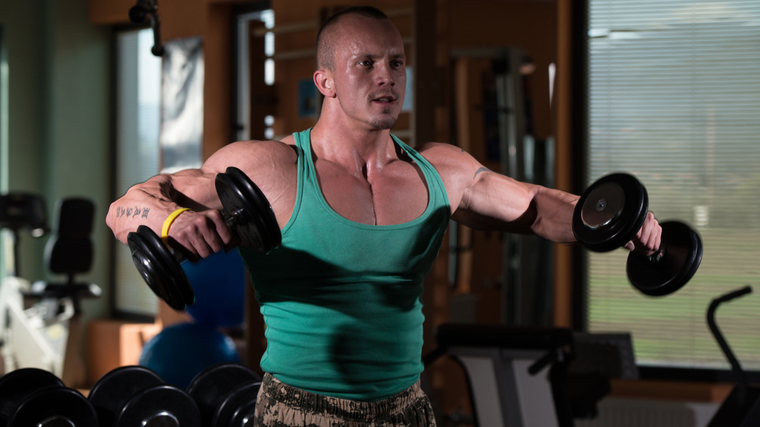
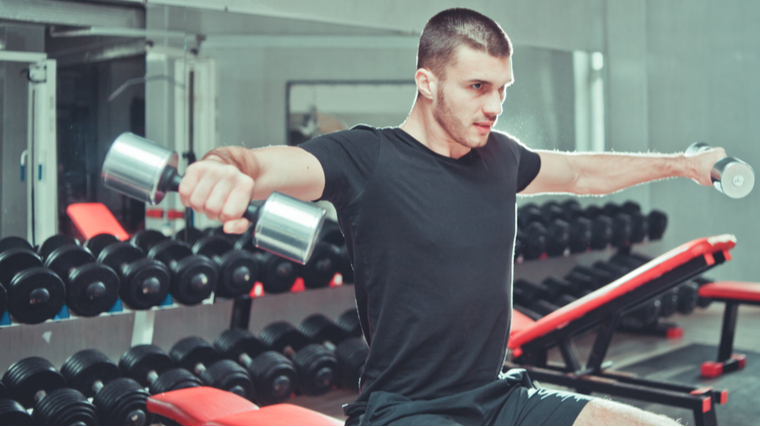
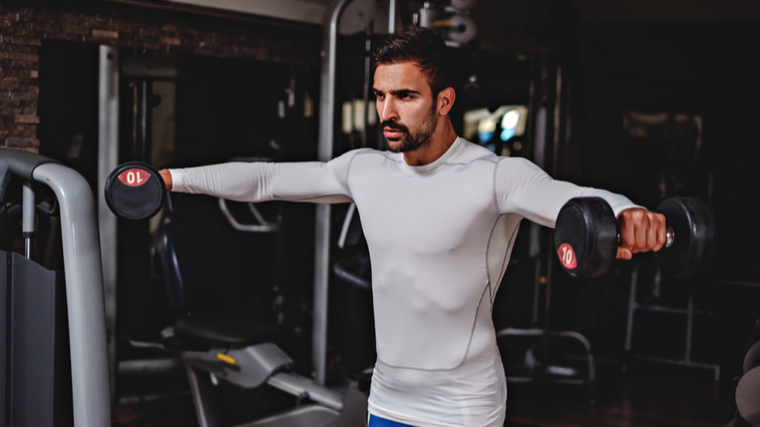
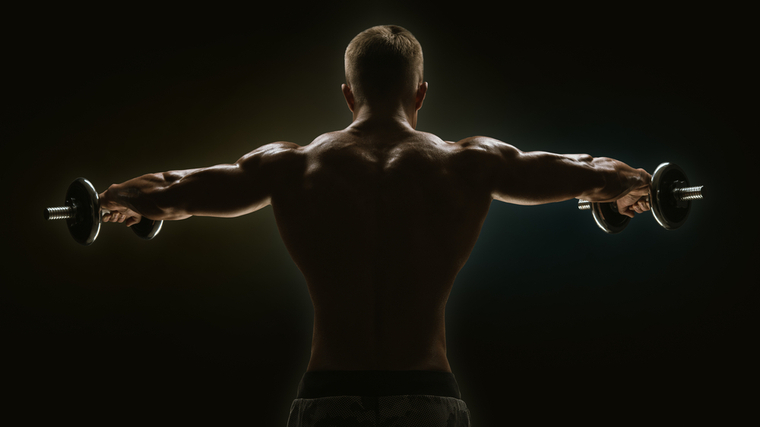
 It’s easy to see why food preservation would have been critical to our ancestors’ survival. Being able to store food to eat later meant they were protected against unsuccessful hunts and less-than-fruitful gathering. Moreover, they could migrate into regions where access to fresh food varied by season.
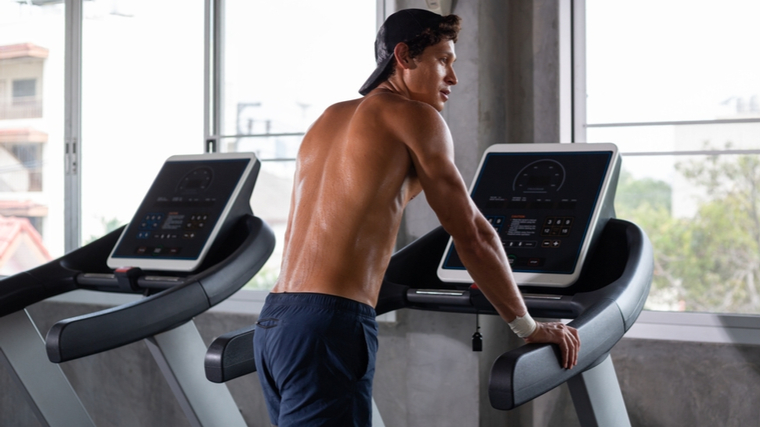
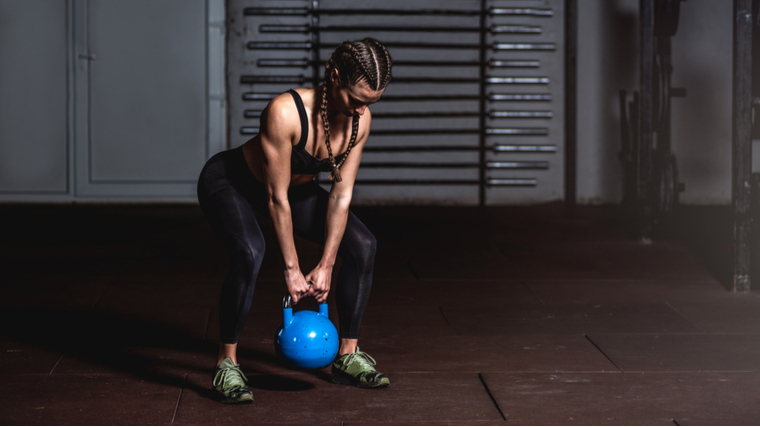


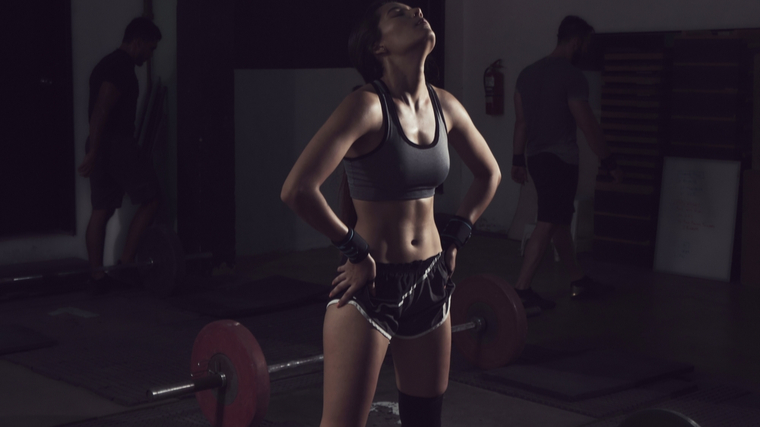
 This recipe for baked pork chops seasoned with Chinese five spice powder and served with sautéed escarole is a fantastic way to add some flavor to your usual dinnertime meal while still keeping it quick and easy!


 For now classes are 6pm and 640pm at 2840 Wildwood st in the Boise Cloggers studio.
Book your class NOW!
click this ==>
For now classes are 6pm and 640pm at 2840 Wildwood st in the Boise Cloggers studio.
Book your class NOW!
click this ==>


