Originally Posted At: https://breakingmuscle.com/feed/rss
Strengthen your muscles and joints to handle rotational movements to benefit you in sports and in life.
Life isn’t linear. Nor is it perfectly controlled—neither are sports.
In both life and sport, we rotate, we reach, we turn, and we spin. Yet in the gym, we often focus entirely on moving linearly and in a controlled manner.
And then we wonder why we get injured spontaneously reaching for something in the back seat of the car.
In a perfect world, we’d all sit down every morning to a leisurely, healthy breakfast. In the real world, however, we’ve all done our share of eating breakfast in our cars, on the bus, or at our work stations Sometimes, where you eat the breakfast you grabbed on your way out the door can’t be helped. What can be helped, however, is what you eat. Keep in mind that while omelet muffins are perfect for breakfast on the go, they’d also be great for a weekend brunch. Double the recipe and make a dozen. Then, make time to sit down with family or friends and enjoy the type of long, leisurely breakfast that’s so hard to come by during the week.
The beauty of these omelet muffins? What you mix in for added flavor is up to you. Anything you love adding to an omelet—diced vegetables, meat, and some cheese if you’re so inclined—you can add to this recipe to create your own personal omelet muffin.
Preheat your oven to 350 degrees Fahrenheit. Arrange the bacon on a parchment covered sheet pan and bake for 20-30 minutes, until it reaches the doneness of your liking. Allow the bacon to cool and chop or crumble it into small pieces.
Whisk the eggs and coconut milk/cream together in a large bowl. Add in the chopped bacon, chopped bell pepper, cheese, cilantro and black pepper. Mix together until well combined.
Spray a set of 12 muffin tins with avocado oil spray. Ladle the egg mixture into each of the tins, about 2/3-3/4 of the way full. Bake for 18-20 minutes, or until they are slightly puffed up, yet firm to the touch. Remove from the oven. and allow them to cool slightly before removing them from the muffin tin. The egg muffins will deflate slightly as they are cooling.
If you’re just starting your strength training journey, check out our massive guide Strength Training 101: Everything You Need to Know. You can snag it for free when you enlist in the Rebellion (that’s us!) by signing up below:
Download our comprehensive guideSTRENGTH TRAINING 101!
Everything you need to know about getting strong.
Workout routines for bodyweight AND weight training.
How to find the right gym and train properly in one.
What Are the Benefits of Doing Pull-Ups? What Muscles Do Pull-Ups Work?
Pull-ups are one of the best exercises you can do.
Here’s why:
#1) Pull-ups work every muscle in your upper body. Pull-ups are what we call a “compound exercise,” meaning they work out several muscle groups at once.
The muscles in your back, arms, and even abs all grow stronger from doing pull-ups.
Abs?
Yep! You engage your abs as you stabilize your body while hoisting yourself up.
#2) Pull-ups are a great indicator of overall strength. Since it’s just you against the force of gravity, if you can do a pull-up or chin-up, you have a greater strength-to-bodyweight ratio.
With push-ups, some of your body’s weight is supported by your feet.
Not so with pull-ups. It’s just you and the bar.
#3) Pull-ups will help you improve your posture.[1]By building strength in your PULL muscles, we strengthen and tighten your back muscles.
This will naturally cause you to pull your shoulder blades back and down into proper position, providing you a better posture.
#4) Pull-ups improve grip strength. Grip strength is another indicator of overallhealth. In fact, a strong grip has been correlated with lower mortality rates.[2]
Pull-ups are a great way to improve your grip since your hands and fingers have to support your bodyweight during the movement.
If you’re looking for a stronger handshake, regularly doing pull-ups will go a long way towards that goal.
#5) Pull-ups are convenient. Some other big compound movements require decent amounts of equipment to perform, like the deadlift or bench press. Meaning unless you have weights, barbells, and power racks at your home, you’re probably heading to the gym for your training.
Not so with pull-ups.
Doing a pull-up really only requires a pull-up bar, but even that can be substituted.
You can use monkey bars at a local playground, a towel around a strong beam, or even a sturdy tree:
If it’s taller than you and can support your weight, you can do pull-ups from it.[3]
Alright, enough about why you should do pull-ups. Let’s show you how it’s done.
How to Do Proper Pull-Ups
HOW TO DO A PULL-UP, STEP-BY-STEP:
Grab a bar with a grip slightly wider than shoulder width, with your hands facing away from you.
Hang all the way down.
Pull yourself up until your chin is above the bar.
Slight pause
Lower yourself all the way back down.
That’s it!
You may be thinking, “That’s all well and good Steve, but what if you can’t even do a pull-up yet! What should I do?”
Don’t panic!
I got you covered boo.
I’m going to share with you the exact pull-up progression plan we use with our 1-on-1 Coaching Clients.
Whatever allows you to get to at least 5 reps a set.
Once you can do 3 sets of 8 reps (each arm), it’s time to pick up a heavier dumbbell.
This will allow you to get stronger and stronger.
When you can lift a 25-pound (10kg) dumbbell or heavier, consider moving up to the next level.
Level 2 Pull-Up Workout: Inverted Bodyweight Rows
Bodyweight rows are the PERFECT precursor to pull-ups – they work the same muscles, and have you lifting your own bodyweight, just at a different angle.
Our goal here will be to work towards a lower and lower angle, increasing the difficulty of the movement.
So at first, we’ll do rows with the bar higher up:
Then we’ll progress to getting the bar lower:
As soon as you’re doing bodyweight rows where your body is at a 45-degree angle or lower, you can progress to the next level.
Level 3 Pull-Up Workout: Assisted Pull-Ups
At this point, you are going to start actually doing pull-ups…with a little bit of assistance.
We’ve got a few options for you.
#1) Assisted Pull-ups with Chair
Either one foot or two on the chair, depending on your needs. Your feet are ONLY there for support, use your upper body as much as possible.
#2) Assisted Pull-ups with an Exercise Band
You can get different types of exercise bands with different levels of strength, or a variety pack for easy progression.
Put your foot in the exercise band and pull yourself up.
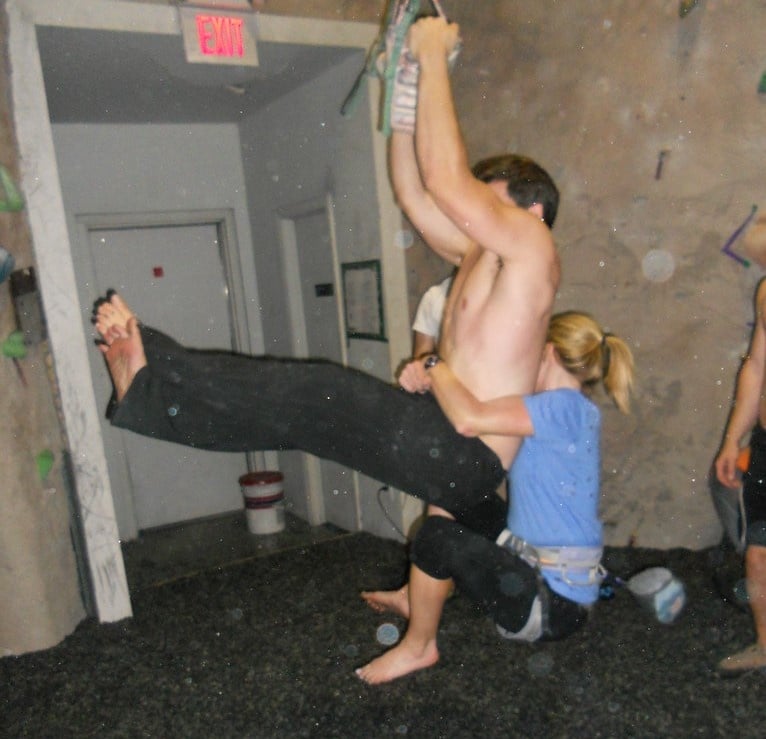
#3) Assisted Pull-Ups with a Partner
Have a friend hold your feet behind you and help you complete each rep. Have them use the least amount of help possible to get you through your workouts.
Once you’re comfortable doing a form of assisted pull-ups, and can do about 10 repetitions, it’s time to advance to the next level.
This is probably the TOUGHEST level before getting your pull-ups. If you get stuck on “assisted pull-ups” and “assisted chin-ups”, you’re not alone. This is where most people get stuck.
We work hand-in-hand with people like you to get them their first pull-up in our Online Coaching Program. If you don’t know how to fit these movements into your workouts, or you just want somebody to give you the exact workout to follow every day, we got you!
Level 4 Pull-Up Workout: Negative Pull-Ups
Our next level on our path for a pull-up is what we call “negative pull-ups.”
Grab onto the bar with an overhand grip
Jump so your chest is touching
Slowly lower yourself under control until you’re at the bottom of the movement.
As you continue to lower yourself down, you’ll build strength, eventually creating enough muscle so you can pull yourself up.
If you want more specific instructions on any of these levels or movements, check out our guide “Get Your First Pull-up” for more.
Pull-Ups vs. Chin-Ups (What’s the Difference?)
You may hear the term “pull-up” and “chin-up” used interchangeably.
However, there is a difference, so definitions are in order:
A PULL-UP is when your hands are facing away from you.
This will work your back and biceps.
A CHIN-UP is when your hands are facing towards you.
Although this also works your back, it has more emphasis on your biceps.
Are chin-ups easier than pull-ups?
Yes, chin-ups are generally easier to perform than pull-ups. The wider grip of a pull-up isolates your lats, which means you get less assistance from your biceps.
Mistake #1: You don’t extend low enough or pull high enough.
Full extension and a full range of motion are major problems for many people training pull-ups and chin-ups. Most people I see in the gym are doing half pull-ups. Either not pulling high enough, not dropping low enough, or both! It’s not a full rep, and it’s robbing your body of effective work.
Solution:
With each repetition you want your body to be in a straight line at the bottom – keep your elbows extended and your shoulder relaxed slightly up to your ears. Full range of motion for the win! Better to do a few proper pull-ups than more half-rep ones.
Mistake #2: You don’t engage your shoulders at the start. Another problem I see with people is not setting their shoulders properly when they start their pull-ups, which can put unnecessary strain on your joints/tendons/muscles. It can also be the difference between being able to get your first pull-up or chin-up and flailing around on the bar!
Solution:
Imagine pinching a pen in between your shoulder blades, then do the pull-up. In other words, pull your shoulders down and back before you bend your elbows to pull up. This puts us in a far more efficient position. By not using our back and shoulder muscles fully, over the long run we’ll be weaker and at a higher risk for injury.
Mistake #3: You’re doing too hard a variation. Whether it’s lack of strength or too much body mass, you should choose a variation that allows you to have great form while getting stronger. Use a box, an assisted band, or an assisted pull-up machine to start at a low weight and build up your strength.
Solution: Always do proper pull-ups and chin-ups. Get your chin over the bar from a hang with every rep, and maintain good form. If you find yourself committing the mistakes on this list, make your variation easier.
Mistake #4: Not engaging your shoulders at the top. Many people will get a good extension at the bottom of their chin-up and start with great form. But then as they perform the movement, they’ll find their shoulders in a poor position at the top.
A classic sign this is happening is if the chest/neck doesn’t touch the bar, or the body curls inward significantly at the top.
Is your shoulder elevated to the ears or rolled forward? Are you shrugging your shoulders as you’re struggling to get above the bar?
Solution: Make your variation easier by working on an assisted chin-up and maintaining a strong shoulder position at the top.
Keep your shoulders down and back and engaged through the movement.
A chin over the bar is a chin-up – we aren’t trying to take away your chin-up if you aren’t getting your chest to the bar. But consider this a progression to even better form so you can eventually work on harder skills like pull-up variations or the legendary muscle-up.
Mistake #5: You use violent kipping motions to do your pull-ups or chin-ups. We know CrossFitters use the kip to get more pull-ups in a short amount of time.
NOW, it is the humble opinion of our team that you should only be kipping AFTER you are capable of doing perfectly functional and safe pull-ups and chin-ups (in fact, many CrossFit gyms require qualifying strict pull-ups before you can kip).
Solution: Build strength and good position (the foundation!) before you worry about speed. You want to know how to drive a car before you learn how to race it!
In summary, don’t sacrifice good form for more pull-ups or chin-ups. You’ll create bad habits this way.
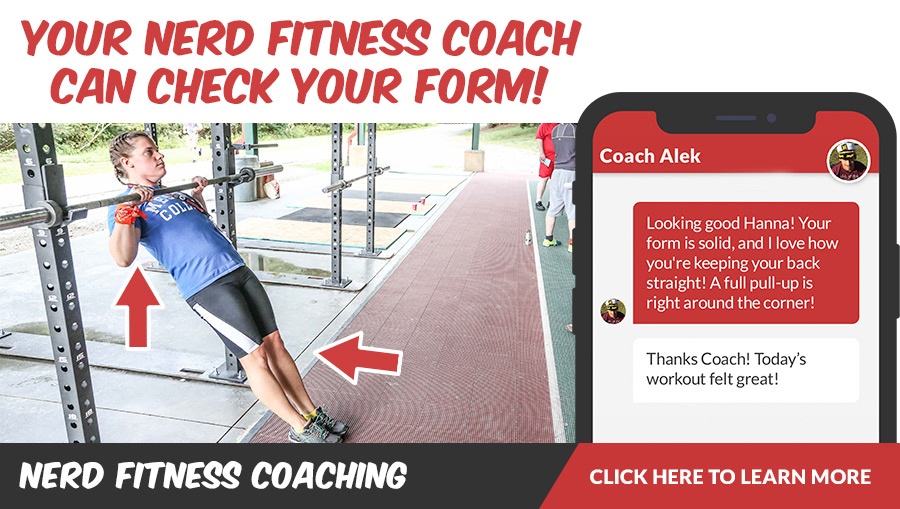
To check your form, simply record a video of yourself doing your pull-up variation and match it against the gifs and videos here.
If you want an expert to review your form, we can help! Through our spiffy app a Nerd Fitness Coach can evaluate your movement so you can perfect your technique!
Advanced Pull-Up Variations
Once you’re able to do 3 sets of 10 pull-ups or chin-ups, it’s time to start thinking about upping the difficulty.
You have two options:
OPTION #1: Continue to get better at doing more reps – 3 sets of 12, 3 sets of 15, 4 sets of 20, etc.
OPTION #2: Start doing other types of pull-ups.
Here are some advanced pull-up variations that you can start doing:
#1) Wide Grip Pull-Ups:
Grab the bar WAY out with both hands. With your grip further out, it’ll require even MORE strengthen from your back (remember our pull-up vs. chin-up discussion).
#2) Side to Side Pull-Ups:
#3) Ring Pull-Ups
Rings hanging from the ceiling are inherently less stable than a pull-up bar. Thus ring pull-ups engage your core more as you stabilize yourself during the movement.
If you’re trying to improve your grip strength, try utilizing a couple of towels for your pull-ups. You’ll build lots of strength in your hands as you grasp the towels during the movement.
#5) L-Sit Pull-ups
Raise your legs straight in front during your pull-up. This will challenge your core like you wouldn’t believe.
#6) Clapping Pull-Up
The trick here is to have enough power to explode above the bar so you can clap your hands. The next trick is to grab the bar in time to bring yourself back down.
Be careful here.
#7) One-Arm Pull-Ups
This is the most difficult pull-up variation you can do, what with the whole only using one arm business.
To keep yourself stable during the movement, keep your inactive arm close to your body while you pull.
If you start doing one-arm pull-ups, email us. Seriously.
That should get you started experimenting with pull-up variations to increase the difficulty.
The other way to “progressive overload” your pull-ups is to add weight to the exercise, which we’ll devote our next section to.
How to Do Weighted Pull-Ups
Personally, my favorite thing to do in a gym is weighted pull-ups:
If you’re at this level and interested in doing so, here’s what you need to do:
Get a weight belt. I bought this one on Amazon and it’s worked out incredibly well for me. I’ve tried doing the whole “put weights in a backpack” thing, and it certainly works. But the angle of the weights hanging off your back is weird. With a weight belt, the weight hangs down between your legs (not a euphemism) so it feels more natural.
Add small amounts at a time. Most gyms will have 2.5 lb (roughly 1kg) weights; you might feel stupid putting on a big weight belt and only hanging a tiny weight off it, but you need to start somewhere.
Consistently add more weight. I’ll warm up with two sets of 5 pull-ups with no extra weight, and then do 3 sets of 5 weighted pull-ups. If I can complete all 3 sets of 5 reps (with my chin over the bar for every rep), I’ll make a note to add 2.5 or 5lbs (1 or 2kg) to my weight belt for the next time.
If you want any help scaling your workouts, check out our 1-on-1 Online Coaching Program. We’ll create you a plan that escalates in difficulty as you grow stronger! You’ll never have to worry about what exercises to do or how much. Instead, just follow the workout prescribed by your coach!
Including Pull-Ups in Your Workout
You now know how to do a pull-up, a chin-up, and tons of variations.
The only thing left to cover is WHEN to do pull-ups.
Unless you’ve been strength training for years and know what you’re doing, we recommend that you pick a full-body routine that you can do 2-3 times a week.
You want a workout routine that has at least one exercise for:
Quads (front of your legs).
Butt and hamstrings (back of your legs).
Chest, shoulders, and triceps: (“push” muscles).
Back, biceps, and grip ( “pull” muscles).
Core (abdominals and lower back).
Pull-ups, chin-ups, and all the variations covered would make a great addition for your “pull” muscles (back, biceps, and forearms).
So a sample workout routine that includes pull-ups could look like:
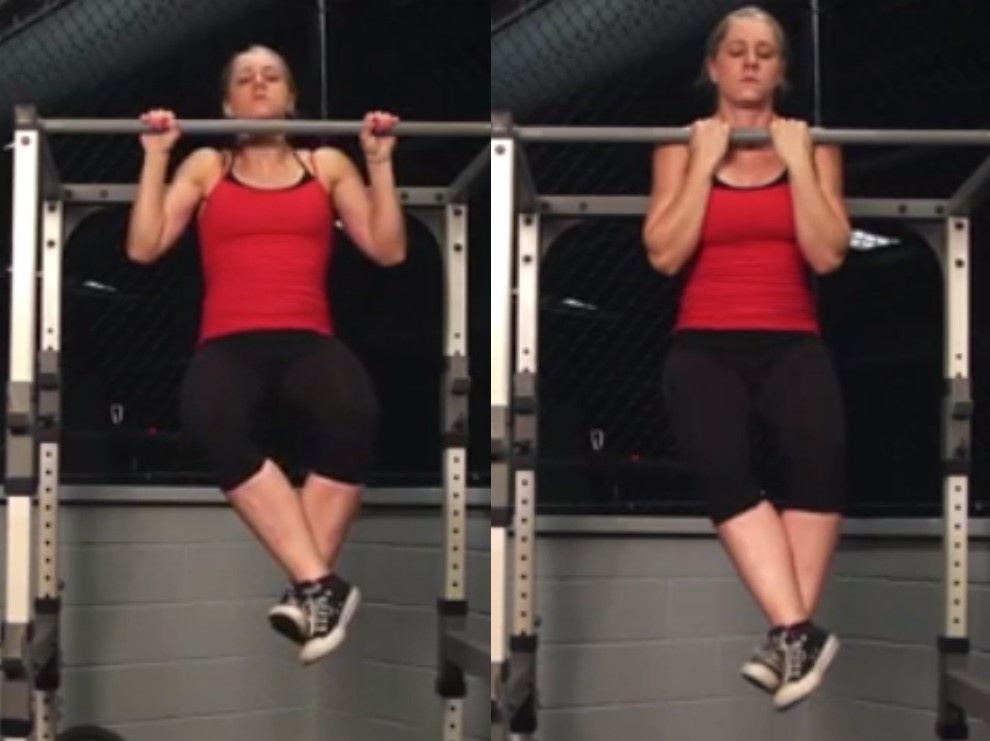
Seriously, you don’t have to leave home to start doing pull-ups and get in shape.
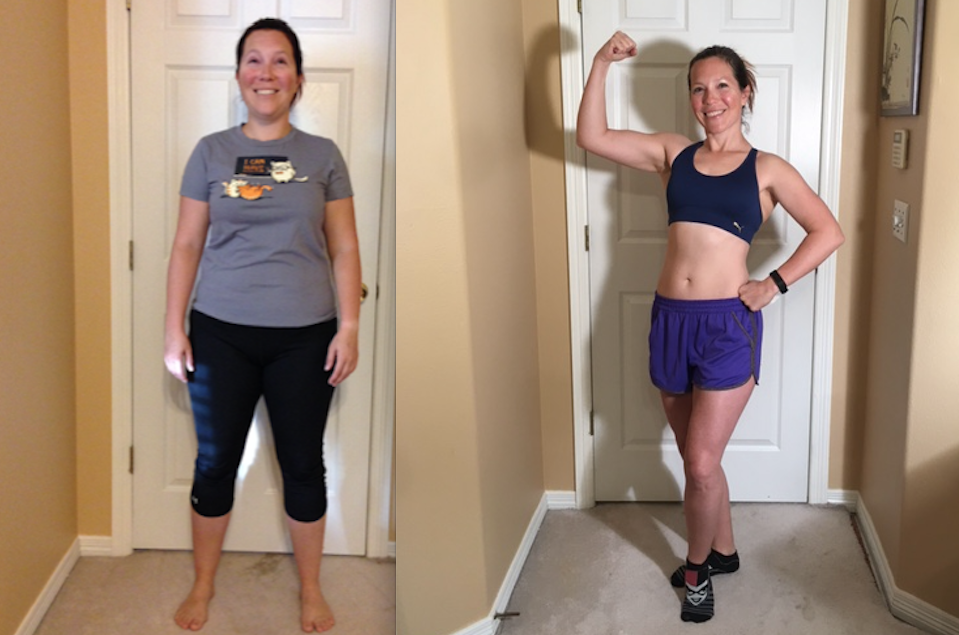
Want proof?
Meet Christina:
Through our coaching program Christina learned to pick herself up, literally, and now crushes her training without ever stepping foot in a gym. You can read her full story right here.
Start doing pull-ups regularly and I promise you your life will improve for the better.
If you’re interested in progressing but want help on the next step, we’ve built 3 options that might float your boat:
#1) If you want step-by-step guidance, a custom strength training program that levels up as you get stronger, and a coach to keep you accountable, check out our killer 1-on-1 coaching program:
2) Good at following instructions? Check out our self-paced online course, the Nerd Fitness Academy.
The Academy has 20+ workouts for both bodyweight or weight training, a benchmark test to determine your starting workout, HD demonstrations of every movement, boss battles, meal plans, a questing system, and supportive community.
3) Join the Rebellion! We need good people like you in our community, the Nerd Fitness Rebellion.
Sign up in the box below to enlist and get our guide, Strength Training 101: Everything You Need to Know. It’ll help you start incorporating pull-ups and chin-ups into your training:
Download our comprehensive guideSTRENGTH TRAINING 101!
Everything you need to know about getting strong.
Workout routines for bodyweight AND weight training.
How to find the right gym and train properly in one.
Check out this study on exercise and posture: “Changes in rounded shoulder posture and forward head posture according to exercise methods.” Source: PubMed.
Check out this study, “Prognostic value of grip strength: findings from the Prospective Urban Rural Epidemiology (PURE) study.” Source: The Lancet.
Be careful on the whole “can support your weight” thing. Falling from a tree is never fun.
A quick note: we have compiled ALL of our strength training content into a comprehensive guide that will remove all the confusion and answer all the questions you have about weight training! Grab our guide, Strength Training 101: Everything You Need to Know, when you sign up in the box below!
Download our comprehensive guideSTRENGTH TRAINING 101!
Everything you need to know about getting strong.
Workout routines for bodyweight AND weight training.
How to find the right gym and train properly in one.
What Is the Dip Exercise? What Muscles Does the Dip Train?
The dip is a compound, bodyweight exercise.
You grab two parallel bars, hoist yourself up, and then lower your entire body by bending your elbows.
When you hear “compound exercise,” it’s referring to multi-joint movements that work several muscles or muscle groups at the same time.
The dip exercise trains your:
Chest
Shoulders
Tricep
Back
Abs
You may be thinking, “abs?”
Yep! You need to stabilize your body as you raise and lower yourself.
Which is one of the reasons bodyweight dips are so great!
Some would even argue that dips are the best chest exercise out there, even better than the bench press.
There’s some logic to it.
When you think about it, the bench itself offers a lot of support during the bench press. So do your legs.
With the dip exercise, your upper body is supporting your entire body. Thus a fuller workout.
Instead of isolating your chest for 5 exercises, your shoulders for 5 exercises, and triceps for 5 exercises, just do dips!
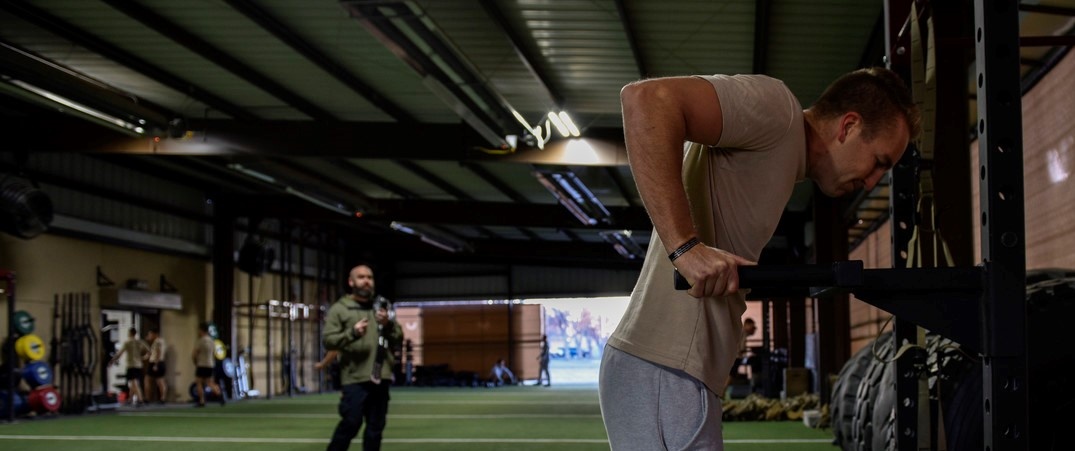
How to Do a Proper Dip Exercise
First of all, make sure you can do a dip.
Don’t hop up there and then lower yourself unless you’re fairly confident you can get through at least one of these things. We can’t have you tearing any muscles or falling on somebody, because that would suck.
Grab the parallel bars (or rings), and hoist yourself up. At this point look straight ahead, and contract your stomach muscles (just like when you do squats and deadlifts). If you’re keeping your abs tight for all of these exercises, you’ll never have to do a crunch again and you’ll still have washboard abs.
Bend your knees if you like (so your feet are behind you), for stability purposes, but keep your head up and look straight ahead.
Keeping your elbows at your side, lower yourself until your triceps are parallel to the floor. A lot of folks will recommend you go past parallel, but I think this puts too much strain on your shoulders at a weird angle and can cause injury/discomfort. I only go down to parallel and haven’t had any issues, so I’d recommend the same.
Once you hit parallel, explode back up until JUST before you’re able to lock your elbows. By not locking your elbows, you keep the tension in your muscles and don’t jack up your joints. w00t.
Now do another one. And then another!
Those are dips.
Keep your elbows as tight as possible, engage your abs, and hold your body in balance as you go up and down.
Are you doing it right?
Check your form by recording a video of yourself and matching it against the videos and gifs here. If it looks close then you’re doing great!
Want to have an expert review your form? Our coaches can do just that in our spiffy app!
What If I Can’t Perform a Dip? (Progression Plan)
If you don’t quite have the strength to do a full bodyweight dip, follow our progression plan below.
You’ll be doing the complete dip movement before you know it!
Level 1 Dip Progression: Knee Push-Ups
If you’re just starting to develop your push muscles, our first stop will be knee push-ups. We’ll build your strength up so you can start doing…
Push-ups will help you develop chest muscles for doing proper dips. Only after you can do 20 proper push-ups should you consider trying to do a dip.
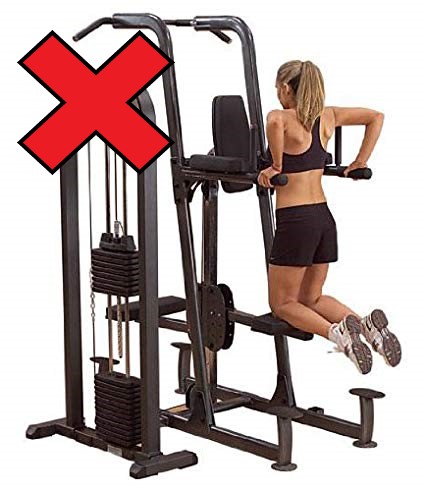
Level 3 Dip Progression: Assisted Dips
It’s now time to do some dips! With a little bit of assistance…
We’ll use a resistance band to help support your weight while you grow stronger. You can progress with weaker and weaker resistance bands until you feel comfortable trying a proper bodyweight dip.
Here’s why: an assisted dip machine stabilizes your body during the movement, which means your own muscles don’t need to do any of that stabilization work! We’d rather you stick with resistance bands than mess with this contraption, as it still makes your muscles work together throughout the movement.
Sure, if you don’t have bands and can ONLY do dips with the machine pictured above, it’s not the end of the world! Just make sure you are also doing other movements as well that DO recruit those stabilizer muscles (push-ups, presses, and so on).
If you find yourself getting stuck on “assisted dips,” you’re not alone. Lots of folks find it difficult to move beyond the support of the band.
We work hand-in-hand with people like you to master bodyweight training in our Online Coaching Program. If you don’t know how to add dips into your workouts, or you just want somebody to give you the exact workout to follow every day, we got you!
Tips and Tricks for Performing the Dip Exercise
Here are some extra tips on getting better at dips:
#1) Don’t swing – this goes for practically every exercise. If you start swinging your body as you go up and down, you take the emphasis off the muscles you’re actually trying to work.
Save swinging for the playground:
#2) Don’t flare out your elbows if you can avoid it – the more “out” your elbows are, the more emphasis on your chest. Elbows tight = emphasis on shoulders and triceps.
Nicholas Elorreaga does a good job showing the difference here:
#3) Don’t do half reps – again, this could be another universal rule. Challenge your muscles by bringing your tricepsparallel to the ground, then make sure you extend arms to almost “elbows locked” at the top:
#4) Don’t go too fast – you want to be slow and in control during your dip. When you go too quickly, proper form is often sacrificed. Make sure you train safely by going slowly…this isn’t a race!
When Should You Do Dips in Your Workout? (Getting Started)
Now that you know how to do dips, let’s discuss when to do them.
Unless you’ve been strength training for years and know what you’re doing, we recommend that you pick a full-body routine that you can do 2-3 times a week.
Do your full-body workout and then go play some Nintendo.
Need some help getting started?
I have three great options to help you with your dip and strength training journey:
#1) If you want step-by-step guidance, a custom strength training program that levels up as you get stronger, and a coach to keep you accountable, check out our killer 1-on-1 coaching program:
2) Good at following instructions? Check out our self-paced online course, the Nerd Fitness Academy.
The Academy has 20+ workouts for both bodyweight or weight training, a benchmark test to determine your starting workout, HD demonstrations of every movement, boss battles, meal plans, a questing system, and supportive community.
3) Join the Rebellion! We need good people like you in our community, the Nerd Fitness Rebellion.
Sign up in the box below to enlist and get our guide, Strength Training 101: Everything You Need to Know. It’ll help you start incorporating dips into your training:
Download our comprehensive guideSTRENGTH TRAINING 101!
Everything you need to know about getting strong.
Workout routines for bodyweight AND weight training.
How to find the right gym and train properly in one.
That should get you going on mastering the bodyweight dip.
Alright, your turn?
Do you head to the gym to crush dips?
Are you currently progressing through assisted dips?
Any tips or tricks we missed?
Let us know in the comments!
For the Rebellion,
-Steve
PS: Want to learn more? Read the rest of our Strength Training 101 series:
Originally Posted At: https://breakingmuscle.com/feed/rss
Getting mad at the bar isn’t just for the bros in the gym. It has an actual purpose related to your “arousal level.”
We have all heard our training partners tell us to “get mad at the bar” when egging us on to make ever-bigger lifts. It works. Indeed, in order to get the most out of ourselves physically, we must get our state of arousal to an ideal level. But what is that ideal level? How does our arousal level affect our performance? Well, in the grand tradition of my old economics professors, I will try to explain this graphically.
Originally Posted At: https://breakingmuscle.com/feed/rss
The most important thing is to wait until your body is healed.
No two women are alike, from their bodies to their deliveries to their recovery and subsequently the healing process. And while each woman may differ, when a person feels ready to start exercising again, the main rules will remain the same.
The most important thing is to wait until your body is healed. Your body will need to be able to cope with the physical demands of exercise, and until you’ve been cleared by a medical professional, which can be anything from six weeks to six months depending on your labor, you must proceed with caution.
If you’re just starting your fitness journey, make sure you grab our guide Strength Training 101: Everything You Need To Know. It covers how to work out, when to train, and tips to keep progressing. Grab it for free when you join the Rebellion (that’s us!) by enlisting below:
Download our comprehensive guideSTRENGTH TRAINING 101!
Everything you need to know about getting strong.
Workout routines for bodyweight AND weight training.
How to find the right gym and train properly in one.
How Often Should I Work Out
We get the question “How often should I work out?” quite a bit, usually from overeager beavers who decide they are going to go from “sitting on the couch watching The Office on repeat” to “exercising 7 days per week.”
I would advise something different.
I mean you can still watch The Office, but you don’t need to be training 7 days a week!
Why? We often see newbies burning out quickly and falling back to square one.
The second is the Nerd Fitness Coaching Program. Your coach will do all the heavy lifting for you (not really, you’ll still need to train) and create a workout specifically for your experience level, that will progress in difficulty as you get stronger.
Is It Okay to Work Out Every Day?
Let’s say you NEED to exercise every day.
No judgment, I like the enthusiasm!
While it’s very important to let muscles heal and recover from your training, a little exercise every day can be beneficial.
Personally, I know I am far less likely to eat poorly when I’m doing some active recovery than when I’m not doing anything deliberately. As we know, 80-90% of our fitness success will depend on how we eat.
To maintain momentum, “off days” shouldn’t become “cheat days.”
In other words, doing some exercise daily can help guide our forks in the right direction.
As we know, a healthy body is made in the kitchen, not in the gym.
It’s important to stay diligent with healthy nutrition even on days when you’re not actively working out.
One of the best ways to do that is to use one of your non-training days to prepare your meals for the week! NF Coach Staci Ardison does all of her meal prep for the week on Sundays, and looks at it like an activity that is furthering her fitness journey.
Interested?
Staci walks you through everything you need to start cooking for the week in our Guide to Meal Planning and Prep. Plus, here’s my exact recipe for batch cooking chicken:
Building the Habit of Working Out (Getting Started)
If you’re just starting your fitness journey, don’t stress too much about how often you are working out.
Three to four times a week may be ideal, but once a week is WAY better than none a week.
If you can do a full-body workout two to three times a week, awesome! You’ll be rocking and rolling on your fitness journey.
If you can only get yourself to train once a week, that’s okay! Let that become normal, then we can brainstorm ways to squeeze in an extra day.
Building the habit of working out is our goal today. We can worry about maximizing “gainz” down the road.
The most important thing you can do now: start. Try the workout sequence we laid out earlier.
Or give our Beginner Bodyweight Workout a try:
It’s designed for a newbie in mind and many a Rebel have used it to springboard their strength training. If you don’t know where to start, start there.
It’ll help you get going.
Want more tips for next steps? You seem like a nice person, so I’ll share with you my top suggestions:
1) If you want step-by-step guidance, a custom workout program that levels up as you get stronger, and a coach to keep you accountable, check out our killer 1-on-1 coaching program:
2) Good at following instructions? Check out our self-paced online course, the Nerd Fitness Academy.
The Academy has 20+ workouts for both bodyweight or weight training, a benchmark test to determine your starting workout, HD demonstrations of every movement, boss battles, meal plans, a questing system, and a supportive community.
3) Join the Rebellion! We need good people like you in our community, the Nerd Fitness Rebellion.
Sign up in the box below to enlist and get our guide, Strength Training 101: Everything You Need to Know. It’ll help you start incorporating a full-body workout into your training.
Download our comprehensive guideSTRENGTH TRAINING 101!
Everything you need to know about getting strong.
Workout routines for bodyweight AND weight training.
How to find the right gym and train properly in one.
Alright, enough from me. Now it’s time to hear from you!
How often do you train and work out?
Do you do any type of “active recovery”?
What’s your goto “fun exercise”?
Let me know in the comments!
-Steve
PS: If you have more questions on how you should train, like when to work out and for how long, read our guide How to Build Your Own Workout Routine. It’ll give you everything you need to create the habit of working out.
A meta analysis found that 1 to 2 rest days between workout sessions was optimal for muscle repair, although they included a caveat that the intensity of the exercise would impact this: “A meta-analysis to determine the dose response for strength development.”(PubMed)
Check out this study on active recovery and DOMS: “An Evidence-Based Approach for Choosing Post-exercise Recovery Techniques to Reduce Markers of Muscle Damage, Soreness, Fatigue, and Inflammation” (PubMed)
Is there anything that coconut oil can’t do? Well, it may not rocket you to the moon, or give you the ability to travel through time…but the list is pretty short. It is becoming increasingly well known that raw organic, extra-virgin coconut oil is one of the healthiest foods you can add to your diet. […]
Originally Posted At: https://breakingmuscle.com/feed/rss
If you are not creating an environment for growth, you are creating one for injury.
Welcome to Ego Lifting 101 this is your bro coach speaking. Social media never fails to astound us with the tomfoolery that demonstrates the fitness community’s finest lifters. Instagram is riddled with trips to snap city on a deadlift or a demo of a knee-jerking quarter squat or a bicep curl that looks more like a cardio session on an elliptical. We have become obsessed with breaking a personal record (PR) without paying much attention to the fundamentals of smart programming. We are stuck with a group of persons that have embraced PR syndrome.
Effective time management strategies can help you run your Functional Medicine practice—without running yourself into the ground. Here’s how to find the time to make a big difference in the world without compromising your health.
For now classes are 6pm and 640pm at 2840 Wildwood st in the Boise Cloggers studio.
Book your class NOW!
click this ==>
Warrior Fit Testimonials
First, I want to say thank you for convincing me to do Tabata! I was struggling to lose weight and Finally I found something that helped! I really appreciate your coaching! - Craig T.
Ever since I was convinced to do Tabata I have seen huge results, I lost 6 pounds and gained energy in the first 3 weeks. I have been working out for 3 months before I decided to do Tabata and I struggled to lose weight.
At first I thought "How am I losing weight by bringing my heart rate up then cooling down then bringing it up again?" I don’t know how it works but it does!
Thank you!! - Theresa F.
The first day of Tabata, I wondered WHAT AM I DOING - I AM 56 !! Five weeks later I knew that it was what I needed. I learned that I could push myself well beyond my comfort zone and feel good later. I have a marked improvement in physical as well as emotional endurance. - Lyn C.
When I was first told about Tabata I was very excited from the word go, however that excitement stemmed from the fact that I had no clue what it meant. I missed the first week of class b/c I was traveling for work so when I came in during the 2nd week I had some making it up to do.
It was hard at first b/c my body wasn't used to working out at such a fast pace, but once I got into a rhythm I started to feel very good. These classes are no joke. If you stick with it you will leave there feeling stronger, healthier and overall better about yourself and what you've accomplished.
I would recommend these classes to anyone. Darrin is a great trainer and he'll keep you going with his energy.
- Jami L.
Warriors Fit Audio
Warrior Fit uses High Intensity Music to get ya Moooovin' So we can all "Get Our Sweat On"
The link below will give ya a freeee shot at Audible plus a couple audio books just to try it out and if you haven't used audio books on your commutes you are missing out. Get pumped up before you get to where you are going and exercise your mind. I use it Everyday. Go get yours now!


 In a perfect world, we’d all sit down every morning to a leisurely, healthy breakfast. In the real world, however, we’ve all done our share of eating breakfast in our cars, on the bus, or at our work stations Sometimes, where you eat the breakfast you grabbed on your way out the door can’t be helped. What can be helped, however, is what you eat. Keep in mind that while omelet muffins are perfect for breakfast on the go, they’d also be great for a weekend brunch. Double the recipe and make a dozen. Then, make time to sit down with family or friends and enjoy the type of long, leisurely breakfast that’s so hard to come by during the week.


 For now classes are 6pm and 640pm at 2840 Wildwood st in the Boise Cloggers studio.
Book your class NOW!
click this ==>
For now classes are 6pm and 640pm at 2840 Wildwood st in the Boise Cloggers studio.
Book your class NOW!
click this ==>


